
Are you ready for post one of our Quilting Finishing Techniques for both the longarm and domestic machine finishing?
Our first post is about the size of backing fabric and wadding that is needed if you are getting your quilt finished on a longarm.
Over the years, I have always quilted my quilts either by machine or by hand (when I had the time, which is usually never).
I seriously dread the layering of the three fabrics to create the ‘quilt sandwich’. I have to admit that larger quilt tops could hibernate in the ‘to be quilted’ box for a number of months …. or years! Not sure why, but I think it is more the dreaded thought that I could end up being short of either the wadding or backing fabric. I can honestly say that I ‘always’ ensure that my wadding and backing fabric is roughly 2-3” larger than the quilt top, around ALL 4 sides. However, I have had, on at least one occasion where I have miscalculated and have run short of either the wadding or the backing fabric and had to re-do the layering process. Tough lesson to have when it is a huge quilt.
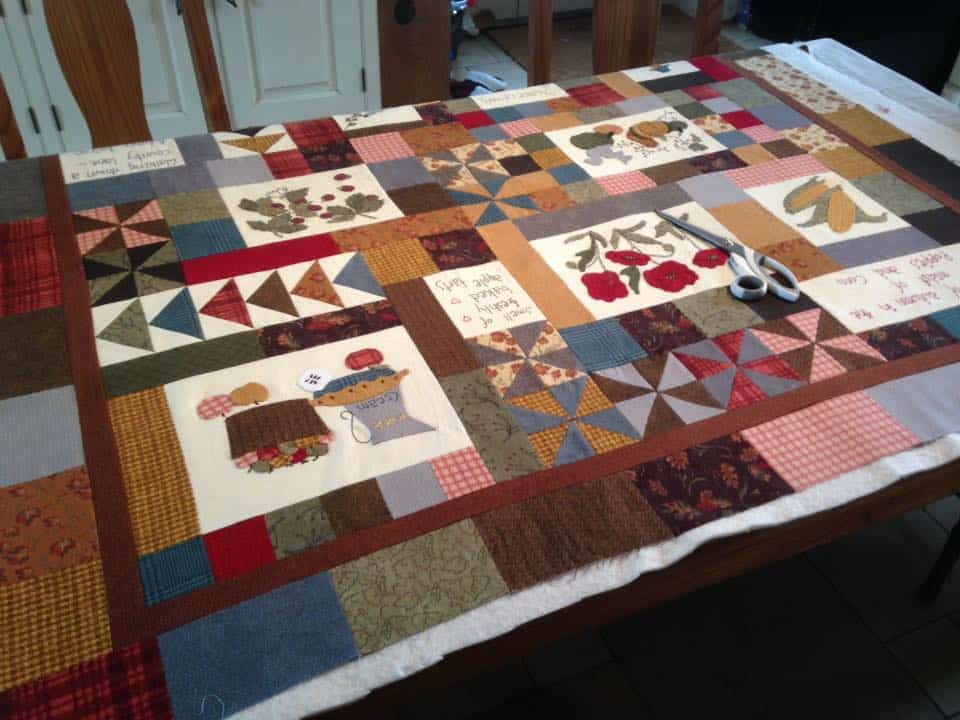
So, what if the quilt is being sent to be long armed quilted? Is the rule of 2-3” larger than the quilt top? I never thought it would be different and was surprised that it wasn’t the same. I am guessing that I wouldn’t be the only one who thought it would be the same principle if you were quilting it on your own machine. Reading that both the backing fabric and the wadding needed to be at least 8” larger than the quilt top (at least 4” larger on ALL four sides) really surprised me.
It got me doing some research to find out why. Strangely enough, I like to know the reasoning behind rules and techniques and why it is so. In finding the answers I thought it would be a great opportunity to explain the ‘why’ in a blog post so you can understand the reasoning why so much extra is needed on the long arm frame.
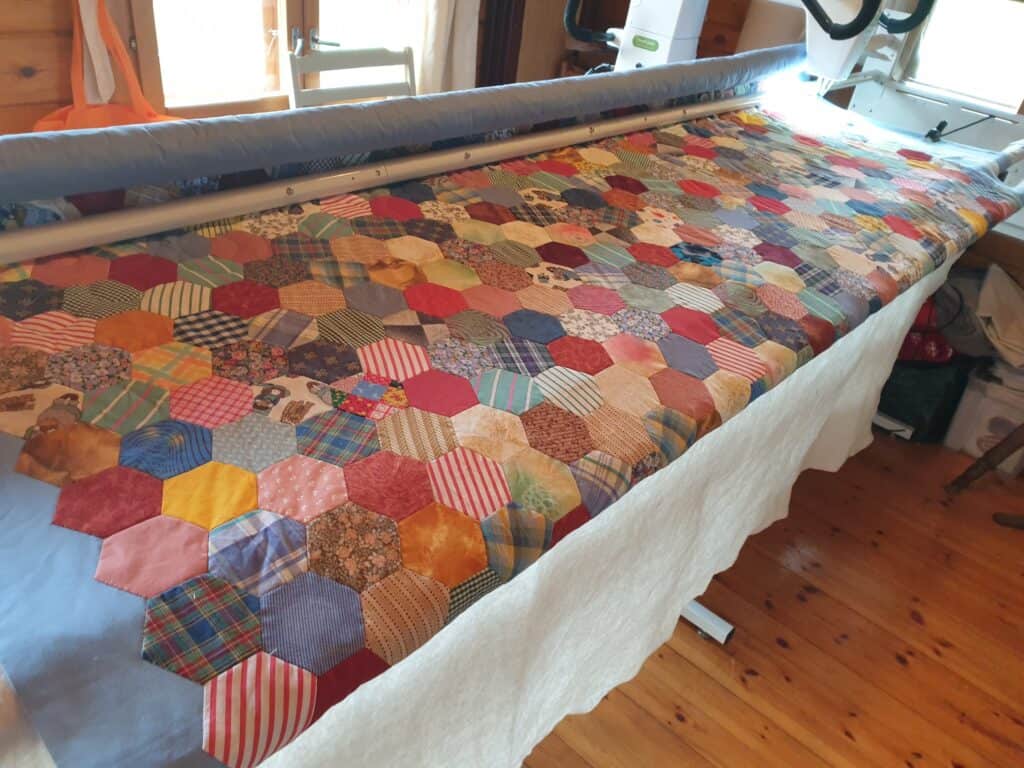
So, the 8” isn’t to allow for the longarm quilter to compensate for any layering errors she may have. The three layers are loaded onto the frame separately to ensure that each layer is wrinkle free and taut on the frame. The backing fabric and top have the centre top marked so that the centre point on both fabrics can be matched to the centre point on the take up rollers on the frame. This helps to ensure that the quilt top is placed centrally on the frame. The wadding is laid between the two with the wadding and backing fabric side edges matching. The quilt top lies on these two with 4-6” clearance all the way round.
So why is size important?
The quilt back is loaded onto the quilting frame and two rollers – one at the top and the other at the bottom. This gives a flat surface, free of wrinkles with a tension that enables you to quilt.
However, to be able to quilt well, you need good tension on both sides, not just at the top and bottom. The side tension is achieved with the side clamps that are attached to the frame. This now gives a 4-way tension on the quilt which prevents any puckers or tucks. This still doesn’t really explain why the extra fabric is needed on the backing fabric and wadding.
Well, if the quilt top was the same size as the wadding and backing fabric or if not much clearance has been allowed, then the clamp would be too close to the quilt top. This causes a big issue when the quilt is being quilted and the need to quilt (or baste) up to the side edges of the quilt top. The machine needs clearance to ensure the needle can go over the quilt edge. If the clamps are too close to the edge of the quilt top, the machine will bump against the clamp, causing the quilting stitches to be off.
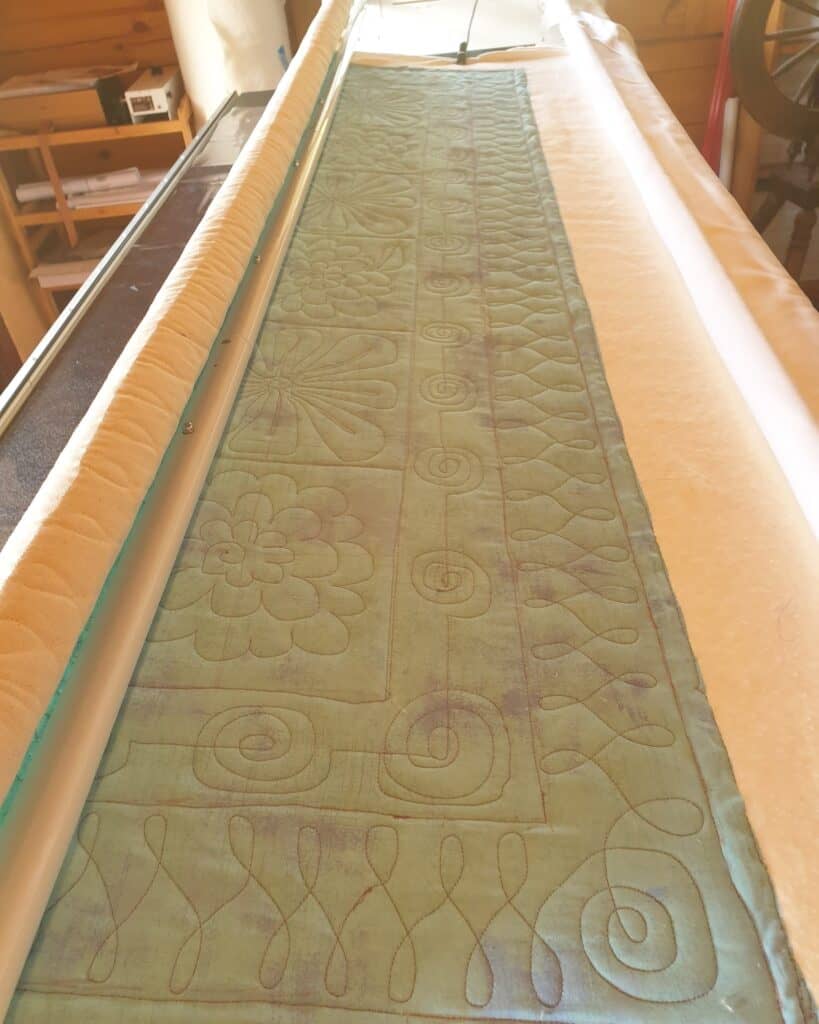
If rulers are being used for quilting, then it really is essential to have clearance as the ruler base extends on each side of the machine. If that base hits the side clamps, then it could mess up the ruler work.
Another important reason for having that extra clearance is that the tension needs to be checked with each new quilt loaded to ensure that both the top and bobbin thread are stitching correctly. This also needs to be done after each bobbin change. The tension test needs to be done using the backing fabric and wadding with a small piece of extra fabric (usually the backing fabric) as this is what is being quilted so will give the actual quilt stitching. If there is no extra allowance, then there is no room to test the tension.
This would also apply if you were stitching free motion on your quilt with your domestic sewing machine.
So with explaining about the size of the backing fabric, it now leads into the question of – ‘what can I use for my backing fabric?’
Come back next week to find out about –
Backing fabric options – Extra wide fabric; Sheeting; Pieced backs
And the following posts –
- “Squaring” off backing fabric and quilt tops
- Binding – How much binding; How to prepare binding; Attaching binding to quilt front; Finishing the binding
- Quilt Labels – Why quilt labels?; What to put on a label; How to create a label; How to attach a label