I have spent a few days working on a beginners’ quilt pattern. This pattern is a quilting beginner’s workshop in a written pattern. Creating this has taken me quite a few days as I had to rewrite the pattern I used in the Introduction to Quilts Workshop. This is a workshop I have held in recent years.
With this pattern I wanted to include all the tips and techniques I would teach and show in a workshop. It proved to take far longer than I thought! Basically, what should have been a simple and straightforward task turned into a mammoth piece of work taking about three days.
While writing out the hints and techniques to help you create your first quilt, I thought back to when I created my first quilt, over 25 years ago! Well, actually, I probably started my first quilt long before that (I am showing my age now).
When I left school at 16 years, I went to work for a Fabric shop in New Zealand. It was a terrible place to work, the owner was awful, working conditions were just as bad and the pay even worse However, due to my sewing experience in dress making, it was a dream job. I was surrounded by all of this fabric. One of our jobs was to cut off the label printed on the fabric, at the start of the role. It was about a ten-inch strip across the width of the fabric and this rejected fabric was placed under the counter. The fabric was all cotton; There was no such thing as quilting fabric or Quilting Shops back then. Those cut off strips piled up, and one of the perks was that we could take them home. I think the owner let us do it as he thought the ink would not come off. But I soon found out that the ink disappeared once it had been through a wash in the machine. So, why am I telling this story? Well, these piles of fabric started my adventure into quilting.
I had an old American quilting magazine at home and I admired all the handmade quilts in it. So being creative and young I decided that it would be a really good idea to create a handmade quilt for my Glory Box (or Bottom drawer) so I would have something for my marriage bed. Let me assure you, I had no plans for getting married nor anyone in mind, but I guess a young girl always had her dreams.
So at the tender age of 16 years, I decided to hand sew the quilt made from hexagons. I had to prepare and cut out the paper hexagons, cut out the fabric hexagons, tack the fabric to the paper hexagons and then hand sew them all together. I had plans for a double bed quilt, where it would hang down to the floor. I had never quilted before, knew nothing about how to go about it and there was no such things as quilting classes or shops but, I had the desire to make a quilt, something that would be treasured.
Well, I can assure you, it never graced a double bed. In fact, it lay half completed in a box for many, many years. That box of tacked hexagons, half completed quilt top accompanied me for many, many years, through various house moves. Even, after I got married, the quilt was still unfinished.
Fast forward about twelve to fifteen years or so and I discovered my boxed-up hexagon quilt still unfinished in a box. I decided that it was well past time for the quilt to be finished instead of lying in a box for another twelve years. It didn’t become a double bed size quilt, more like a lap size. But it was finished. I think back now with sorrow, thinking I no longer have that quilt, it was tattered and never made it with me on my journey here to Northern Ireland. I wish I had treasured it more. But I still carry those memories with me.
It did inspire me to sew more quilts, but on the machine, not by hand sewing! I was into cross stitching and I had this book of mouse designs that I was wanting to stitch for Latisha. This was when she was a toddler, but I didn’t want to frame them. That began my first venture into quilts. I made simple blocks, then pieced them together and made it into a quilt. I was self-taught and quilt making was totally new for me. I didn’t have the tools needed, or the techniques and I didn’t even know what tools I needed. I began my quilting journey on my own, learning, using books borrowed from the library. There was no internet, google or YouTube back then. It was still the Dark ages.
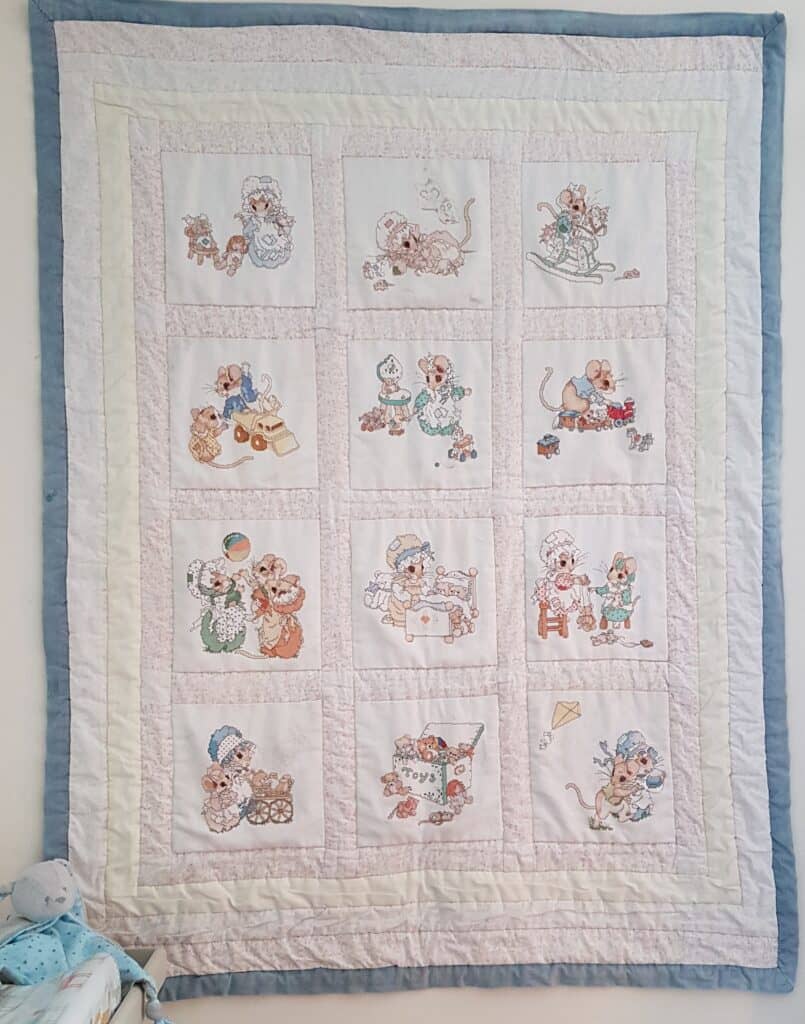
I learnt by my mistakes and went by my gut feeling. Latisha still has that quilt after 15+ years. It is a bit faded and worn but still very much a treasured item. It now graces the wall of Lucas’s bedroom.
From that very first quilt, I wanted to make more. There was still no quilt classes or quilting fabric shops. I think the nearest one to me was a seven-hour drive away. There was no online shopping either. So, all I had was the one fabric shop, you know the one that I worked in after I left school, and their selection was more for dressmaking rather than quilting fabric. So my only option was searching local Charity Shops and finding clothes that had very little seams and was 100% cotton. It is amazing what treasures you can find in those Charity Shops. These were also the places that I found old wool blankets (the type that we used to have on our beds, before duvets). They were usually cream and 100% wool. They made a brilliant option for the wadding, as there was nowhere to buy wadding. The upside was that the woollen blankets made the quilts warm in the winter (there was no such thing as central heating, I am really showing my age now).
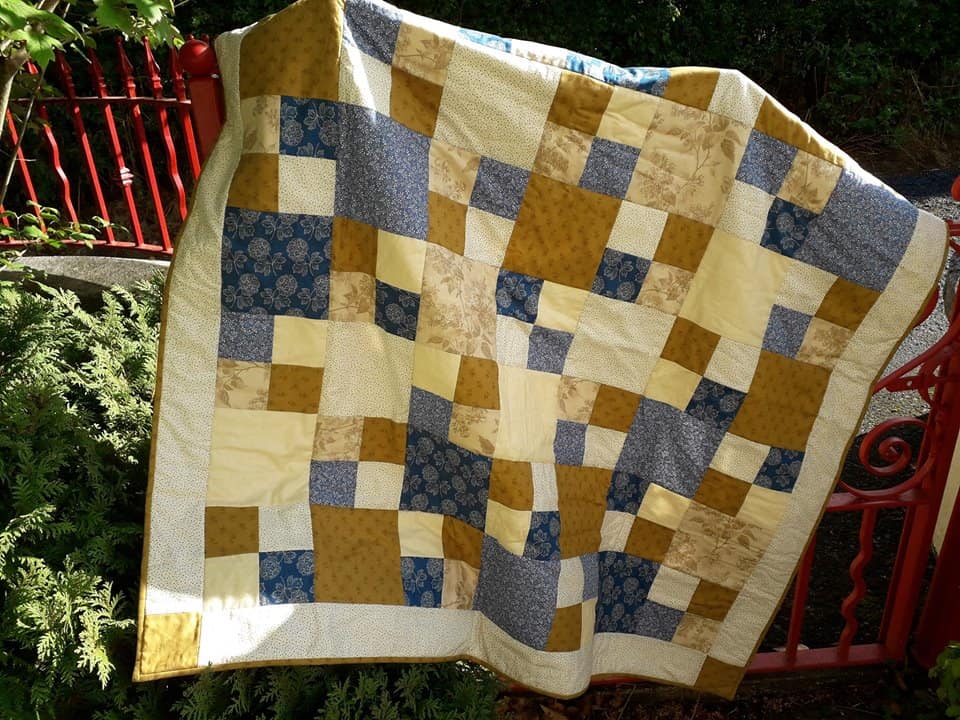
I remember finding a stash of lovely Japanese patterned cotton fabric in a charity shop. From this stash I made a large double bed size quilt for Latisha to take to university. It had a large woollen blanket for the wadding and kept her warm for many years at her various accommodations. She even brought the quilt over here when she moved over from New Zealand. That quilt bears many battle scars, but it is still doing its job.
While looking into quilting and the history of it, I found that during the pioneer days, quilts were made from old clothes and old blankets. I was just reliving those traditions without knowing it, making quilts from old clothes and blankets to give them new life. I have made quilts from curtain fabric, chintz and whatever I could find. I was self-taught and created quilts with what I had on hand. My skills would not have been the best and I made many mistakes. I read book after book to improve my skills. I didn’t know about ¼” foot, applique, machine piecing and other tips to improve my quilt making.
Going forward a few years and I am now in my mid to late thirty’s and I discovered that there was a quilting guild in the area. It was in a historic House and gardens in the village I grew up in and I had spent many years exploring the grounds. At one time I even joined their painting group when I was a teenager. Wanting to learn more about quilting, I nervously went to one of their meetings, eager to learn new skills from them. It would be easy, after all quilters and crafters are all friendly helpful people that would welcome me gladly. I still remember, very vividly, stepping into that room of strangers Twenty years ago. I very nervously asked if it was possible to join as I was interested in quilt making. I was confronted with questions. What is your experience? Have you done quilting before? I answered that I had been sewing since I was 9 years old, did dress making and recently started to make a few quilts.
“Oh, what do you use to make your quilts?” I told them about my finds at Charity shops and how I made my quilts.
“Heavens!! That is not quilting! Quilts are only made with the proper Quilting materials!”
There was no warm welcome, no instant friendships. Basically, I had broken all of the Quilt Police Rules! I left and vowed never to put myself in that position again, deflated because I chose to do quilting my own way. It was the start of the journey into learning how to do quilts MY way, teach myself and reach my goal of showing others how to sew and quilt.
I have learnt so much along the way of my journey and I can honestly say I am still learning. Quilting techniques and tools are constantly improving and I have found, that what I knew and did ten to twenty years ago is NOT what I do now. I look back at my first quilts, I have a slight shudder to myself when I look at my mistakes and lack of techniques. But this is all part of the process and I am proud of what I have achieved and how far I have come. I have learnt the tricks and techniques, but I will never say that I need to stop learning. Learning is always an ongoing process. I will always treasure those first quilts, the ones where I didn’t use a rotary cutter, mat and ruler – they just weren’t round back then, but I would never think of NOT using them now. Why go backwards in the journey of making quilts? They make it easier to get accurate cutting, so anything that makes it easier is the best.
So, after that journey back in time, I now come to the purpose of what I started in the beginning of this post. The rewriting of a pattern for your very first quilt creation, to begin your journey in quilt creating.
When I teach workshops, I like to share the tips and cheats that I have learnt to creating a quilt easier. The tips on how to correctly press your seams and why, how to pin and the importance of pinning so that you can ensure all seams and points meet up as they are meant to.
I learn things from experience, for instance, my first experiences in layering quilts and having disasters due to the three layers not working together, ending up with huge wrinkles when I do the quilting to hold the layers together. Not using the right tools or materials did not help either, so I have shared how I have overcome the issues, so you can enjoy the process of layering and quilting.
Basically, this tutorial pattern is like having me looking over your shoulder guiding you through making your first quilt. I usually get that from my students “I wish I could have you at home looking over my shoulder, telling me what to do.” So, if you have always wanted to make a quilt but have been putting it off due to not knowing how to go about it, having no classes to attend and just need the hints and tips to improve your quilting experience, then this tutorial pattern is a great place to start.