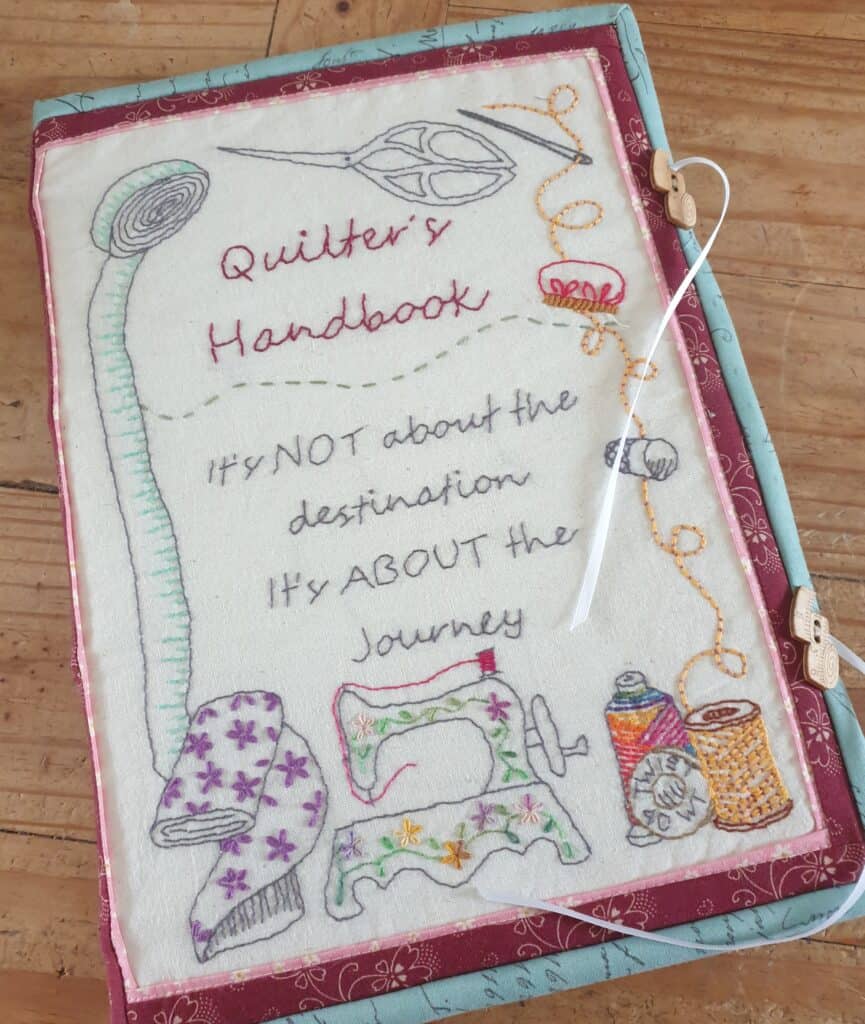
I have written a couple of blog posts about getting my craft snug (and stash/materials) organised in the lead up to my latest release – The Quilter’s Handbook. I have gone over the first two sections in the handbook – Inventory Section and Planner/Journal Section. I hope you found those posts to be interesting and helped to encourage you to get more organised with your quilting area. If you didn’t get a chance to read them, please do.
Have you ever had a tension issue while sewing and completely forgot just how to fix the problem? Or maybe you have been stumped on how to cut the correct measurement of fabric pieces needed? You may feel completely confused when confronted with the names of fabric pre-cuts or quilting terminology or even wondered on just how big to make the quilt which is to go onto a particular sized bed, etc.
Well, the next section in the Quilter’s Handbook deals on just those issues. I have complied the most common issues that we all experience at some stage. Now you just need to refer to your handbook for quick reference, instead of having to try and find the answer online and never knowing exactly where to look. Why waste time searching while you could be spending that time quilting?
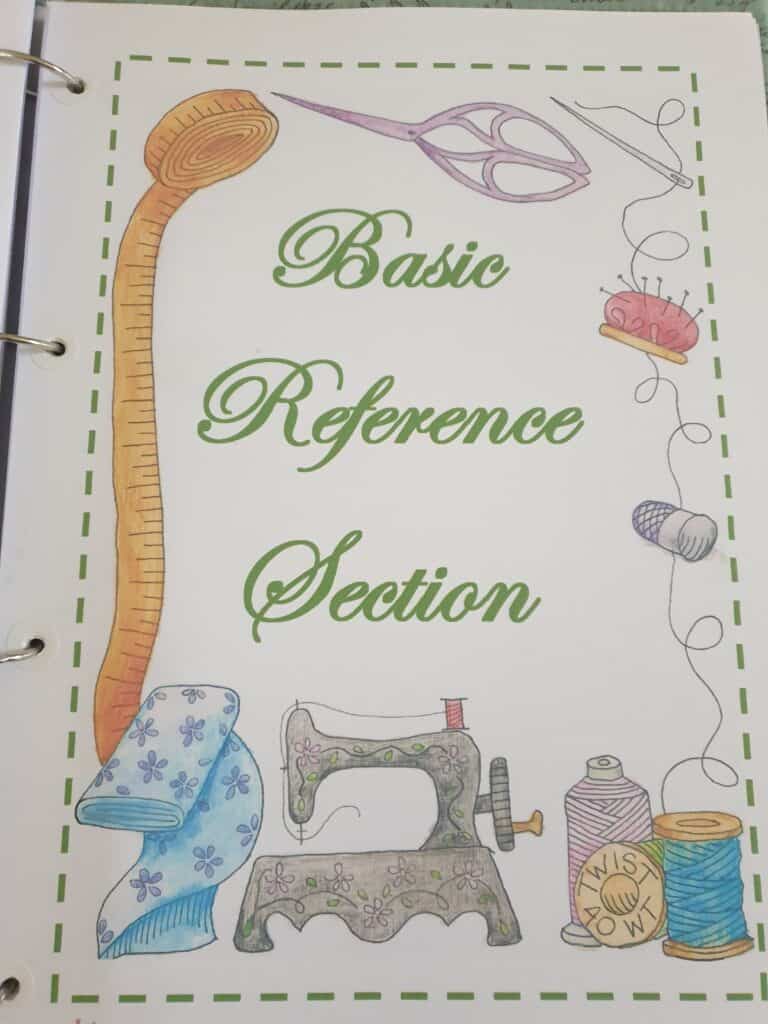
So, just what is in this section?
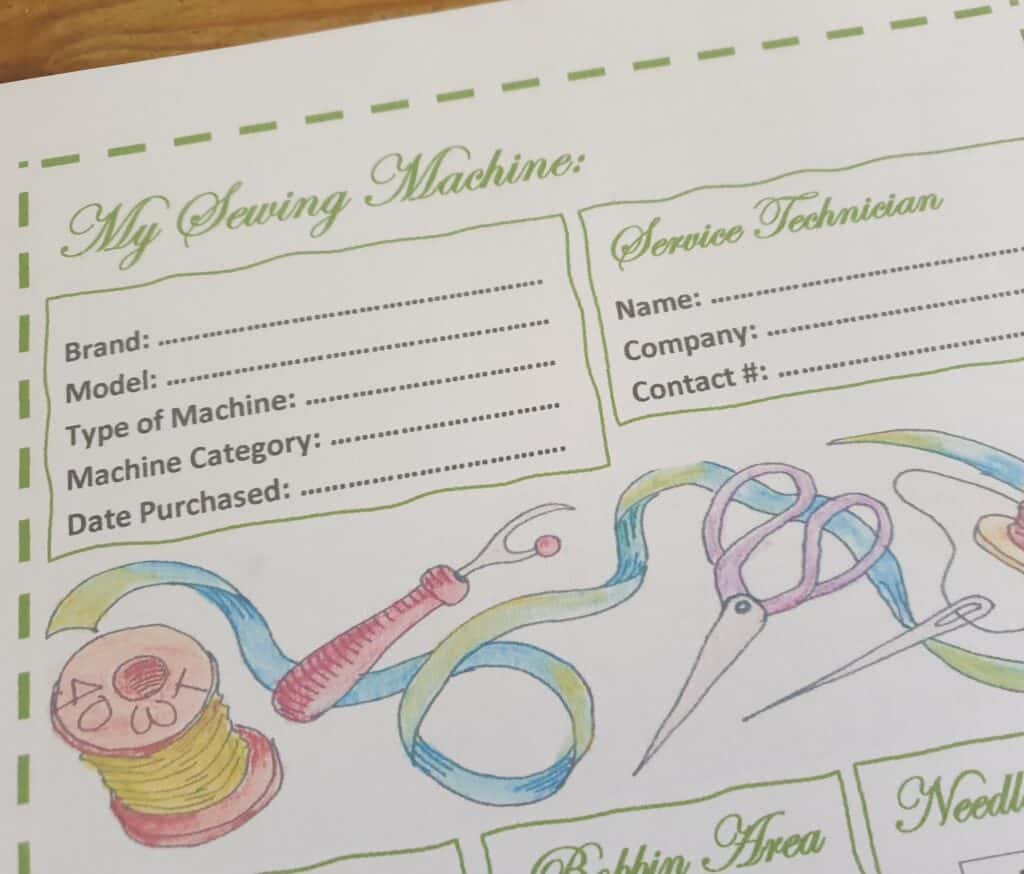
I have designed a template that is all about our sewing machine. It has space to fill in all the details of our sewing machine – Brand, model, and the category group of the machine if applicable, along with any extra feet/tools you may have brought for your machine. I have found this handy as I have quite a selection of extra specialised feet for my machine. My machine is also quite a specialised machine, and it is in a certain category which is important for when I am wanting to order extra bobbins or feet for my machine. Without knowing this category, I could purchase the wrong foot/bobbins for my machine. I can assure you I have done exactly that in the past! With these details recorded in my handbook, I can now quickly double check what category I need to search for when purchasing extra parts for my machine. Not all machines will have this, but it is always handy to have that recorded somewhere that it is quick to double check.
I have included a section where you can write in all the extra tools and feet that you have purchased for your machine. I found this quite useful when I went through my pile of feet that came with the machine and that I have purchased along the way. I was now able to identify and write down what the feet where for. My next step is to sew a handy zipped bag to house the feet separately, along with any instructions sheets that came with them, so I can keep them safe and know exactly what they are used for. This is especially true for the feet that I wouldn’t use as often but still need to use on specialised sewing projects. I am still working on the perfect bag to keep them all where I can also label each compartment with the name of the foot!
There is space to record the contact details for the service technician that you may use for servicing/repairing your machine. You no longer need to search frantically for the contact number that you wrote down on a scrap piece of paper or wonder where you placed their business card …..
I have drawn up sections where you can write down the dates of when your machine was serviced, as well as the date when the bobbin area was last cleaned, and the needle changed.
If you hold more than one sewing machine, it is handy to have one for each of your machines. I have done one up for my Pfaff sewing machine but also plan on doing one up for my longarm machine so I can keep a record of all the extra tools and feet that I have purchased for the machine. It just helps for when I may want to purchase anything in the future and I know straight away what I have for the machines, instead of having to go and search through my box of tools or feet for the machines.
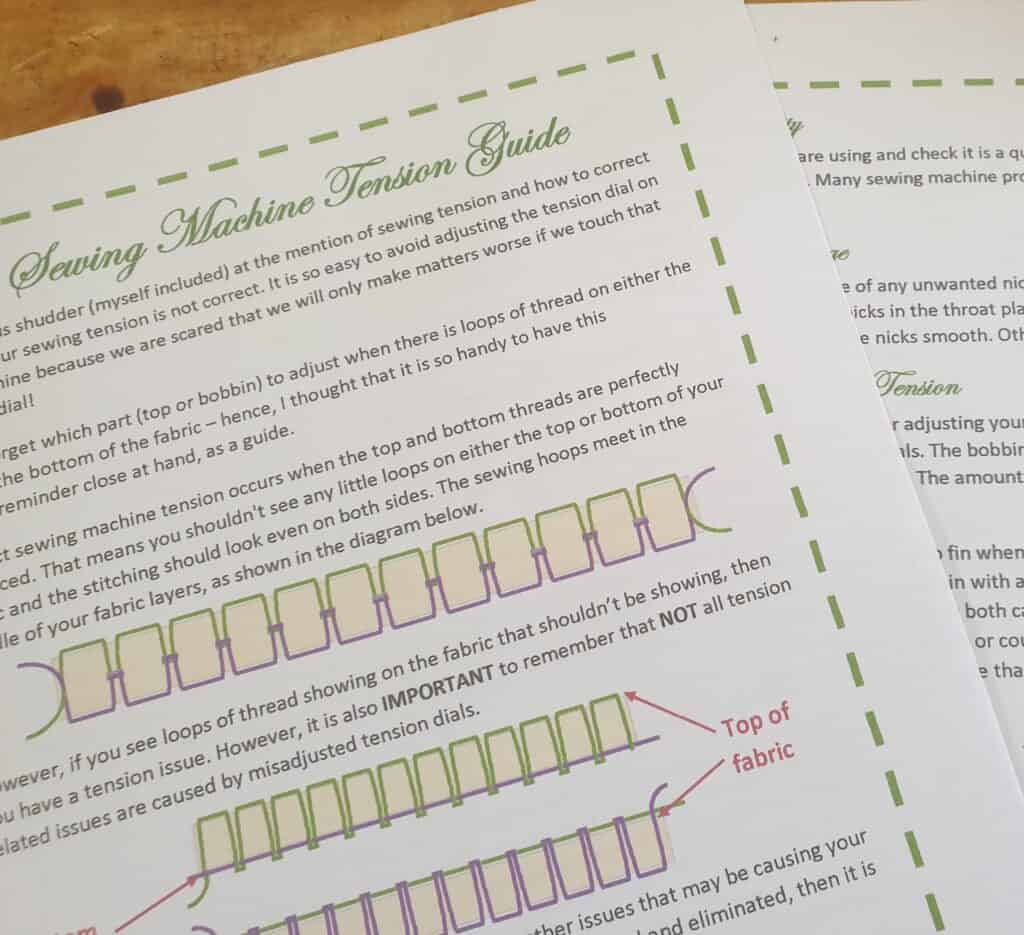
How many of us shudder at the mere thought of having tension issues while we are sewing? We can be sewing quite happily only to discover that our sewing is not right, we either have loops on the top or bottom of our fabric and the stitching is not balanced. One pull of one of the threads and the whole stitching comes undone!
I know I really do run scared if the machine has any tension issues and I dread having to touch my tension dial! I seem to inwardly hope that I never have to fix any major tension issues. However, having issues with our stitching where the loops do not meet in the middle of the fabric layers does not instantly mean that we should fiddle with our dials! Before we go anywhere near our tension dials, there is so much more that we should check. The dials are what we check last, after we have go through and checked everything else!
This handy reference goes through what to check when our machine is giving us tension problems and once, we have eliminated all of those other possible issues, we can then start to adjust our tension dials.
However, I have always found it hard to know which way to move the dial – is it up or down the number range depending on if our tension is tight or loose? I also tend to forget how to work out from the way the thread shows on the fabric as to whether the tension is too loose or too tight. I need to have something visible in front of me to remind me.
I really do dread tension issues, and my longarm machine is very sensitive to having the correct tension to ensure that the stitching is perfect with no loops on the bottom or the top of the quilt. The stitching loops need to meet in the middle! I knew that I would have to overcome my fear of tackling and correcting tension and I had gotten to be quite good with ensuring the correct bobbin tension. The slightest things would throw it off, even were the tension would be off if the bobbin was not wound on with the correct tension of the thread going through the tension discs.
It seemed that my longarm decided that I needed to face my fears and conquer the fear of tension. Last August I was quilting a wholecloth quilt which required a lot of stitching as the design was the stitching! I was working to a deadline, and would you believe that my quilting had serious loops underneath! Half a day’s quilting took me over a day to unpick! I really needed to conquer and overcome my fear and be able to tackle and solve tension issues. I went through all the steps prior to attacking the tension dials. I kept on saying out loud ‘Loosey lefty / tighty righty’ – it certainly imbedded into my brain, and I learnt which way to tighten or loosen the tension dials. I must say that those couple of days of pure hell – stitching, unpicking, not so nice words, and going through all the tension steps – really helped me to overcome my fear of tension issues. I can not say that I will not shake with fear the next time I have a major tension issue, but I know that I can always refer back to my tension guide, take a deep breathe, grab Jack, and know that I can overcome my tension issues.
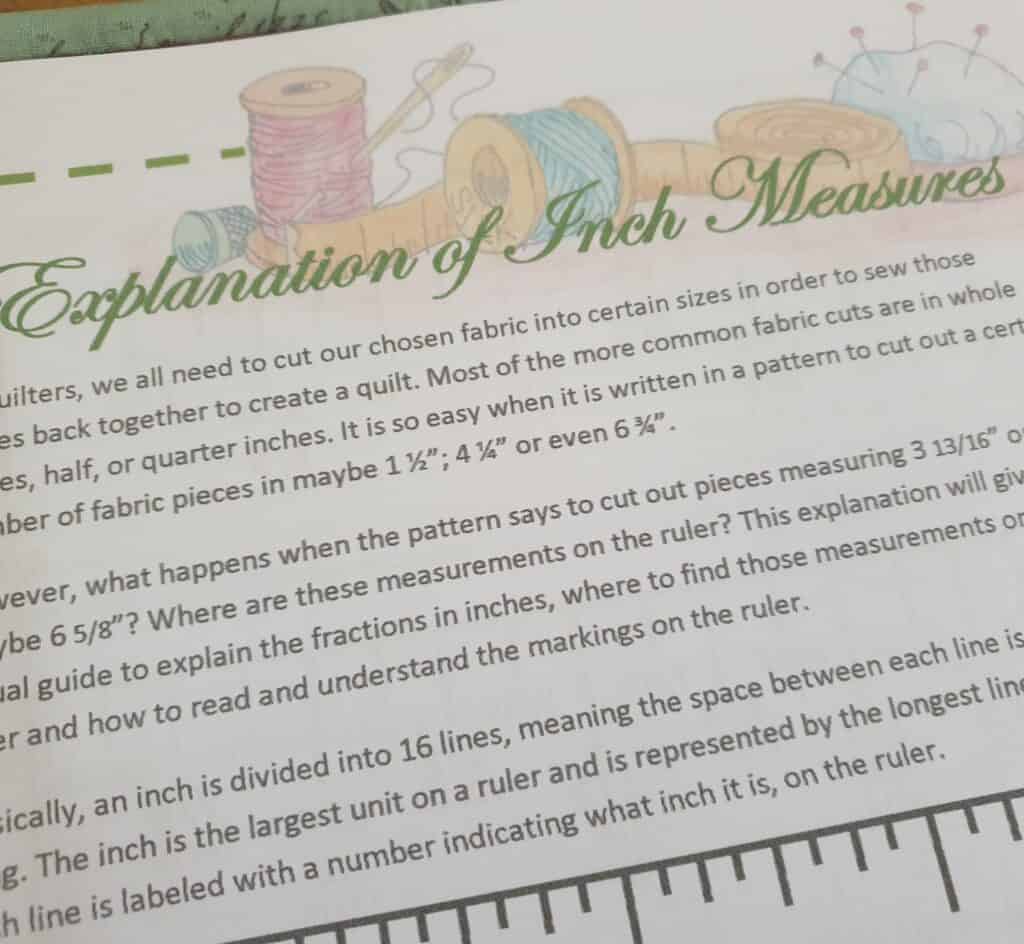
When I am teaching workshops, I have often been met with bewildered looks at times when the pattern calls for cutting fabrics which may not be of the more common inch fraction measurements. We will all be familiar with the ¼”, ½” and ¾” measurements and able to find those with ease on the ruler. But there are times when the pattern calls for the less common fraction measurements – the ones that talk about eights or sixteenths. Where do we find those on the rulers?
This guide gives a visual guide to explain the fractions in inches and where to find those measurements on the ruler. More confusingly, those fractions may have several ways to write them. So this guide explains how to read and understand all those lines on the ruler between each inch.
Why is it that our quilting patterns all work in inches for cutting our fabric and yet the material lists are usually in metres and the fabric shops sell the fabric by the metre? I haven’t worked out the reason yet, and I don’t think I ever will.
Coming from New Zealand where everything is in metric – kilometres, kilos, centimetres, metres, etc it was quite alien to come to the UK and instead of driving in kilometres, I was doing it in miles! Yet I brought my meat/vegetables by the kilo or grams and the fabric was by the metre or half a metre.
It then got stranger when I starting to cut my fabric for making a quilt, my rulers were in inches and the cutting instructions talked about inches or parts of an inch! The seams were ¼”. It really was a mixed up world! Then there were times when we downloaded a pattern from the states and the material list was all in yards! Just how did a yard compare to a metre? I know that there is 100cm in a metre, but just how many inches are in a yard?
I have drawn up a couple of visual charts, so it is easy to see at a glance on converting yards to metres and inches to centimetres. Now you don’t have to go and google to find out.
In this reference, I have also included the approximate sizes of UK beds to help give you an idea on what size to make that quilt. It is easy to find quilt sizes online for the American beds, but they are different from the UK. Even New Zealand has different bed sizes from the UK, and I found it strange to learn that the UK does not have a Queen, but rather King or Super King!
This table makes it easy to give you an approximate guideline on what size to make the quilt if it is to fit a certain bed size.

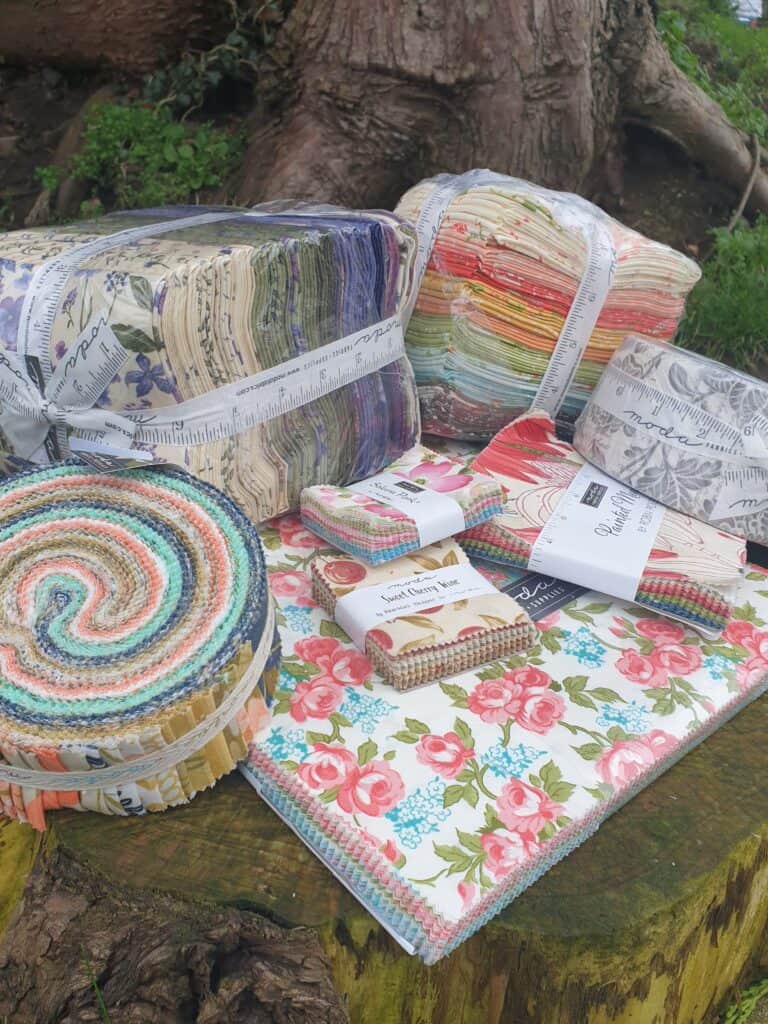
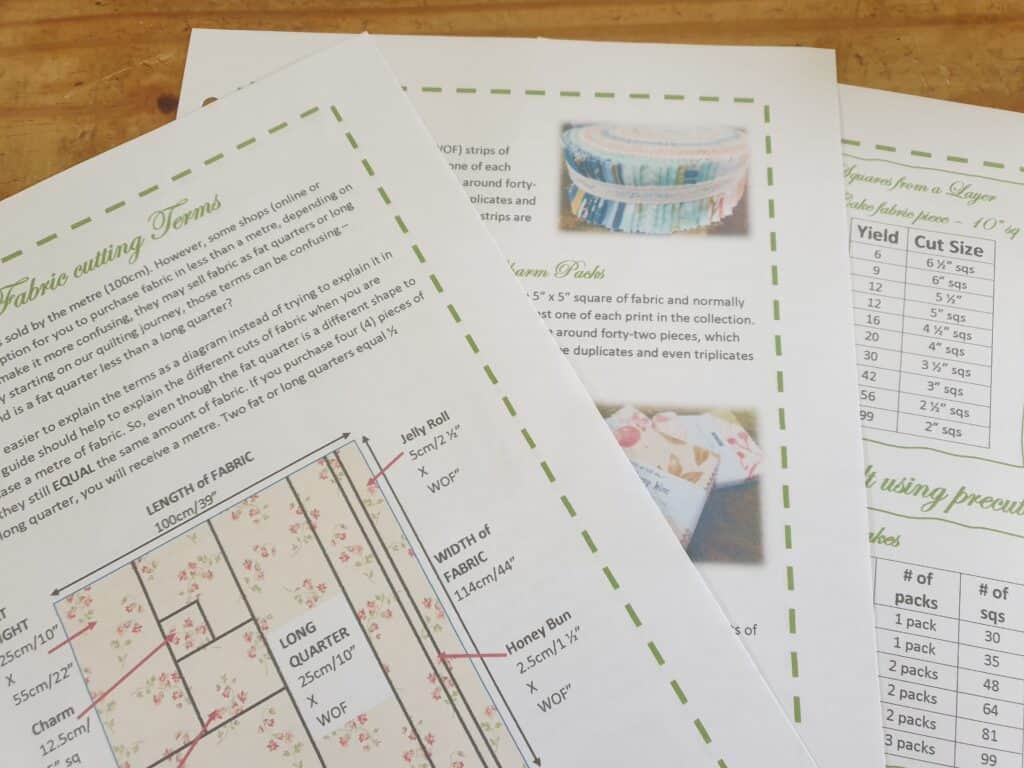
When it comes to purchasing fabric for a certain project, it can also be daunting. You can go into a shop and purchase a metre or part of a metre of fabric, but what if you need to get a Fat quarter, or maybe a long quarter? Even worse, you may need to purchase a Layer cake, Honey bun or a jelly roll …. You would be forgiven if you suddenly thought that fabric purchasing just turned into some kind of cake eating spree. If you are new to quilting, all these lovely or weird sounding fabric terms can be daunting! Is a Fat quarter the same as a long quarter? Just what does it all mean?
I have drawn up a visual guide showing and explaining what the different fabric cutting terms mean and just how much fabric is involved in each cut. I have also written a guide to all the pre-cuts along with photos for each type. I knew that my personal collection of pre-cuts would come in handy – a photo shoot for the handbook. I am sure they enjoyed being taken out of the boxes that they had been thrown into and having the opportunity to see some daylight for photos. The most attention and handling they have received for quite a while I can assure you.
So with having some pre-cut fabrics like a layer cake or charm pack, you may want to create different cuts from the 10” or 5” fabric squares. I have compiled charts so you can see at a quick glance just how many 4”, 2” or how size squares you can get from the different precuts. Maybe you just what to know how many charm packs it takes to make a quilt? These handy charts will give you all the help you need by working the math’s out for you.
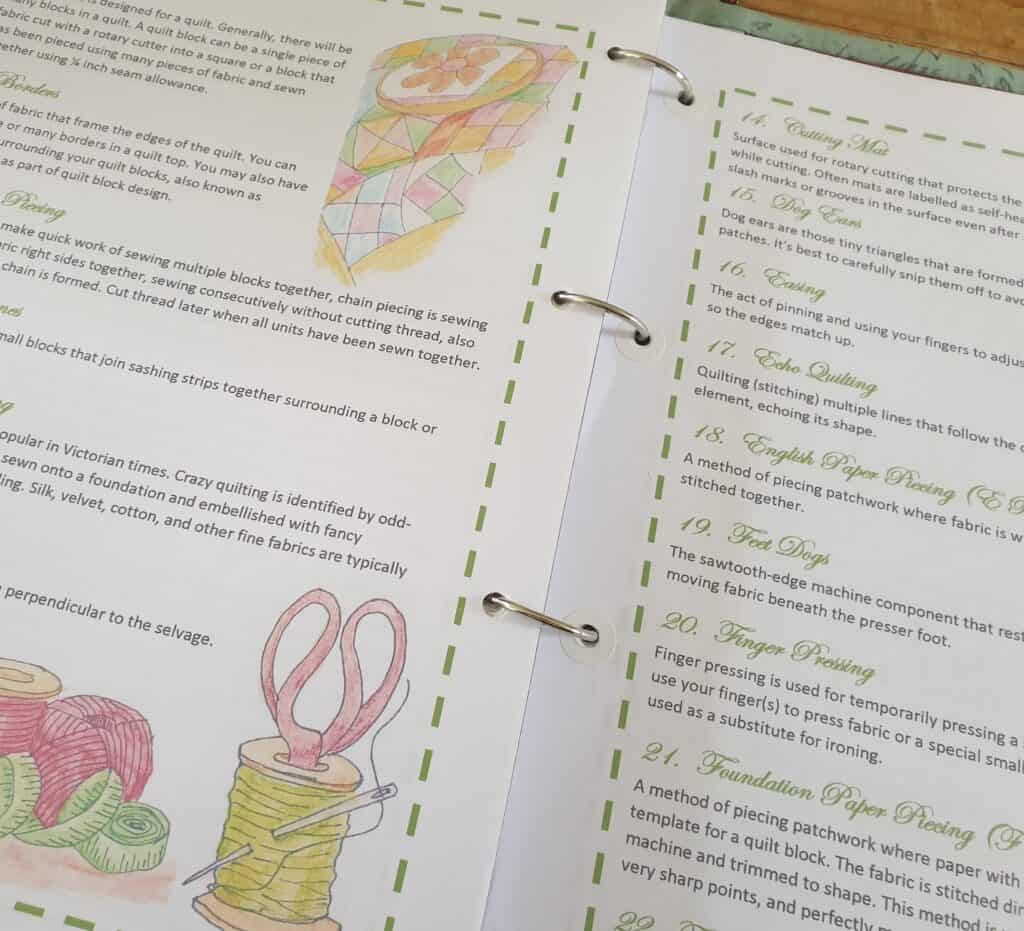
What if you are just at the start of your quilting or sewing journey. Do you find that there is quite a few strange terms and words that are used? It really does seems as though quilters have this secret language that needs to be used.
So to help de-code those strange sounding terms, I have compiled a list explaining the meanings for the more commonly used terms to help you break down that language and just be able to get down to the more important part – sewing and quilting.
What I like most with the Handbook is that you only need to purchase the parts that you would find useful, which is so much better than purchasing a prebound one where you have to have parts that you would never use.
For example, you may know what all the terms are and don’t need to have this reference, so there is no need to include it in your handbook. Maybe you are not interested in inch measurements or machine tension.
Basically you can pick and choose what you need in your basic reference section and make your own personalised handbook.
Come back next time when I will discuss and look at the final section – Cheat Sheets Section. The section that gives you step by step instructions on how to make the more popular and commonly used units in quilting, along with a maths cutting chart so you can quickly refer to so you know what size fabric to cut for the finished sized unit that you are wanting …..