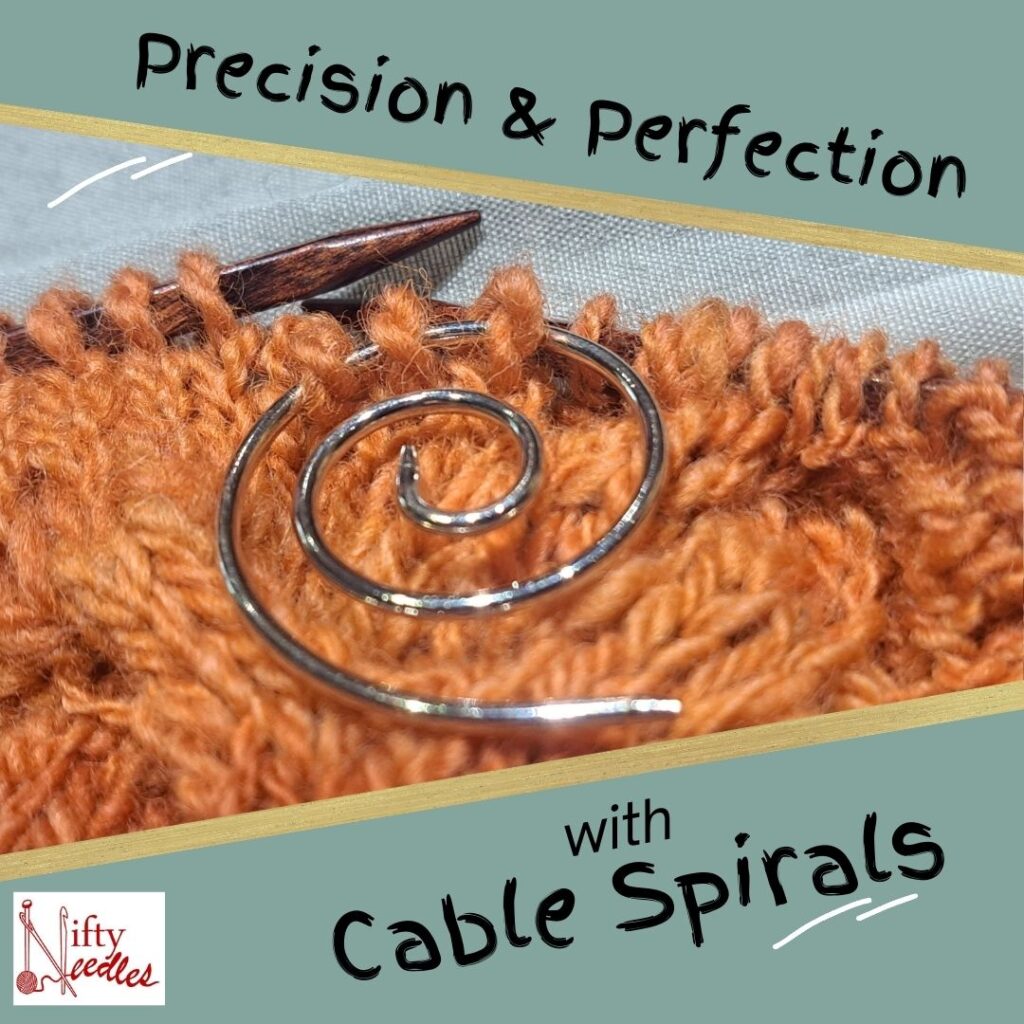
Cable knitting, with its intricate designs and beautiful textures, can be both rewarding and challenging. Those who have embarked on cable knitting adventures know that keeping those ‘paused’ stitches secure while working on the cables is a crucial, yet often tricky, task. Traditional cable needles can sometimes get in the way, and ‘paused’ stitches may easily slip off, leading to frustration. But there’s a solution that brings both functionality and style to cable knitting – the Nifty Needles Cable Spiral.
Advantages of Nifty Needles Cable Spiral:
Hassle-Free Cable Knitting: Cables can be a knitter’s nightmare. With the Cable Spiral, you can say goodbye to frustration. It securely holds your ‘paused’ stitches, making cable knitting smooth and frustration-free.
Compact and Lightweight Design: The Cable Spiral’s compact and lightweight design makes it the perfect travel companion. Knit on the go with ease, whether you’re on a vacation or just want to craft in different corners of your home.
Dual Functionality: The Cable Spiral isn’t limited to cables. It’s a versatile notion that also doubles as a shawl pin, adding elegance to your knitwear. It’s a decorative piece that’s as functional as it is stylish.
Securely Holds ‘Paused’ Stitches: One of the most significant advantages of the Cable Spiral is its ability to hold ‘paused’ stitches securely until you need them. No more dropped stitches or unravelled cable patterns.
Unique Decorative Design: The Cable Spiral isn’t just a utilitarian tool; it’s a work of art. Its unique decorative design adds a touch of novelty to your knitting projects, making them stand out.
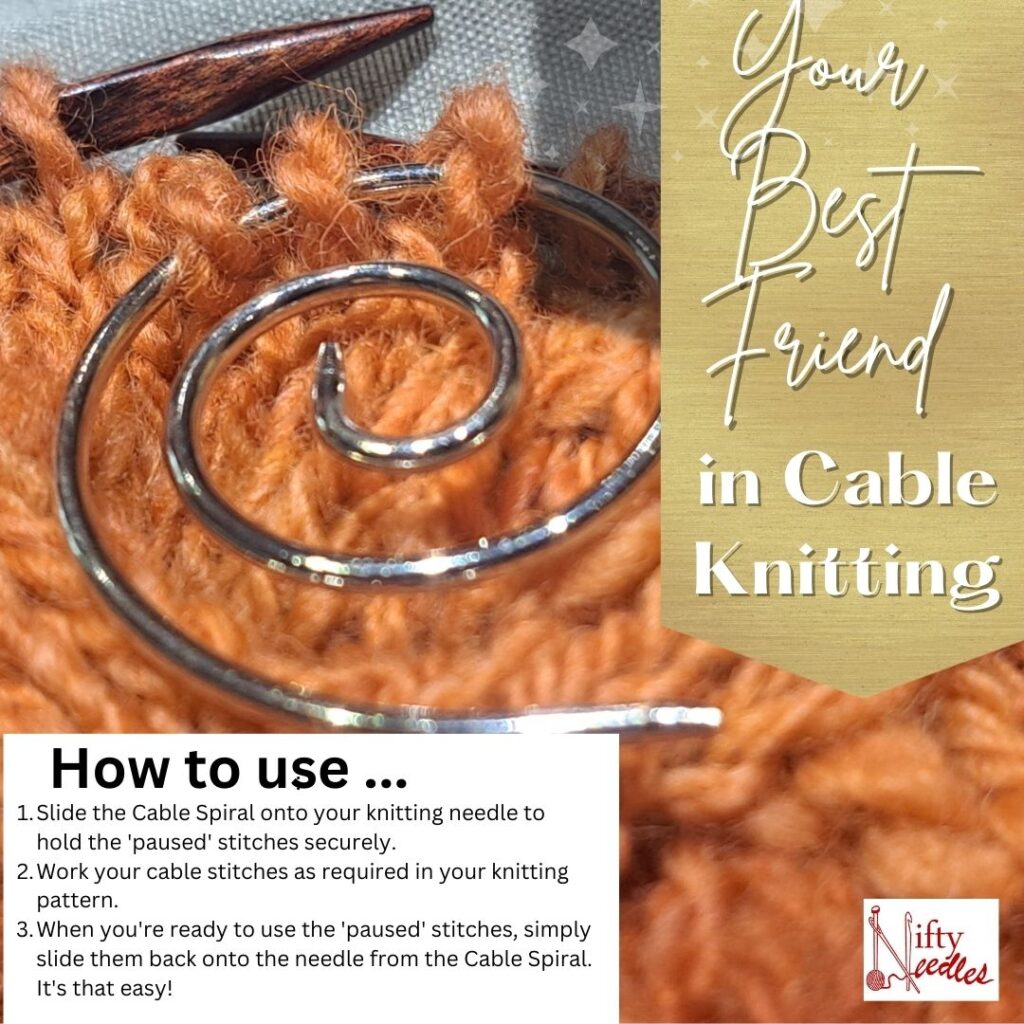
How to Use Nifty Needles Cable Spiral:
Using the Cable Spiral is a breeze:
Slide the Cable Spiral onto your knitting needle to hold the ‘paused’ stitches securely.
Work your cable stitches as required in your knitting pattern.
When you’re ready to use the ‘paused’ stitches, simply slide them back onto the needle from the Cable Spiral. It’s that easy!
What Sets Nifty Needles Cable Spiral Apart:
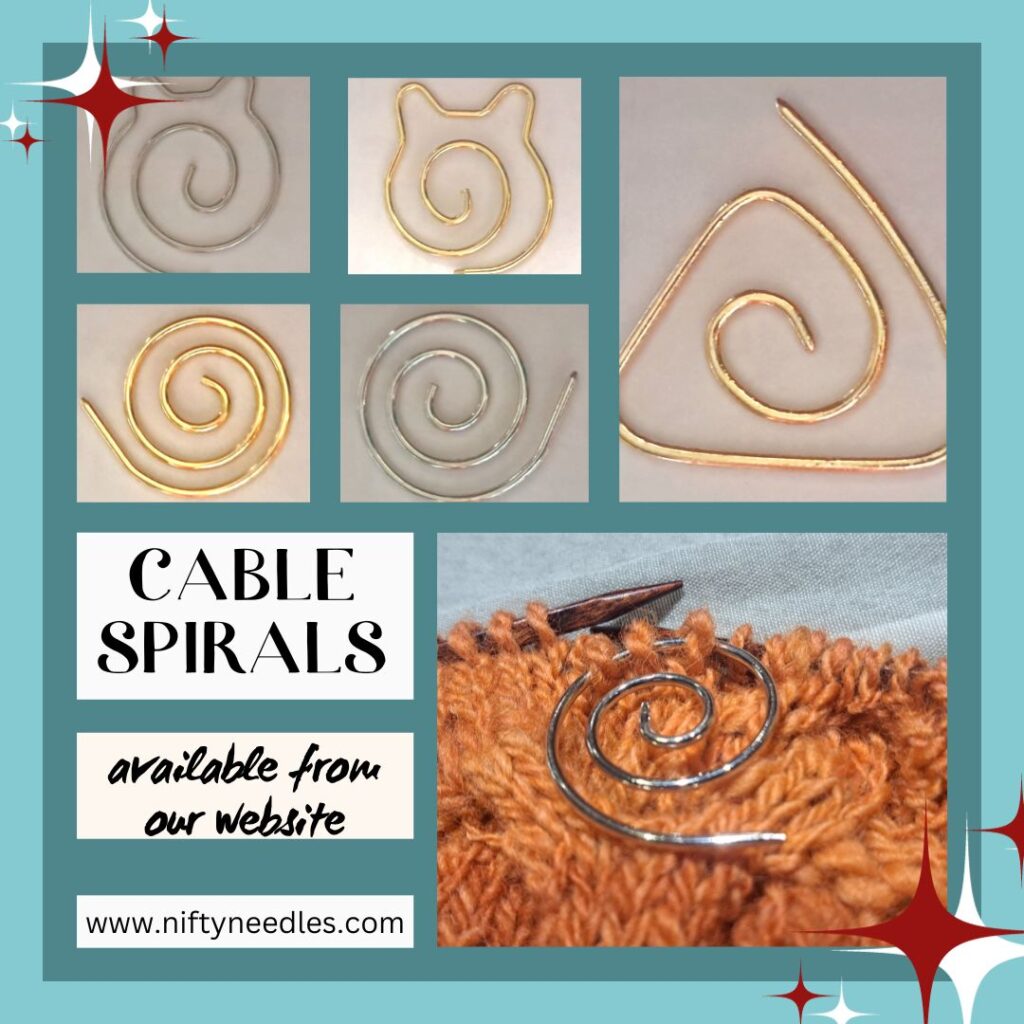
What makes the Cable Spiral stand out from traditional cable needles is its combination of elegance and practicality. It’s not just a tool; it’s an accessory that enhances your knitting experience. The Cable Spiral’s unique decorative design and shawl pin functionality set it apart from alternative cable needles in the market. It’s a must-have notion for any knitter who appreciates craftsmanship and style.
Ready to Elevate Your Cable Knitting?
Are you ready to make your cable knitting experience more elegant and frustration-free? Nifty Needles Cable Spiral is here to help you achieve that. With its unique design, hassle-free cable knitting, and dual functionality, it’s a versatile and stylish addition to your knitting toolkit.
Don’t miss out on the advantages of the Cable Spiral. Elevate your cable knitting experience and add a touch of elegance to your creations. Shop now on our website and discover the difference for yourself.
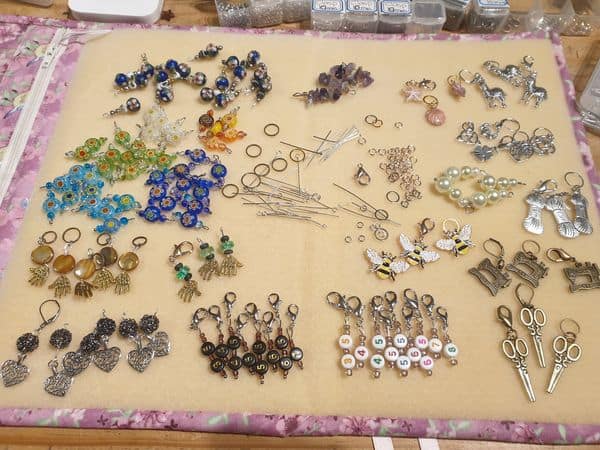
Following on from my previous blog in regard to Alyssa and I hunting out my jewellery craft bits and bobs …. And starting to make stitch and progress markers …. I thought it was a great way to introduce this exciting new product line ….
I have used stitch markers for many, many, years with my knitting. When I first started knitting, I never used them, or had even known about them. That all changed when I was introduced to knitting my garments from the Top Down (a great technique and I would strongly recommend you learning it if you haven’t already done so – in fact I even have a ‘Learn to’ kit in the shop) …. And stitch markers are essential with doing this technique as they marked where you needed to do the increases for the sleeves, front and back. I then used them when knitting shawls to remind me to increase at the shawl spine and even to divide the lace pattern repeats.
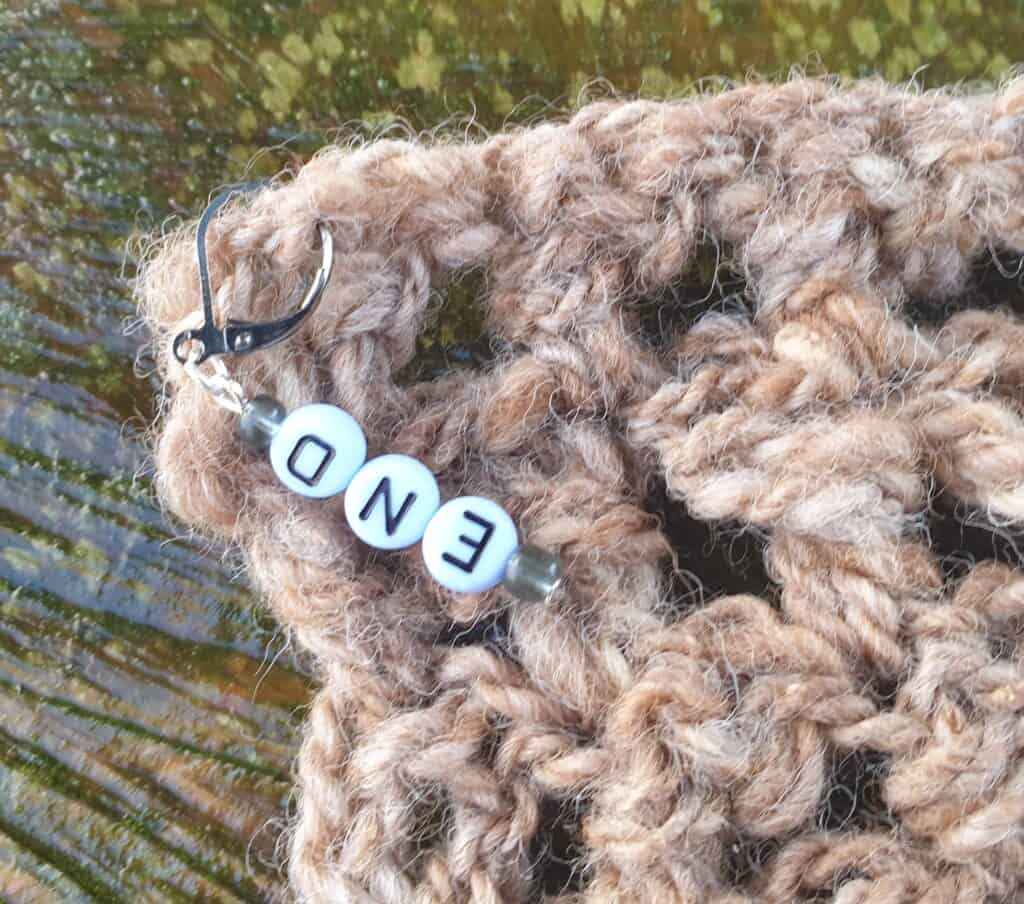
I must admit that I really never used them much for crochet. But in saying that, I found that the hook like markers came in quite handy to keep track of where the very last stitch was when crocheting in rows. I used this hack when teaching the learn to crochet course and this provided an invaluable tip/trigger for remembering EXACTLY where the VERY last stitch was meant to go. The perfect learners trick. I also found these hooks invaluable for keeping track of important places in the crochet piece.
End Marker for last stitch in crochet row
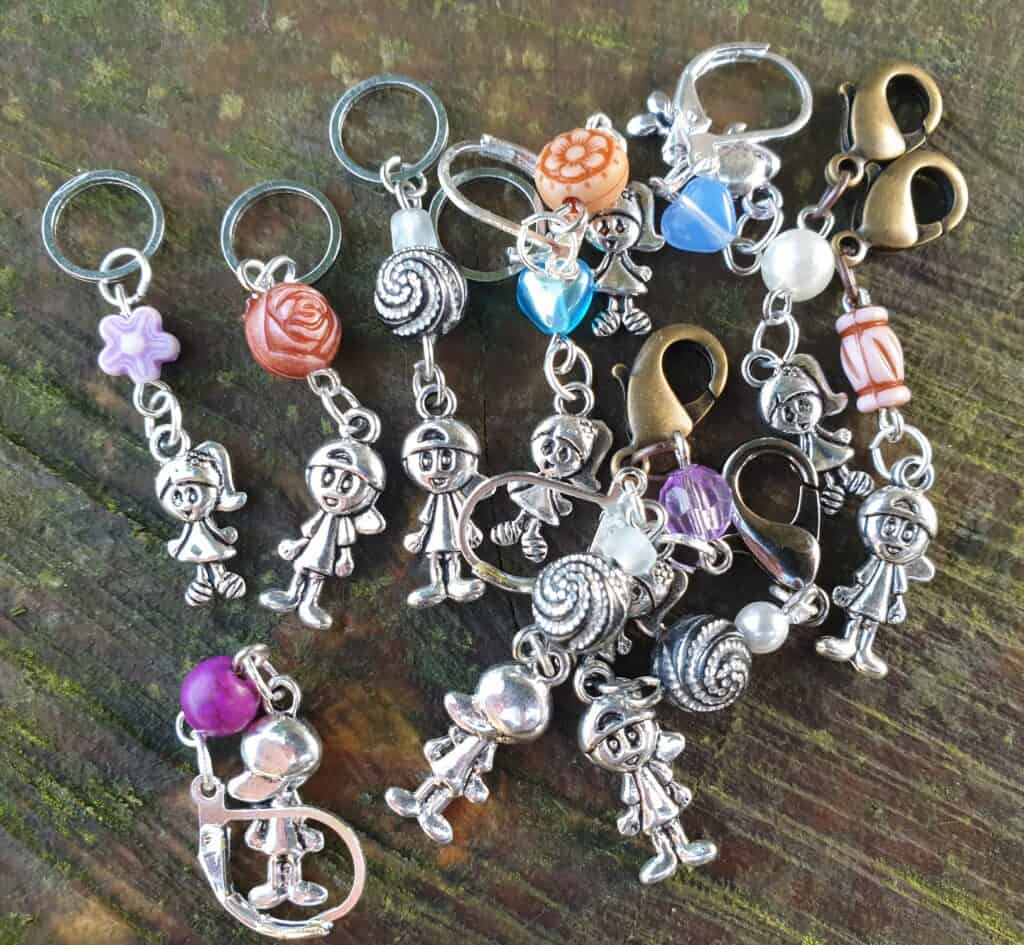
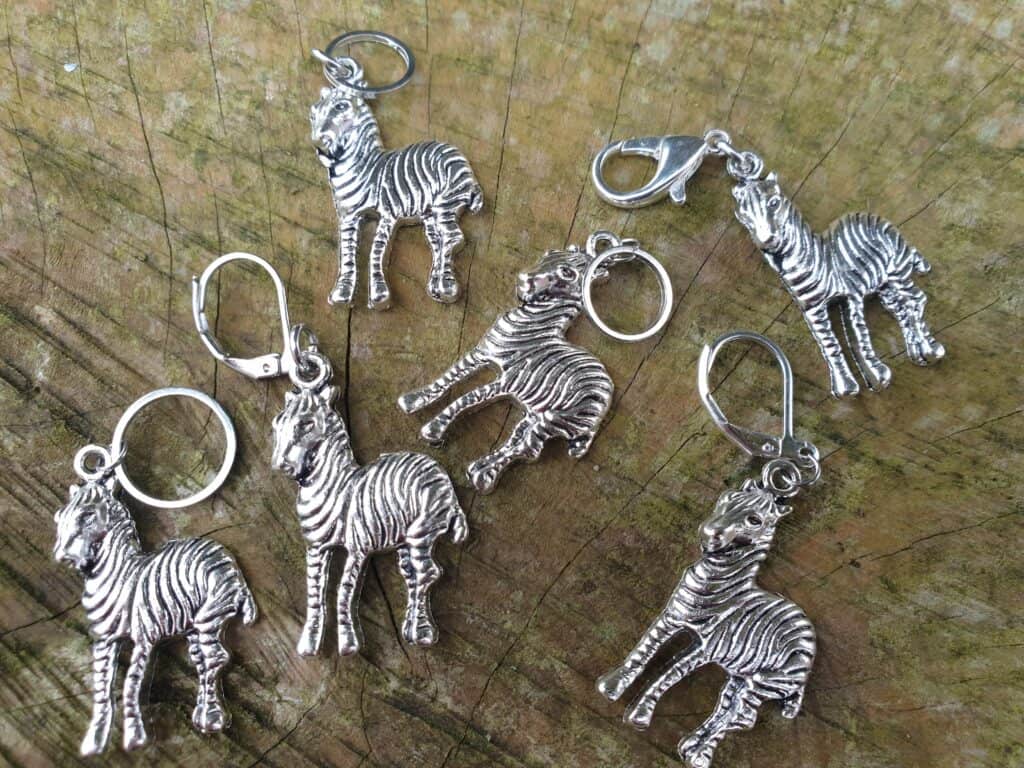
As mentioned in my previous blog, I love to use pretty, practical tools with my crafting. Yet I only used plain plastic markers even though I loved the decorative ones. I had a couple of decorative markers, but I hated using them. One lot used open jump rings so there was a split in the ring for opening and closing and no matter how careful I was, the ring always managed to snag my yarn which wasn’t great when using delicate and luxurious yarn …. So those rings were cast aside. I also had the wire loop style, which was a close loop with no opening, but the loop ‘moved’ …. In other words the bead at the base of the loop was not secured so would move up and tighten the loop.
In seeing all of the jewellery treasures, it really inspired me into wanting to make some markers. I did some research and online finger shopping to source the ideal findings needed to make the perfect markers, that I would be happy to use. That was a success (or disaster on how you look at it) – a success for my creative mind and a disaster for my bank account! But the orders were placed, and I started making up my first lot of decorative and practical markers.
ordering and making
So, while getting excited about making these unique wee tools and sharing the photos on Facebook, I soon learnt that not everyone (even knitters and crocheters) know what these wee markers are, or what they are used for. So of course I had to write a blog and go into detail on how to really make the most of these useful wee tools.
As mentioned earlier, I only had the plastic stitch markers for my knitting that came in two sizes and two colours. It really did not give me much scope for making full use of these tools. They were fine when I needed four rings to mark where the increases go in top down knitting. However, when knitting in the round, I had to place a marker to signify the start of the round. This can be difficult when you only have the one colour, or maybe a slightly larger ring…. And being me (short memory span) I would usually forget what colour/size ring I had used for the start of a round.
So, what is the difference between all the markers and just how many types are there?
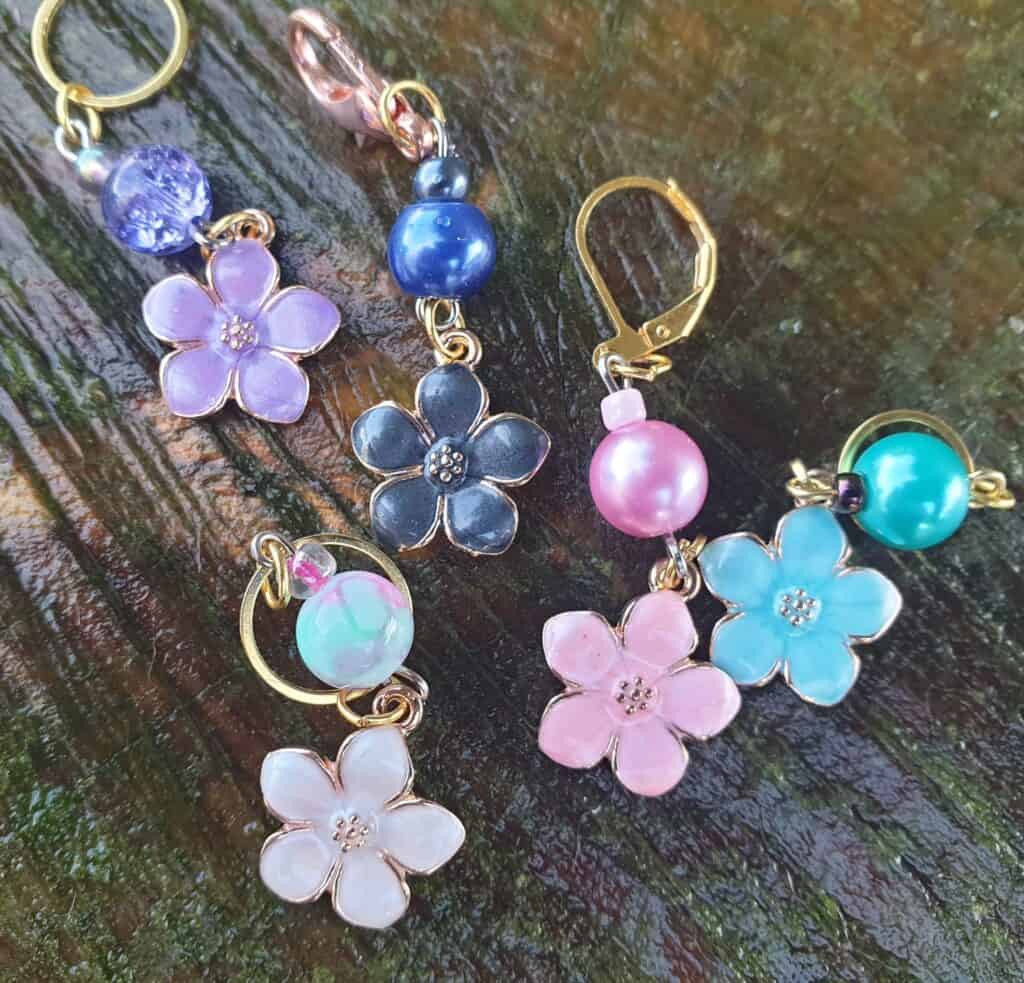
Stitch (or progress) markers come with a number of different clasps ….
CLOSED MARKERS
As the name implies, these cannot be opened and are commonly known as Ring (Stitch) markers. These can be either with a split jump ring, wire loop or a closed jump ring. I am not keen on the first two types, which I explained about above and these in effect put me off the decorative markers. I make my stitch markers with a closed jump ring which is basically a solid metal ring made in the same way as the plastic rings. The rings usually come in a variety of sizes to fit a range of needle sizes, which makes sense as it would be awkward to use a very large ring on tiny knitting needles. It would also be the same if you only had tiny rings that couldn’t be used on larger needles.
The closed rings can only be used for knitting but have so many uses. Once you start to use markers in your knitting, you will not know how you managed without them.
These markers sit on your needle between the stitches to mark pattern changes, where the round begins and ends, pattern repeats and so forth. When you come to the marker, you just slip it from one needle to the other, or remove it, if it is no longer required.
One thing to remember, ring markers can only be used for knitting. They can’t be used in crocheting as the rings are closed and there is no needle for the marker to sit on between stitches as crochet only has one stitch.
Closed Markers using solid closed rings in various sizes to fit different needle sizes
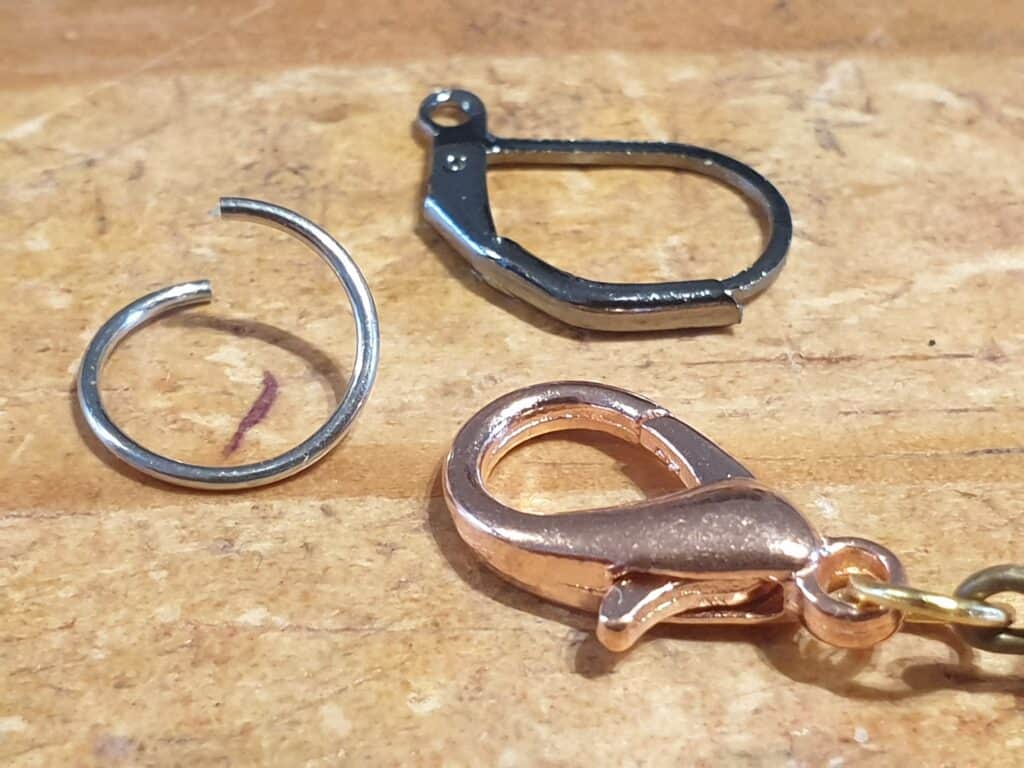
OPEN RING MARKERS
These come in a variety of clasps –
Split ring marker which uses the split jump rings which you need to open like a paper clip. I am not keen on these as they can be difficult to open and closed with your fingers and the ends can snag your yarn.
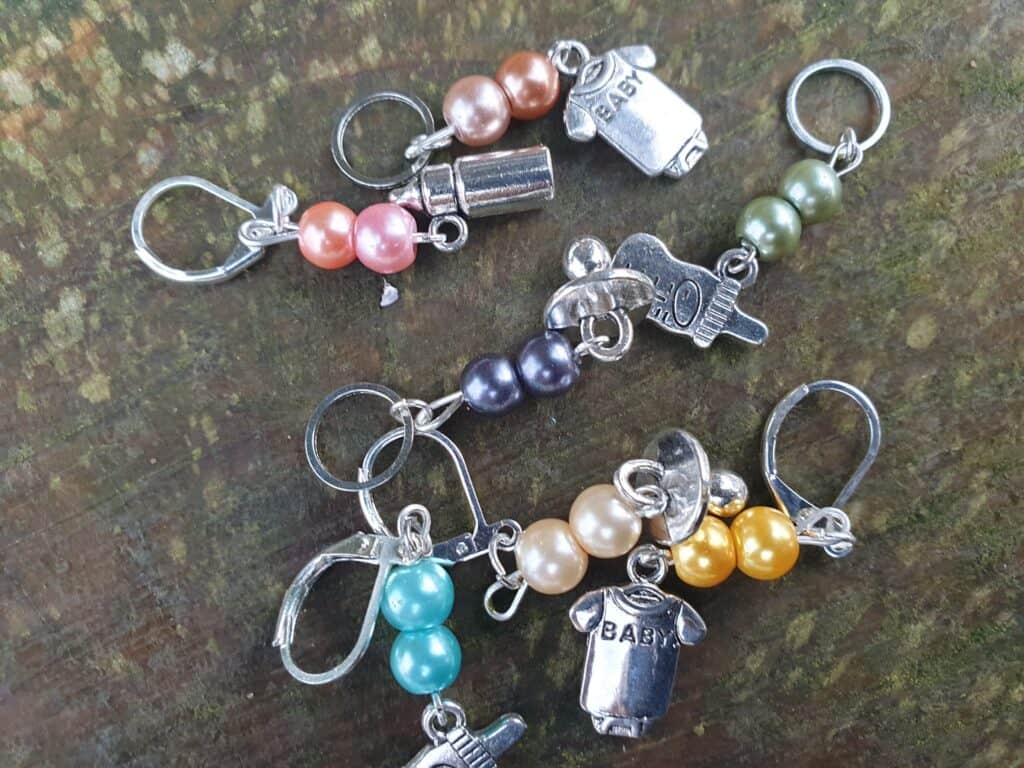
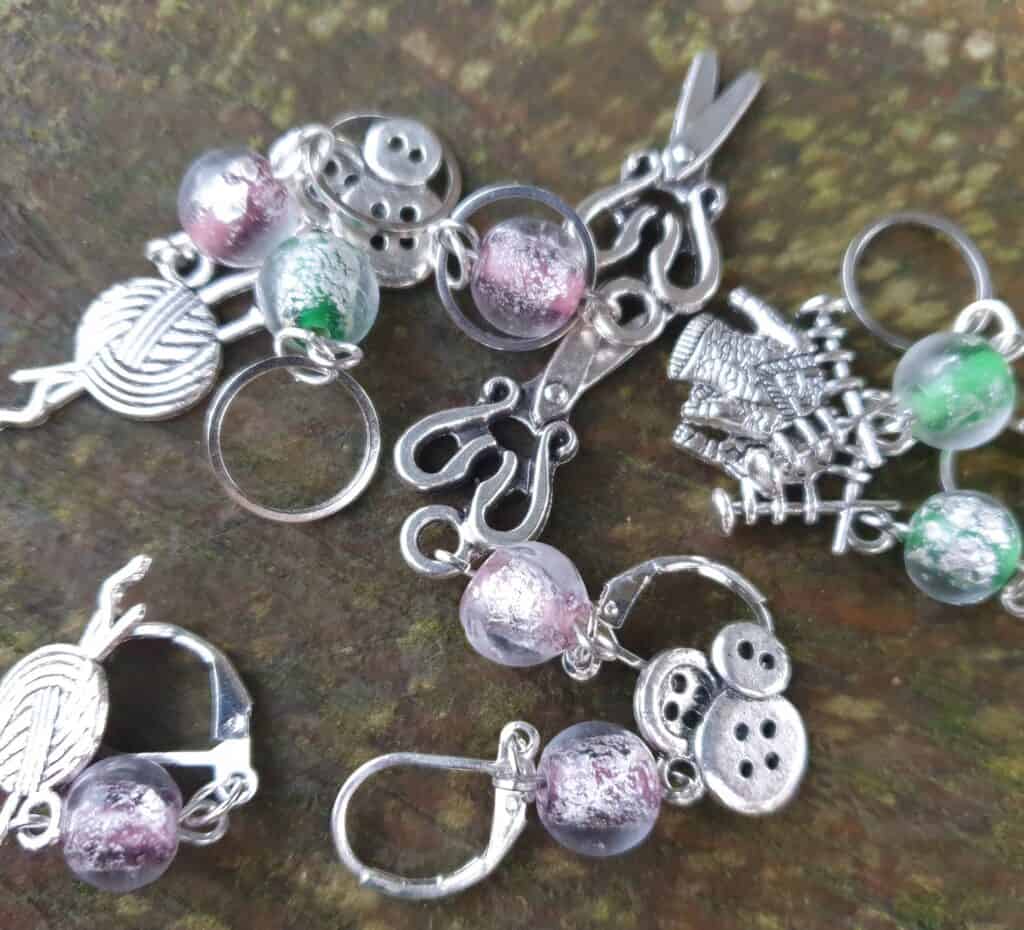
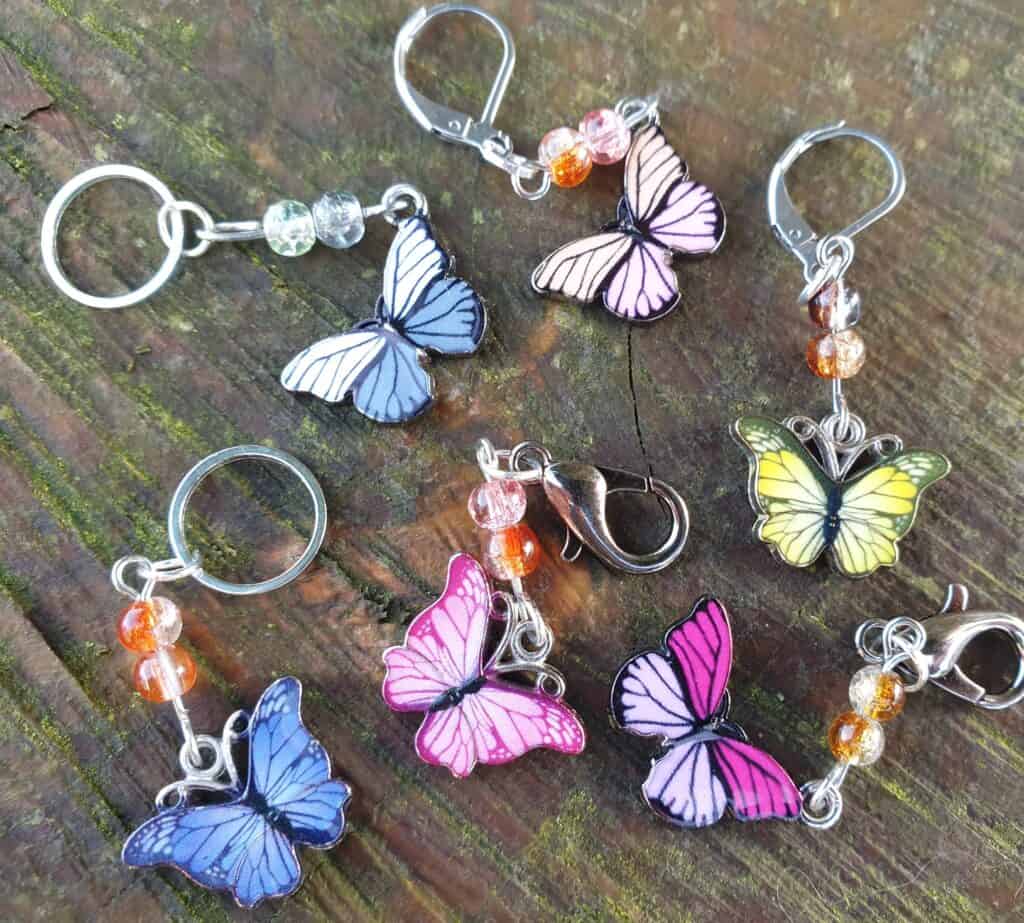
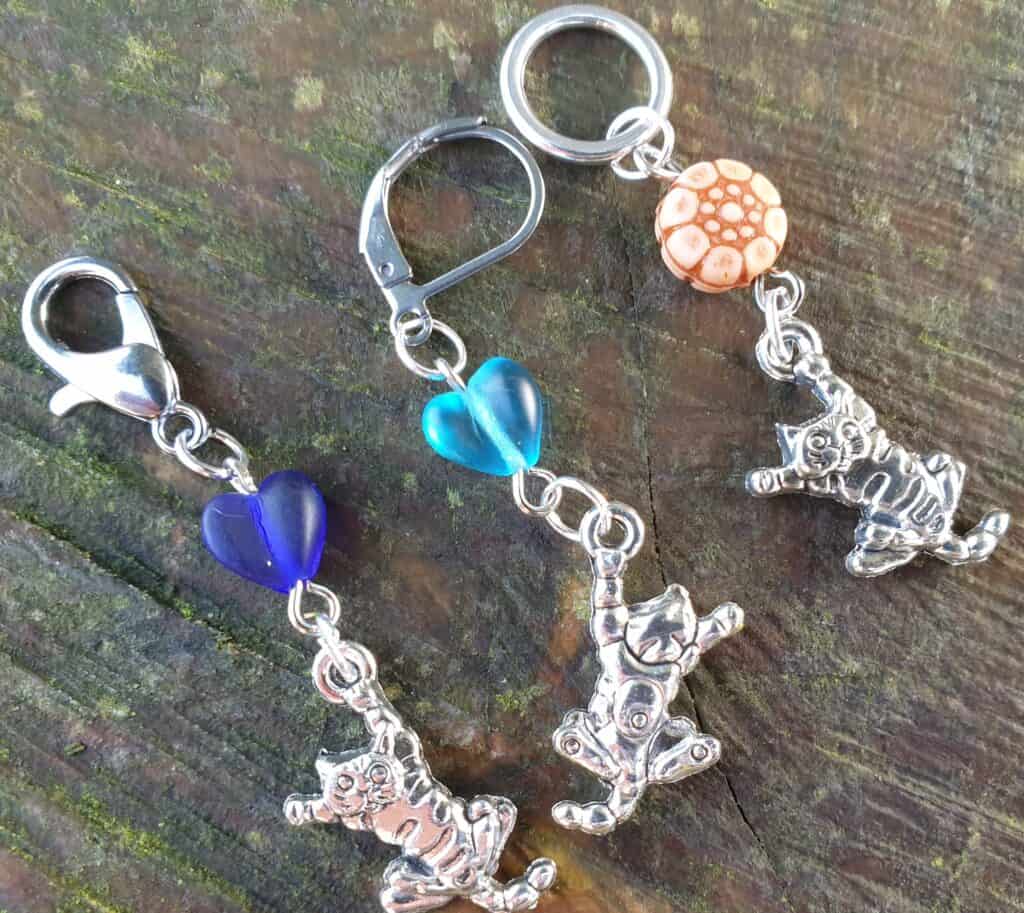
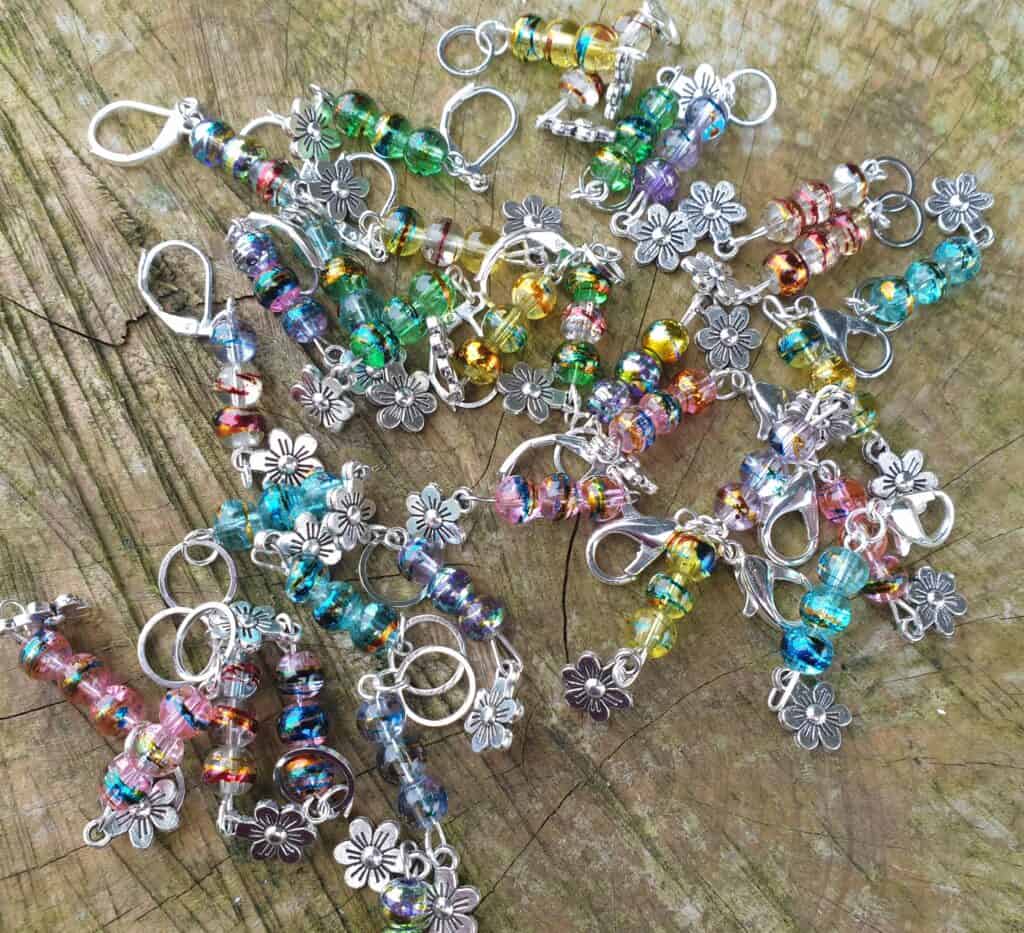
Locking ones, using a Lobster or Leverback clasp like the ones that are common on necklaces/bracelets or earrings.
Split ring, Leverback and Lobster Clasps
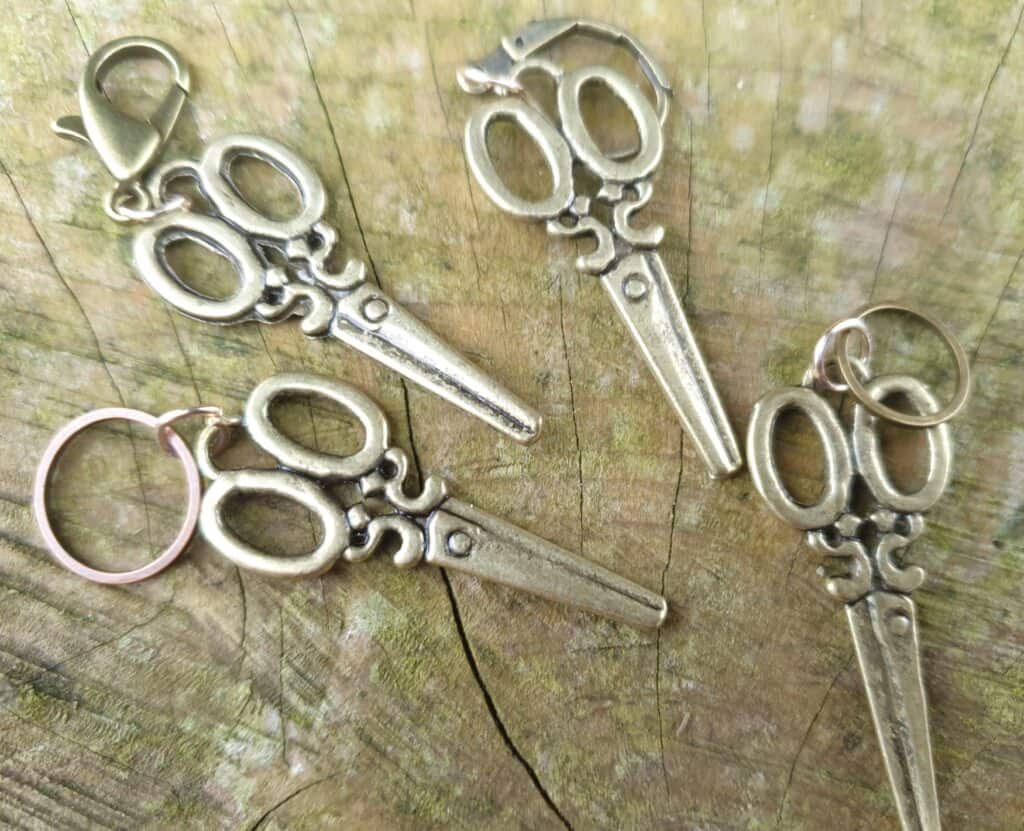
Less common is the open marker which uses a hook clasp which does not close. They can be useful when it is not essential to have a locking marker but still need to be easily removed.
These markers are commonly used for crochet as the marker is basically attached to any stitch and easily removed when no longer required. They are great to use to indicate where the last stitch is needed to be worked when crocheting in rows, especially since it can be so easy to miss that last stitch to be worked into the turning chain of the previous row.
The open markers can also be used in knitting in the same way as the closed ones and placed on your needles. However, I have found that using these markers may be abit more harder, especially if the clasp is a lobster or an open hook. The lobster clasps are not exactly round so would not slide from needle to needle as well as the closed rings. The Leverback clasp would be more ideal but still not as smooth as the ring. The only perk would be if you accidently knitted the marker into your project, you could open the marker and remove it which you could not do with a closed ring. In being able to open up, the other downfall could be that they could open up and fall off your needle which would cause you to misplace where the marker should be in your project.
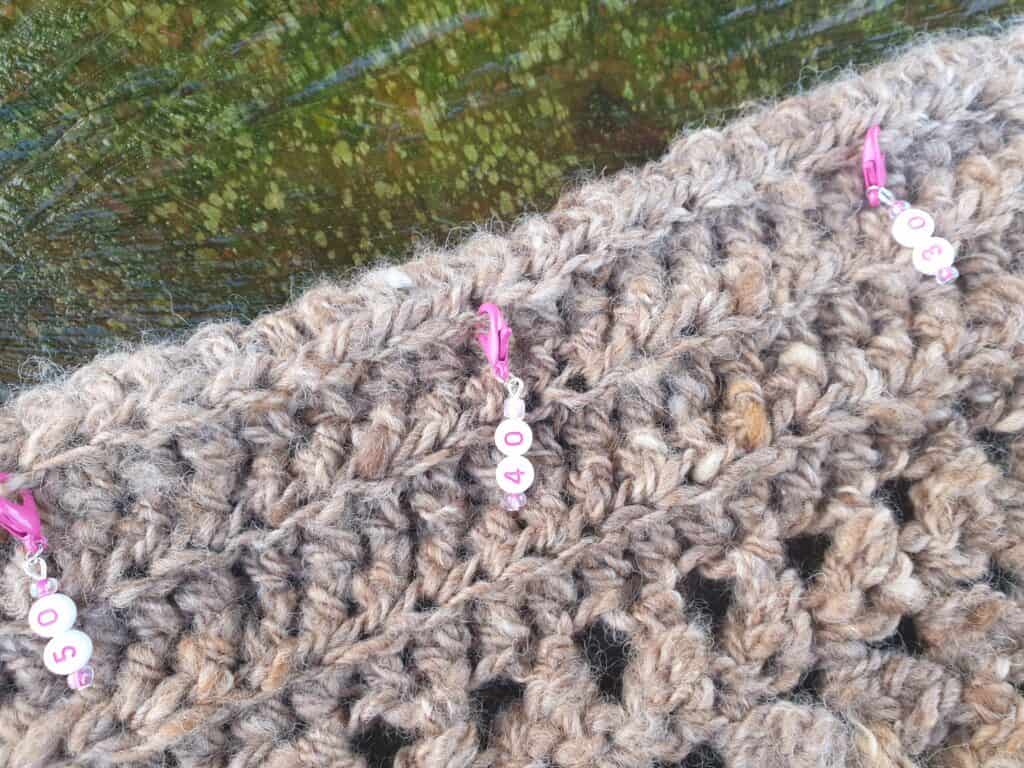
They are perfect for counting rows and tracking your progress. If you are working a pattern that repeats often, these markers can be placed on every few rows and you can count as you go. If you are needing to do a lot of rows, then a marker can be placed every 10 rows so you can keep track of rows in groups of tens. It is a lot easier than counting 100 individual rows. These are the type of markers that are placed in your work and not on your needle, so they need to be removable and the clasps easy to use.
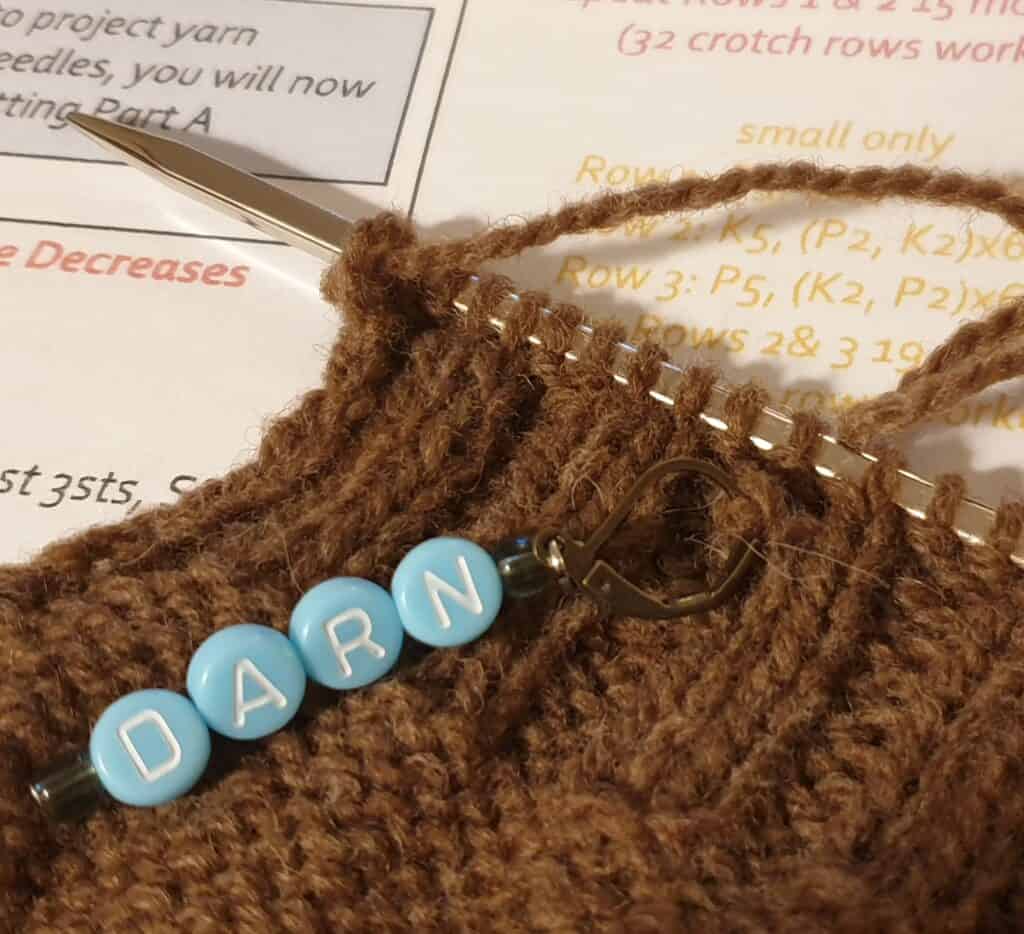
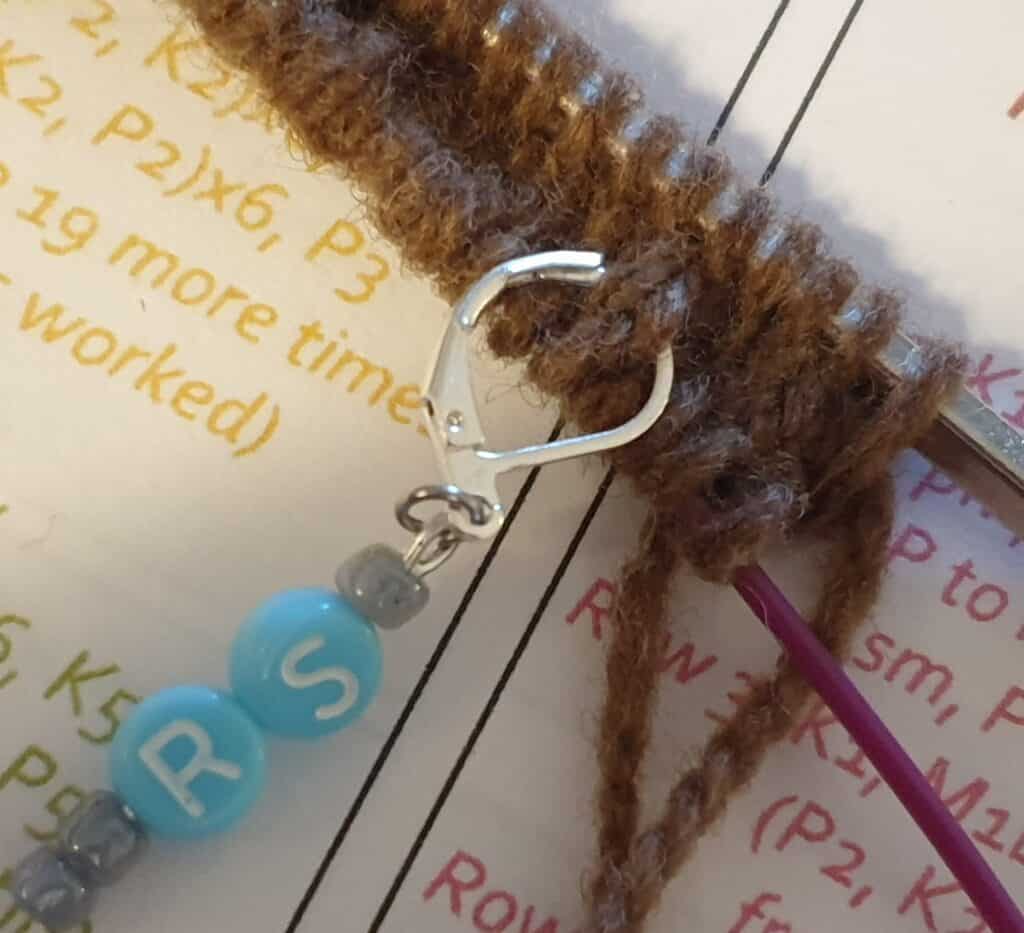
So, in making up the markers I started to think in what I would like to have and use and really liked the idea of having specific markers for certain tasks. I have made up open markers (using the different clasps) for stating the wrong or right side of the project, the start or end of a row/round, row counters in either 1-10 or in 10’s. I have even made up markers designed for holding those dropped stitches (Oops and darn) so you can’t forget why those markers have been placed into your project.
One last item to talk about is all about the counting. How many of us have a pattern that tells us to knit so many rows …? Are you like me …? Try (without too much success) to keep tally in my head of the rows worked before the next pattern instruction? Especially if there is no paper and pen at hand and you are too lazy to get up and find it …. Yes, I still do keep tally on paper with a stroke if I have quite a few pattern rows to complete and still lost myself if I stop part way through as I need to head to bed. I have to admit that I would also keep going long past bedtime so I can ‘finish’ at a good stopping point in the pattern. I have also manually kept count of the rows in my head and still lost count. These row counters are great to use when you start your knitting or crocheting and at the end of your session you will be able to see just how much (or how little) you have accomplished.
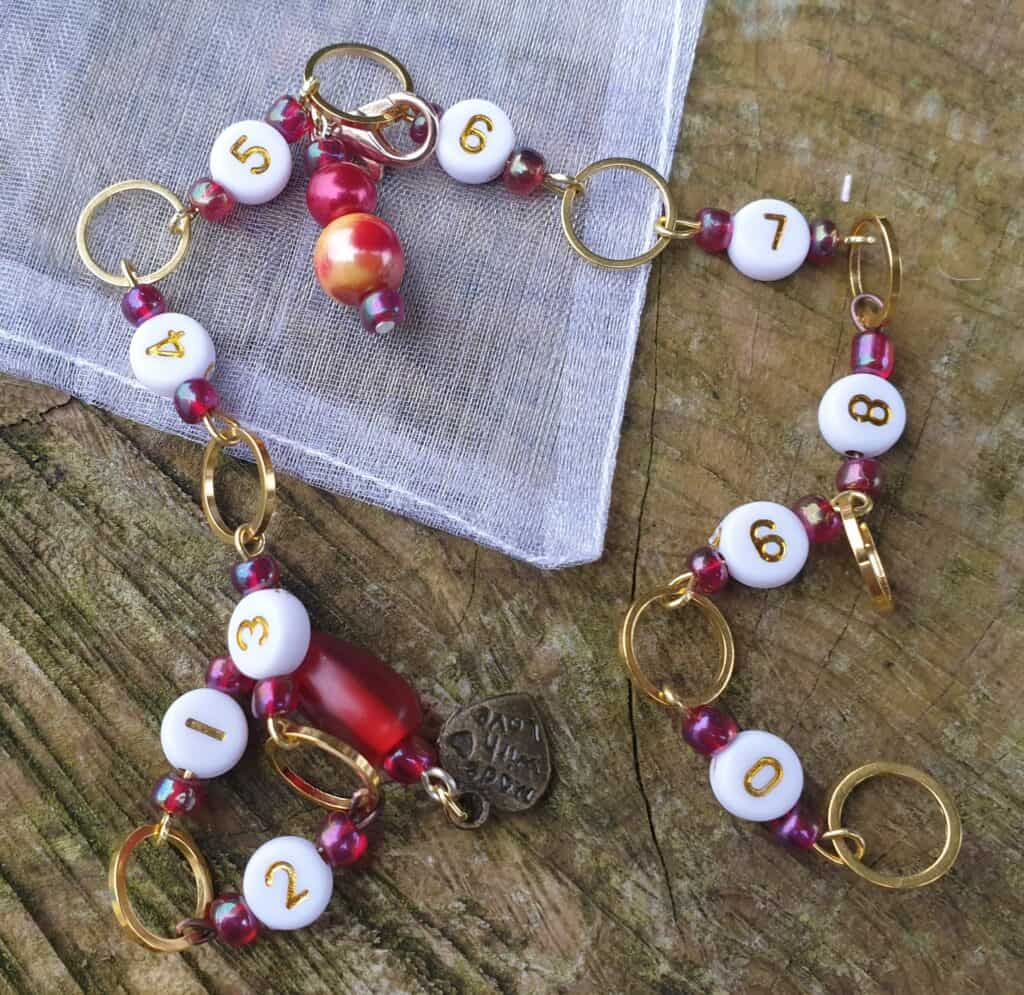
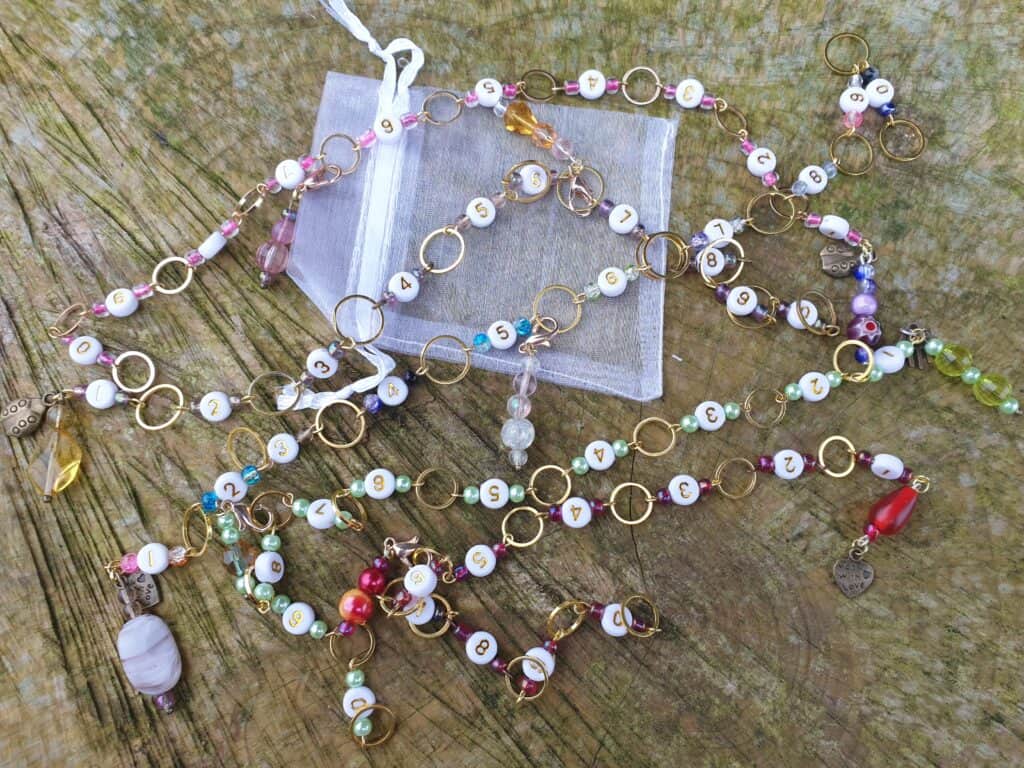
In doing my research I came across this ingenious chain and wondered how I had ever done without it (as well as not known about it). It is a row counting chain that keeps track of your knitting rows from 1-99!!! As well as being practical (& ingenious) it is also so very pretty. At last a beautiful tool for keeping count, so much nicer than paper and pen. I know I have used the barrel row counting tool that you placed on the knitting needle, but I found those oh so boring and I always forgot to click forward at the end of a row …. Now all I need is to find patterns that require a lot of row counting …. Oh my, I am starting to sound like the Count from Sesame Street!!!
Row Counting Chain
I can hear you ask, So, how do you use this tool exactly? …
The chain is numbered 1 – 0 using beads and closed rings between each numbered bead. There is also a removable marker with a lobster clasp…
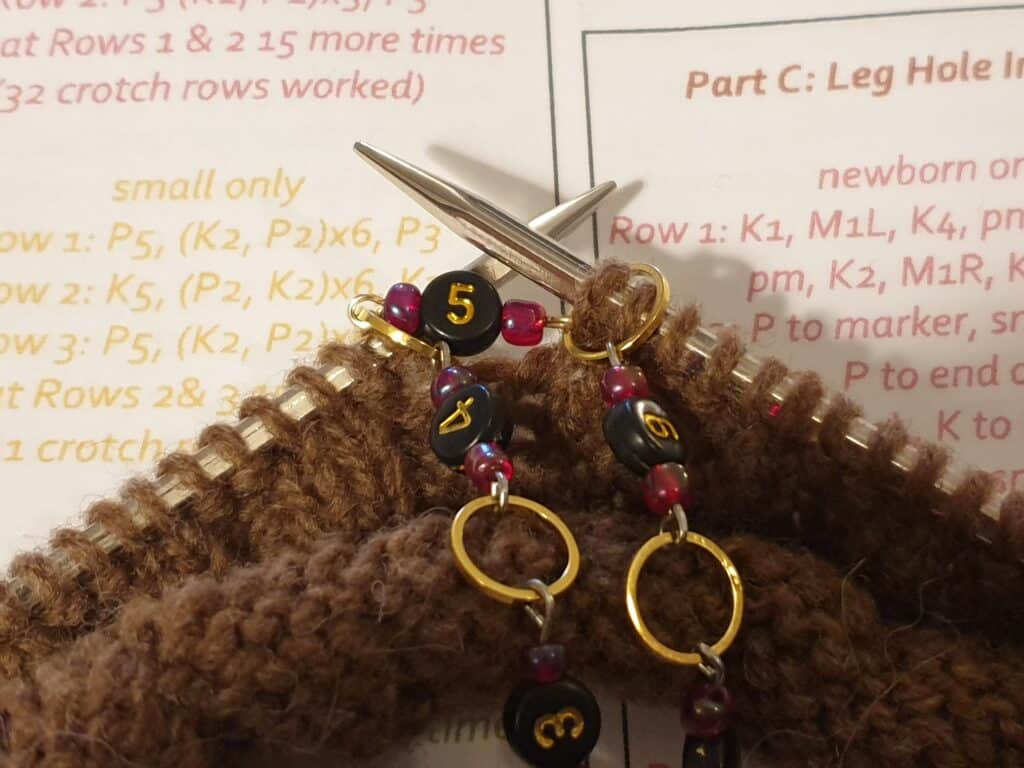
Basically, once you have completed (part way through to keep it secure) your first row, place the ring (between 1-2) onto your knitting needles. Change up to the next ring on your chain when you come back to the chain while knitting the next row. Continue like this, working your way through all rings on the chain, until you reach the zero ring and you have completed 10 rows. Place the lobster clasp onto the ring between 1 and 2 to represent the number 10. After completing the 10th row, restart at the first ring again and work your way down the chain again. Every 10 rows you move the lobster clasp to the next number ring.
For example, if you have completed 37 rows the lobster clasp should be on the ring between 3 and 4 and the knitting needle is in the ring between 7 and 8. This chain is ingenious, and you will never forget how many rows you have completed if you need to set the project aside halfway through completing a set number of rows.
I used the chain last night to do some knitting. I needed to knit 54 rows of rib (as well as keeping tabs on which was the right side). I was looking forward to using the counting chain and wondered how it would go … would it be awkward while knitting? …. I had knitted this item before and I manually kept count in my head, which was a total nightmare and not very practical, especially if you needed to take a break part way through… so on came the chain …. Part way through my first round I placed the needle into the ring between 1 and 2 and continued knitting. On the return row, I came up to the marker and literally slipped my right needle into the ring between 2 and 3 and slipped off the ring from my left hand needle. As simple as that! No hassle, I just had to remember to keep my chain to the front of my work and NOT knit the chain into my stitches! I kept on going, not needing to manually remember or write down how many rows I had knitted – it was always there on the chain for me to see. Once I came to the end of the chain – 0 -, I placed my lobster clasp marker into the ring between 1 and 2, to represent 10’s and on the next row, I moved my right hand needle into the first ring of the chain and continued working through the chain to 0 again.
slipping new ring to the needle
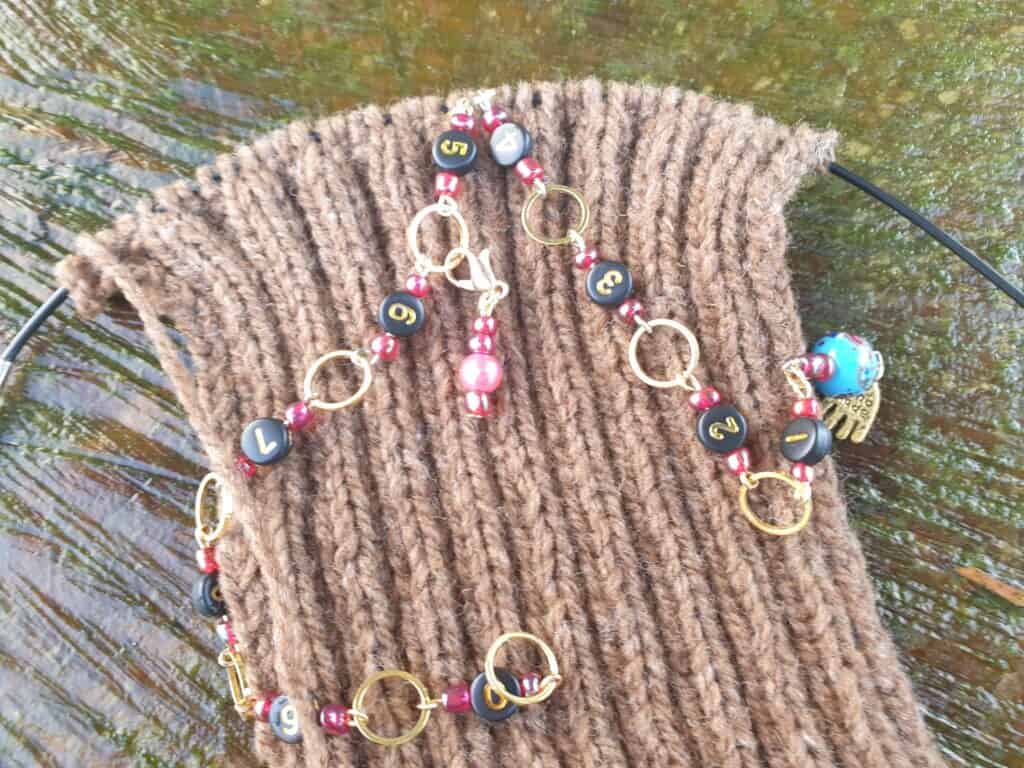
completed rows knitted and shown on chain – 56 rows
This counting chain is so easy to use, and it wasn’t long before I had worked my 56 rows and the chain is still firmly in place on my needles telling me exactly how many rows I have worked. I just need to remove the chain when I come to it when knitting my next row. This pretty, practical tool has firmly earned its place as an ESSENTIAL tool in my knitting kit. I just know I will be wanting a counting chain in the different sizes to accommodate the various needle sizes that I use.
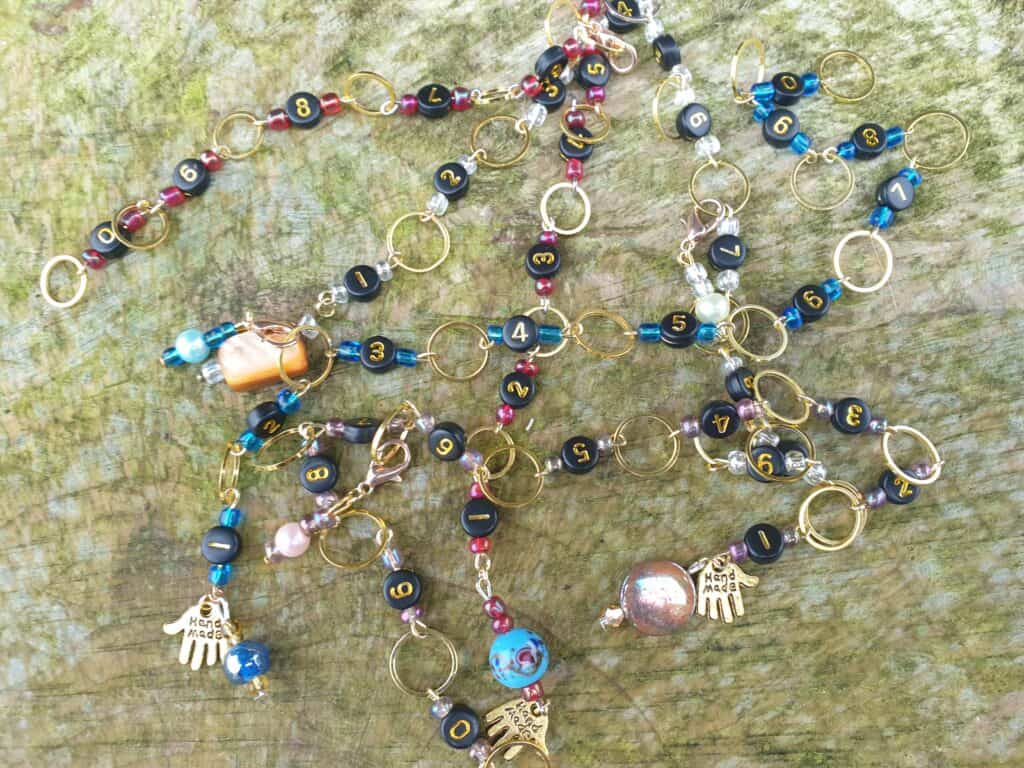
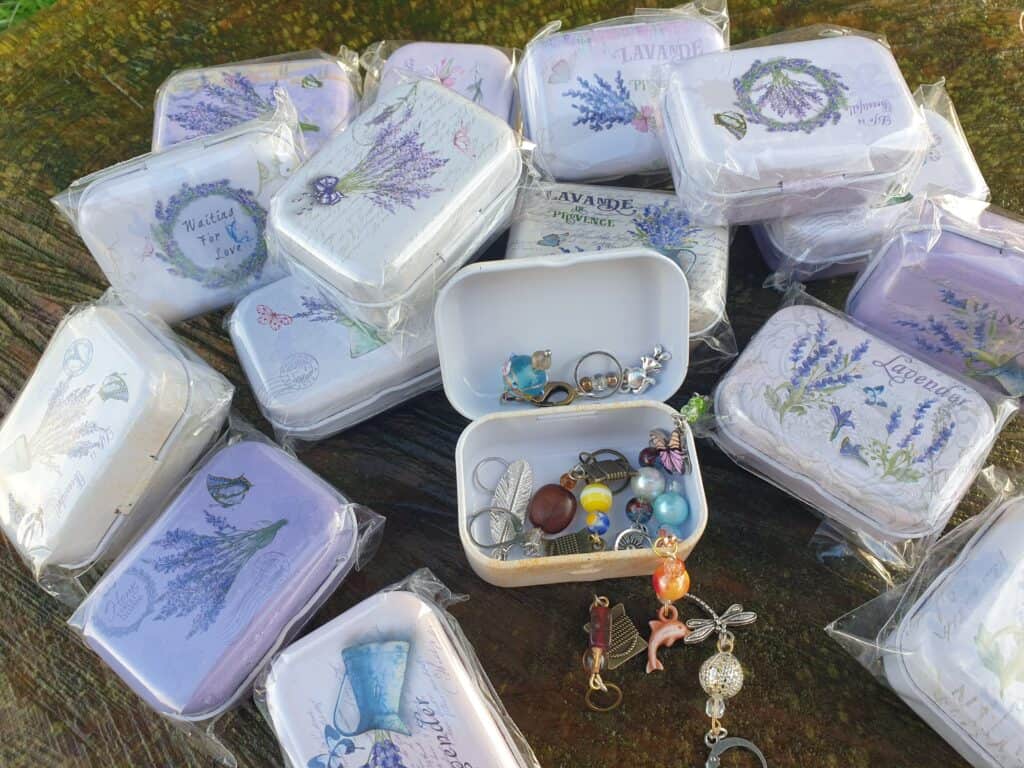
The chains are all made so each one is unique and definitely one of a kind as I use different beads and markers on each and every counting chain. The only common theme is the colours of the number beads and the small seed beads that I use with the number beads. However, the colourway of the seed beads is limited, in that I only use the same colour on about 4-5 chain sets and the colours are often limited. The end charms and the lobster clasp marker and unique and different for EACH chain. I wanted these chains to be unique and feel like treasure, so NOT ONE chain is the same. The counting chain comes in an organza pouch for safe keeping, along with a printed card on how to use them and the size of knitting needles they will fit up to. These would make ideal gifts for a knitter or yourself.
The row counting chain is only for knitting and cannot be used in crocheting. However, the other row counters with the opening clasps are great for crocheting and work just as well.
Don’t be afraid to use the stitch markers and use them often. Keep them in reach and keep them safe in a lovely tin. I can even help with that …. I have some lovely vintage tins that have arrived this morning that will be just so perfect for keeping your cute markers in. These tins are available on the website.
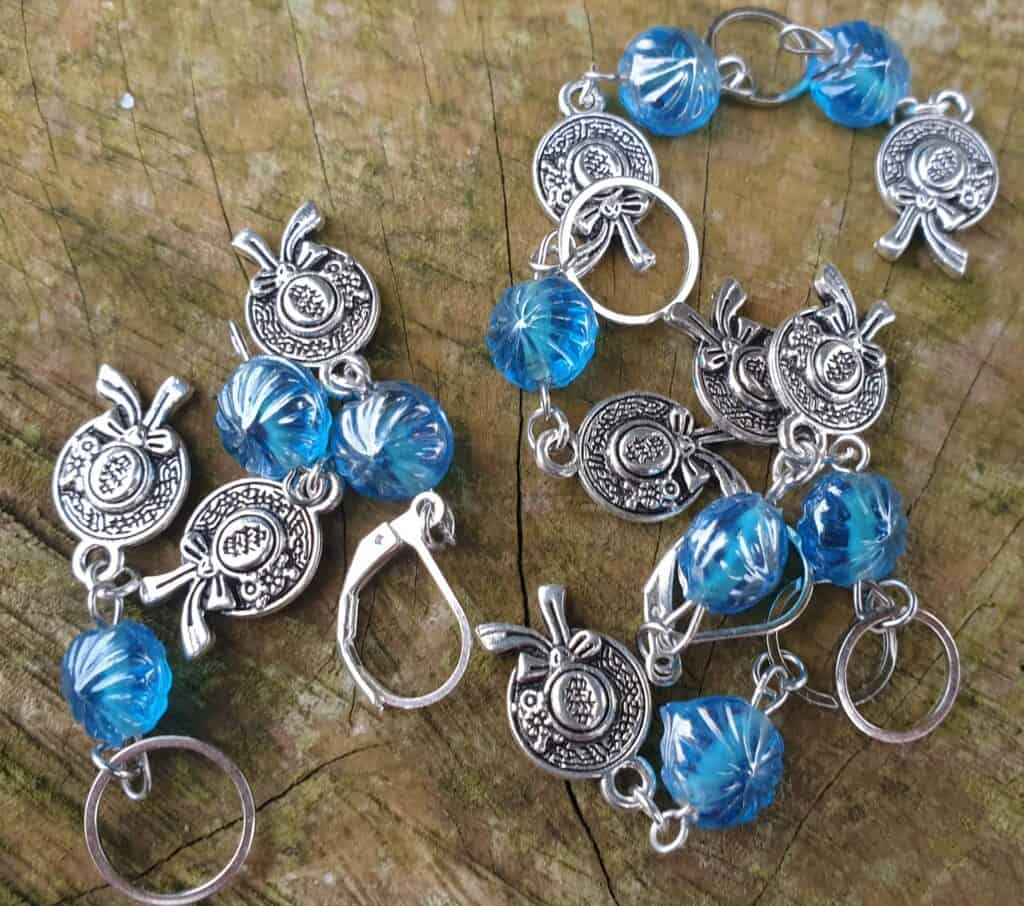
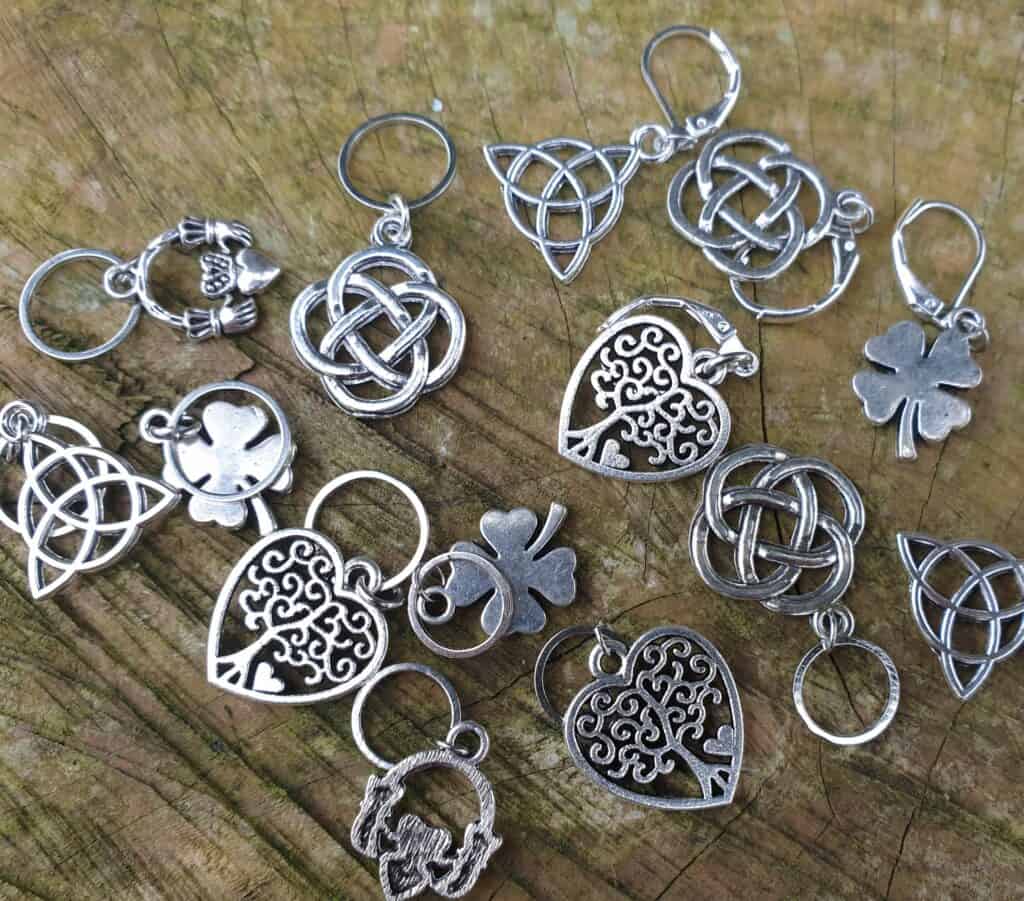
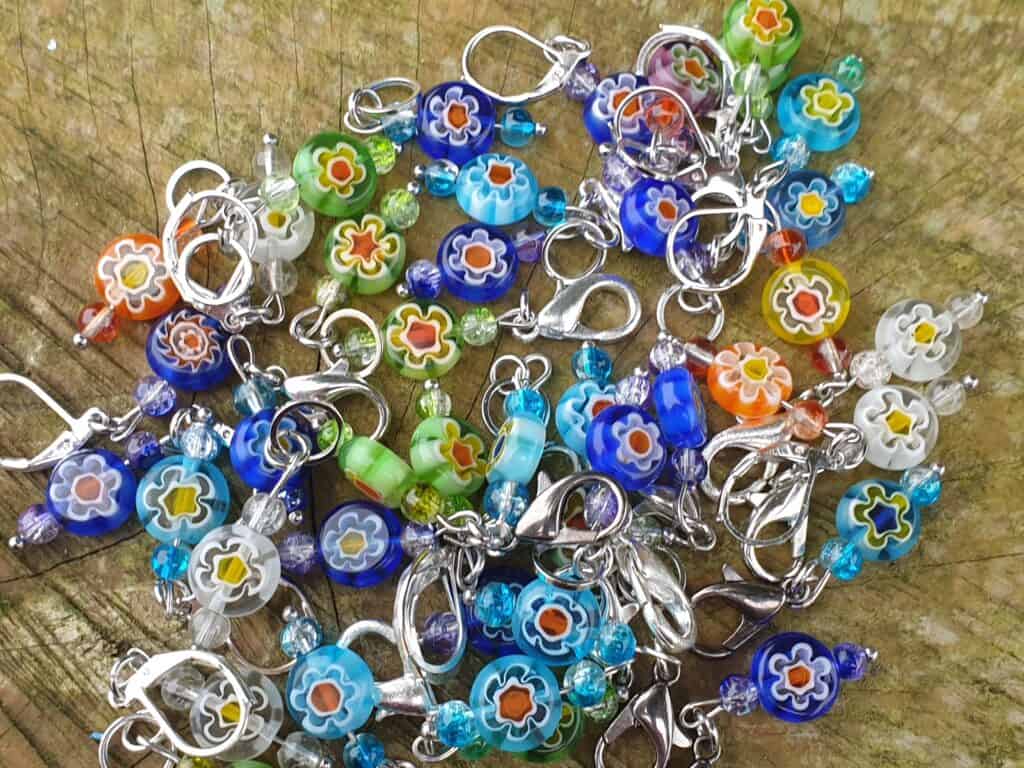
I will be regularly updating the sections with new marker designs, and I have quite a few ideas for some more counting tools. So do keep a regular look on the website for newly added markers. I am wanting to have a large selection of handmade markers that are not only practical, but also unique in being limited editions. So when you purchase any markers, you know that they are NOT mass produced and will only be a limited line. This applies mainly to the markers that use the beads and charms, as I purchase in small orders. I feel that in this way, the markers are that extra bit special. You know that you are purchasing a ‘one-off’ marker that cannot be mass produced.
One can never have enough markers and there is no need to just use the one for multi tasks and forget exactly what its task was for. Have a collection of markers that have their own individual tasks and are clear about what you need to remember. Adorn your knitting and crochet with handmade unique markers.
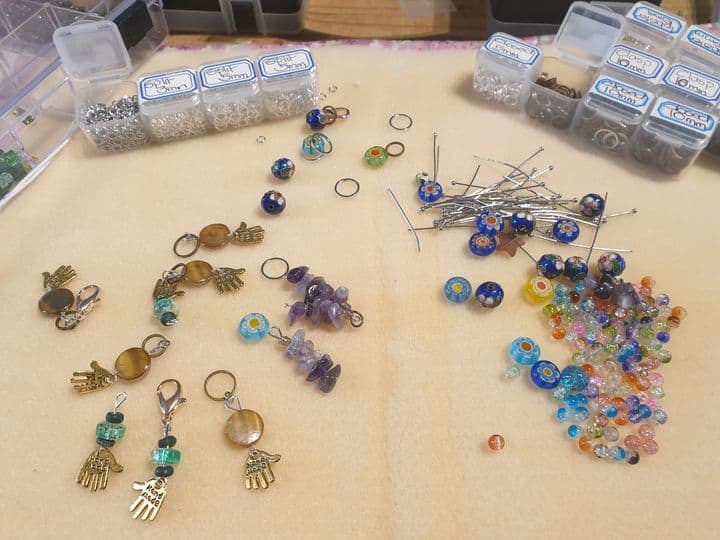
Alyssa was talking to me a few weeks back on how her tutor at tech had suggested to her about making jewellery. She asked if I had done it before and so forth…. I was abit taken back as I had never known her to be interested in jewellery …. I had to remind myself that she is nearly 19 years old, and her choices/interests are changing. I also remembered that she was probably too young to remember that I had gone through a stage of making jewellery and still had so much beading supplies! So, we spent an enjoyable couple of hours hunting out the jewellery boxes and going through them and seeing what I had. It was like finding a treasure box! There were so many lovely wee finds and jewellery that had been finished or part finished….
Alyssa claimed quite a few lovely pieces from old antique jewellery that I had found in charity shops and was able to make them up into earrings for herself. There were bags of seed beads that I used regularly in lace shawls that I had made up over the years – and the most recent shawl …. Latisha’s wedding shawl…
It also got me thinking on, just how much I enjoyed making jewellery and doing the beading as well as thinking (with some sadness) that I just do not have the time to do the craft now … Alyssa is all inspired to start on making fashion jewellery …. And is now showing the tutors and fellow students in her class on how to make up earrings and bracelets to sell at their upcoming craft morning at the tech as part of her course.
So, you are probably wondering (at this point) exactly what this all has to do with stitch and progress markers ….
Well … I use stitch markers all the time with my knitting. They are essential when knitting Top Down garments and even more so when you are knitting a complex lace shawl pattern where you need to keep an eye on the pattern repeats/sections. I also used special hook markers for crochet, or to remind me what the start of a row was when knitting socks ….
I use my faithful KnitPro markers that come in two sizes – extra small and extra-large – as well as two colours – pink and blue. Quite boring really and restrictive when the pattern advises you to use numerous colours (& you only have the two colours) to help you to remember what each section in the knitting is for …. I also NEVER seem to have enough of the right size. This was especially true when I was knitting the wedding shawl and needed to add in more markers on every NEW pattern repeat. I think I had 50 odd markers on my needle towards the end. I can assure you that I DID NOT have anywhere near 50 markers to put on my needle! So this was where I was so glad that Alyssa had gone through that stage (Just like every other child to the point that they were impossible to buy at one point) of the bungie band thingies that was a global craze so many years ago!! For the life of me … I CANNOT remember the proper name! Those horrid, brightly coloured, EXTREMELY tiny rubber bands that were made into bracelets, charms, key rings, and numerous other items. The bands that were so easily lost and found all over the house or down a small person’s/pet’s throat! The ones that now lie abandoned and they can not be given away! Alyssa’s vast collection lay abandoned in a drawer for quite a while …. Until I discovered an alternative use for them.
They make brilliant alternative stitch markers! They are made from rubber, so can stretch and are an endless, smooth circle. They fit snuggly between stitches on your needles and can be easily moved from needle to needle. They also come in a vast selection of colours. The only downfall … they have the tendency to flick across the room if you are not careful, while you are trying to transfer the bungie band from needle to needle! But never fear …. There is always plenty more of those wee bands ….
Now, I do love using unique and lovely tools with my crafting … but somehow think that those wee rubber bands DO NOT classify as unique and lovely craft tools. They are certainly unique ….
I recall that many years ago I had acquired some hand crafted stitch markers …. Ever so pretty …. But not very practical. Two had been made with a split ring for the ring that goes onto the needle. Not great, as the split on the ring kept snagging onto the yarn, which isn’t the best when you are using delicate (& expensive) yarn. So those were put to the back of my knitting notions container. The other two were made with a beading wire which created a smooth loop to go over the needles … perfect …. As there was NO split to snag the yarn. However, the loop area was able to move … in other words, as the beads could move up (&down) the wire, the loop became smaller, which made it harder to be able to slide your needle in to transfer it to the other needle. So, guess what happened to those markers.
As time moved on, I still went back to those stitch markers (when I ran out of the plastic plain stitch marker rings) to see if they had improved with lack of use. Sadly, NO.
So, that brings us back to disused jewellery box….
There was so many lovely beads and charms lying in wee containers, all begging to be made up into wonderfully unique and lovely stitch markers. But definitely with NO splits in the needle ring and no moving loops! So, I did some research (on faithful Google) and several hours (ahem, maybe longer) I had discovered some wonderful things in the world of stitch markers! There are also markers called progress markers, using opening clasps that are used for crochet as well as knitting. There are markers used with a specific purpose – to keep track of the beginning of the round if knitting/crocheting in the round, the right side and wrong side of your project, along with so much more. Stitch markers have entered the world of creativeness! I also found some other wonderful tools used for counting and so forth. My creative juices over flowed ….
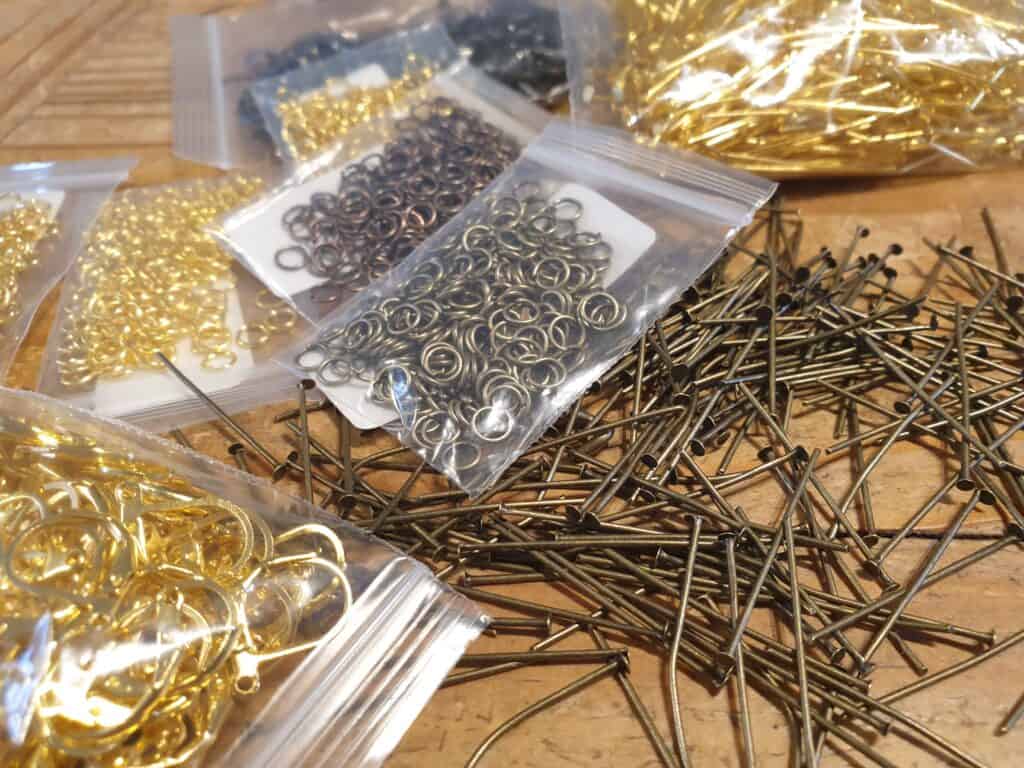
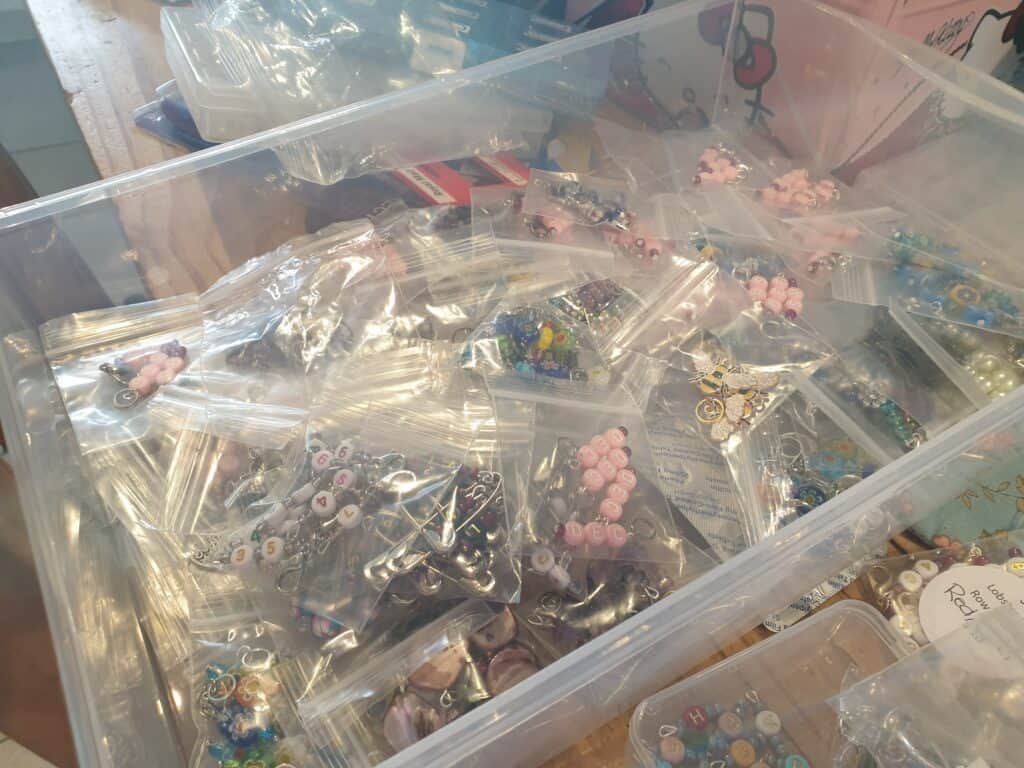
I placed some orders for the tool items I would need …. As well as some other loveliness that just kept jumping into my basket along the way. Alyssa was also getting into the spirit (and obsession) of this jewellery making lark. The purchases started arriving in the post and the pile kept growing …. Alyssa was itching (along with myself) to dive right in and start creating. However, there were more important tasks (workwise) to be done and more importantly, the items needed to be sorted, labelled and put into containers so it made it easier to know what was what and where it was. It is about the crafters obsession for being organised in a very messy crafty way. So, the two of us spent a few hours (which quickly turned into a day) sorting through everything and putting into assigned containers and labelling for easier reference. A long but necessary task and OH, so satisfying at the end.
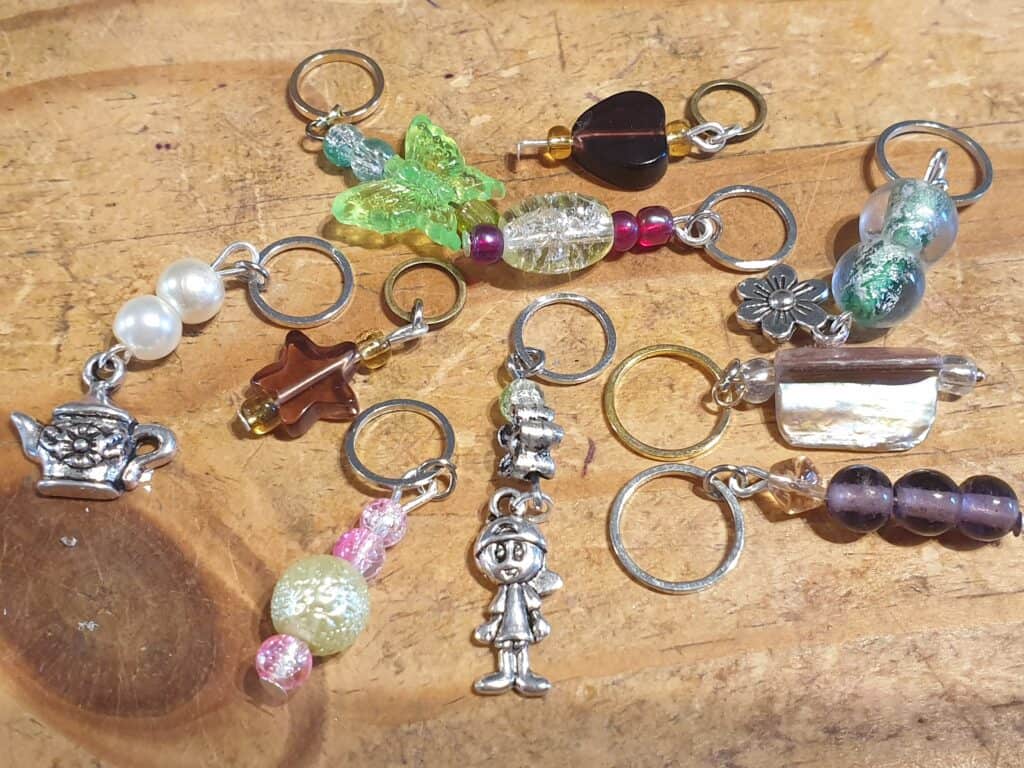
Then, came the time to actually start creating the markers up. A few turned into a small pile which grew into a HUGE pile. And would you believe, I am still wanting to make more (& use them). Who says markers need to be boring?
I got to thinking that maybe not everyone would know quite how to use the markers to their best protential …. or maybe not know exactly what is available ….. So, of course me being me …. I thought that it maybe it would be best to actually do up blogs on the different markers and what they are used for. Over the next few weeks, I will release a blog on the different sort of markers and how they are (can be) used. I knew of stitch markers to use for knitting the top down technique and in shawl knitting, but there is so much more ways to use these wonderful wee tools. I am actually shocked that I had not heard of them and now wonder how I did without them over the years.
I also discovered some other wee items/tools that I will be making and adding to the Nifty Needles products. I am all about useful tools that we just can’t do without but are also pretty in appearance.
The stitch/progress markers will be released shortly, just in time for Christmas as these would make amazing gifts for any crafter. I didn’t quite think everything through …. All I focused on was making up a selection and forgot about the time it takes in photographing them, writing up descriptions etc, and then uploading everything to the website …. So I think I need to step back …. Slow down and realise that things just take time ….. BUT, it is hard when your mind overflows with creative juices and you just want to do it all NOW …..
So do come back and find out about all the uses of decorative markers ….. I am sure you will be convinced that these are the perfect wee tools that you just cant do without ….
The next post will all be about the stitch and progress markers for both Knitting and crochet
So with the wedding day over and slowly recovering, it is hard to believe that a week ago, we were all gathered to see my oldest daughter, Latisha, getting married to her wonderful partner, Brian.
Reflecting back on the build up to the wedding, it is amazing to think just how much Latisha achieved in the organising of the wedding. She planned and made all the decorations – the arch decorated with wisteria and voile, where they said their vows to each other. She raided everyone’s house to collect the rustic crates, lanterns and vintage bottles to complement the wedding arch. She made the ring holder and the hand fasting cord.
My contribution was to bake and decorate the wedding cake and to knit the wedding shawl.
Wedding Day Gift
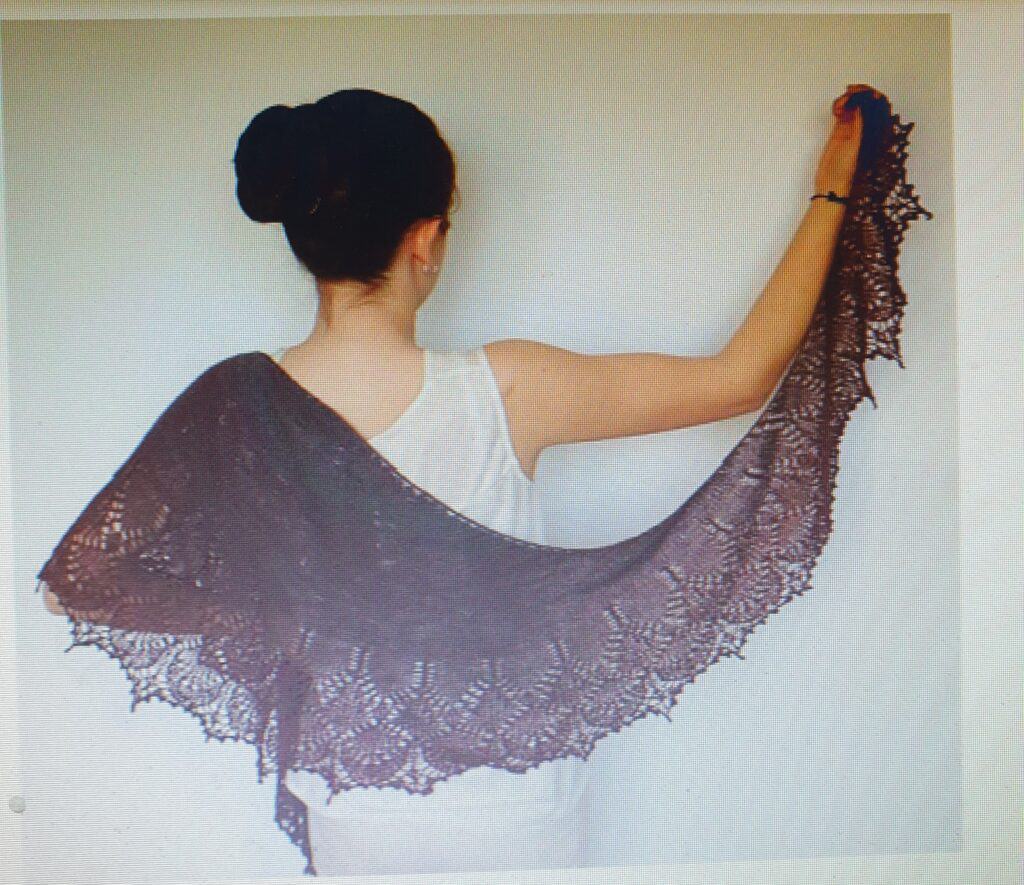
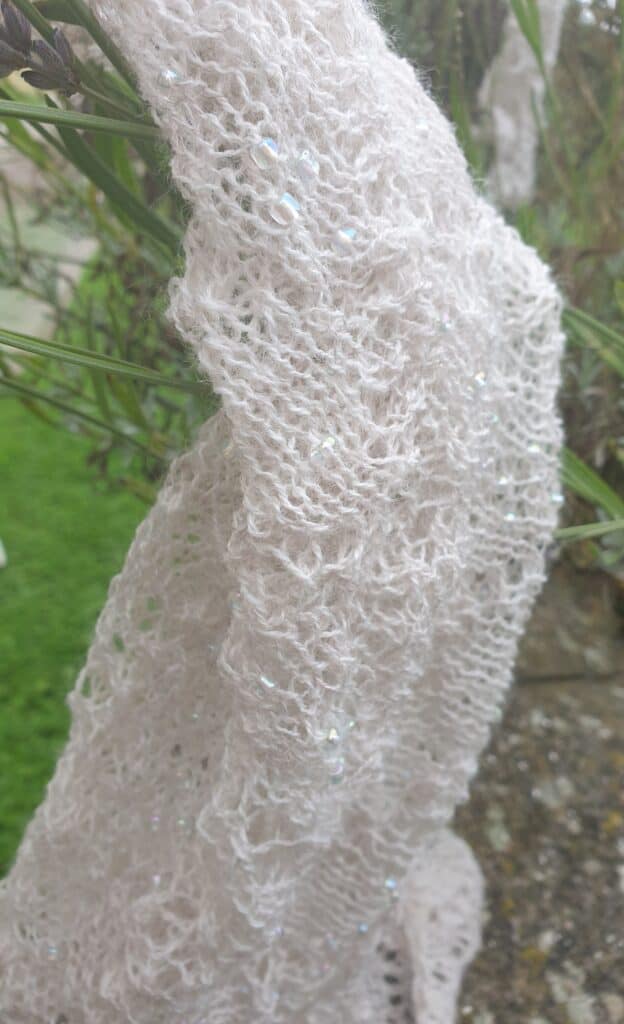
I have knit many lace and beaded shawls in the past, but none for well over 8 years. When it was agreed on having a shawl for her wedding dress, I don’t think I ever thought it would turn out how it did on the wedding day. Latisha chose the pattern – It is a wonderful design by Boo Knits (a English designer that sells through Ravelry) – called Out of the Darkness.
She wanted a crescent shawl, which is different from a traditional shawl as it does not form a back spine where the stitches are increased. A crescent shawl has the increases at each end of the shawl to form a slightly rounded shawl without a point at the back. I prefer the crescent shawls as well as it means you get the longer edge for wrapping the shawl without having a huge depth to it at the back and can be worn in so many different ways. Basically if I had knitted a traditional shaped shawl and had the same length for the width, the depth of the shawl point would have trailed on the ground behind her.
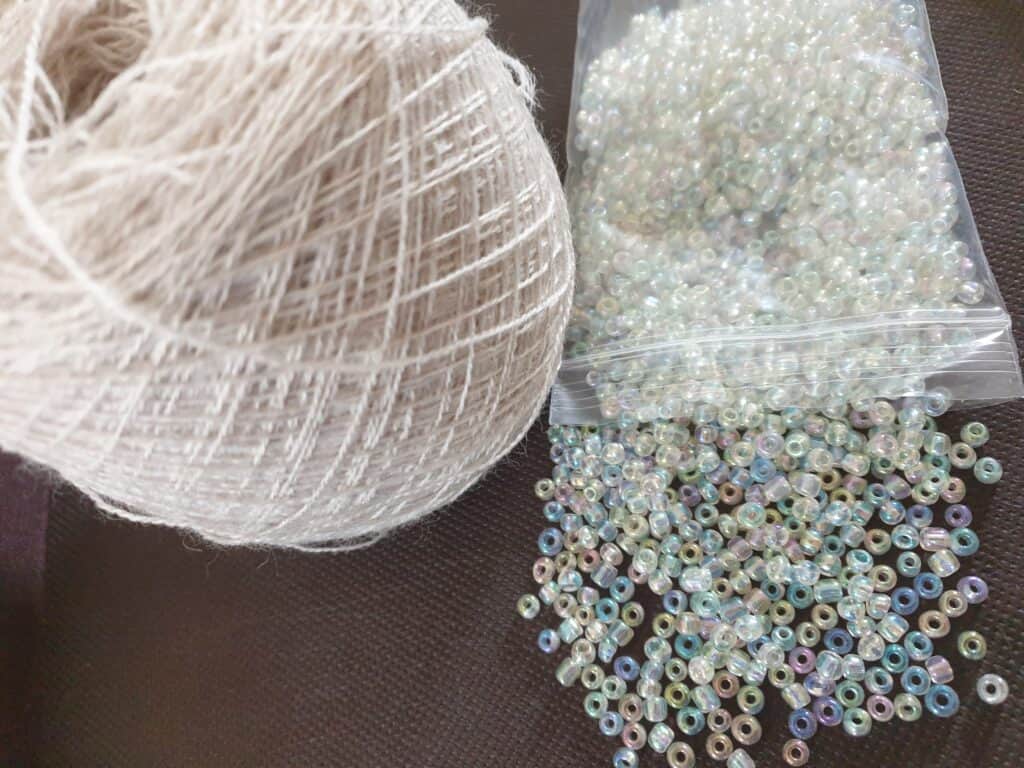
She then chose the yarn – a very fine cobweb yarn in a pale silver grey and the beads – a clear colour with rainbow reflections – that hid in the shawl until the light caught the reflection of the bead and just sparkled slightly.
Yarn and beads
I started knitting the shawl back in July, thinking that it would not take me long. I was basing it on the fact that I used to knit shawls in under a week many years ago. But times have changed – it had been many years since I had knitted a lace shawl by following a chart – so that took a couple of evenings to get back into the swing of things.
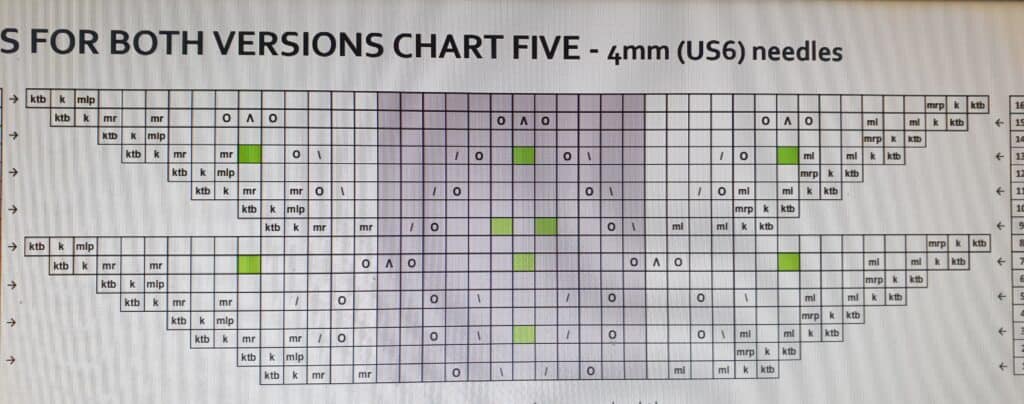
Lace chart – green squares indicates bead placement
I was also busier than I used to be with the business so my time for knitting was only in the evenings now. As the shawl grew, I was only really able to knit a couple of rows each evening as one row could take anything up to an hour to complete. The stitches increased by 6 stitches every two rows, so it grew very quickly and the width of the shawl was more than the actual depth.
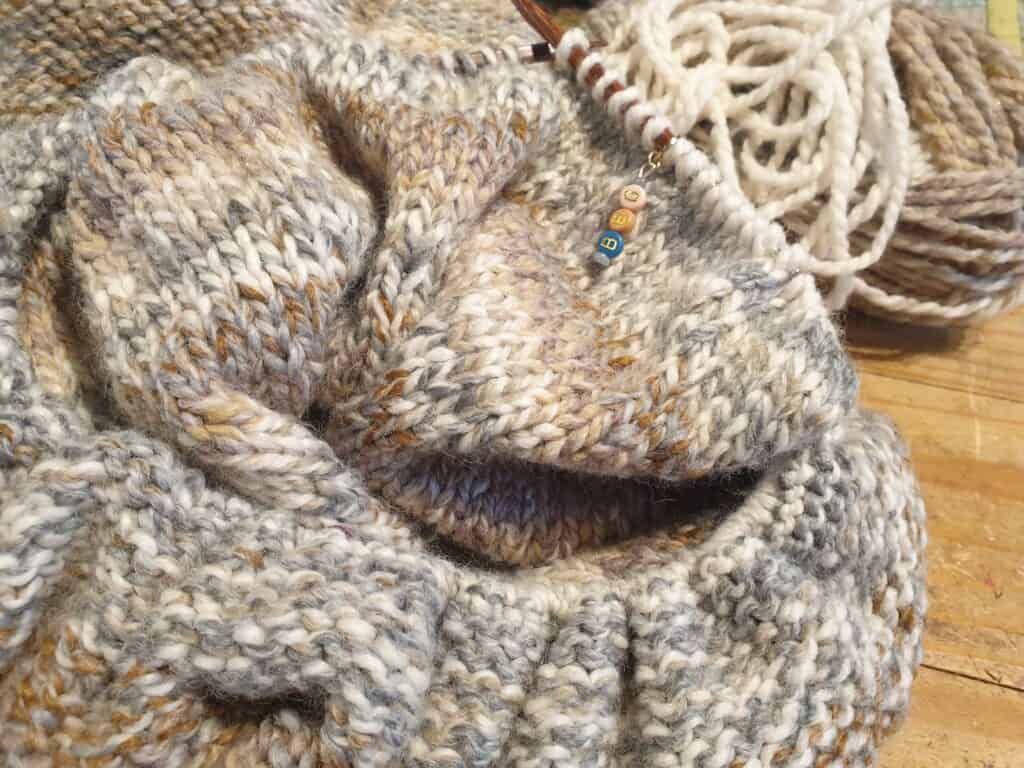
There were 12 stitches per pattern repeat and stitch markers had to be placed between each pattern repeat. These markers were a godsend and really needed to help keep me on the right track of knowing where the pattern repeat started and ended. I know that these little markers helped me quite a number of times throughout the shawl. Once the lace charts started it was essential that the pattern repeat section of 12 stitches was easy to find as it was easy to miss a stitch and then the whole pattern sequence would be wrong and then had to be ripped out. Honestly, I didn’t want to even consider going down this route, so the wee rings were great. They saved me on many occasions where I was able to fudge a stitch within the pattern repeat and get me back on track with the 12 stitches. It really was a better option than pulling out the rows to correct one missed loop over ….. in the big scheme of things, I don’t think anyone would have noticed if there was a stitch extra or less in one of the pattern repeats for one row.
So, I started knitting and at the start it was easy going, there was a small amount of stitches and the knitting went quickly. The pattern suggested 3 plain sections before going onto the lace sections, but it was also stated that you could repeat the plain section as many times as you wish to increase the size of the shawl. Since I had over 1000 metres of yarn and Latisha had asked for a large shawl, I decided to repeat the plain section another 3 times. It meant placing more beads into the plain section as there were beads placed into the shawl at pre-marked places on the chart to produce ‘random’ placement of beads over the shawl. I wasn’t too concerned about using extra beads or yarn. I knew I had double amount of yarn and beads that was needed to complete the shawl, so I was fine …..
I remember many, many years ago, I was taught that if you wanted to knit beads into your knitting, then you had to thread the required amount of beads onto the yarn prior to beginning your knitting. I did it that way once, and ONLY once!! It was terrible!! Not only was it difficult to thread the yarn through the hole of the beads, but it took so much time!!! Time that could be used knitting. And then while knitting, you had to push those beads along the yarn away from where you were knitting and bring a bead up each time you wanted to place one in the pattern and try your utmost to ensure you knitted the bead in the correct stitch. It was murder! Especially, if you had miscounted the amount of beads you placed onto the yarn before you started. Can you imagine getting to the end of a complex pattern and finding out that you did not have enough beads to finish the knitting? It left you in a sticky situation with very few choices – and none of them ideal – either unpick everything you had knitted, so you could place the required amount of beads on, knit on and don’t have beads in that section which would stand out, or break off your yarn to thread more beads on and then place a knot in your yarn.
So, how did I manage to include beads in my knitting without any hassle? Well, the only hassle I had was when the bead would flick away from me when trying to pick it up with the crochet hook and the bead would fly across the room. I lost count with how many I lost to the floor and Alyssa would gather them up for me.
I came across this technique of knitting with beads quite a few years ago and I now always use this way. Basically you place the beads onto the stitch with a crochet hook as you knit the stitches. When you come to the stitch that has a bead, you place a bead onto a crochet hook (usually a .75mm hook – one where you wouldn’t use it for crocheting, unless you like to torture yourself) that is fine enough to go through the hole in the bead. You then place the stitch from the left hand needle onto the hook of the crochet hook and push the bead back over the hook and down onto the stitch. The stitch is then placed back on to the left hand needle and is knitted. The bead is now placed securely onto the stitch and will not move around. It really is a pain-free way of adding beads to your knitting, it just slows you down with knitting when you have to place 3-4 beads in every pattern repeat!
Translucent Beads
Once I had knitted the plain section, it was time to start on the lace sections – there was about 5 different lace sections to do for the shawl. It was also suggested that if you wanted to knit a larger lace section, than two sections could be repeated. So, since I still had a good amount of yarn and beads, I decided to increase the lace section as I really wanted the shawl to be lacy and open as well as a decent size. I still had plenty of time before the wedding. However, I seemed to forget that as the shawl grew in size, the amount of stitches also grew with every row completed.
Following a complicated lace chart, where beads are placed A LOT throughout out, takes a fair bit of concentration and time to complete one row. I did some maths towards the end – each pattern repeat had 12 stitches ….. I counted about 50 odd pattern repeat markers!!! Work the maths out on that one!
When I was about to complete the last chart, I was nearly out of my pack of beads – pack of 1500 – so I had to order more. They arrived in time and I was able to do the final few rows of the shawl – this row had even more beads placed on to give the edging some weight and a luxury touch. The cast off edge took me several evenings to complete – at this point I had calculated that I had close to 700 stitches to cast off, but it was no ordinary cast off – the cast off was done with picots being formed while casting off, so it was basically – cast on 4 stitches, cast off 6 stitches – all the way along the row. The casting off was tedious and long winded, but I have to admit that the edging was spectacular and well worth the extra effort. So the final stitch came off the needles a week before the wedding. So this shawl, nearly used the 1000 metres of yearn and OVER 1500 beads!
Picot edging and beads
However, the shawl may have been finished – knitting wise – but it still had to be blocked to bring the lace to life and truly make the shawl bloom. To block my shawls and to bring out the lace, I always soak them in warm water with some fabric softener, mainly to freshen it up and give it a lovely smell. After the shawl has been soaking for about 20 minutes, I wring out the extra water so it is not soaking wet and it is time to bring it to life by blocking and letting it dry thoroughly.
I use the interlocking foam play mats to block, they are brilliant as you can stick the pins in them and they stay secure. I place my first pin in the centre of the top edge of the shawl and work my way along the top edge towards the very edge of the shawl that meets with the cast off edge, one half at a time. The cast on edge is slightly pulled and pins placed every couple of inches along this edge. It is when you also create the curve that you want with your blocked shawl.
Once I have completed pinning the top edge, I pull the shawl out to reveal the lace pattern and let it bloom and then place a pin in the centre of the shawl bottom. Again, I work outwards to the edge point, one side at a time, pulling the shawl to open the lace. This is where you also create points at your edge.
I soon discovered that I had a slight issue with the shawl and the blocks – I didn’t have enough foam blocks to accommodate the shawl! The two edge points of the shawl went way beyond the foam blocks and I had to fold the edges and bring them back to the centre of the shawl. Sometimes you just need to improvise! Once the shawl is pinned open, it is now left for at least 24 hours so it can dry completely. Sometimes, it can take longer, as it depends on how much rain we have having and just how damp the air can be.
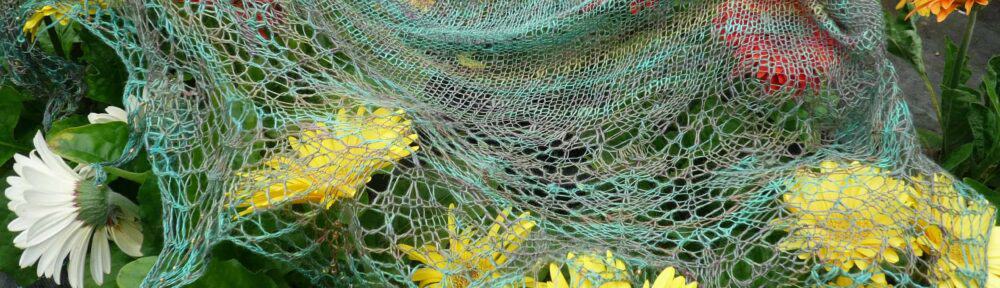
After a day and a bit, the shawl was completely dry and I was able to remove the pins. The shawl had grown with the blocking and the lace pattern had truly opened and become even more like a cobweb – a sparkling cobweb with beads (or dew drops)! All that had to be done now was to weave in the ends of yarn at the cast on and cast off points and then lovingly wrap it in tissue paper and into a box so it could be gifted to Latisha as she was getting into her wedding dress prior to the ceremony.
I think it is safe to say that the shawl really did suit her and set off her dress and hair so well.
To provide the best experiences, we use technologies like cookies to store and/or access device information. Consenting to these technologies will allow us to process data such as browsing behaviour or unique IDs on this site. Not consenting or withdrawing consent, may adversely affect certain features and functions.
Functional
Always active
The technical storage or access is strictly necessary for the legitimate purpose of enabling the use of a specific service explicitly requested by the subscriber or user, or for the sole purpose of carrying out the transmission of a communication over an electronic communications network.
Preferences
The technical storage or access is necessary for the legitimate purpose of storing preferences that are not requested by the subscriber or user.
Statistics
The technical storage or access that is used exclusively for statistical purposes.The technical storage or access that is used exclusively for anonymous statistical purposes. Without a subpoena, voluntary compliance on the part of your Internet Service Provider, or additional records from a third party, information stored or retrieved for this purpose alone cannot usually be used to identify you.
Marketing
The technical storage or access is required to create user profiles to send advertising, or to track the user on a website or across several websites for similar marketing purposes.