When I am asked to tutor workshops at various groups or organisations, I usually come up with a design following the request from the group facilitator. It can be fun to come up with a design once I have been given a theme or guidelines.
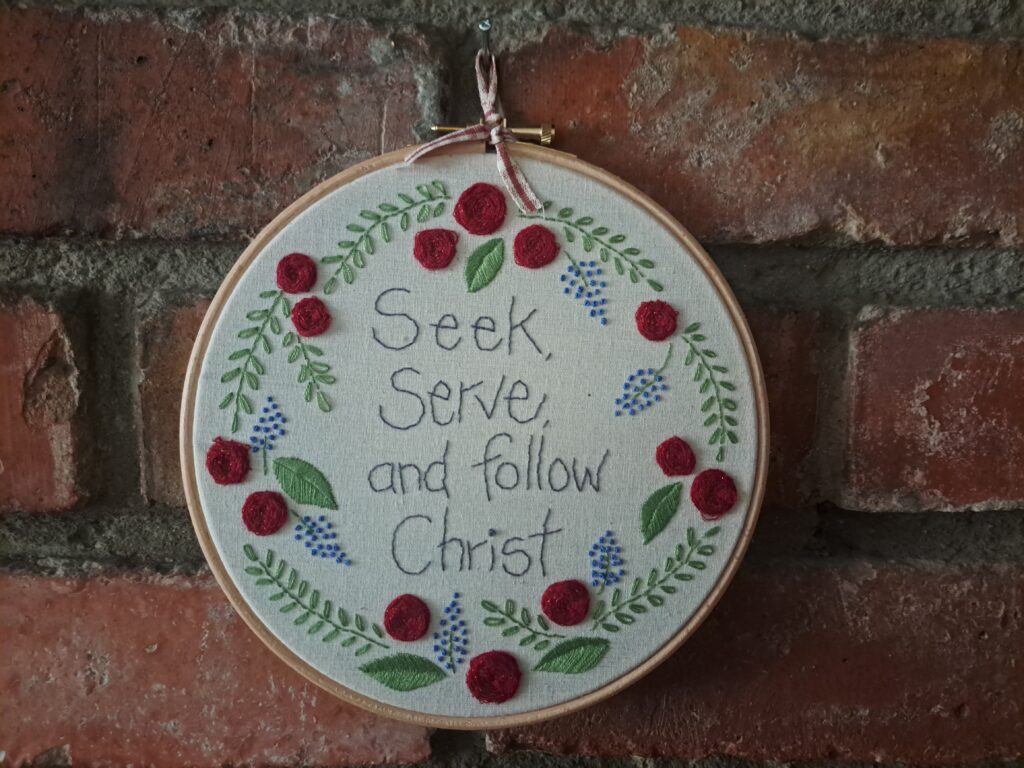
Back last year, I was approached by the local branch for Girl’s Brigade to teach needlework to a group of girls ranging from 13-18 years. The request was for a simple embroidery design that can be displayed in an embroidery hoop featuring the Brigade’s motto. It was quite daunting coming up with something simple enough and yet challenging enough for the group of girls. I came up with the simple round design featuring leaves, roses and bluebells, with their motto in the centre of the wreath.
It was a fun (and challenging) 3 classes to share the skill of needlework to the class of girls, many had never threaded a needle, and none had done needlework before. Many enjoyed the process and really immersed themselves into the needlework.
Girl’s Brigade design
When I shared photos of the design on Facebook, I had many messages from parents of other Girl Brigadiers that were interested in purchasing the kit for their daughters. I emailed the Head Office to seek guidance in selling the kits to other parents, but it was not forth coming. I could not offer this kit on my website. So in order to make the embroidery design available to the general public, my original design needed to be adjusted. I needed to put on my thinking cap.
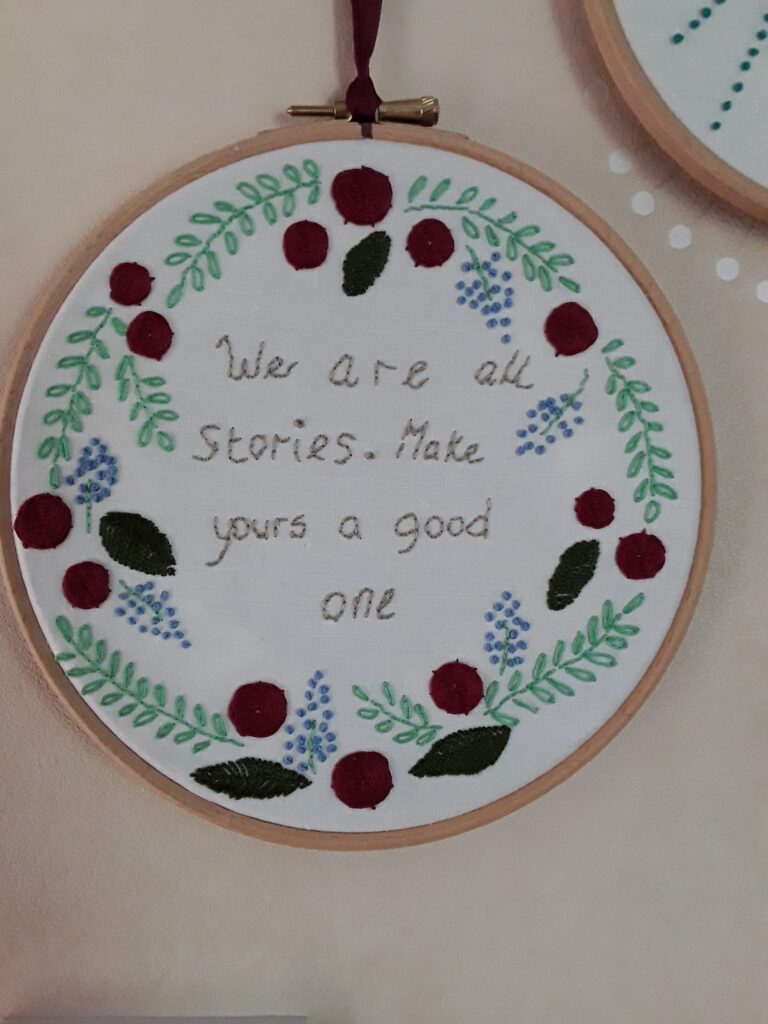
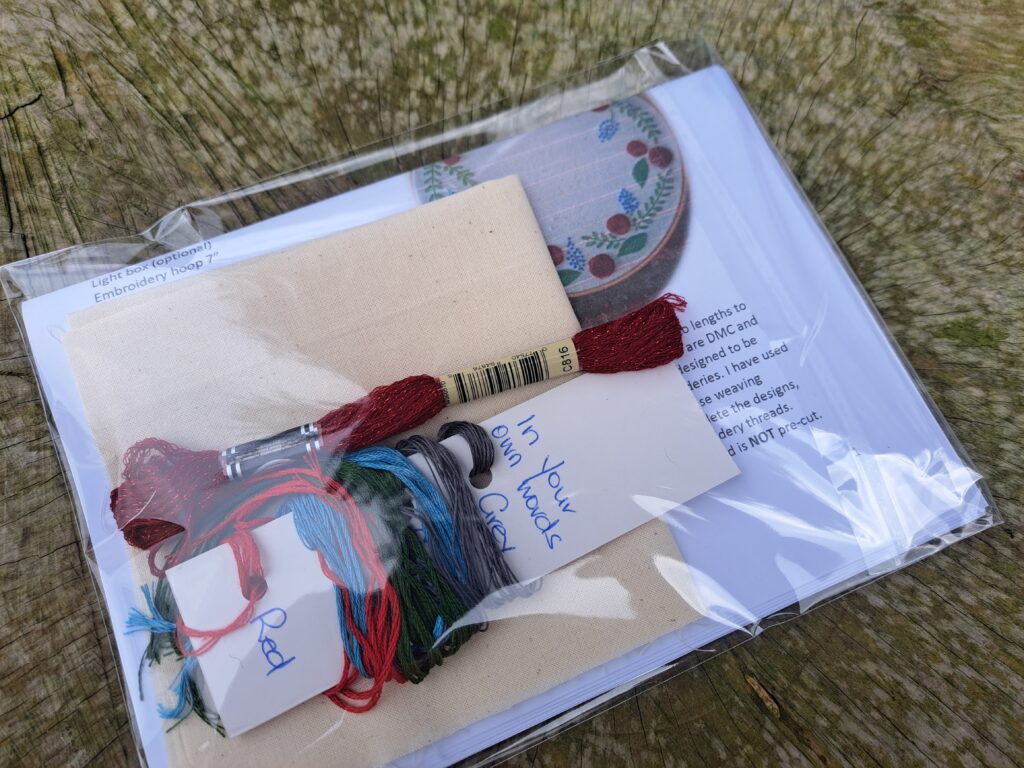
It was a lovely embroidery design, and it seemed a shame to see it put away and never to be seen on the website as a kit or pattern. This is when the concept of ‘In Your own Words’ came about. Why not create the pattern/kit of the embroidered floral wreath and let YOU add in your OWN words! This would then allow you to really personalise the embroidery design.
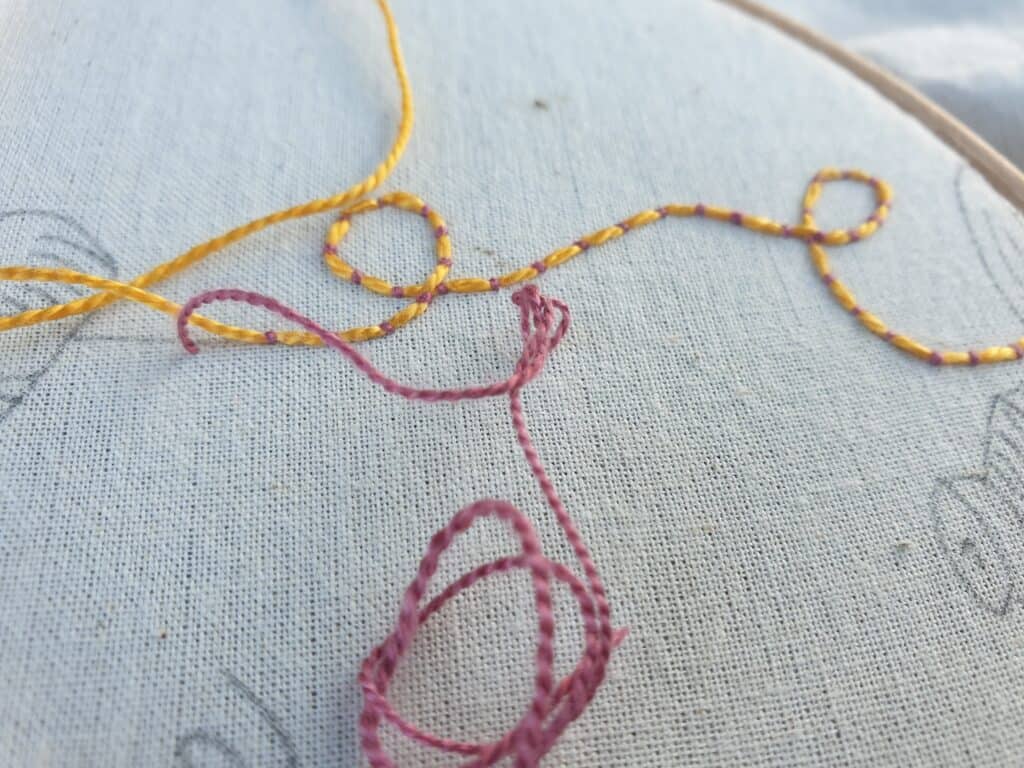
‘In your own words’ – Blank Canvas to personalise with your own saying/quote
In recreating the design in this way, really opened up so many possibilities. My testers had fun writing in their own favourite sayings or even using one of the sayings that were suggested in the pattern. What would you put into your design?
Tester’s sampleTester’s Sample
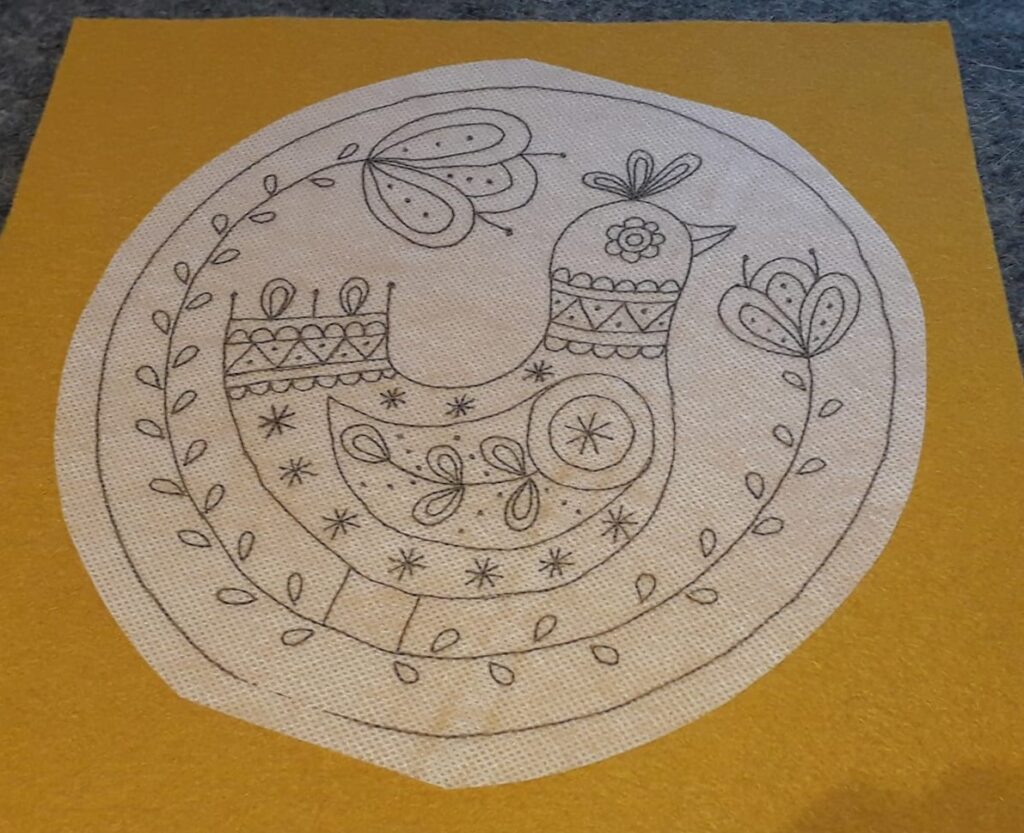
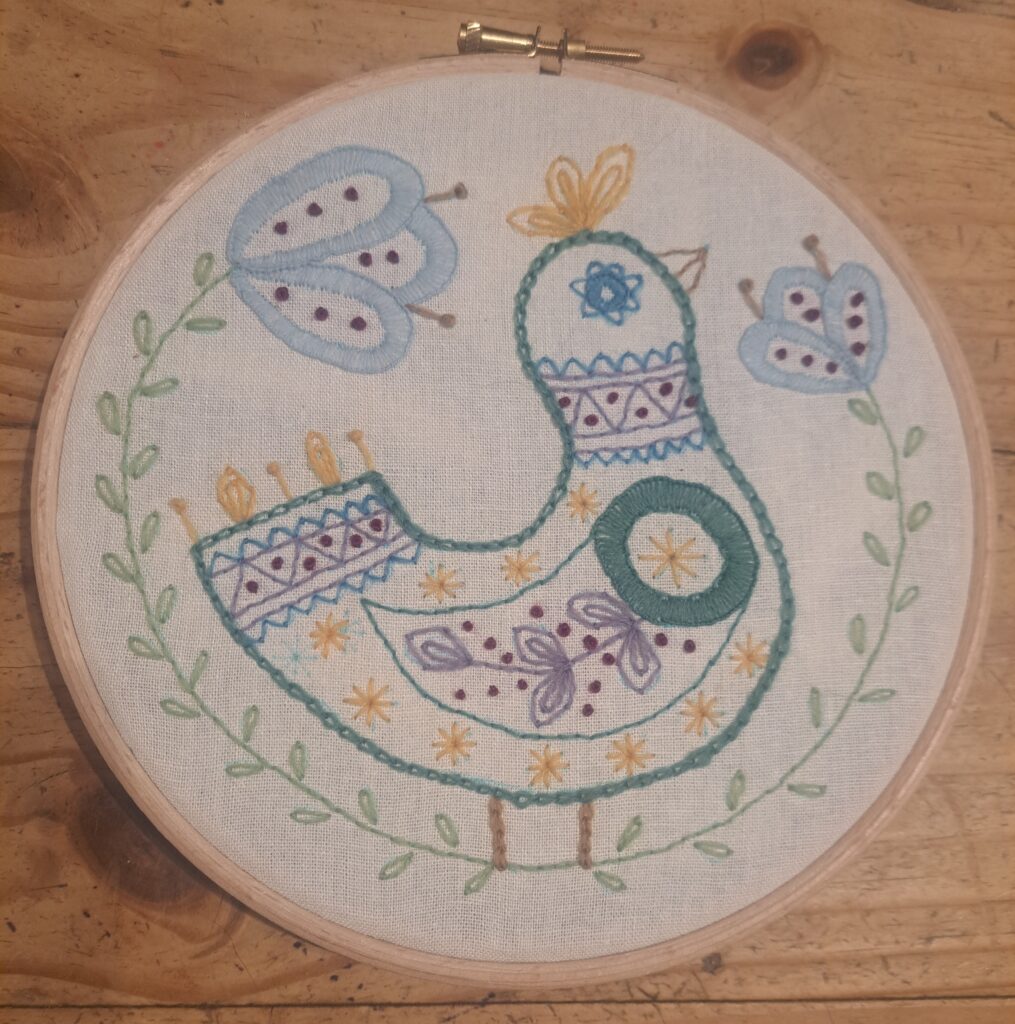
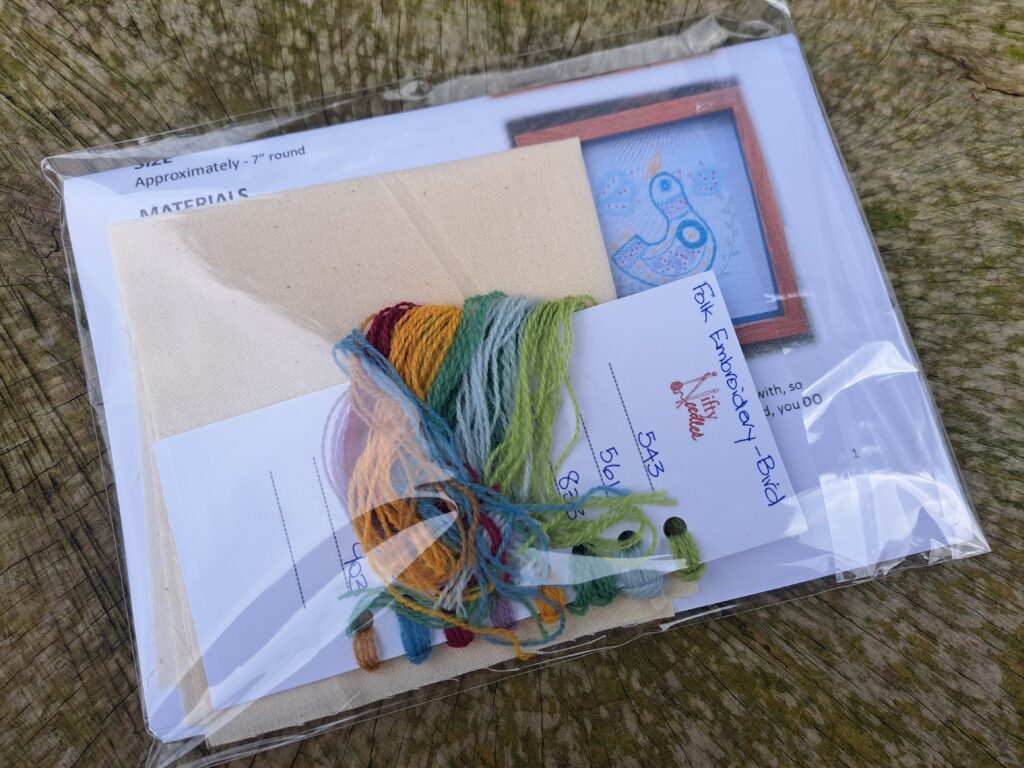
The second embroidery design to be created for an upcoming workshop was Folk Embroidery. I was approached by the organisation that they had had enquiries about Folk Embroidery and would I be interested in designing something and taking the workshop. I love a challenge, and this definitely was one. I had never really thought of Folk Embroidery, so I did some research online to get some guide lines. I then sat down one afternoon and did up some rough sketches and came up with the bird. At first it was slightly out of my comfort zone, as I had never really drawn up anything whimsical before. I have to admit it was fun to do, once I realised that the bird was NOT meant to be realistic, and I could play with colours and embroidery stitches.
Design template
This definitely was a FUN design to embroider, and I loved using the Appleton’s Wool Embroidery threads for my design. These threads are finer than wool tapestry threads and the colours are just amazing. The wool thread is what is normally used in creating Crewel Embroidery, but they were also perfect for creating this Folk Embroidery. They are the threads that are included in the kits.
Folk Embroidery – Bird – using wool embroidery thread
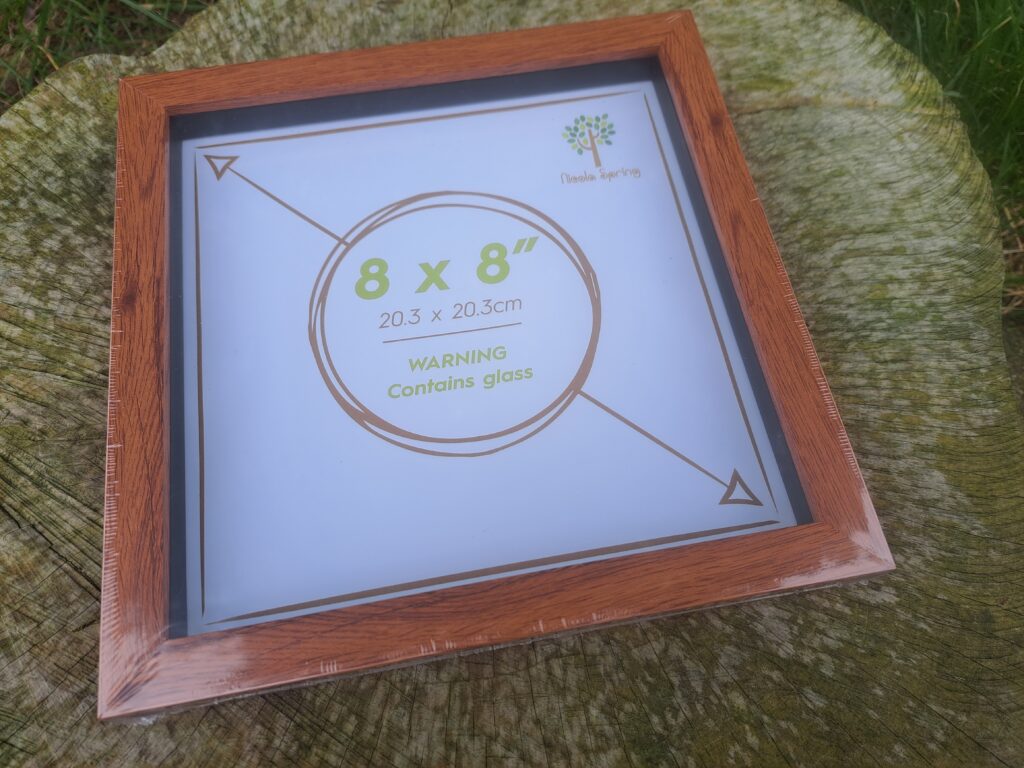
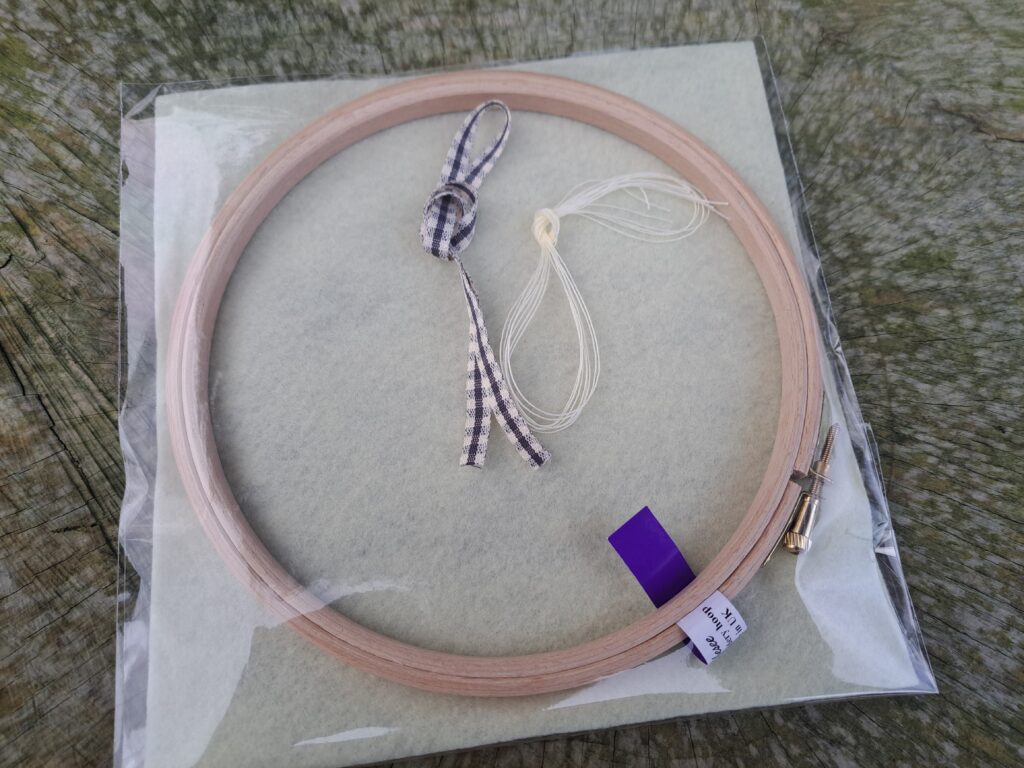
In coming to display my design samples, I was of two minds. The original designs for the workshops were designed to be displayed in the embroidery hoop that is used to stitch the design. The hoops make for a quick, practical and even cost effective way of displaying your finished embroidery. But sometimes it is even nicer to have your work framed to give it that touch of elegance (& also protect it behind glass).
So, I decided that in making up the kits, I would have several kit options available. The fabric, threads and patterns for the designs are in one kit and sold as is. There would also be options to purchase the Hoop/Backing kit or a frame. This allows the purchaser to choose what they need or want. Many have hoops at home or wish to finish it in other ways. So why purchase a kit which includes the hoop and backing felt if you are not going to use it to complete your design? Just trying to give everyone as many options as possible….
Square frame with glassHoop and Felt Backing kitFolk embroidery kit contents‘In your own words’ kit contents
I am hoping this new way to offer kits for sale will work and open up the options for everyone. It was hard for me to decide if I wanted to create different designs that were to be displayed/framed on hoops or to have them in frames. Personally I prefer frames, so my work is protected behind glass, but then again, a hoop finish is easily done, and a collection of designs grouped on a wall make for a lovely display.
I have also released the patterns (in both PDF and printed format) for both the Folk Embroidery and ‘In your own words’ in case you want to use your own materials to create these lovely designs.
So, I hope you like my latest embroidery designs and maybe they will start you onto your own needlework journey…..
As a crafter of many different craft interests, it can be so hard to know where and how to keep yourself organised (and tidy). If you are lucky enough to have a designated craft room (no matter what size) it is brilliant to be able to have/store everything in the room, go in there to create and when you are finished, just close the door behind you. However, not all of us are lucky enough to have that separate space to store, organise or just to shut ourselves way to be able to sew or craft.
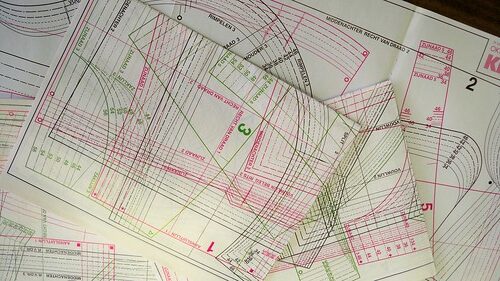
I have always been interested in crafts; in fact it was a way of life when I was growing up. My mother was a sewer who helped to supplement the family income by doing dressmaking for people. I often remember ladies coming to the house for fittings and so forth to have that outfit sewn up. Even back then (50 odd years ago) she didn’t have a designated sewing room. Thinking back now I have no idea where she stored all her sewing/crafting notions and equipment. With a young child’s eye, they always seemed to magically appear when she needed them and magically disappear when they were no longer needed! She sewed from the kitchen table, did the fittings there as well (when my father was not at home) and would draft out the paper pattern for the outfit from a magazine on the floor of the sitting room under the watchful eye of my sister and I (both very young) but even at that young age, we learnt by watching and taking everything in.
It was just the routine of our family and from a very young age, we learnt the skills of understanding the strange language of the lines (with different colours and patterns) that represented the different outfits in the magazine. Those magazines were sent out a couple of times a year to New Zealand by her mother in Holland and over the years they grew into quite a large pile, and they were used by several generations of sewers. She never threw any of the magazines out and you knew at some stage the outfits would eventually come back into fashion. The magazines were in Dutch, so we could never understand the written instructions on how to make up those wonderful outfits that were photographed in the magazines. However, we were taught how to locate the lines that were for the particular outfit, locate them on the pattern sheets, use the roll of newsprint and the tracing wheel to draft out our very own patterns.
Pattern Drafting sheets
My sisters and I learnt to sew by watching and participation. I was sewing outfits for myself when I was 7/9 years, and those early years gave me a firm foundation into dressmaking. It wasn’t just sewing that my mother gave us a lasting love for. She was also kept herself busy with several other crafts – knitting, crocheting, painting, cross stitch, needlework and spinning. Her passions in those crafts were passed down to myself, and my sisters.
So, how does this relate to craft organisation? Well … my mother never had the luxury of a designated sewing room. She did her sewing on the kitchen table and her other crafts were done in the evening. Looking backon how long I have been sewing and crafting for, I can also honestly say that I never had a designated craft room to store all my crafty notions and materials. Moving from childhood into young adult and then into my own home, I still did not have a designated craft area where I could store everything.
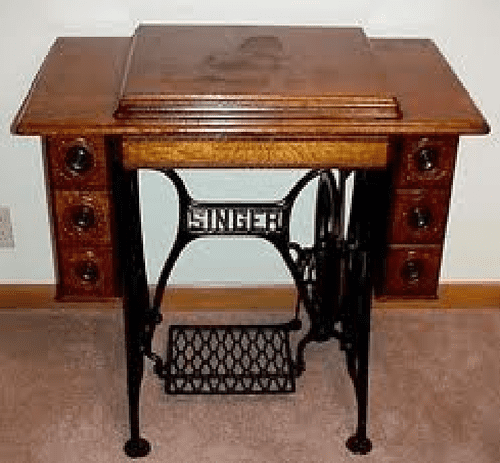
It is hard to think of just where did I store everything. My Dad acquired an old Singer sewing machine treadle table (minus the machine) when I was a teenager. He restored it for me, and it was my own small, designated sewing area. I could keep my machine on the table and sew there. There was space inside (where the machine once was stored) where I could keep all of my dressmaking patterns and the drawers were just perfect for keeping my scissors, pins, and other essential notions in. Maybe I just didn’t have as much as I thought I did. When I was sewing all my own outfits (as well as my girls) I would generally go out and buy the fabric needed, there was no fabric stash. Could I also be right in thinking that maybe now, we are needing so much more in the way of ‘essential’ equipment?
Singer sewing machine table
I kept my other craft materials in cupboards around the house and when I wanted to work on them, I would carry them together and take them where I wanted to work. It was generally in the lounge or the kitchen table. The latter was a bit more of a nuisance as I would have to tidy everything away at every mealtime due to the table being needed.
I remember one house I lived in, I was overjoyed to find there was a space in the laundry (Utility) room with a wooden bench by the window with some shelving on each side. I finally had my own sewing room. However, it was not ideal, the utility room was out through the back door and was basically a concrete floor outbuilding which I had to share with the freezer, washing machine and dryer. There was barely any room in which to work in. I definitely could not lay anything on the floor, it was uneven as well. There was no room to have an iron or to cut everything out. The bench was narrow and not that long, so just large enough for the sewing machine to sit. It was nice when the weather was dry and warm, but during the winter, it was cold and dismal. I think I generally ended up taking my machine and sewing on the kitchen table. The shelves were great to store my odd bits of fabric onto. I was just starting to get into patchwork at this stage and was slowly buying pieces of cotton fabric. There was also a disused toilet and shower room off this area, so it had become a place where I could store my surplus craft materials in boxes, along with fleeces I had acquired for spinning. I guess we make do at the time with what we have. But we all need to have it organised.
Once I moved into the rabbit hole of quilting, my essential notions and tools seemed to explode at an alarming rate. At the start (over 20 years ago) it seemed that only essential tools needed were the cutting mat, ruler, and cutter. Now there is so much more on offer and all claiming to make our quilting so much easier. I am not disputing that, as I have acquired so many tools that I just wouldn’t be without as they have made quilting/sewing so much easier and enjoyable. But when you invest in these needed tools, you really need to keep them safe and more importantly, know where they are so you can grab them when you need them.
We all need to have that one area, that we can go to and know that we can find exactly what we need, where it is kept and more importantly …. To know exactly what we have. Have you ever purchased a tool and then realised that you have exactly the same at home, but had forgotten about it, or maybe mislaid it due to not being organised?
I know I am guilty of that over the years. If you don’t have a designated craft/sewing room, it can be hard to know where everything is kept. Thankfully, I can now say, after 50 years of sewing, I now have my very own designated sewing/craft snug! However, like many crafters I am a messy crafter, and it can be so difficult to keep my craft snug tidy and organised, especially after a day of sewing and pulling things out when I have needed them. I am good at getting out what I need, but just not that great at putting it back after I have finished with it!
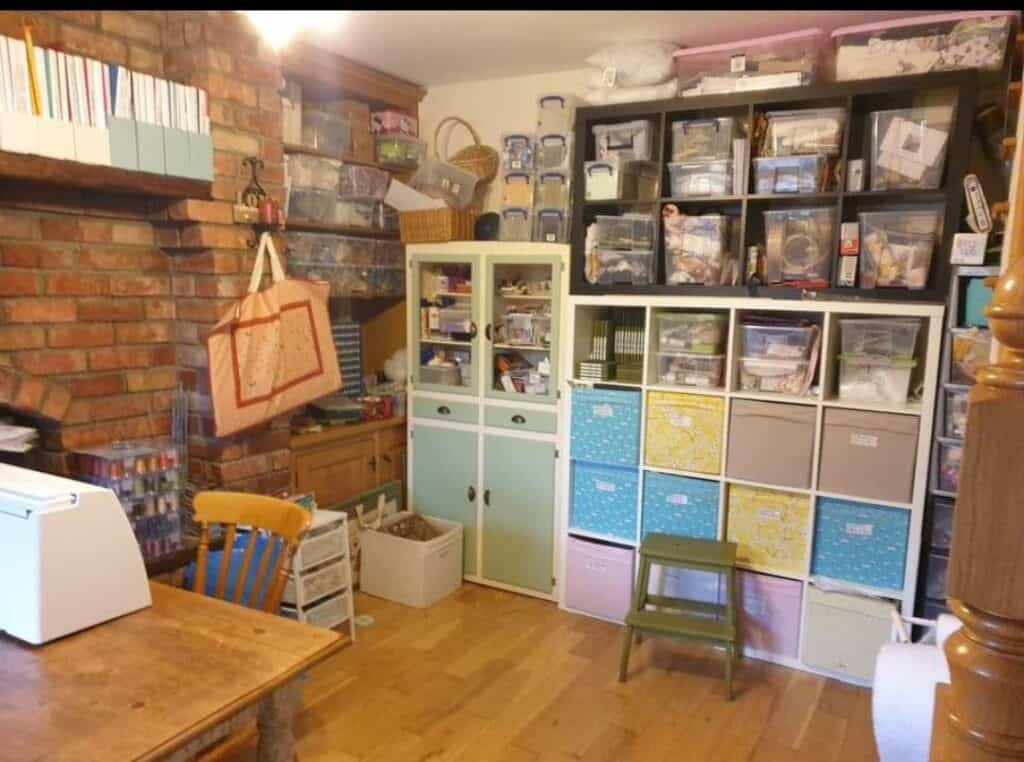
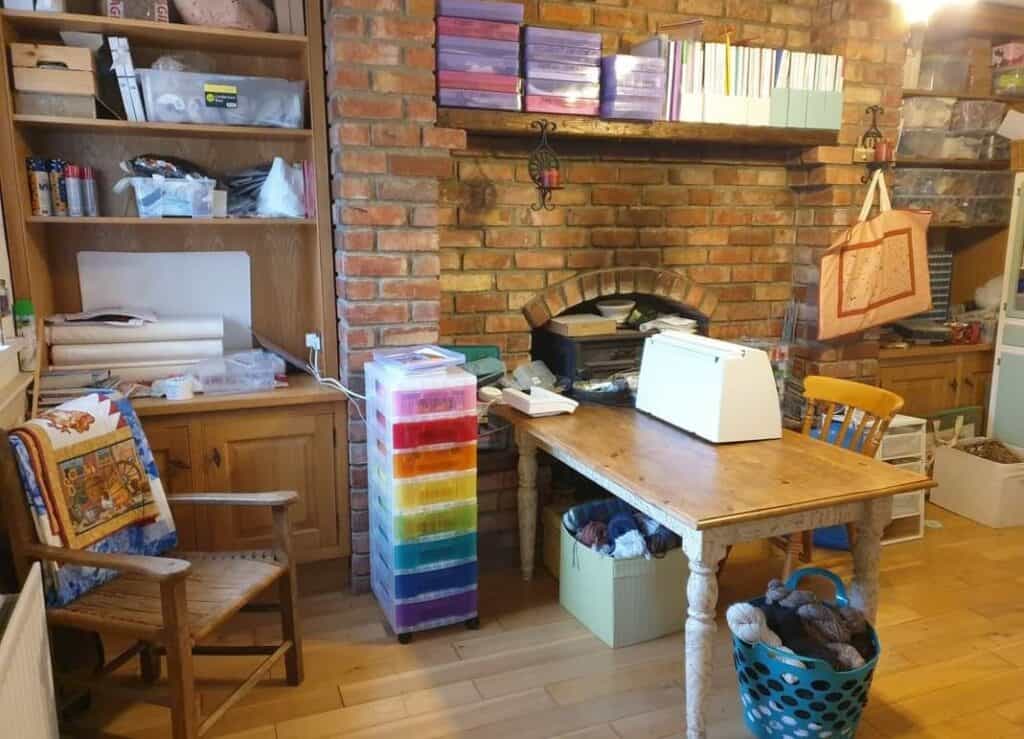
Once tidy craft snug
I love my craft snug and after a few trials and errors I am making it into what I need and require in a sewing area. I have my table in the middle, so I am not facing a wall. The window is far too high to have my machine there and there is a radiator directly under the window. It is not an ideal room as there really isn’t any wall space available, it is basically an open area off the kitchen and next to the stairs. So it is making the best of what I have to work with and using it to its best ability. The Ikea storage shelves are brilliant, and I have found the fabric bins and plastic tubs really make for great storage containers. There is built in shelves and cupboards which are still a work in progress. I have purchased several types of plastic drawers which are put to great use – for storing all my spinning tools and blending fibres as well as the different types of needlework thread.
Once tidy craft snug
I have found that I am ‘a list’ person. I like to work to lists. It gives me something tangible to work from and to look at when I need to refocus myself and know exactly what I have. I like order, I just find it hard to maintain that order all the time. I tend to be a messy sewer …. I will leave that there ….
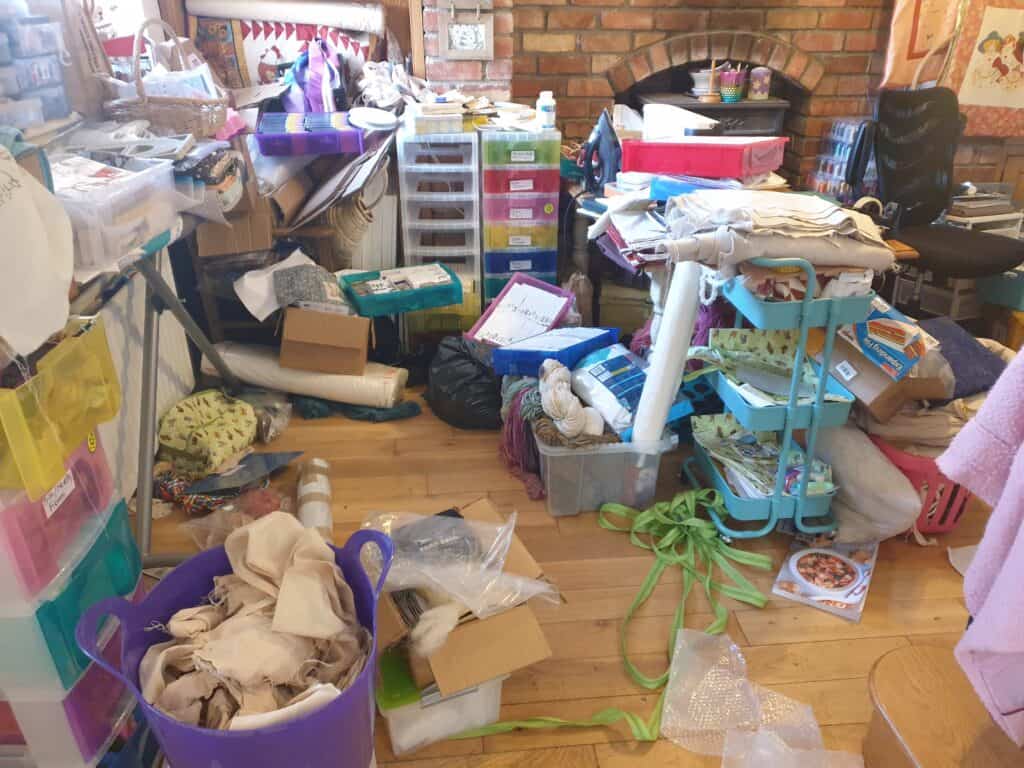
I also found that my craft snug can tend to become a dumping ground. When in a rush, things get dumped in there with the intention of ‘sorting that out later on’ and it just never does. I am also a crafter that needs to have several projects on the go at the same time. To the point where I have numerous (too many to count) Unfinished Projects. There are times when I tend to forget about them and stumble across them many years later. It shouldn’t be like this, but it is. My creative mind seems to jump about from one idea to another, especially when it comes to coming up with new designs.
During the first COVID lockdown I used the time to think over my craft projects and different crafts. I was in desperate need to know exactly what projects I had, be it partially finished or yet to be started. What tools and equipment I had and just exactly where it was all stored? To find a suitable method in which to store my fabric. The list was endless.
Fabric storage
I know I could just tidy and organise my sewing snug again, but how long would it stay in that state, and it still didn’t solve the need to know what equipment I actually had. I had purchased an Accuquilt machine several years ago and had been slowly adding to my collection of dies. When I found a good sale for them online, I struggled to know what I already had without having to go through them all and write them down. This was the first step in starting to organise my tools. I had complied an Inventory for my Accuquilt dies. I found this so handy, and it was brilliant to be able to transfer that inventory idea to the other expensive equipment I had acquired over the years – books, patterns, free motion rulers, quilting rulers and other handy specialised notions.
Inventory pages
There is such an achievement when you have gone through all your notions, tools, patterns, etc sorted them and compiled an inventory of them all. It gives you a sense of being in control and knowing exactly what you have. It is even better if you know exactly where that particular notion is kept. I decided that this was the year that I would truly get myself organised.
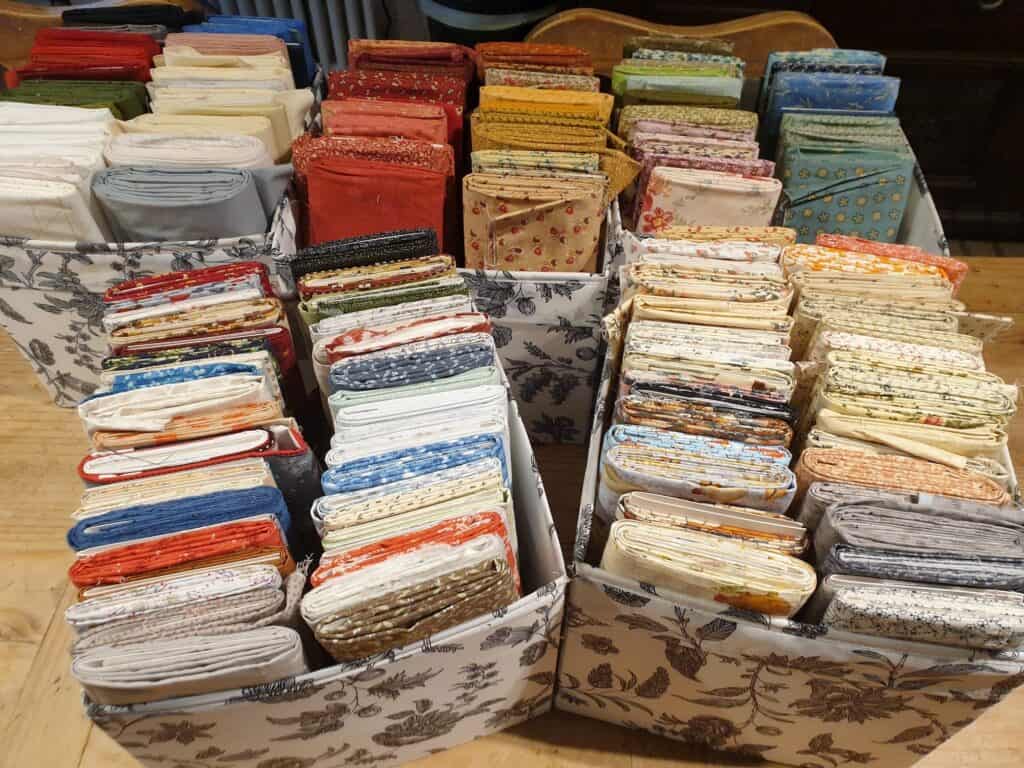
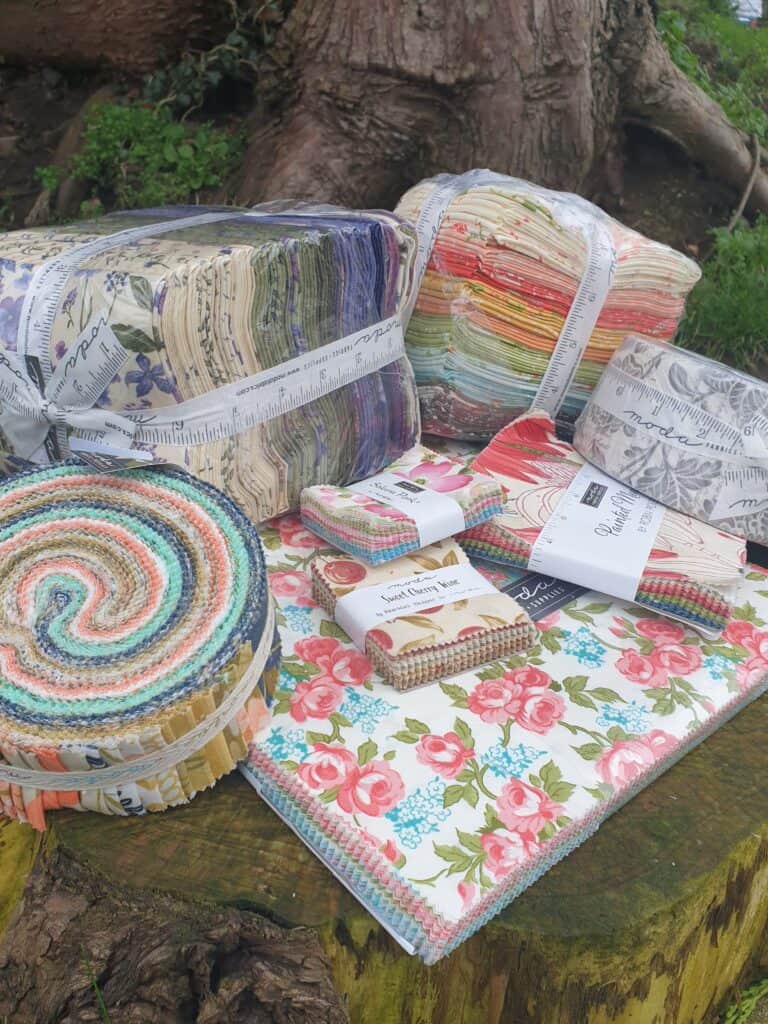
So with inventories all completed, it got me thinking of the projects started but never finished and even the ones planned but never started. In sorting through my craft snug, I pulled out containers of long forgotten fabric bundles, obviously placed together for a particular project but having no idea which one due to no pattern or note placed in the container. This is when I decided to expand on my inventories. I discovered several containers of pre-cut fabric bundles – jelly rolls, charm packs, layer cakes …. I had no idea of just exactly what I had and NEEDED to know so I could use them!
Pre-cut fabrics
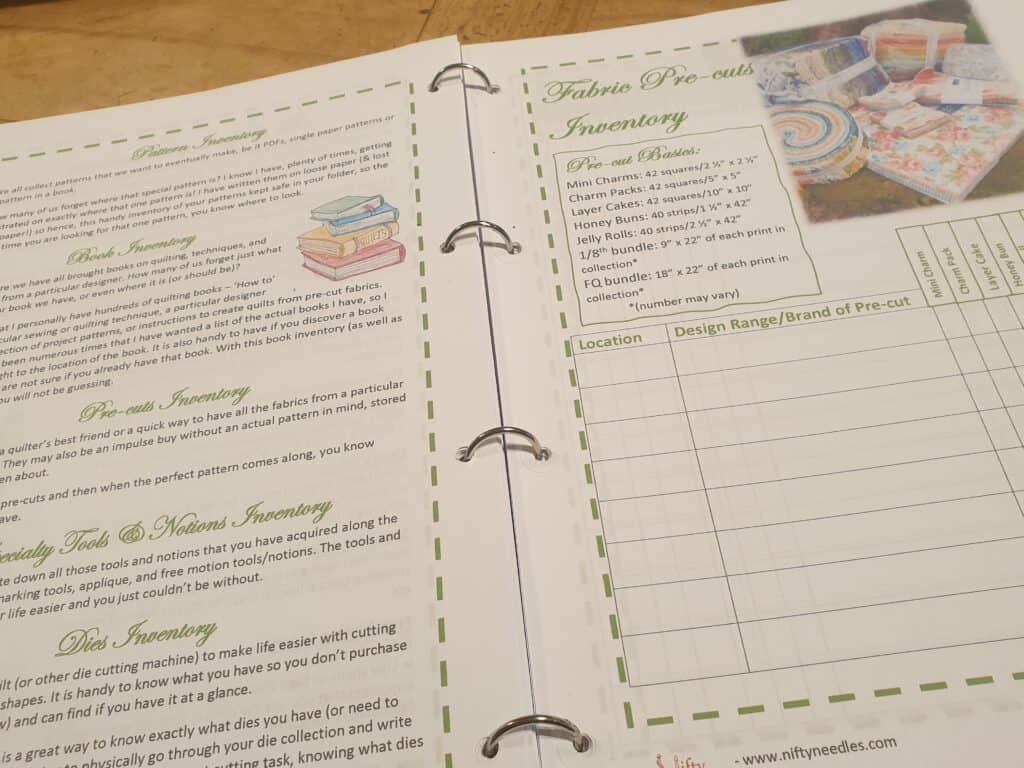
I wanted to create some organisation with my sewing so I would not get overwhelmed with what I had to get done or even to forget about the special quilt I wanted to make but never got round to. I started thinking on the project folders/books that many quilters spoke about. The concept interested me, but I never found exactly what I wanted or needed in such a book. I like to work from lists. I am terrible for roughly scribbling lists/notes on scraps of paper and then losing them as I had nowhere to keep them safe. I guess I searched and thought about the concept for quite a number of years, but never did anything about it. I just couldn’t find one that fitted all my needs. I wanted something that I could add to if I ran out of space – so a book wouldn’t work as it would not allow me to add to the pages when I ran out. It would also have pages that I wouldn’t use so it would be a waste of a book. I didn’t want to print off templates and put them into a folder – it just wouldn’t be special enough. I thought of placing the paper sheets into plastic pockets – but that wasn’t suitable – as it meant that each time, I wanted to write something down, I would have to take the paper out of the plastic pocket. I really needed to put my thinking cap on.
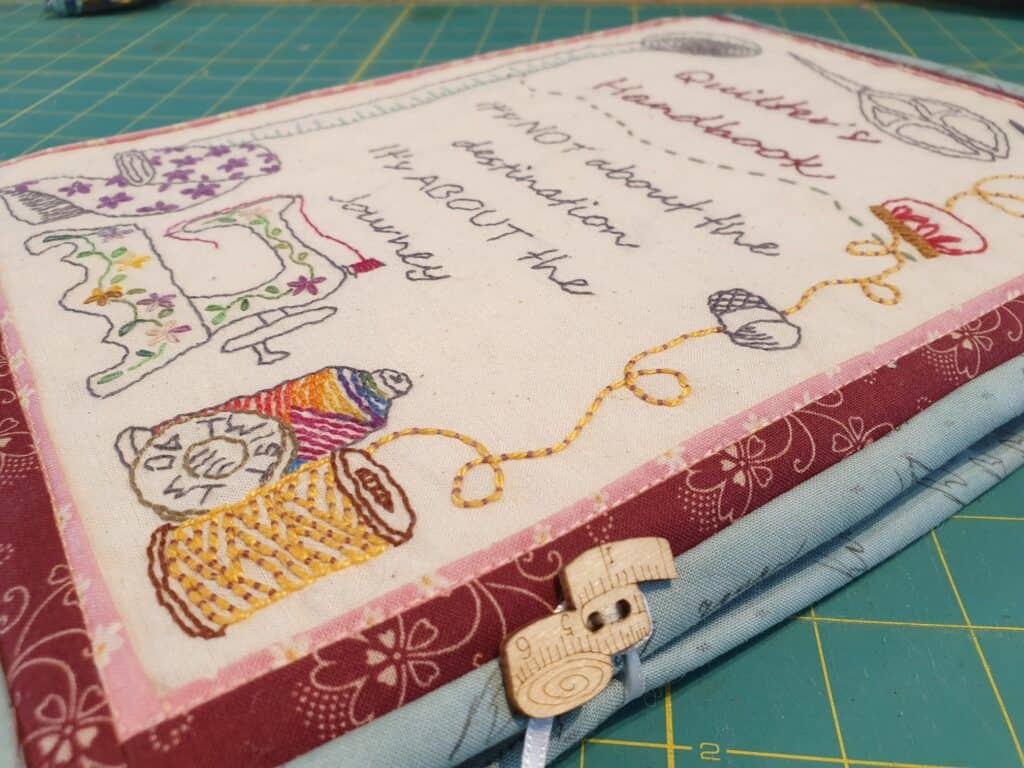
So, the Quilter’s Handbook was conceived…. I started to put down ideas of what I wanted in my book to keep me on track…. Somewhere I could write down all the projects I wanted to start, those I needed to finish, as well as the projects I was currently on where I could add in notes for any adjustments. Somewhere that the notes would be safe, and I could refer back to them if I ever needed to make that particular project again. It also gave me a record of what I had made, something to go back over in years to come. I also needed a place where I could keep a record of all the patterns, books, tools, and notions that I have and where they are kept. The handbook was designed so that you could decide just what pages/sections you needed for your own use, so there was no wasted or unnecessary pages.
Front cover of the Quilter’s Handbook
I had so much fun deciding on what to put into this folder. I am excited about sharing it with you over the next few weeks. It is the result of many months of research, ideas, trials, and errors in putting together the perfect quilters handbook to help keep you organised and on track. I also felt it was important to add in a section of the basics when it comes to quilting and using your machine. How often have we had tension issues and just not quite sure on how to adjust the tension dial or even to check through all the tension issues before touching that dial? What about how to accurately cut fabric when we are directed in the pattern to cut fabric with a 16th fraction? Maybe all the quilting terms are confusing? What about the common sizes of UK beds if we want to make a quilt for a particular sized bed? I have complied all that to go into this Handbook. Now you just need to grab the handbook and look it up instead of spending hours searching online for answers. There is so much more to this book….
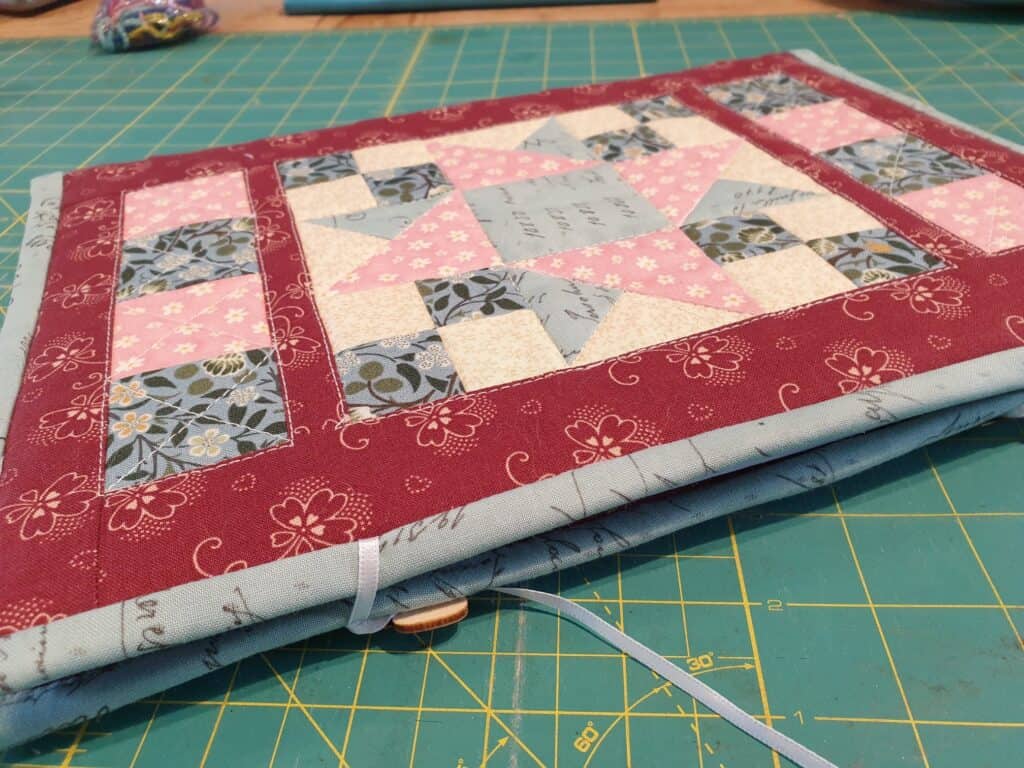
Back cover of the Quilter’s Handbook
Over the next few weeks, I will do blog posts on helping you to organise your sewing area. We will discuss storing your tools, notions and fabrics and using the inventory sheets and making them work for you. We will also look further into the Quilters Handbook and how to make the most of it.
I hope you will enjoy accompanying on this journey while, together, we will organise our designated sewing space…… and move this area ….
One very messy craft snug in desparate need of organising and sorting
Into an improved, tidy and VERY organised sewing space ….
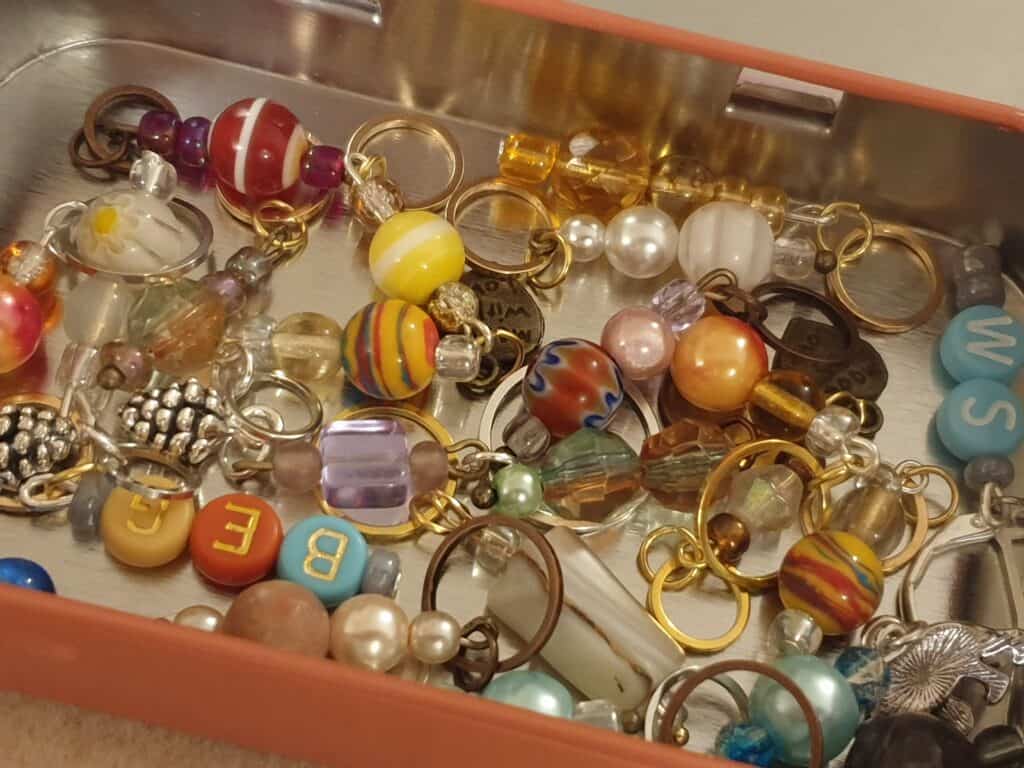
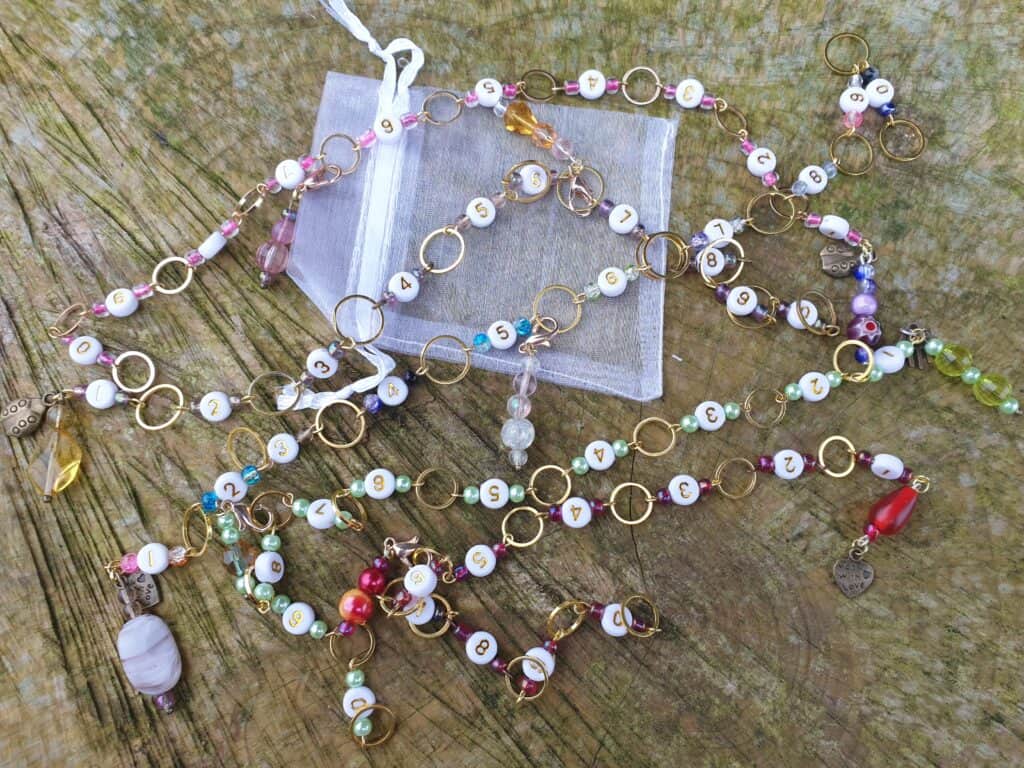
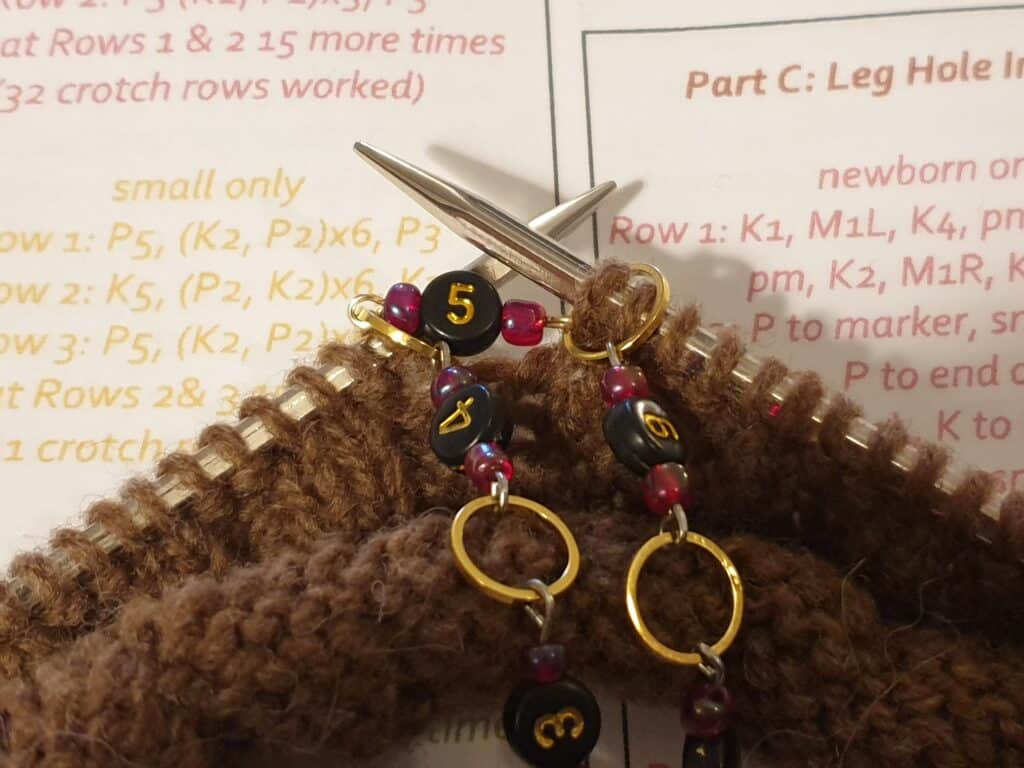
I have had so much pleasure in making our selection of stitch and progress markers. It is lovely to be able to use beautiful handmade notions when knitting and crocheting. I have been using mine a lot since Christmas and have found them so lovely to use.
The counting chain is one that I use a lot now and this notion has been a game changer when it comes to having to keep count of how many rows need to be knitted. You can read more on how to use this fabulous notion in my previous blog post.
I have a good selection of the chains on the website in a variety of ring sizes and colours. If you haven’t tried them yet, why not check them out….
Whiteselection of row counting chains
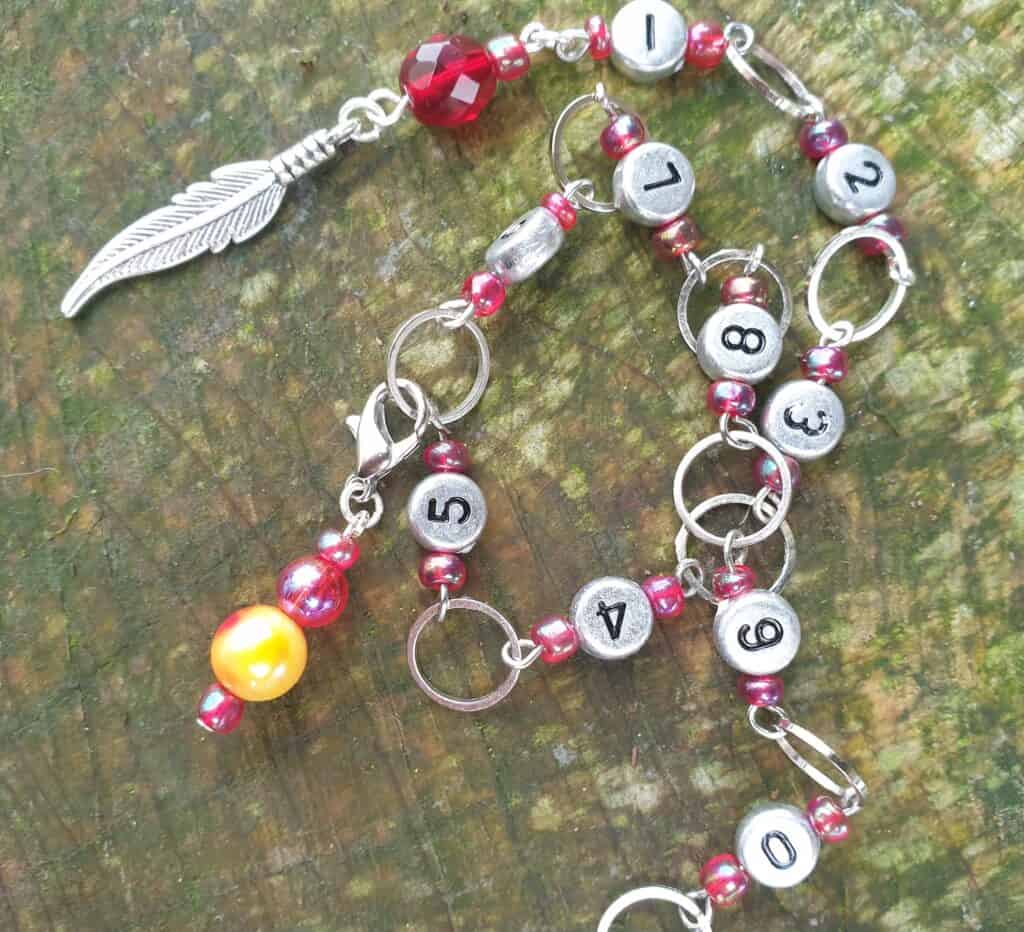
silver counting chain
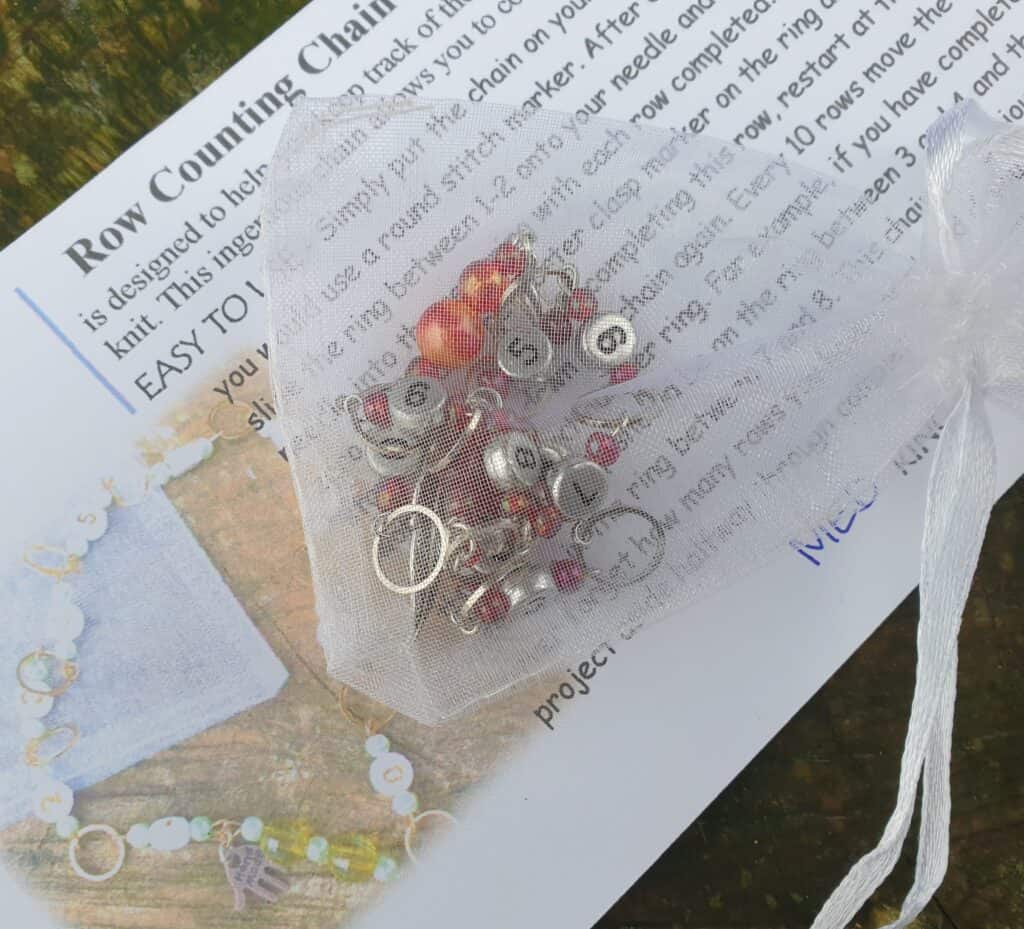
chain arrives in pouch with instructions
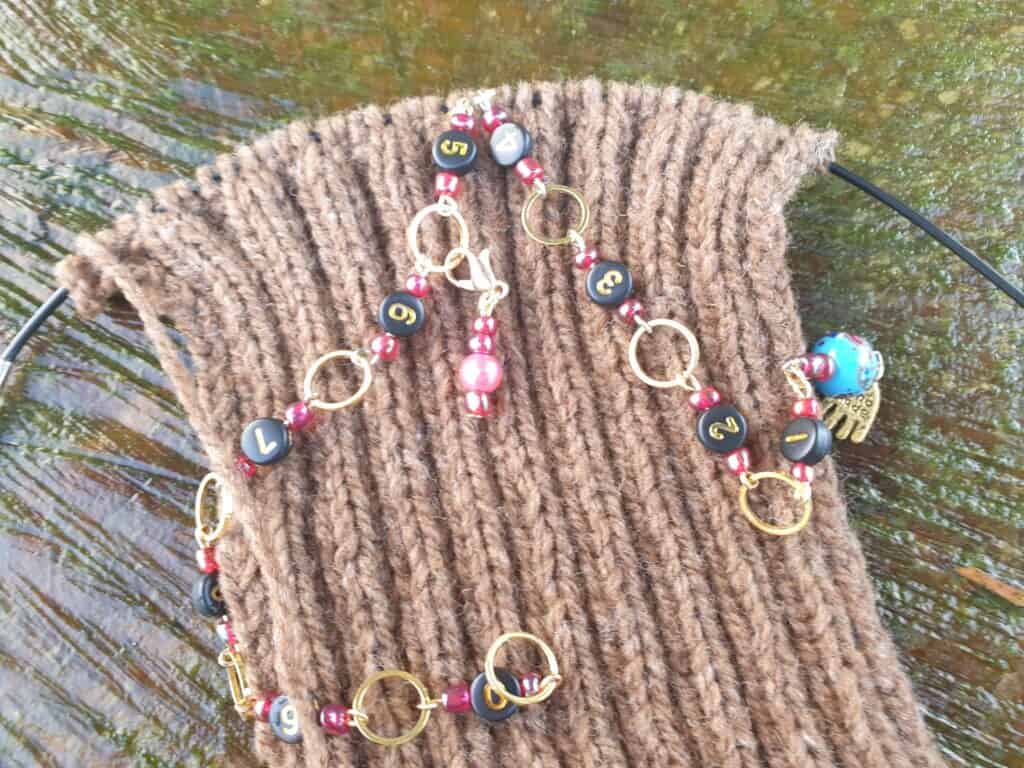
completed rows knitted and shown on chain – 56 rows
slipping new ring to the needle
I also have a few other counting themed notions in the pipeline for BOTH knitting and crocheting and hope to have those added to the website by February. But enough of the knitting notions – this blog is all about our new needlework notions.
In making the markers, etc, it got me thinking on what could I create for the needleworkers? What would be some lovely handmade notions that are ‘essential’ for when we are doing needlework? I was wanting to create a lovely unique range that would make perfect small gifts for the stitcher, and I got thinking about the items I like to have in my sewing box that is invaluable for when I am doing needlework. I am sure you could think of a number of notions in your sewing box that you could not be without.
Whether we do cross stitch, blackwork, embroidery, Redwork, white work, or other forms of hand stitching, I know that these three notions will become an essential part of your needlework kit. So, what are they?
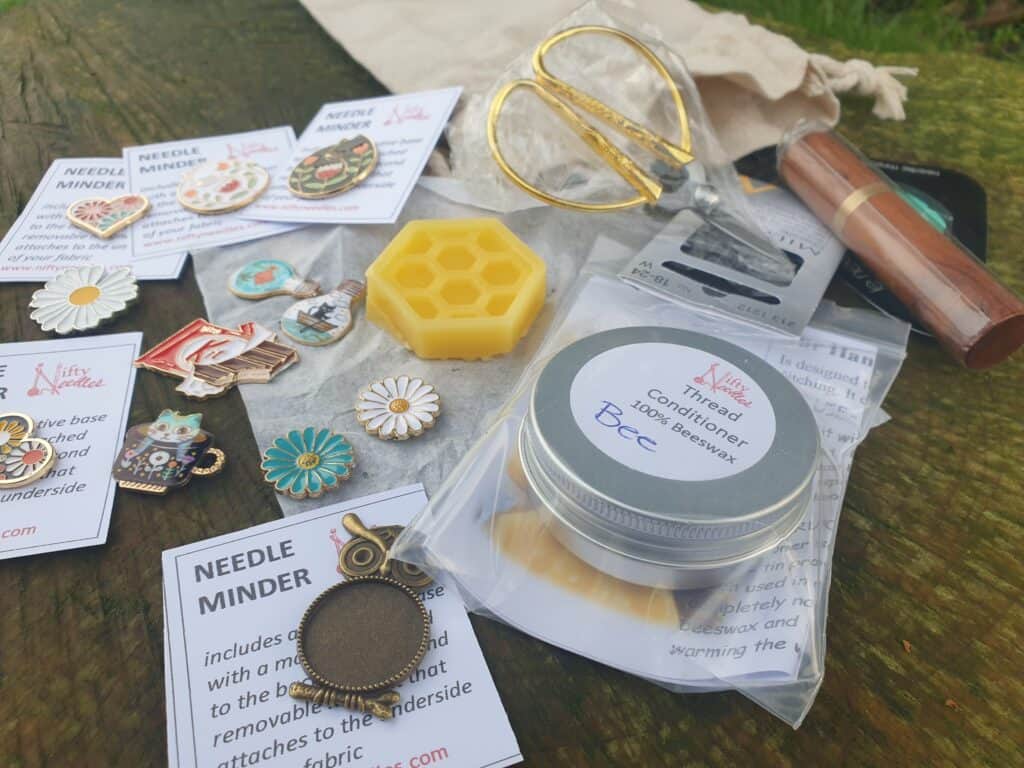
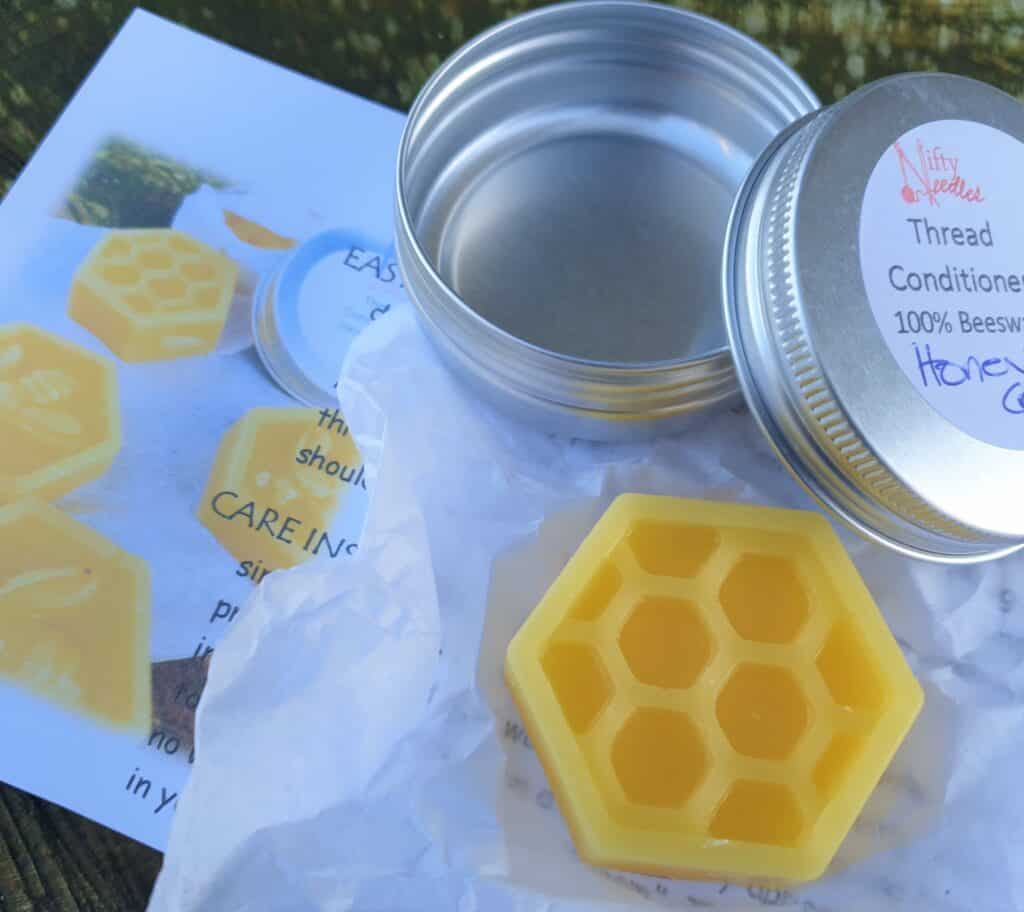
Thread Conditioner
Just what is thread conditioner? Well…. Have you ever experienced knotty or tangled thread? Using metallic thread and ending up fighting with it, having it get knotted or broken? Or are you like me, and just plain avoid using metallic thread as you know it is completely unworkable, no matter HOW stunning it looks in the finished project?
I was like that for many years. I loved the look of metallic threads in my needlework designs, BUT the very thought of actually having to work with it sent me into complete shudders and I would just not put it into my work. However, that changed quite a few years ago when I came across a product that came from America and was available through Amazon at a huge price for such a small item.
So how do you use it and what does the beeswax do to the embroidery thread? Basically, you pull your thread through the wax, and it helps stop the thread from getting tangled and really makes the metallic thread behave itself and is a pleasure to work with. It also helps to prevent the thread from fraying and strands separating. A real game changer!
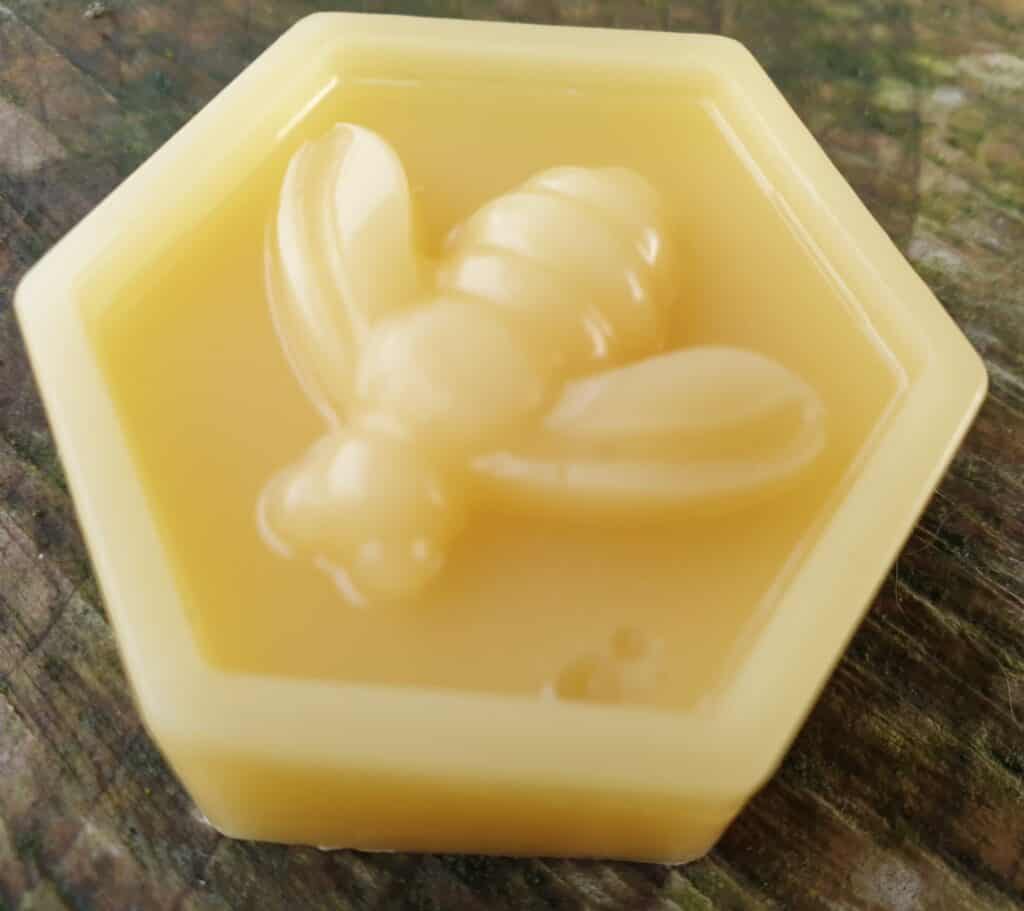
I got thinking on how these would be a nice gift idea, but I wanted them to be unique and handmade, not just a blob of beeswax in a plastic container. I did some research and have come up with my own handmade thread conditioner which is made from 100% bees’ wax. I poured the beeswax into cute bee themed blocks, and once fully set, each block is wrapped in tissue paper and kept in a small tin, which is perfect for keeping in your needlework basket. They also come with an instruction card on how to make the most of your thread conditioner.
I am also looking at maybe doing some with added essential oils to really help relax and de-stress you while you are stitching, or maybe some seasonal smells to set the mood of the season and you’re stitching. Let me know what you think ….
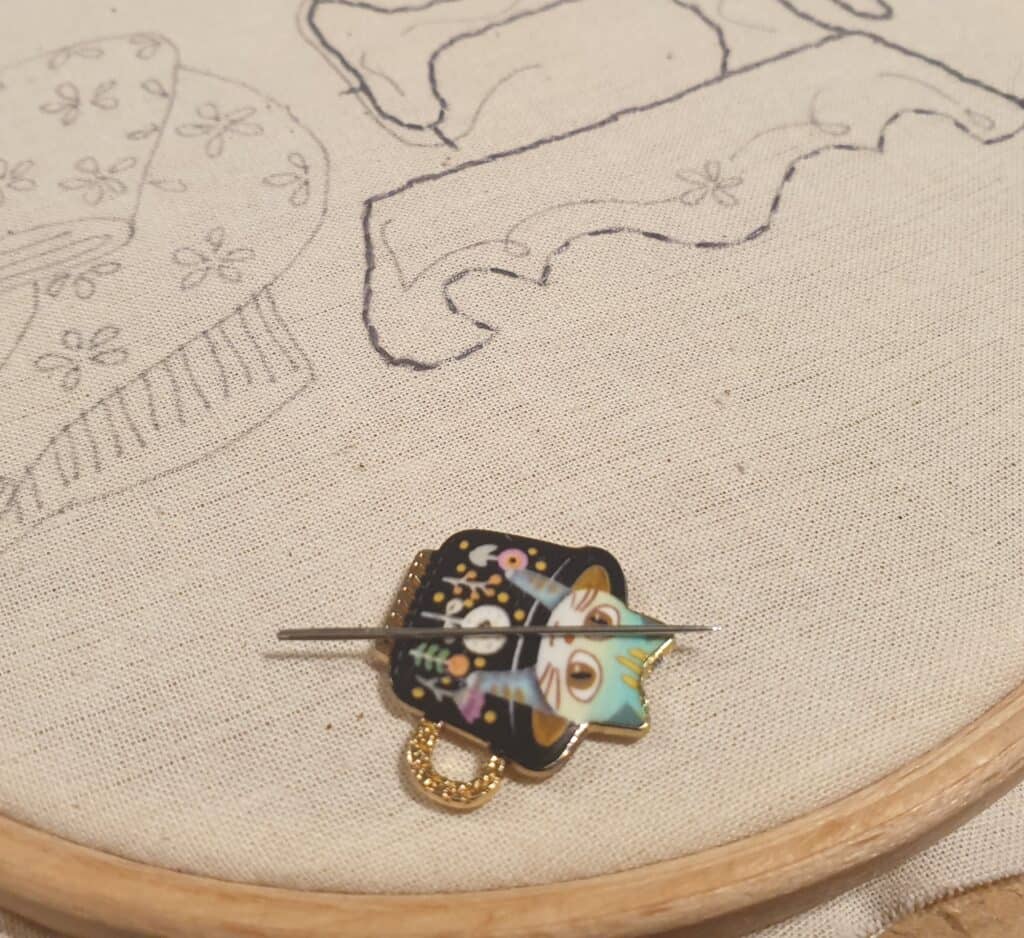
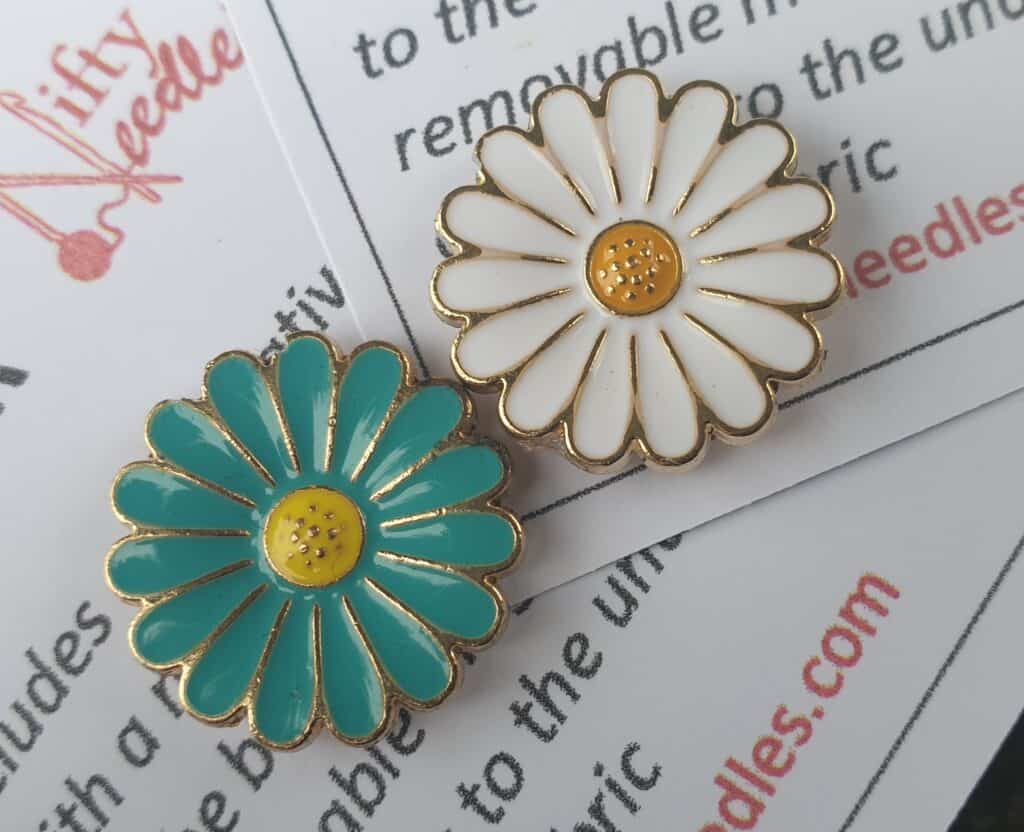
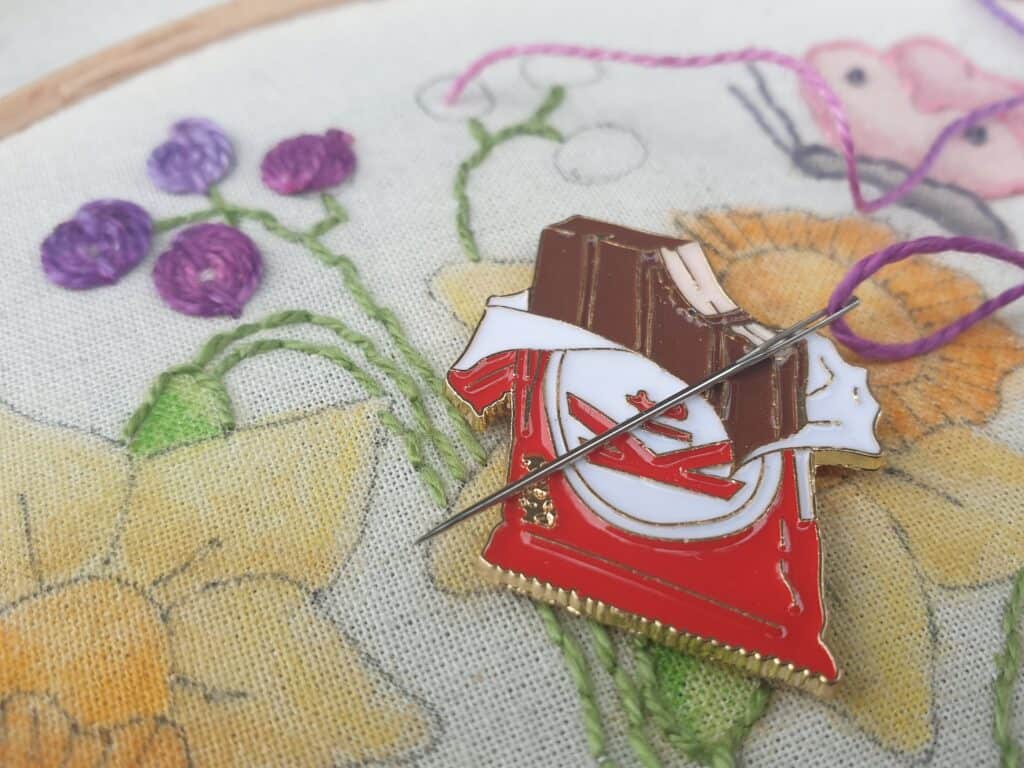
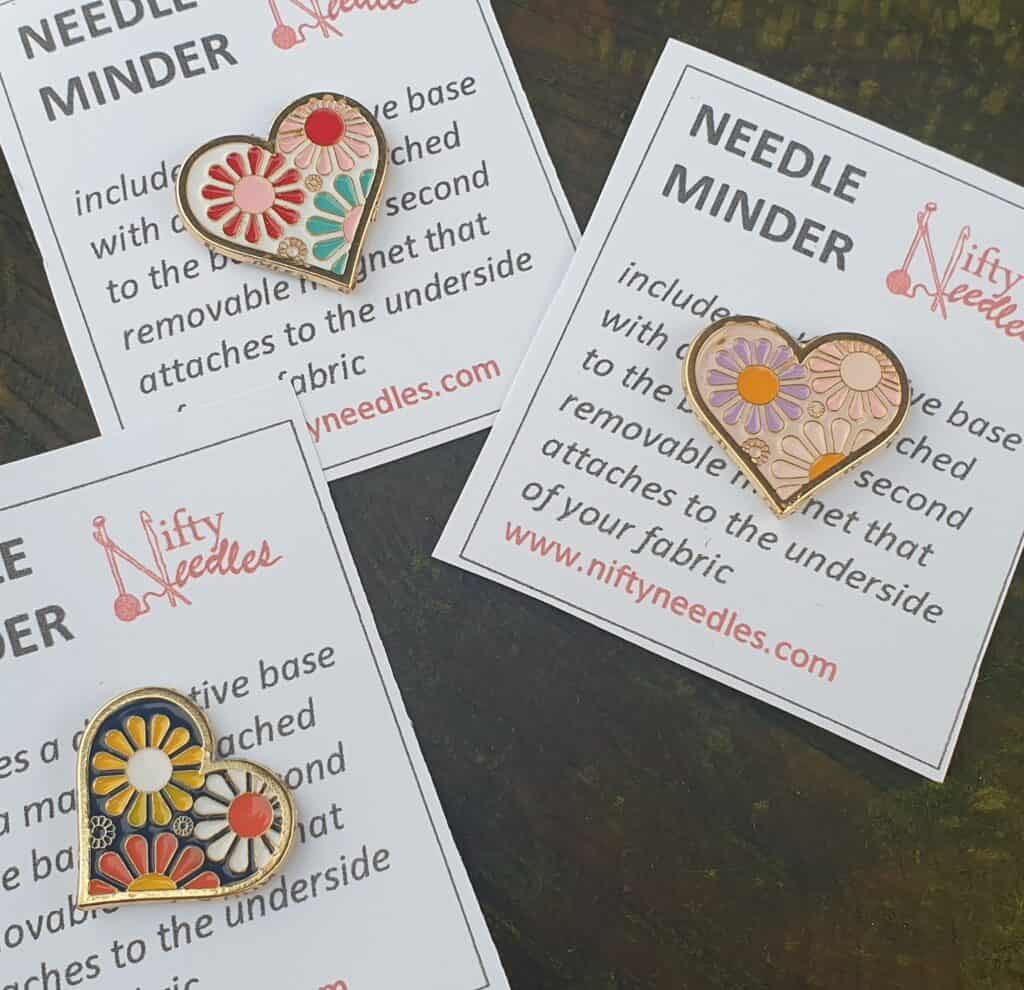
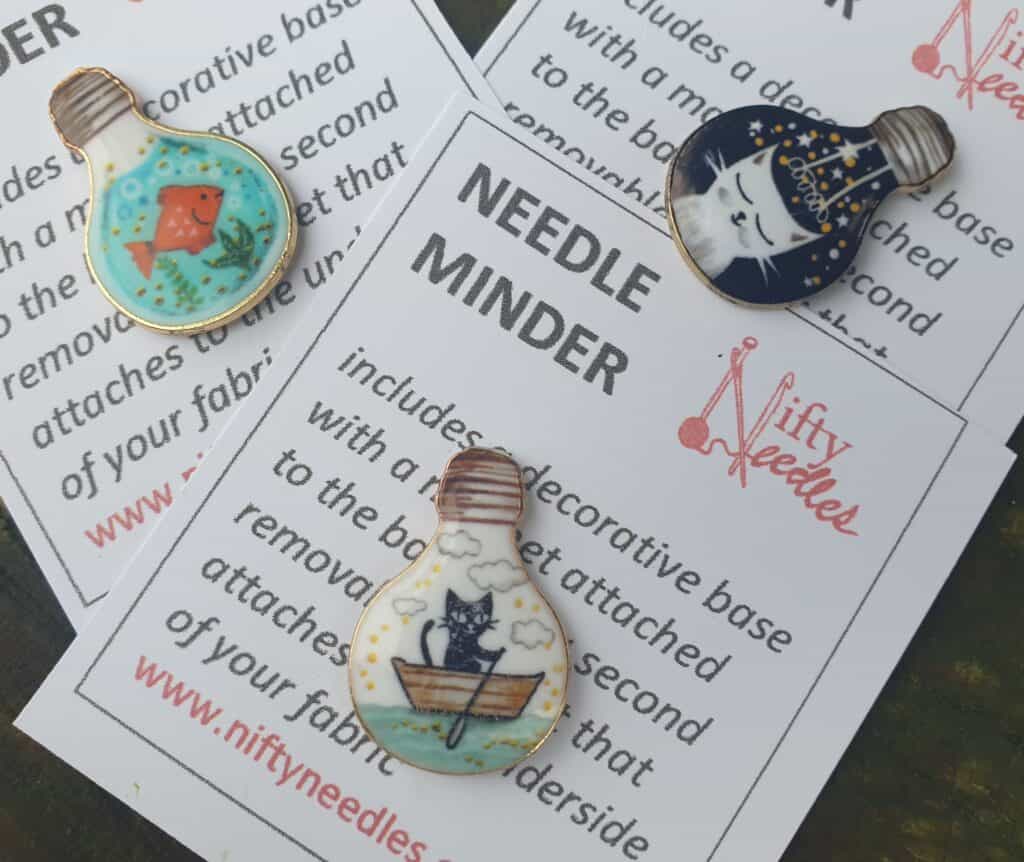
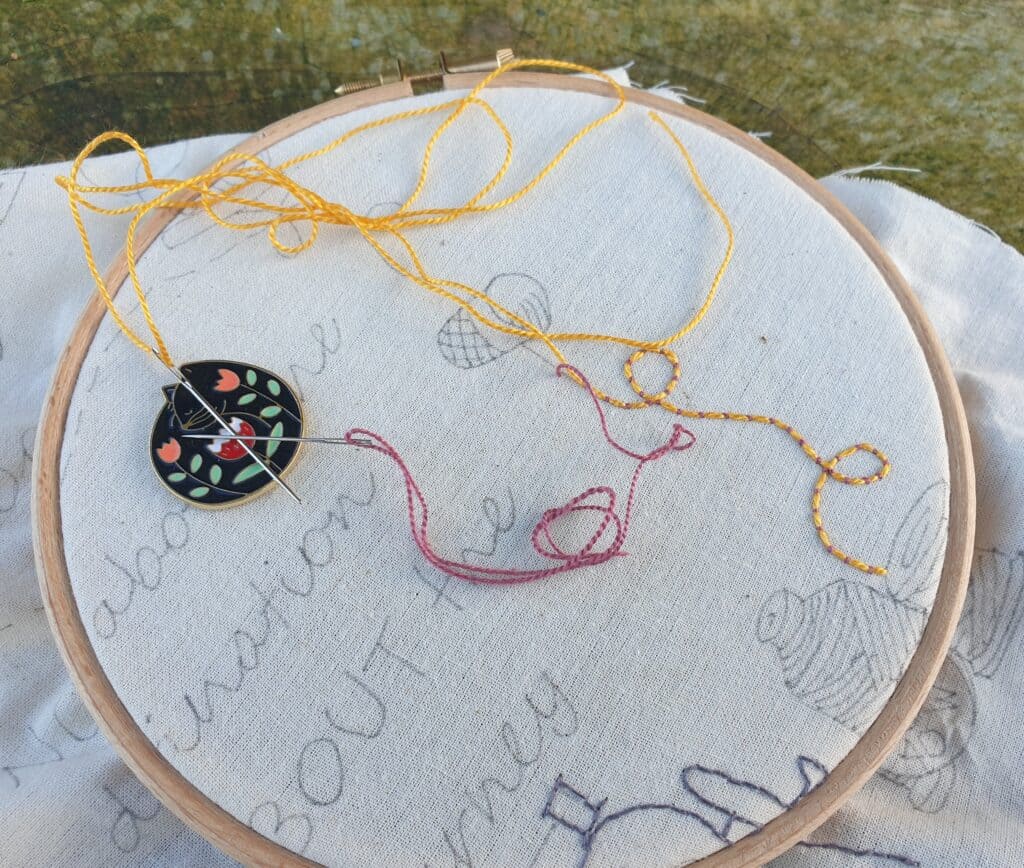
Needle Minders
So, how many can relate to misplacing your needle? Or are you guilty of ‘just’ piercing your needle into the arm of the chair so you can cut your thread and rethread it? How often have you had to dig through the back of the sofa to try and find the needle that dropped while you were just going to rethread it? The even thought of ‘accidentally’ finding a lost needle is even more frightening. I know I have experienced all of the above and it isn’t a nice feeling when you CAN’T find that lost needle and just pray and hope that when it is found it is not going to be with serious consequences.
I tried to get into the habit of sticking my needle into the fabric I was working on. It was not ideal, BUT it seemed better than piercing it into parts of the furniture. I am sure we have all found ‘lost forgotten’ projects that we were working on … ages ago …. Or maybe we inherited some half-finished needlework from another stitcher who started it many (many) years ago … only to discover that the needle that was placed ‘safely’ into the fabric had long since rusted the fabric and ruined the project. I have had a few half-finished projects gifted to me that had been started so long ago (and a few of my own) and the needle has rusted the fabric. I remember, I was taught NEVER to keep the needle in the fabric – but how often do we pay attention to what we are told to do?
I must admit I was also abit sceptical on how secure they would keep the needle. But after using it and keeping my needle on the minder, in my project bag when not working on the stitching, it was brilliant to know that the needle would be exactly where I had left it.
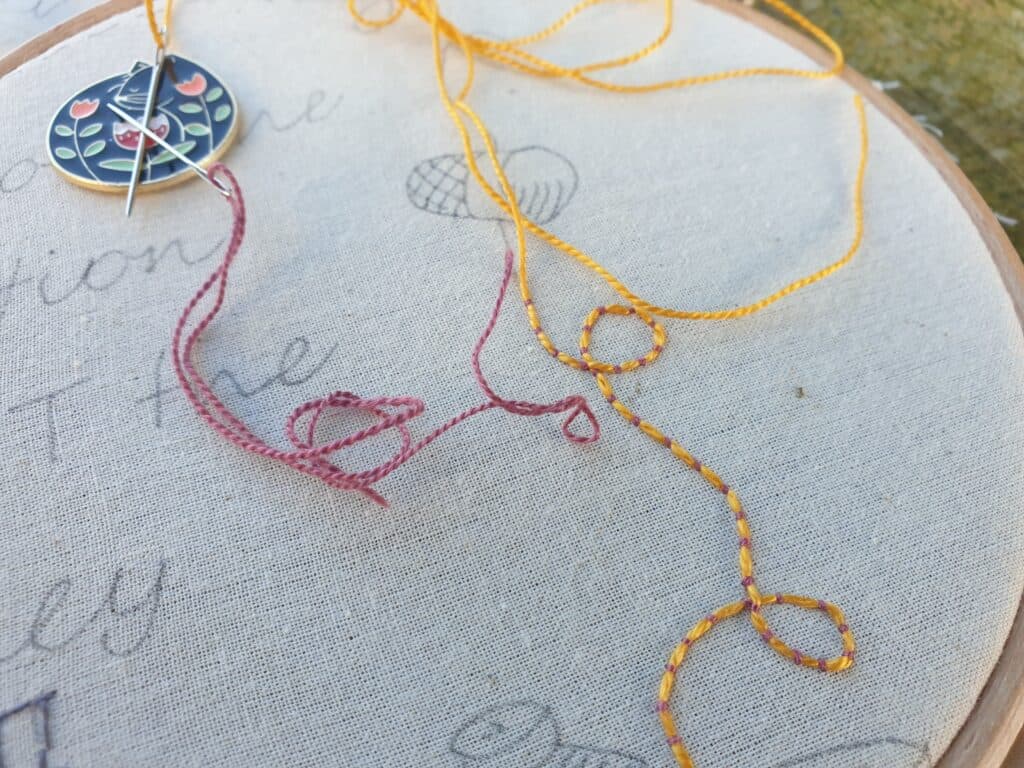
Sometimes, I need to change thread colour to work on a small section, but don’t want to unthread my current needle. With the needle minder, you can place the threaded needle onto the minder and know it is safe while you use the new colour and come back to the previous needle when needed and it is still threaded up ready to use. It is also handy when you are working a particular embroidery stitch where you would use two needles threaded up with two different threads, i.e.., Couching stitch. The couching stitch requires two threads – the foundation thread and then the thread to secure it. Usually you place the foundation thread along the desired line and secure it at both ends. I found that I prefer to have the foundation thread loose so I can move it as needed, especially if the foundation line is curved or longer than the working space in the hoop. This is where the minder came into its own, I was able to leave the foundation thread threaded onto a needle and kept safe (and out of my way) on the needle minder….
working with both threads
close up of couching stitch
keeping both needles safe when not in use
Needle minders can make a great gift because of the almost endless possibilities of designs. There is nothing nicer than having a cute and pretty notion that you can use while you are stitching. I currently have a small range of unique needle minders, but rest assured, I will be constantly expanding on the different designs. You can never have enough needle minders….
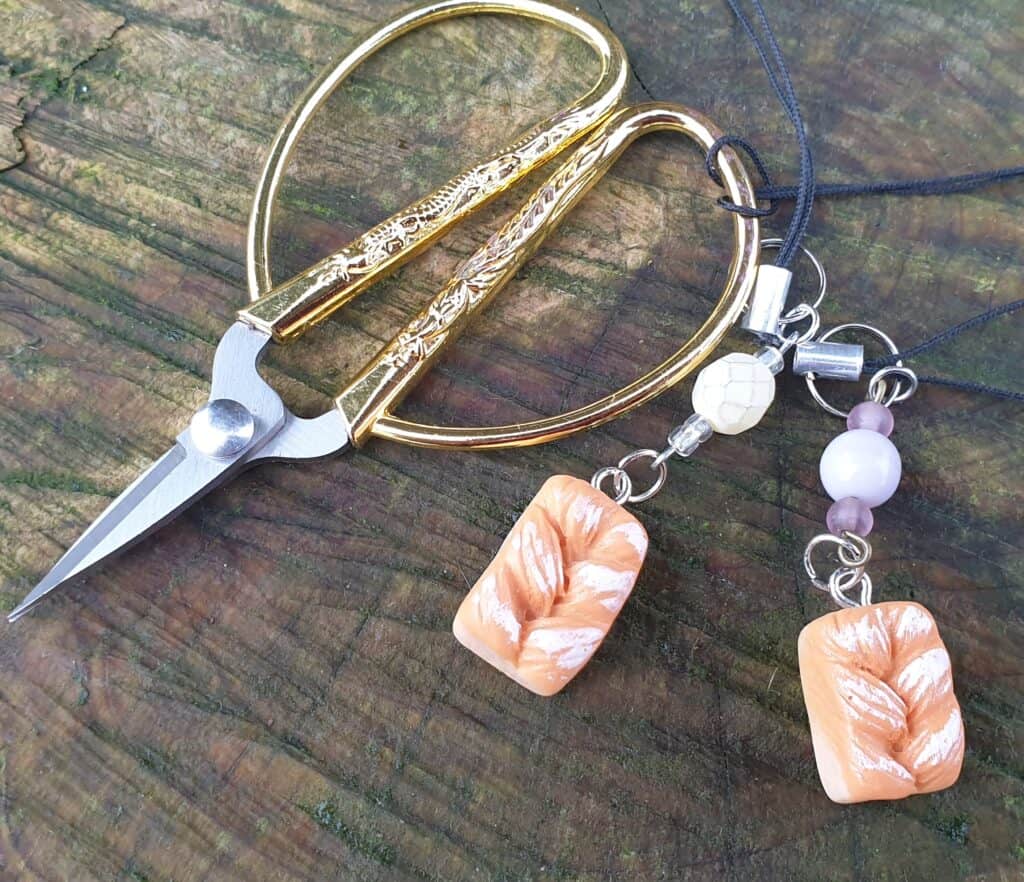
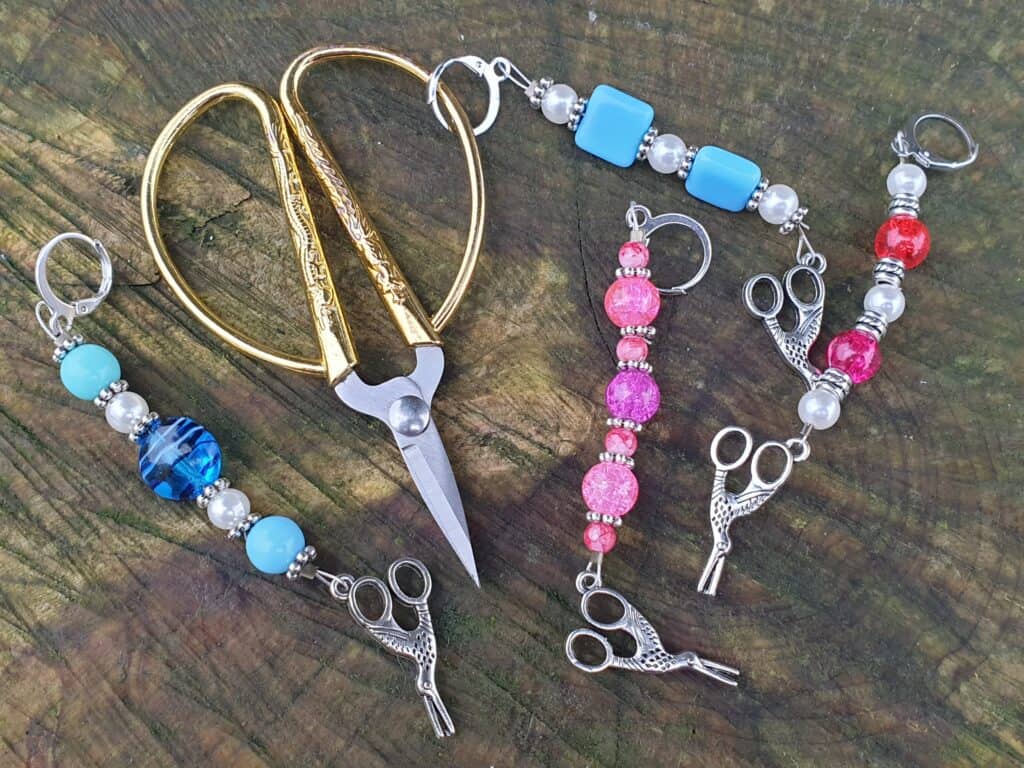
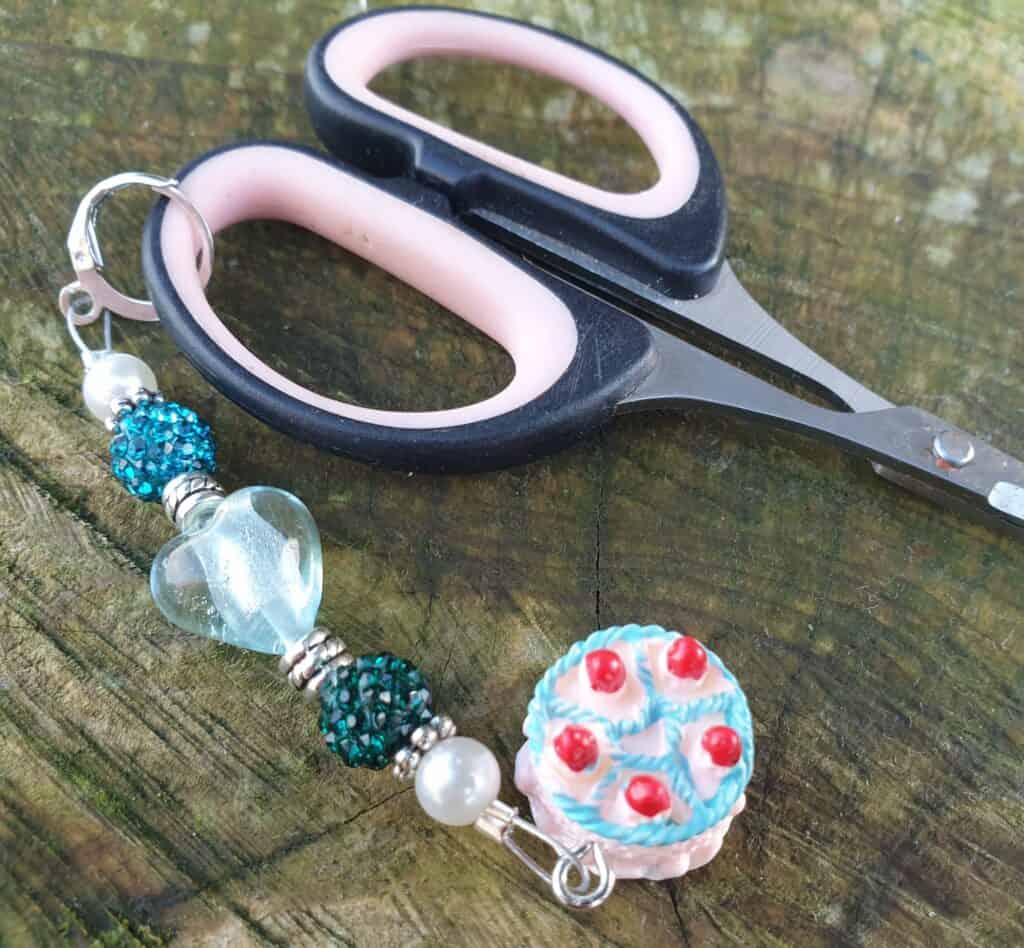
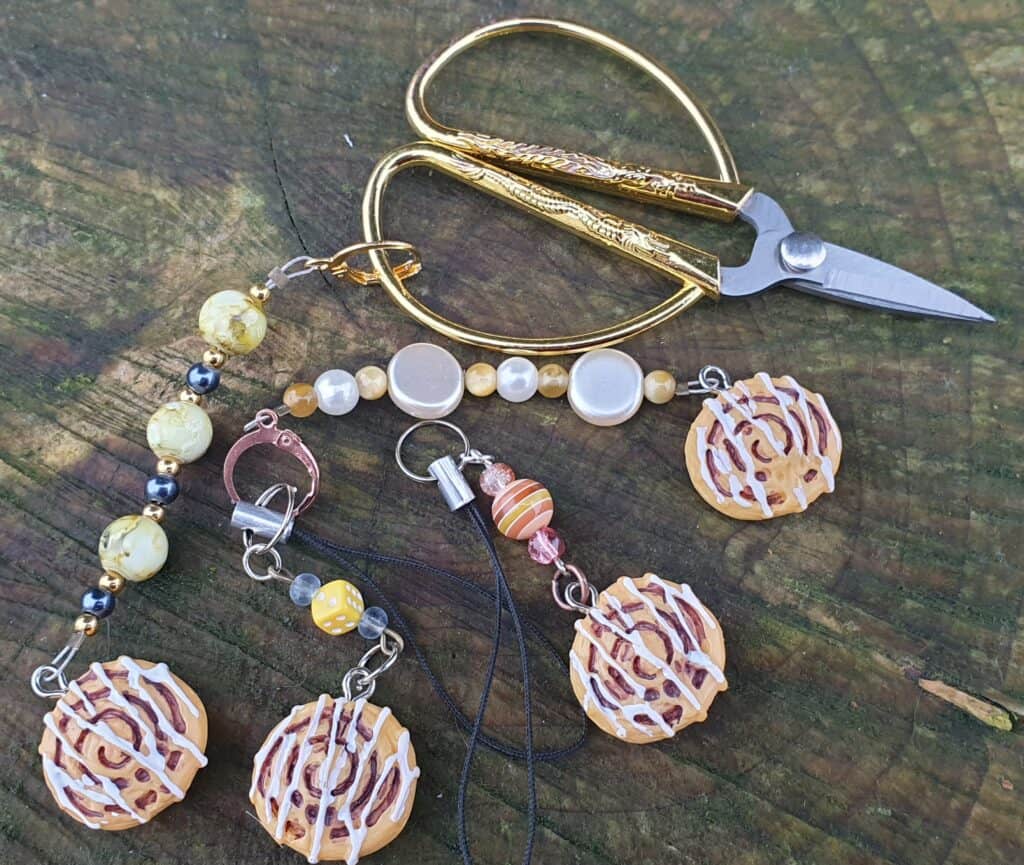
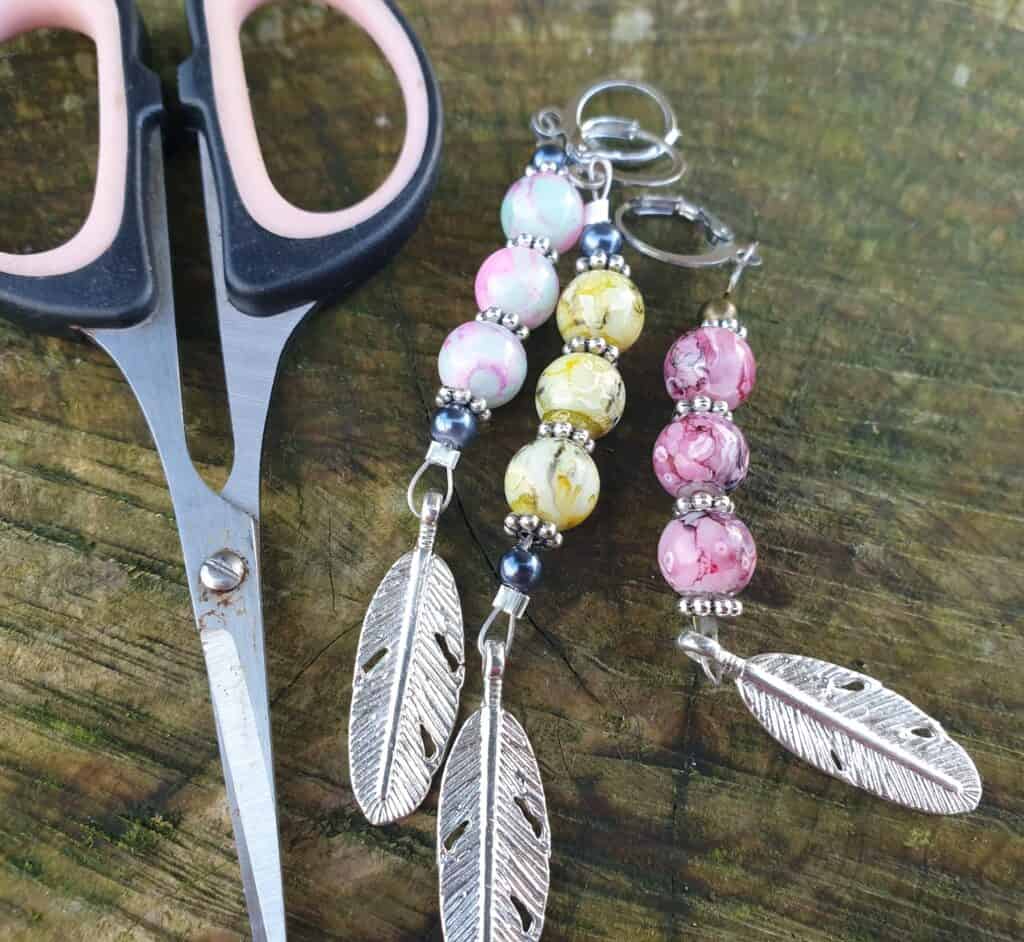
I love using small scissors when doing needlework. Lovely small scissors with an extra sharp and small blade. The small ones that are so easy to lose down the back of the sofa, right into the innards of the sofa. I have to confess that the other week I did my deep clean of the sofa where I sit and to my horrid, I found about 4 pairs of lost scissors, some I didn’t even realise I had misplaced! I try so hard to be good and keep them safe on my worktable beside the sofa, but … it is so much easier to just place them on the sofa seat beside me….
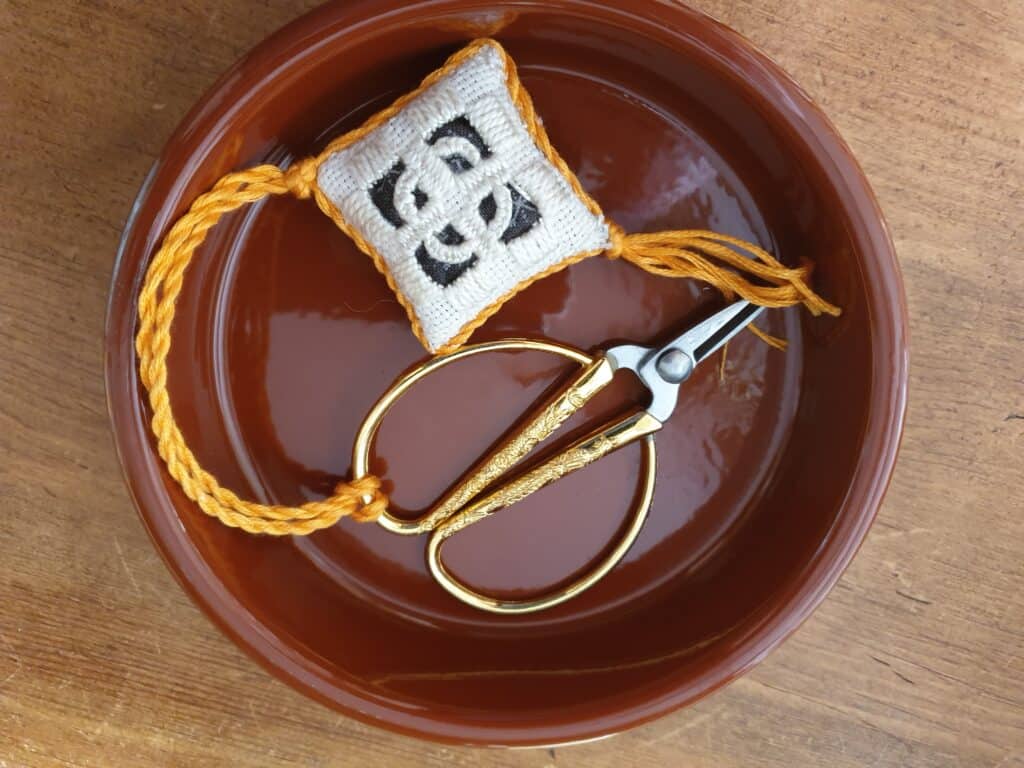
Our needlework ancestors had a lovely accessory to their scissors – scissor fobs. I had seen them years ago and wondered on how they would be useful …. However, a few years back I made one for a needlework course I was teaching. I have to say that once I had the fob on my scissors, I loved it and I rarely misplaced my scissors! – until the fob was taken off for some reason …. And then I misplaced the fob!
Another reason to have a scissor fob is so our scissors are easy to recognise. This is so true when we attend classes or retreats. I have lost count on the times I have ‘misplaced’ scissors at a class or gathering with other crafters …. It is second nature to borrow someone’s scissors as they are ‘on hand’ and it is just as easy to not pass them back straight afterwards. With a handmade fob attached to your scissors, they are now unique and not just your standard ‘blend into the crowd’ scissors. It is also a great way for family members to recognise that the scissors are for needlework and NOT to be used on paper!
With Alyssa coming home from tech those few months ago, asking about jewellery making and if I had done it before, it has revived a love for jewellery making without actually making jewellery.
I started into the progress and stitch markers and rediscovered my love of unique beads and charms and the satisfaction of creating unique lovely, yet practical items that can be used in crafting.
From those markers and counting chains I started to think on how the handmade jewellery items could be transported into my other craft loves …. Quilting and needlework …. I was searching for items that would make brilliant and unique gifts for the crafter and even for ourselves. There are times when we ALL need to treat ourselves to something pretty that doesn’t cost a fortune….
So the thread conditioner started …. And then the needle minders and creating a range of cute and different needle minders …. And now … the scissor fobs ….
I have created a variety of different styles of scissor fobs from the simple charm fobs to the more decorative beaded fobs and even ones that can have your initial added into the fob….
As with all of my handmade crafting notions, each one is unique and handmade with care using quality materials. Many of the items are limited edition and cannot be repeated, which I feel makes them even more special.
So why not have a look through and let me know what you think of the new range of accessories for Nifty Needles….
To provide the best experiences, we use technologies like cookies to store and/or access device information. Consenting to these technologies will allow us to process data such as browsing behaviour or unique IDs on this site. Not consenting or withdrawing consent, may adversely affect certain features and functions.
Functional
Always active
The technical storage or access is strictly necessary for the legitimate purpose of enabling the use of a specific service explicitly requested by the subscriber or user, or for the sole purpose of carrying out the transmission of a communication over an electronic communications network.
Preferences
The technical storage or access is necessary for the legitimate purpose of storing preferences that are not requested by the subscriber or user.
Statistics
The technical storage or access that is used exclusively for statistical purposes.The technical storage or access that is used exclusively for anonymous statistical purposes. Without a subpoena, voluntary compliance on the part of your Internet Service Provider, or additional records from a third party, information stored or retrieved for this purpose alone cannot usually be used to identify you.
Marketing
The technical storage or access is required to create user profiles to send advertising, or to track the user on a website or across several websites for similar marketing purposes.