Beginning Your Quilting Journey

Featured

I have spent a few days working on a beginners’ quilt pattern. This pattern is a quilting beginner’s workshop in a written pattern. Creating this has taken me quite a few days as I had to rewrite the pattern I used in the Introduction to Quilts Workshop. This is a workshop I have held in recent years.

With this pattern I wanted to include all the tips and techniques I would teach and show in a workshop. It proved to take far longer than I thought! Basically, what should have been a simple and straightforward task turned into a mammoth piece of work taking about three days.

While writing out the hints and techniques to help you create your first quilt, I thought back to when I created my first quilt, over 25 years ago! Well, actually, I probably started my first quilt long before that (I am showing my age now).

When I left school at 16 years, I went to work for a Fabric shop in New Zealand. It was a terrible place to work, the owner was awful, working conditions were just as bad and the pay even worse However, due to my sewing experience in dress making, it was a dream job. I was surrounded by all of this fabric. One of our jobs was to cut off the label printed on the fabric, at the start of the role. It was about a ten-inch strip across the width of the fabric and this rejected fabric was placed under the counter. The fabric was all cotton; There was no such thing as quilting fabric or Quilting Shops back then. Those cut off strips piled up, and one of the perks was that we could take them home. I think the owner let us do it as he thought the ink would not come off. But I soon found out that the ink disappeared once it had been through a wash in the machine. So, why am I telling this story? Well, these piles of fabric started my adventure into quilting.

I had an old American quilting magazine at home and I admired all the handmade quilts in it. So being creative and young I decided that it would be a really good idea to create a handmade quilt for my Glory Box (or Bottom drawer) so I would have something for my marriage bed. Let me assure you, I had no plans for getting married nor anyone in mind, but I guess a young girl always had her dreams.

So at the tender age of 16 years, I decided to hand sew the quilt made from hexagons. I had to prepare and cut out the paper hexagons, cut out the fabric hexagons, tack the fabric to the paper hexagons and then hand sew them all together. I had plans for a double bed quilt, where it would hang down to the floor. I had never quilted before, knew nothing about how to go about it and there was no such things as quilting classes or shops but, I had the desire to make a quilt, something that would be treasured.

Well, I can assure you, it never graced a double bed. In fact, it lay half completed in a box for many, many years. That box of tacked hexagons, half completed quilt top accompanied me for many, many years, through various house moves. Even, after I got married, the quilt was still unfinished.

Fast forward about twelve to fifteen years or so and I discovered my boxed-up hexagon quilt still unfinished in a box. I decided that it was well past time for the quilt to be finished instead of lying in a box for another twelve years. It didn’t become a double bed size quilt, more like a lap size. But it was finished. I think back now with sorrow, thinking I no longer have that quilt, it was tattered and never made it with me on my journey here to Northern Ireland. I wish I had treasured it more. But I still carry those memories with me.

It did inspire me to sew more quilts, but on the machine, not by hand sewing! I was into cross stitching and I had this book of mouse designs that I was wanting to stitch for Latisha. This was when she was a toddler, but I didn’t want to frame them. That began my first venture into quilts. I made simple blocks, then pieced them together and made it into a quilt. I was self-taught and quilt making was totally new for me. I didn’t have the tools needed, or the techniques and I didn’t even know what tools I needed. I began my quilting journey on my own, learning, using books borrowed from the library. There was no internet, google or YouTube back then. It was still the Dark ages.
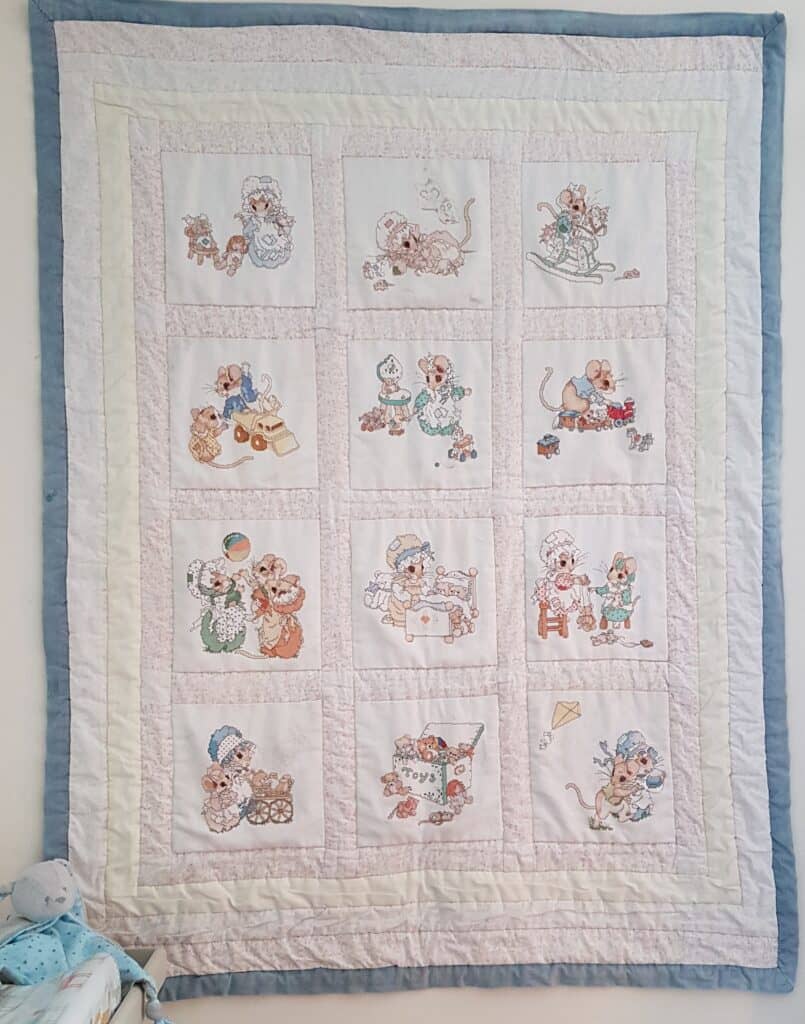
I learnt by my mistakes and went by my gut feeling. Latisha still has that quilt after 15+ years. It is a bit faded and worn but still very much a treasured item. It now graces the wall of Lucas’s bedroom.

From that very first quilt, I wanted to make more. There was still no quilt classes or quilting fabric shops. I think the nearest one to me was a seven-hour drive away. There was no online shopping either. So, all I had was the one fabric shop, you know the one that I worked in after I left school, and their selection was more for dressmaking rather than quilting fabric. So my only option was searching local Charity Shops and finding clothes that had very little seams and was 100% cotton. It is amazing what treasures you can find in those Charity Shops. These were also the places that I found old wool blankets (the type that we used to have on our beds, before duvets). They were usually cream and 100% wool. They made a brilliant option for the wadding, as there was nowhere to buy wadding. The upside was that the woollen blankets made the quilts warm in the winter (there was no such thing as central heating, I am really showing my age now).
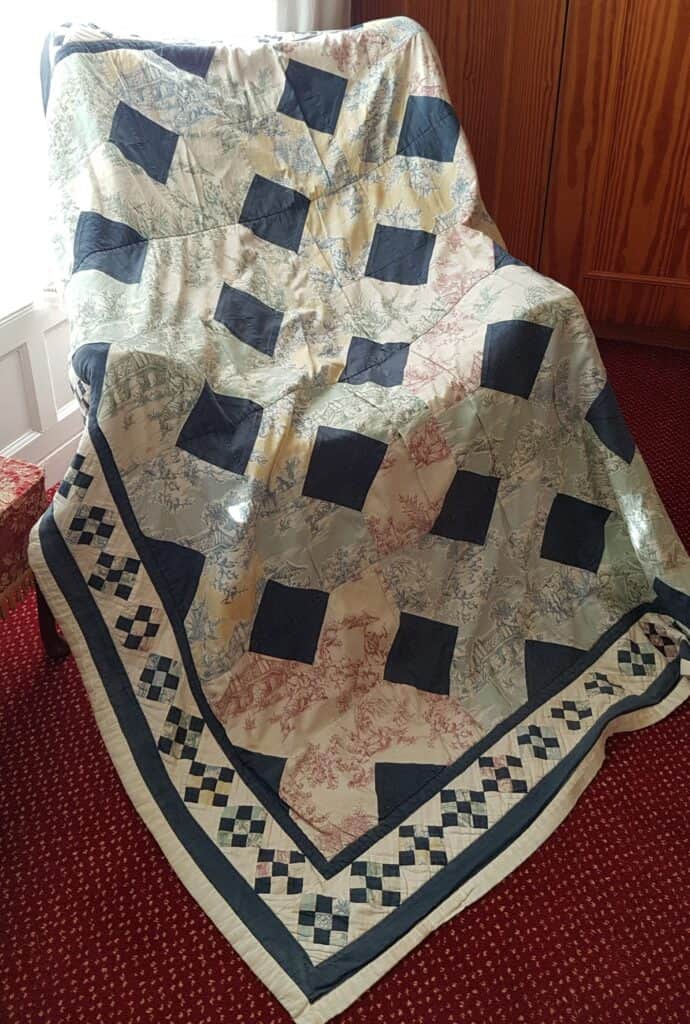

I remember finding a stash of lovely Japanese patterned cotton fabric in a charity shop. From this stash I made a large double bed size quilt for Latisha to take to university. It had a large woollen blanket for the wadding and kept her warm for many years at her various accommodations. She even brought the quilt over here when she moved over from New Zealand. That quilt bears many battle scars, but it is still doing its job.

While looking into quilting and the history of it, I found that during the pioneer days, quilts were made from old clothes and old blankets. I was just reliving those traditions without knowing it, making quilts from old clothes and blankets to give them new life. I have made quilts from curtain fabric, chintz and whatever I could find. I was self-taught and created quilts with what I had on hand. My skills would not have been the best and I made many mistakes. I read book after book to improve my skills. I didn’t know about ¼” foot, applique, machine piecing and other tips to improve my quilt making.

Going forward a few years and I am now in my mid to late thirty’s and I discovered that there was a quilting guild in the area. It was in a historic House and gardens in the village I grew up in and I had spent many years exploring the grounds. At one time I even joined their painting group when I was a teenager. Wanting to learn more about quilting, I nervously went to one of their meetings, eager to learn new skills from them. It would be easy, after all quilters and crafters are all friendly helpful people that would welcome me gladly. I still remember, very vividly, stepping into that room of strangers Twenty years ago. I very nervously asked if it was possible to join as I was interested in quilt making. I was confronted with questions. What is your experience? Have you done quilting before? I answered that I had been sewing since I was 9 years old, did dress making and recently started to make a few quilts.

“Oh, what do you use to make your quilts?” I told them about my finds at Charity shops and how I made my quilts.

“Heavens!! That is not quilting! Quilts are only made with the proper Quilting materials!”
There was no warm welcome, no instant friendships. Basically, I had broken all of the Quilt Police Rules! I left and vowed never to put myself in that position again, deflated because I chose to do quilting my own way. It was the start of the journey into learning how to do quilts MY way, teach myself and reach my goal of showing others how to sew and quilt.

I have learnt so much along the way of my journey and I can honestly say I am still learning. Quilting techniques and tools are constantly improving and I have found, that what I knew and did ten to twenty years ago is NOT what I do now. I look back at my first quilts, I have a slight shudder to myself when I look at my mistakes and lack of techniques. But this is all part of the process and I am proud of what I have achieved and how far I have come. I have learnt the tricks and techniques, but I will never say that I need to stop learning. Learning is always an ongoing process. I will always treasure those first quilts, the ones where I didn’t use a rotary cutter, mat and ruler – they just weren’t round back then, but I would never think of NOT using them now. Why go backwards in the journey of making quilts? They make it easier to get accurate cutting, so anything that makes it easier is the best.

So, after that journey back in time, I now come to the purpose of what I started in the beginning of this post. The rewriting of a pattern for your very first quilt creation, to begin your journey in quilt creating.

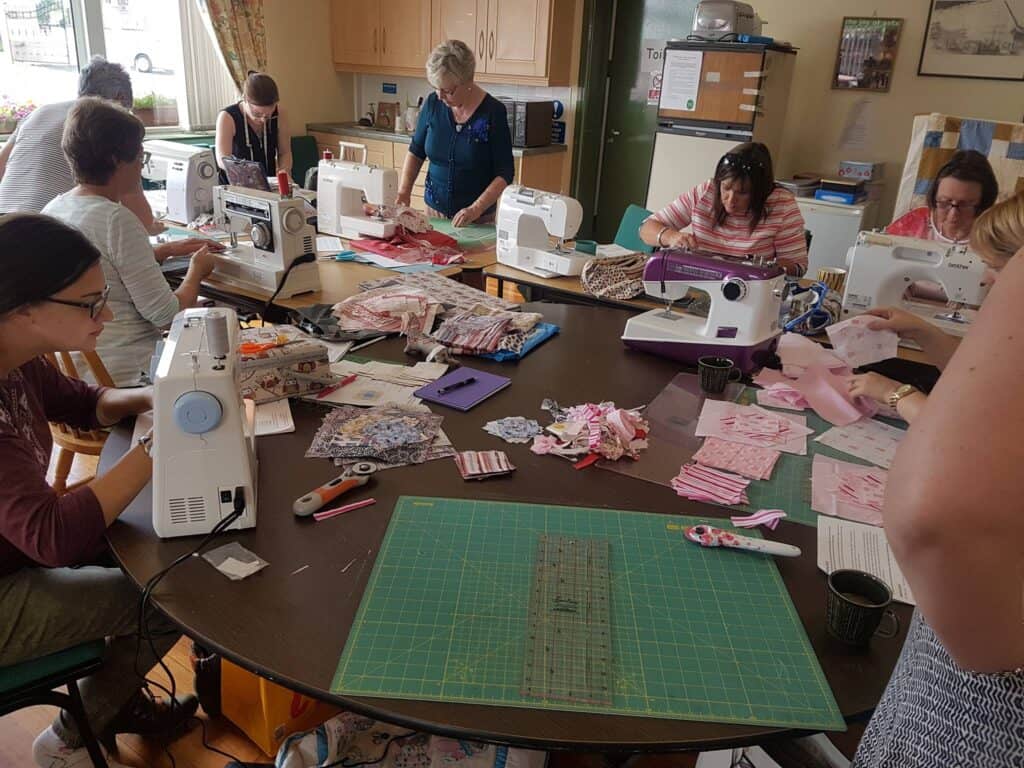
When I teach workshops, I like to share the tips and cheats that I have learnt to creating a quilt easier. The tips on how to correctly press your seams and why, how to pin and the importance of pinning so that you can ensure all seams and points meet up as they are meant to.

I learn things from experience, for instance, my first experiences in layering quilts and having disasters due to the three layers not working together, ending up with huge wrinkles when I do the quilting to hold the layers together. Not using the right tools or materials did not help either, so I have shared how I have overcome the issues, so you can enjoy the process of layering and quilting.
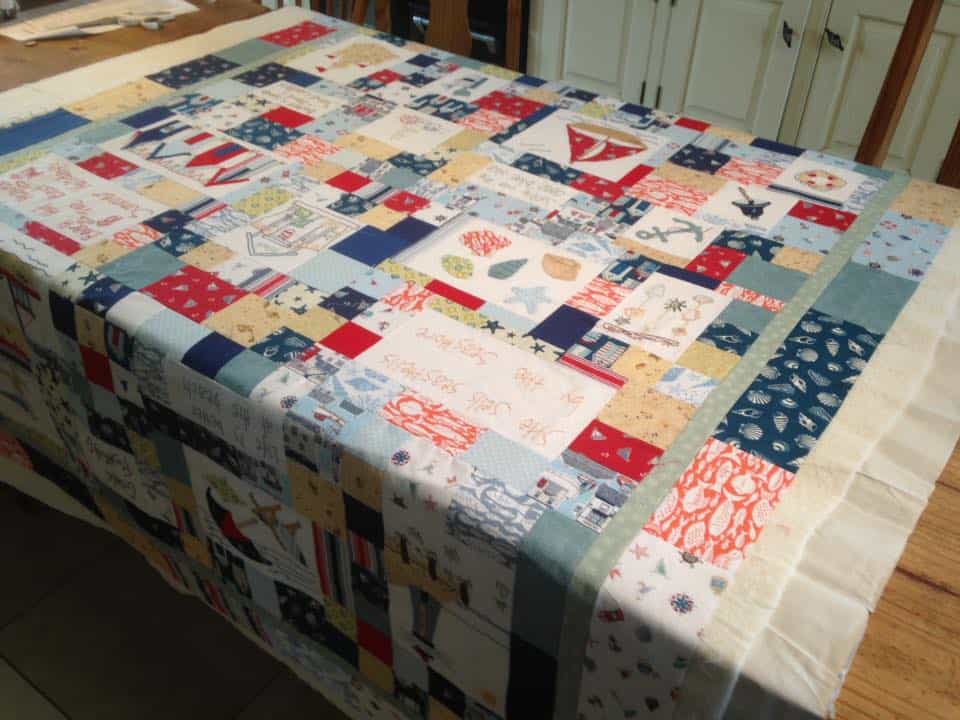
Basically, this tutorial pattern is like having me looking over your shoulder guiding you through making your first quilt. I usually get that from my students “I wish I could have you at home looking over my shoulder, telling me what to do.” So, if you have always wanted to make a quilt but have been putting it off due to not knowing how to go about it, having no classes to attend and just need the hints and tips to improve your quilting experience, then this tutorial pattern is a great place to start.
Valentines Day – Be Mine

Featured

Valentine’s Day generally goes unnoticed in my household.  This is due to it just being Alyssa and myself. However, going through my planner so I can plan designs and kits to important dates or celebrations I came upon Valentine’s day. Valentine’s day is not a celebration I have ever designed for, but I thought with the way 2020 went and with what we are facing similar this year, I thought we all need something positive and maybe a bit of romance to focus on. I think most (if not all of us) will be in a lockdown and will not be able to book that romantic getaway or dinner. Like most of last year’s celebrations, Valentine’s Day 2021, is going to be different.

So, while doing up my quarterly planner for 2021 my brain went off track, which isn’t unusual when I am sitting down to do admin and paperwork. I far prefer to be creative, so I started to ponder on what would be nice to do for Valentine’s Day, something that would not only last one day but be a message all year round and show how important relationships are.

As I started put some sketches onto paper, my thoughts went onto the true meaning of Valentine’s Day. I think we all know that it is the day when couples show each other their affection in one way or another, be it with flowers, card or a dinner out. Mostly it has become a pure commercial gain as, coming up to Valentine’s Day roses double in price, restaurants create special Valentines specials, at ‘special’ rates. But, when and how did Valentine’s Day come about?

It got me thinking, so I carried out some online research (while I should have been doing my quarterly planning for the business) and I came up with some interesting facts which I thought I would share with you.

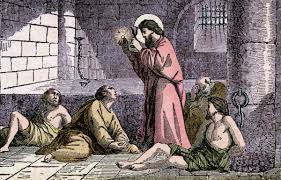
There are several legends to the origin of Valentine’s Day and to find out more, we need to go far back into history, right back to the 3rd century A.D. to ancient Rome when Emperor Claudius II ruled. Apparently, Claudius decided that single men made better soldiers so he outlawed marriage for young men. A priest, called Valentine, found the law to be unjust so he secretly continued to perform marriages. When Claudius discovered what Valentine was doing, he ordered that Valentine be put to death.

St Valentine History

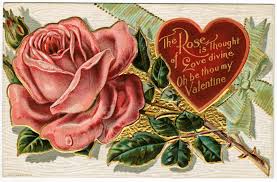
Another legend is that a bishop called Saint Valentine of Terni, was the true namesake and was also beheaded by Claudius II for helping Christians escape from prison. According to the legend, Valentine fell in love with his jailor’s daughter and before he was beheaded, he sent her a card signed “from your Valentine”. From this sad card came the phrase that is commonly used on Valentine cards today.

Old Valentine Card

Though we may never know exactly who was the true Valentine, these legends all portray a very heroic and romantic figure. By the middle ages, Valentine became one of the most important Saints to be worshipped. It later became a festival to celebrate the coming of spring which included fertility rites. In 1375, the English poet, Geoffrey Chaucer became the first to record St Valentine’s Day as a day of romantic celebration with his poem ‘Parliament of Foules’. In the 1400s, it became popular to send written Valentine’s cards. King Henry VIII was known to send them to his wives.

By the 17th and 18th century it was common to celebrate St Valentine’s with handwritten letters and cards and in 1900, cards started to be commercially printed and sold. However today, it has also become very commercial with sending cards, flowers, presents or having a romantic dinner.

So, pondering on suitable designs, I knew that I wanted something that was a symbol of lasting love but also gave a simple message of love and affection. I thought on how to display the design. I wasn’t keen to make it a card format as I felt that would make it look like a temporary project. I wanted it to be a bit different and to create an everlasting expression of love and admiration. Why should our display of affection be limited to just one day?

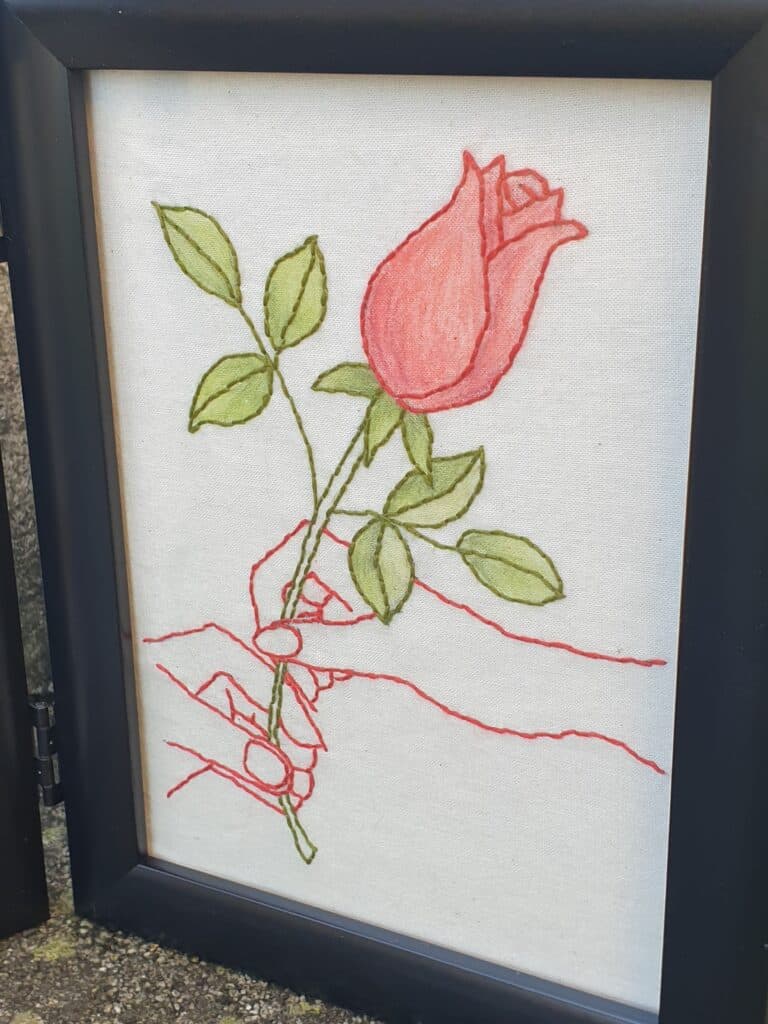
Single Rose

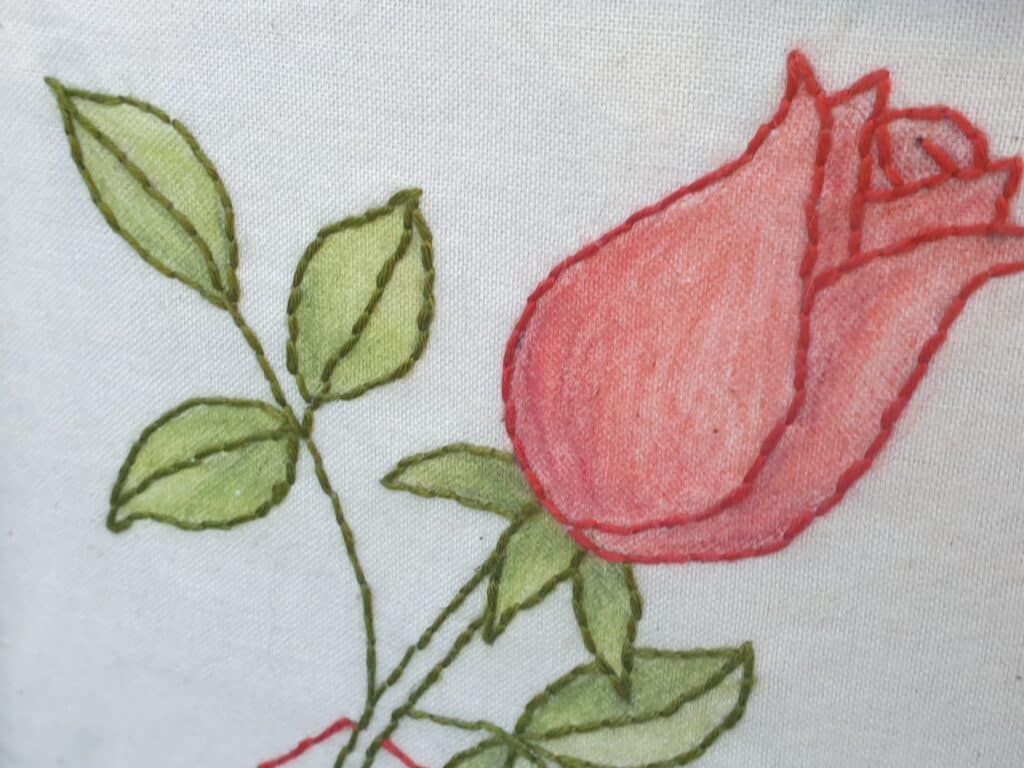
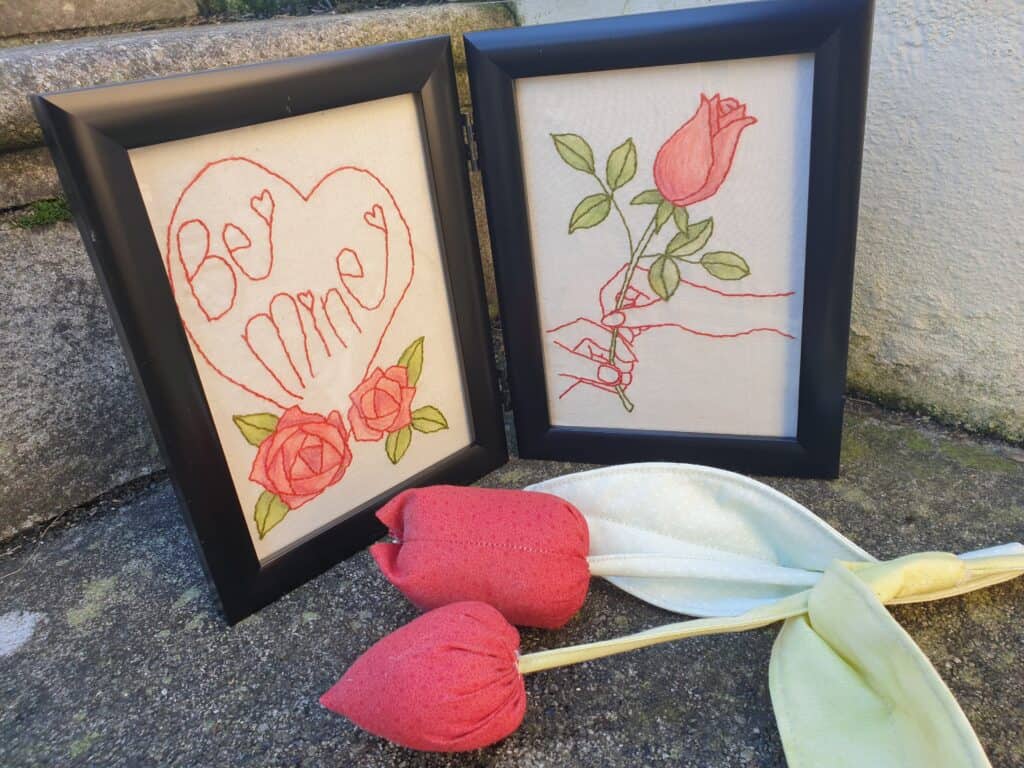
When we think of Valentines and love, we think of the colour red with red hearts and red roses. I felt that those were important to be included in the design. I also felt that the design would be more striking done in a simple Back Stitch using a red thread. It really couldn’t be any other colour. The symbol of love is a red rose, and what is more appropriate to show affection is the giving of a red rose to another, hence the two hands holding the red rose. I wanted the roses to really stand out by colouring them red, which then brought on the next process – do I paint the leaves green or leave them uncoloured. I decided to colour them green, which brought out another problem. I had planned on stitching the designs in red thread completely, but I felt that the red thread would look out of place if stitched around the green leaves. So, I stitched the leaves and stalk green and the rest of the design in red. I didn’t want the hands coloured, as I wanted the rose to be the focal point in the design. At times it is hard to know exactly what the design will look like when finished. Especially when you have a design or look in your head. So, I went with my gut instinct and just did it. I wanted the two designs to be in a twin frame so that it could be displayed indefinitely and became a permanent statement of love and affection. I think I actually made the right choice in bringing in the green thread into the design, it really makes the roses stand out and that is what I wanted.

Close Up Rose

This romantic design is not just limited to one day, it can easily be left out on display all year. This design would also make a lovely personal wedding gift. You could easily include and stitch the wedding date and their names. This would be done simply by leaving out ‘Be mine’ in the heart and writing or stitching the names of the couple and the date of the wedding under the hand in the bottom right-hand space. This design really leads to quite a few possibilities.

Be Mine

As a celebration of Valentine’s Day, I am offering the PDF pattern as a free download and the printed pattern will be on special for £4.00 from the website till the end of February. I am also offering kits for you to stitch you very own Valentine’s message. This kit will contain the printed pattern, threads, needle and calico which will have the design traced on and the roses coloured in ready for you to start stitching start away.

I hope you all have a lovely Valentine’s Day; in whatever way you choose to celebration or acknowledge it.

From your Valentine x

Reflecting Back On 2020

Featured

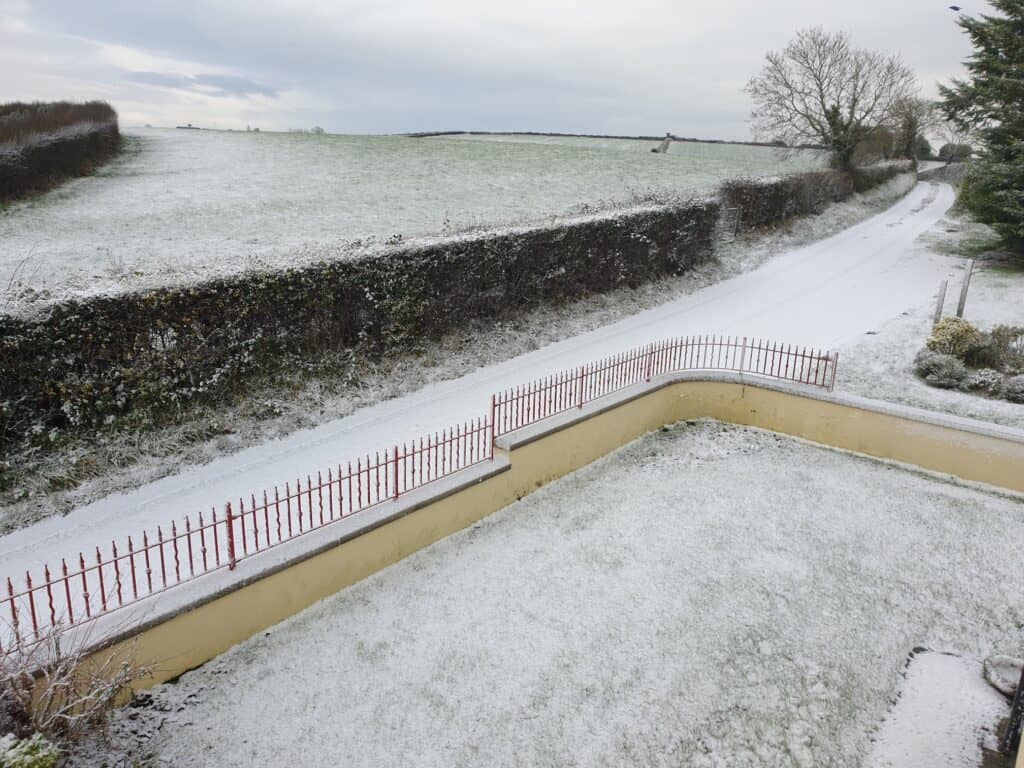
I woke up this morning on New Year’s Eve to a white 31st of December. It is presenting a very cold and somewhat snowy end to 2020. It is very quiet here, and nothing is stirring. It is so magical to be here all cosy at home, looking out on a white scenery. I guess living in the countryside, up a very narrow and somewhat steep lane has its advantages or disadvantages, depending on what way you look at it. It means that we are snowed in and unable to leave the house as the lane is too dangerous to drive on. So, the prospect of being inside is actually a nice way to see 2020 end, especially when we have no need to be out and it is all cosy inside, and I have enough food, drink and crafts to keep me busy.

Snow on the lane

With the prospect of being unable to go anywhere due to the snow on the lane, it seemed appropriate for me to sit at the computer to write my last blog post for 2020 and reflect back on how this year has been and look forward to a hopefully better 2021.

I am sure that no one will forget 2020. It is a year that will be placed in future history books for all of the wrong reasons. The year when the world was struck by a deadly virus and how everyone was affected in one way or another. The year when our normal every day activities stopped and we were presented with new everyday restrictions and guidelines. The year when small businesses were closed down. The year we were stopped from gathering together for weddings, funerals, family celebrations and entertainment. I know that many thought that we would be back to ‘normal’ by September and the virus would be gone, however, here I am, on New Year’s Eve and we are again facing a national lockdown in the hope that the numbers of those that have contacted COVID will decrease. Local businesses are again forced to closed their doors and lose much needed income and we wonder if it will never end.

I know that as a small business myself, 2020 has been hard. I reflect back to this time last year when everyone was looking forward to a bright 2020. For me, the business was getting stronger and I was enjoying hosting workshops, classes and retreats, but also getting asked more increasingly to facilitate workshops for community and craft groups around Northern Ireland. My diary for 2020 was getting full with workshops for outside groups, some new ones and some of my regular groups. I could definitely say, 2020 was looking good and I was looking forward to planning and designing products for these community workshops. So it is hard to think that just in a flash, all my planned workshops throughout 2020 was postponed or cancelled.

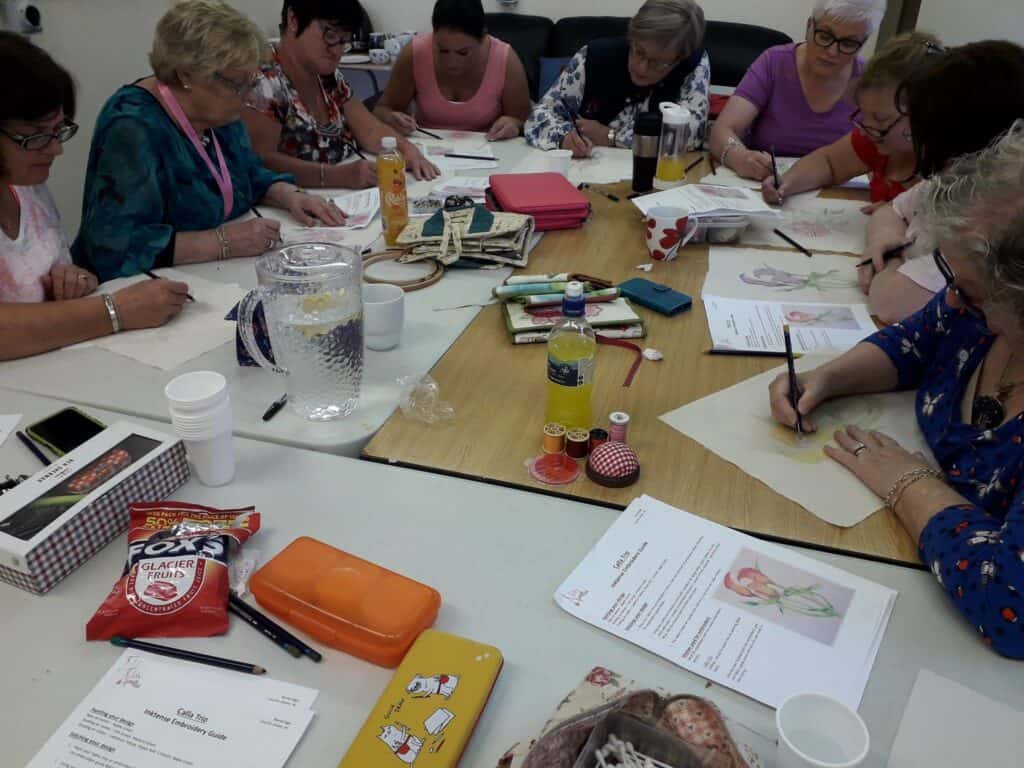
Inktense Class
Retreat

Reflecting back over the past 9 months, it has been hard to stay positive all the times, especially when you need to keep positive for your children and help them understand exactly what is happening in the world. Alyssa and I coped, we learnt to talk to each other, let each other know how we are feeling and do things together. Those that know Alyssa will know that she is quiet and doesn’t talk much at all. Thinking on it as I write, I can look back on the past 9 months with such positive thoughts. It has been a period of strong bonding between the two of us. 2020 has been the year that Alyssa has opened up to me, actually hugs me, holds a conversation and we have grown together. So, that is one major positive that I am taking from 2020, forward into 2021. It has been a time to strengthen family bonds and relationships.

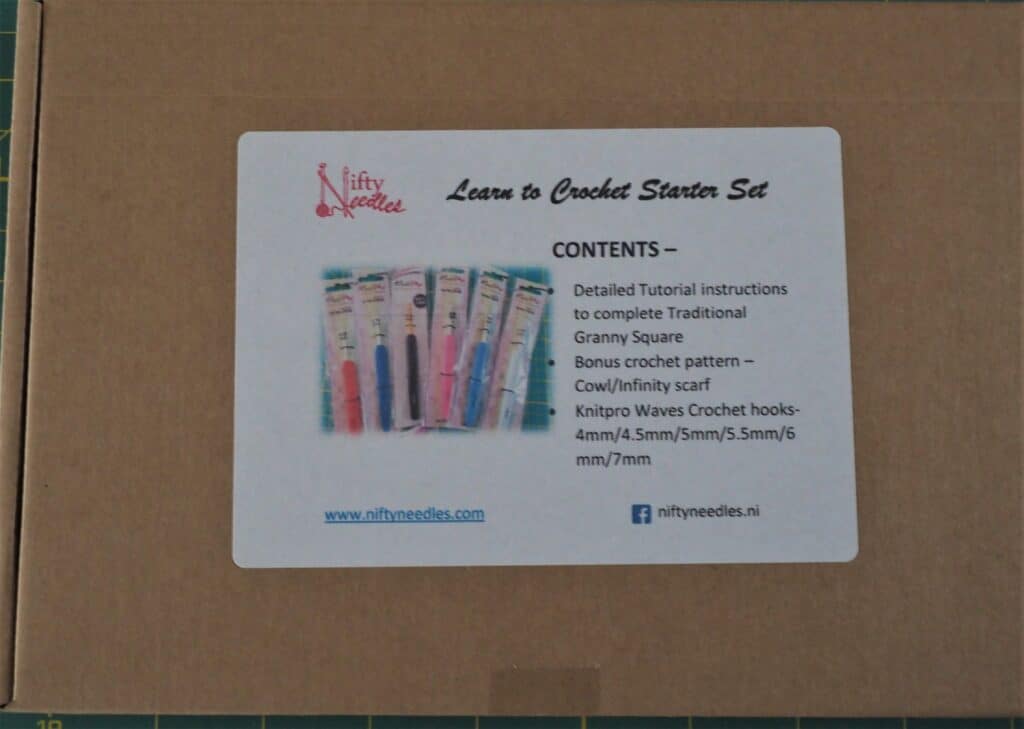
If someone asked me, what did you achieve in 2020 during lockdown and your business not being able to function normally? How would I respond? Truthfully, at the start of the first lockdown in March, I thought, ‘I can finally spend the time doing all my own personal unfinished and yet to be started personal projects. Did that happen? No! I started to think out of the box and thought this was a great time to clear out the log cabin, and actually sell the yarn that was just being stored up there. Our initial thought was to clear out the cabin and turn it into a personal craft retreat, somewhere that Alyssa and I could go to relax, craft and enjoy some time out. So, that is what we did, sorted through the yarn and sold it off through Facebook, which was a great success. When that was gone, I got thinking on other ideas. And I was asked about doing Learn to crochet kits and tutorials. It was a challenge and I loved doing it. I guess that was the start of the kits. We all needed something to do and we had the time to learn new crafts or continue with our favourite crafts.

Still looking back I think that was the birth of so many designs and creating kits. I started to look at past workshops I had held and how those projects could be put together as kits. It was a fun challenge and something that Alyssa and I could do together as she was off tech with no coursework, and in helping me she was able to keep some sort of order and routine in what was a strange year. Once we had kitted up existing projects, we got to thinking on new ones. Looking back on what I designed during 2020, is wonderful. There was the sewing trio set – Floral Garland, Redwork and whitework designs. I also compiled up a couple more ‘Learn to’ kits – Tunisian crochet and top-down knitting. The months of lockdown flew by and I did not get to work on any of my personal projects.

Learn to crochet kit

2020 presented some unknown challenges for Nifty Needles. With no workshops, classes or retreats being allowed, it meant that I was unable to fulfil the role that made Nifty Needles. I had an online website selling my PDF patterns and designs, but it really wasn’t doing anything positive for Nifty Needles. I have to be thankful for the virus and government restrictions, as I may not have achieved what I have done in 2020 if the world had not dramatically changed. Without the Saturday zoom sessions with my ‘crafting’ buddies and spending a relaxed afternoon crafting, chatting, laughing, drinking and putting the world to rights, the new online shop and website may never have been created. From those zoom sessions, came the idea and birth of an online shop and a new improved website. Months of hard work followed by everyone in the new ‘Nifty Needles technical and management team. Research, compiling a list of stock, patterns, deciding on categories and what goes where, taking photos, inputting the products onto the website and writing up descriptions for everything to get the online website that we now have. Sometimes, sharing your dreams and aspirations out loud to friends, and with support, you can achieve your dreams.

Reflecting back now, I know that this would not have been possible if we did not have COVID or restrictions. So I am thankful for 2020 and how it made this possible. It has been a strange journey this year and it has been one of personal and professional changes, reflection on what is really important and how the life and world can change in an instance. I have learnt new computer skills, the value of true friendship and family bonds, and how precious friendship and family is. I am grateful for the things I have and it does not need to be a lot, just enough to keep you safe, warm, healthy and happy with what you have.

So, with the dawn of a new year upon us, for me, it is a time to reflect on the positive things that 2020 brought us, take on board the negative things and learn from them on how we can move on from 2020 and look forward to a brighter and more positive 2021. We are moving into the new year with a lockdown and still not able to socialise, gather with friends and family but those bonds will not weaken and together, socially distanced, we can see in the new year with a positive outlook for a better future.

Hopefully it will not be too long before we can gather together for workshops and retreats so we can craft together, socialise, share laughter, skills and good food. This is what I have missed in 2020 and it is hard not to be able to organise something where we can come together. However, I am remaining positive and hope that we can do what we most like to do in the not too distant future.

Finally, I want to thank every one of you for being here with me (virtually) throughout 2020, supporting and encouraging me. Hopefully, I have helped in some way to keep you all sane in 2020 with crafting and my designs and kits. We have all been together, sharing our thoughts, our creative projects and positivity throughout 2020.

Last Minute Xmas Rush

Featured

It is less than two weeks before Christmas!! It is so hard to believe that it has crept up so quickly. With the way life is at the moment and with not going out and socialising (or shopping) it has been hard to keep up with time.

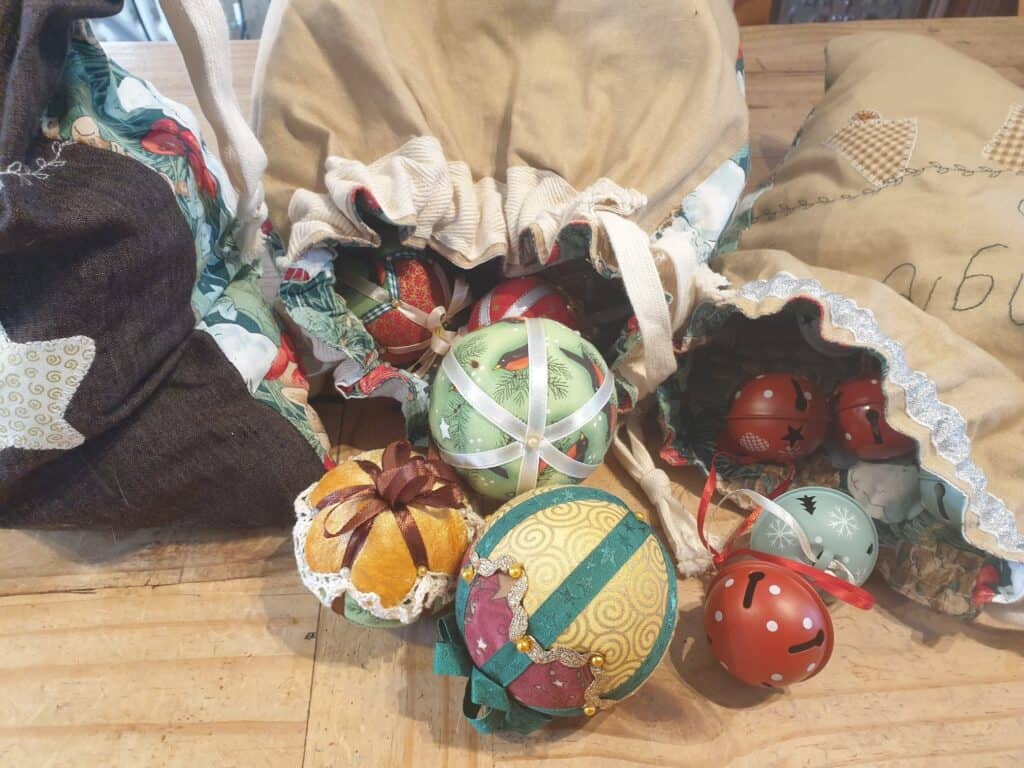
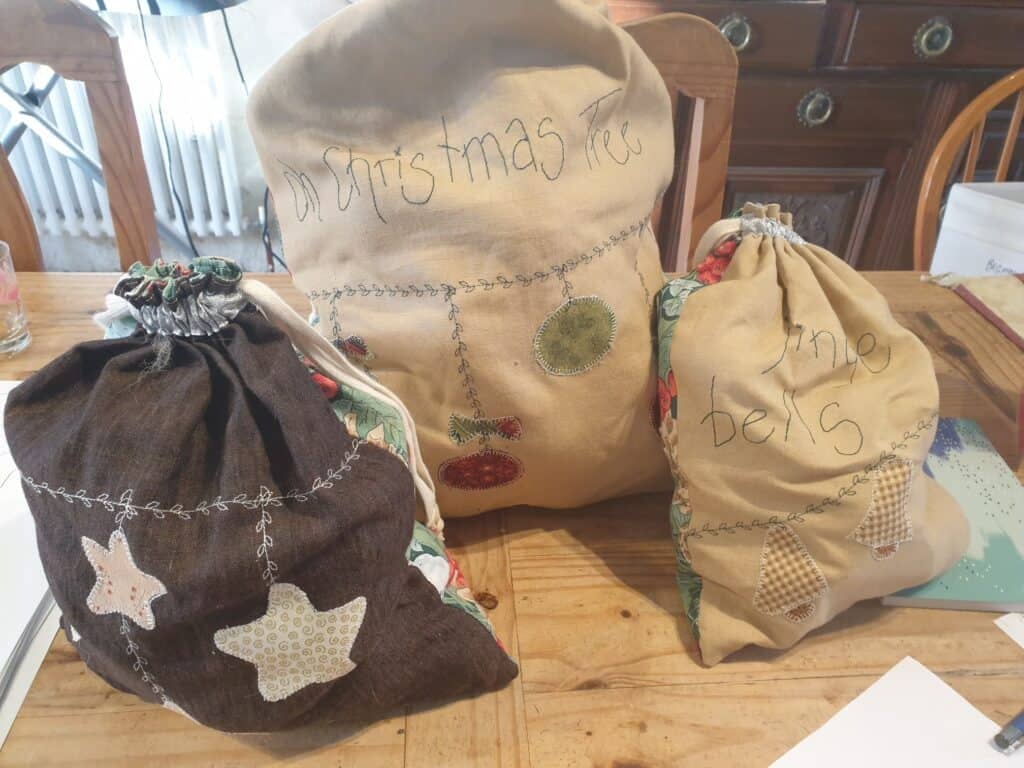
I have to admit that my heart really isn’t into Christmas this year. There will just be the two of us at home this year, so I think that aside from the ‘essential’ presents, it will be a small and quiet Christmas. I am focusing more on handmade gifts and getting something that is asked for. I have a few presents that need to be made, drawstring bags for storing tree decorations being one. I made these bags around ten years ago to store my tree decorations in and they have been great for keeping all the decorations in one place. My daughter asked me to make her some for Christmas, so I have taken out my original bags and drawn up new improved designs for the bags. I also thought they would make a great pattern so will be taking notes and photos while making the three bags and get it into pattern form in the New year. I also planned on sewing up an appliqued play mat for my grandson as well as a panelled duvet cover and pillow cases for Alyssa. I definitely think that I need to start having some days at the sewing machine.

As I am writing this, I am thinking back on past Christmases. It is the time when we were busy with Christmas themed workshops and enjoying the workshops for the treats, laughter and gathering together to share in a common love, crafting and learning new skills. It is hard not having that this Christmas, not being together and crafting. It was a time that we could all relax, have some fun and create in the middle of such a hectic period with the run up to Christmas.

For many of us, it will be a very different Christmas. We may not have the numbers gathering around on Christmas Day for the meal and celebrations, but hopefully, we can enjoy the day regardless of the restrictions and keep safe. I think it will be a quiet day for many of us, but hopefully, we can enjoy the day in whatever way we have planned.

This year has been different for small businesses and having to close during the run up to Christmas has been especially difficult for many businesses and shops. It is usually the time when the local businesses do well. People would be out buying their Christmas presents locally and supporting our local businesses and shops. It has now become the norm to buy everything online as we are not able to get into the shops in one way or another. Many of the local shops have had to look at other ways to bring in the income to keep themselves going and riding out the storm that COVID and the government restrictions have caused. We had to look at creating a website where I could sell online and if we hadn’t of done this, then we would not have been able to keep going and ride out this storm. Being able to offer an online service has been great for us and I want to thank everyone that has supported us and been with us as we have expanded and created new products. It has certainly kept us busy over the last nine months.

In mentioning the website, did you know that we offer gift vouchers? Such a great Christmas gift for the person who loves to craft and you are unsure on what to buy for them. With our gift cards, you are able to spend the money on anything in the online shop. You don’t need to spend your voucher all in one go either, the website keeps track of your balance so you can come back as often as you like.

Gift Card

We are still posting out for Christmas, so if you are looking for something to gift, then have a look at what we have to offer. Our craft kits are very popular and make great presents to give, either as a kit or as a finished item. We have some lovely Christmas themed needlework kits that would be lovely to stitch over the Christmas period and to display year after year.

Alyssa has her birthday 3 days before Christmas, which has always been a strange time to celebrate her birthday and we always kept her birthday and Christmas separate. We had made the tradition of going out for her birthday meal and it was always a lovely way to relax before Christmas and enjoy abit of celebration and a delicious meal out. I know that this year, we will not be going out as an extended family to celebrate her birthday with a meal out. It had become a tradition to go to Cosmos Restaurant in Victoria Square, Belfast, which was lovely as we got to see the wonderful Christmas display that Victoria Square always put on. The atmosphere was incredible and so festive with late night shoppers and meal goers. It certainly gave everything a festive buzz and a great start for our Christmas celebrations as a family.  It will definitely be a meal out when everything is safe to do so. It is a shame as she turns eighteen this year which marks a special milestone. It is so hard to believe that she is eighteen years old! We will be doing something special at home together.

The weather is certainly dropping and looking more like winter weather. We woke up this morning to a heavy frost and thick mist. The frost just doesn’t seem to lift at all during the day and the temperatures stay near zero. It is the time to stay warm inside and do some crafting. I am finding it hard to get going in the mornings.

It is also around the time that I start to think about knitting winter woollies, jumpers, mitts and shawls. I enjoy knitting from wool that I have spun up on the spinning wheel. Actually, in the past week, I have been spending a few hours each day at the spinning wheel. I find it so relaxing and therapeutic. I have built up a small pile of handspun yarn, all hand dyed and ready to be made into that special lacy shawls or snood, a pair of mitts for the cold days that are ahead of us.

I am planning on putting up some skeins of the handspun yarn which are ideal for knitting into shawls and mitts for the freezing days. A special, one off skein of beautifully dyed natural fibre would make an ideal Christmas present for the person that knits or crochets. They can be assured that the wool they use to make a shawl or mitts is completed unique and one of a kind. There really isn’t anything more special than knowing you have made something and know that it is the only one out there. Being hand dyed and hand spun means that it is not mass-produced. So, do keep an eye out.

If you are still looking for those last-minute Christmas gifts, then please remember to support the small local businesses. Your purchases mean so much to us. We actually do a wee happy dance every time we get a sale. Finally, I want to wish everyone a safe and relaxing Christmas and I hope you all get to enjoy the day, in whatever way you are spending it.

Whitework Christmas Lights

Featured

Contents

Background

With the launch of my latest kit design, I thought I would write about it and some of the background. If you have been following my blogs, I volunteered to write this without any prompting from the team.

Early last year, a hen party approached me to do a small workshop on Whitework.  This workshop was my first time doing a craft workshop for a group of ladies at a hen party. They wanted a small craft session and had asked me to design a suitable Whitework design for the Bride to be and then show everybody how to do the needlework. This was a fun task, coming up with a suitable design with the guidelines being – the Bride to be loved ‘folksy’ designs and to keep in line with a wedding.

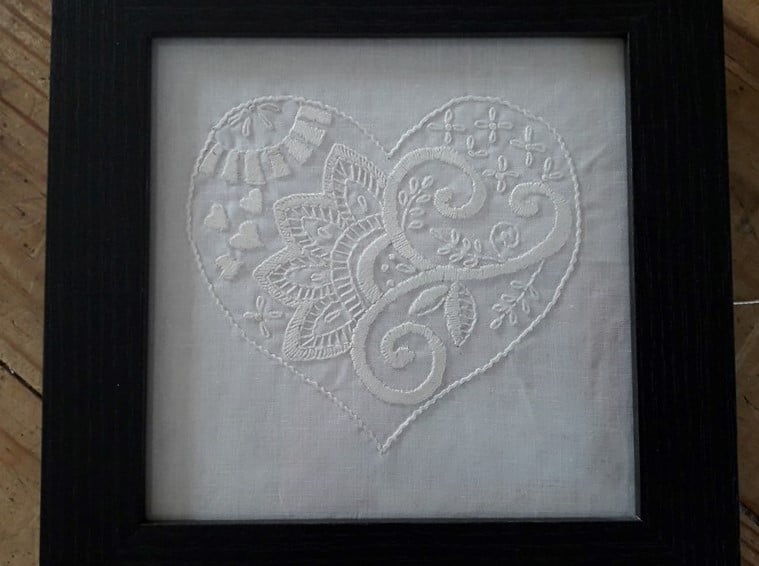
So, the design that came together for that workshop was my “Floral Heart” design. I did not think that when I designed it for the hen party group it would have proved as popular as it has this year. With lockdown and not being able to hold workshops, I developed kits which enabled everyone to try out new crafts at home. The Floral Heart continues to be one of the most popular needlework kits.

Later the same year I was asked to facilitate a six-week course covering Traditional Needlework. This got me thinking about the different methods of needlework and the history of each one. It was an interesting project and even though I had done lots of needlework in the past, it was great to get more in-depth with each one and the history of each craft.

Whitework was one of the crafts that I was teaching and it is such an elegant embroidery. It is funny how there are different names for the different types of needlework and yet they use the same stitches at times. Redwork uses the same stitches (at times) and yet it is different from Whitework.

The Origin of Whitework

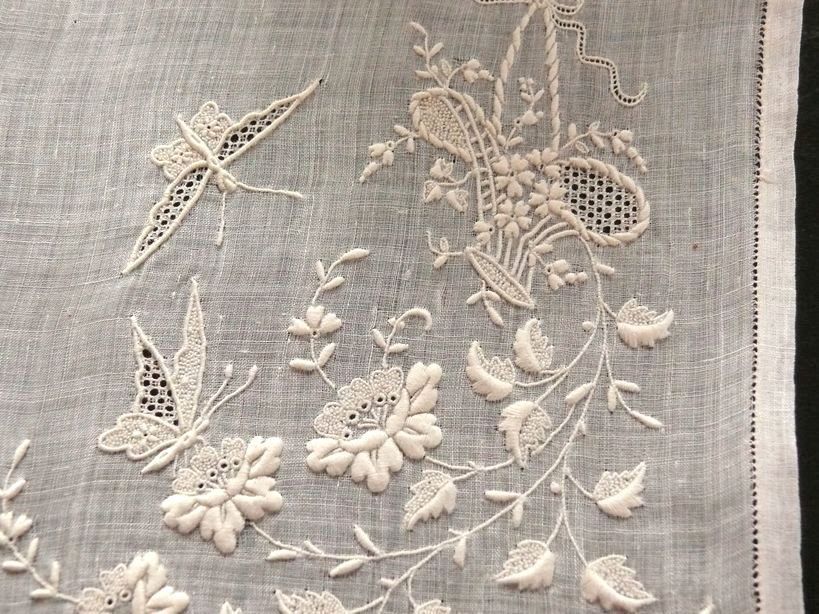
Whitework embroidery originated in India and China, then became popular in the West during the 15th century. It refers to any embroidery technique in which the stitching is the same colour as the foundation fabric. Whitework was traditionally worked with white thread on white fabric and used for church linens, underwear, bridal and christening wear. It is also the forerunner to the fabric Broderie Anglaise which is a whitework needlework technique consisting of embroidery, cutwork and needle lace. I am sure many of us remember wearing dresses or shirts made from Broderie Anglaise.

It seems that many countries or regions have their own form of Whitework. Ayrshire work, a form of Whitework used mostly for christening gowns was developed in Scotland during the 19th century. Ireland also has their own form of Whitework which is known as Mountmellick and has quite a distinctive finish to the Whitework as it had a crocheted edge to the work. There is also drawn thread work, pulled thread work, Hardanger, just to name a few, which are all really connected back to Whitework. So really Whitework covers such a range of different needlework techniques.

Various techniques were employed to make the stitches stand out against the white background. The type of thread that is used to help give it the look, is a Perle cotton or Coton a border. This thread tends to be thicker than 6-stranded embroidery cotton and has a matt finish which sets off the white embroidery against the white fabric.

Vintage Whitework
Vintage Whitework

Whitework Designs

With teaching the Whitework to groups, I designed a few simple designs which proved to be a great success. With lockdown this year and not being able to conduct workshops, I decided to release kits and the two whitework designs that I had taught previously, proved to be very popular as kits. It is great to see how popular this needlework is and it got me thinking of how elegant Whitework would be with a Christmas theme. It was also due to the fact that I had been asked during the year to teach a Christmas whitework class during November. I think we were all hoping that lockdown would be over and workshops could resume as before. Unfortunately, that workshop was cancelled due to restrictions being in place. However, I was able to teach it to another group which was great to be able to do. The class stitched one of the designs and thoroughly enjoyed learning the techniques.

After that workshop, I came home and decided that the design would be lovely in a free-standing frame and have two different designs. Which is what I did, I wrote the pattern and decided on the stitches to be used and stitched the two designs up in the white cotton and added a bit of sparkle in the design by using silver thread to stitch the stars. It certainly adds that bit of elegance into a simple needlework design and I will be displaying it with pride over the Christmas period.

Christmas Kits

So, in time for Christmas, I am releasing the kits to make these two whitework designs. They would make great presents to give to someone, or even for yourself so you can make the designs to display in your home over Christmas. The kits contain everything you need to stitch the two designs. I also have them available in pattern form. The anchor Coton a Broder and metallic silver thread is also available online, along with the freestanding duo black picture frame to complete your two whitework designs.

If you enjoy needlework and hand stitch, I know you will enjoy stitching these two whitework Christmas Lights.

The Hen Party Block of the Month (BOM)

Featured

The Launch

So, with the launch of a new Block of the Month quilt design, I thought it would be an opportunity to attempt another blog post.  Hopefully, I will be more comfortable with writing the posts, the more posts I do. I have no problems writing up posts on my Facebook page, but somehow, when my team encourage me to write, I shake internally and panic sets over me; All I am thinking is, how on earth do I write a post that is interesting and relevant? 

So, this new BOM that is launching is a quilt that I designed and worked on a couple of years ago, but I never got round to launching due to several factors. But I can now finally sit down and get it started or finished? I guess I am also a bit nervous about releasing it. It is a bit like releasing apart of myself out into the world and hoping that it will be able to cope on its own in the big world. But enough sentiment for now. 

Designing the Quilt

I loved designing this quilt, and there is quite a story behind this particular quilt.

I have come to know hens on a different level since my daughter started keeping chickens. Her love for them (and the love they have for her) is so apparent, and I have come to respect them all for their quirky personalities. Each hen is so different you could almost swear that they understand everything you say to them. We have a couple of hens that insist on laying their eggs in a kitchen cupboard, which has to have a blanket inside. Others love to check out the grocery bags when you come back from the supermarket to see if you bought any treats for them. We have hand-reared chicks when the mother hen hasn’t been able to cope, and we have also helped chicks on their journey out of an egg. We have nursed ill hens back to life. There is also a sad part of keeping hens. Alyssa has comforted them on their final journey to the rainbow bridge and talked to them while they pass, so they know they are loved and not alone in their final journey. Watching her gift with the hens is amazing. Our life with chickens is certainly not dull! You really get to understand where the saying ‘Henpecked’ and ‘Pecking order’ come from.

Inktense

This quilt began when I found the love of colouring with Inktense pencils and incorporating that with embroidery. (I also had a charm pack that I didn’t know what to do with) These coloured and stitched blocks are a tribune to our lovely quirky hens and what they would be like if they had their own Hen Party. A Hen Party could also be taken for the party that a bride has before her wedding, so with a twist and a bit of quirky hen humour, this quilt is in honour of how hens would have their own hen party.

Quilt Design

The quilt is in seven monthly patterns and will be released around the middle of each month. The first pattern gives you the instructions on how to make the hourglass blocks that complete the quilt in the final pattern, so you can work away on these blocks at your own pace. Each month a new block will be released with the full-size template for each coloured block. Don’t worry if you haven’t done the colouring technique before, I have given detailed instructions for working with Inktense pencils and the list of colours that I have used for each block. It is more about having fun colouring in your own hen blocks.

So, Month One – Gossiping, is now available in our online shop for both the printed or PDF pattern. I hope you enjoy making it as much as I enjoyed designing it.

Sheepskin Slippers

Featured

Many of you know that I moved here to Northern Ireland from New Zealand. I spent most of my life in New Zealand, and my children were born in New Zealand. We all see Northern Ireland as our home and love it here. However, there are a few things that I miss about New Zealand, that you can’t get here in Northern Ireland.

I miss Pineapple Lumps (sweets, but kiwis call them lollies), Lemon & Paeroa (a lovely fizzy drink that is unique). Onion dip (made from a packet of dried onion soup and a tin of reduced cream) which you have with potato chips (crisps), Milo (a hot chocolate drink) and amazing marshmallow centred chocolate covered Easter Eggs, Oh, and not forgetting the Chocolate Fish (pink marshmallow cover in chocolate, shaped like a fish). My taste buds are going into overdrive as I am writing this. Thankfully, a few years ago, I discovered a London based company that stocked all the Kiwi speciality food (along with Australia and South Africa) so all of us ‘imports’ could buy our fav foodstuffs from home. So once (or twice) a year, I treat the family to all those favourites.


Sorry, I got a bit side-tracked in explaining the true Kiwi items that we grew up with and miss as they are not available here. It was the mention of the pineapple lumps and marshmallow Easter eggs. There is one other item that we grew up with and I forgot completely about until my oldest daughter reminded me when she was expecting Lucas last year.

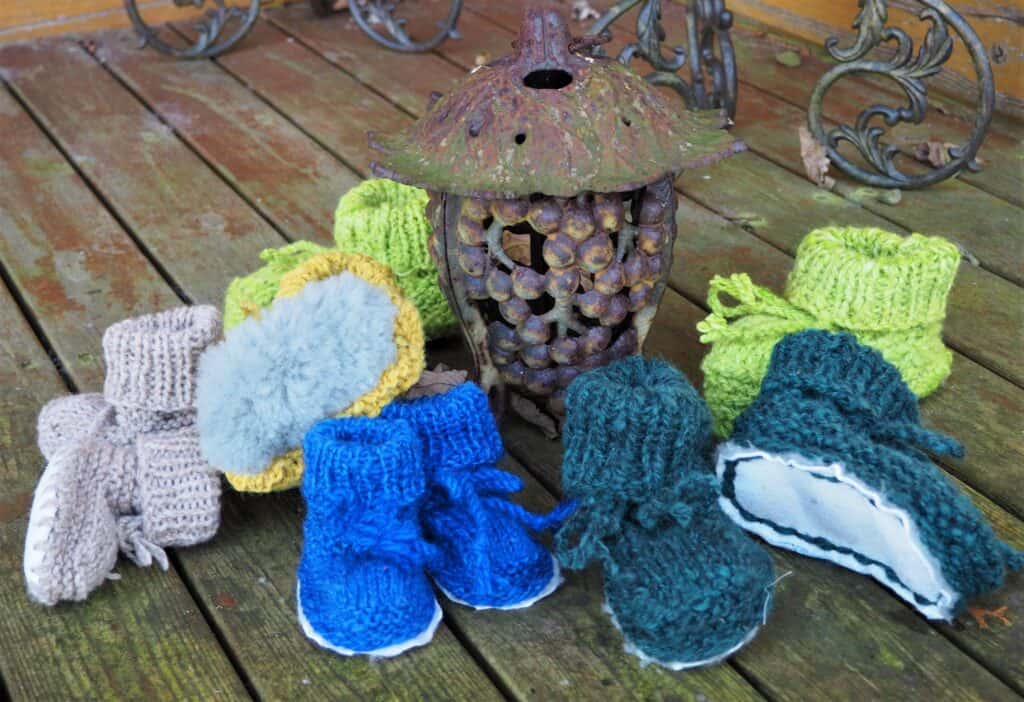
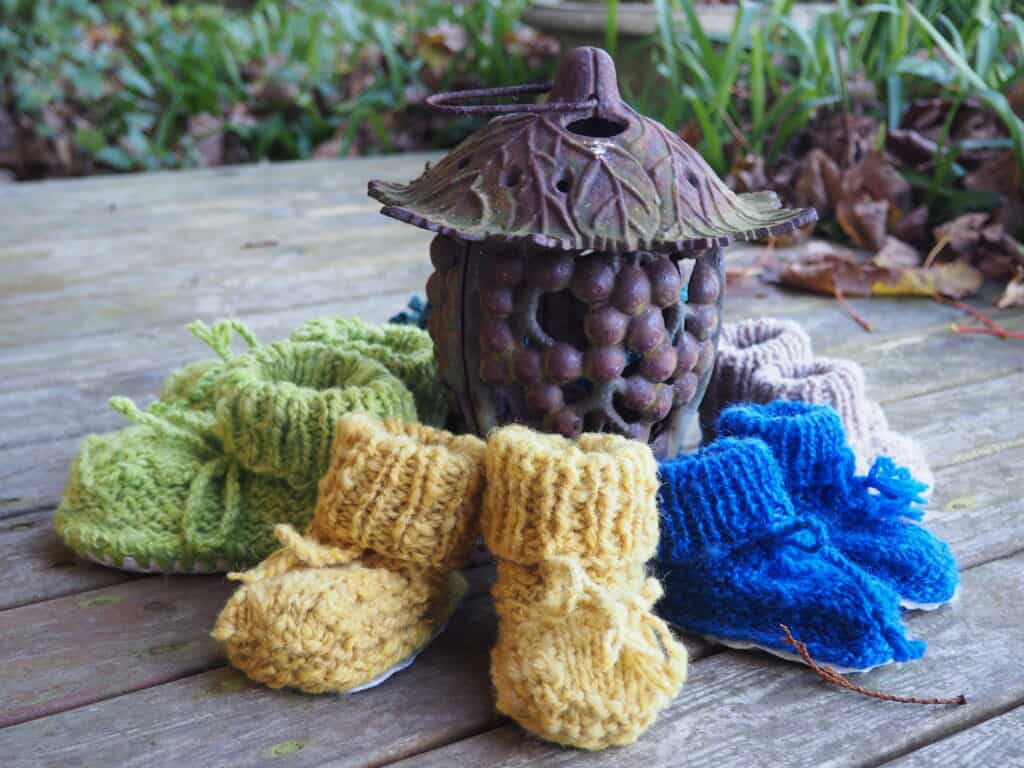
She asked me to make Lucas some of the sheepskin slippers I made for the girls when they were babies and toddlers. These slippers are very much a Kiwi icon and very popular. They are so warm in the winters and cool in the warmer months. Being made from sheepskin means that the outer soles are nonslip, which is great for when they were learning to walk. This meant no slipping on wooden floors. They were warm and cosy on their feet as the sheepskin was inside. The upper part was either knitted or crocheted which meant that the entire slipper was soft and pliable on their feet, right from birth. I had completely forgotten about these slippers, as it had been over 15 years since I had made them for Alyssa.

Sheepskin Slipper

Being New Zealand – the land of the sheep (& the long white cloud), it was easy to go down to a local tannery and get some sheepskin offcuts or even buy the kit with the soles ready cut and with holes to make the slippers. However, being in Northern Ireland, the task of finding suitable sheepskin offcuts was slightly more difficult and there was nowhere to buy the sole kits (other than buying direct from New Zealand). I had long since lost my original pattern and could not find a pattern for the knitted slipper uppers.

Sheepskin Slipers

So last year, I made up a couple after doing a few experiments in the designing process. Suitable sheepskin proved to be harder to find but I got some which I could make a couple of pairs. Lucas lived in the slippers.

Fast forward to October this year (and Lucas’s first birthday) – Latisha asked if I could make some more slippers as he had grown out of the ones I had previously made. So I really got my thinking hat on. I needed to be able to source a good reliable place to obtain suitable sheepskin, which I did, the bonus being that the skins have been treated specially to be used next to babies’ skin. I then had to work out, write and test suitable patterns for the slipper tops (after input from Latisha about what was the best design for the babies’ feet) and be able to have several sizes available. So I have finally got a pattern written for knitted slipper tops from sizes new born through to 2 years old. I will be doing a crochet version as well.

Full Range

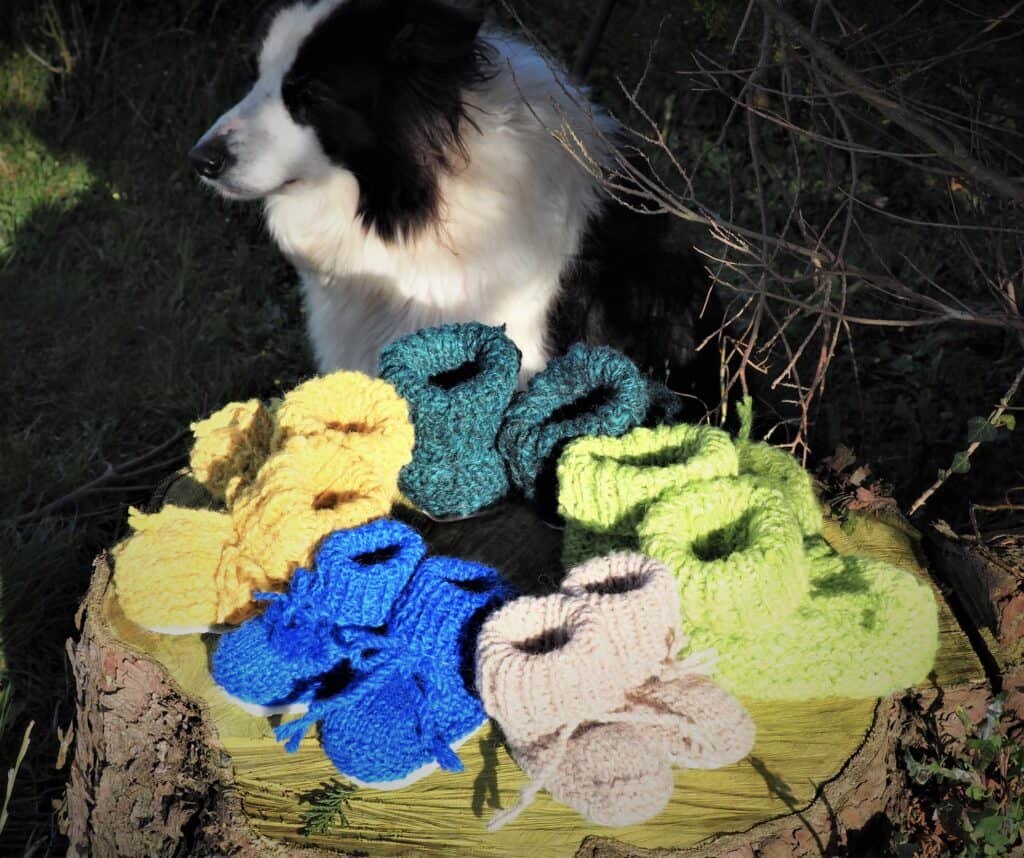
These slippers are amazing and so practical and stylish, while being cosy and pliable for babies’ feet. I knew that I wanted to share this Kiwi tradition and product with everyone here. These slippers really work well with the tops being made from handspun yarn – it truly makes these totally natural and all from the sheep (so to speak). I have used both hand dyed and natural handspun in my samples and love how rustic they look.

So, I then got to thinking on how it would be great to offer these in kit form – pair of soles (with holes ready to use) and the corresponding size pattern to make up a pair. I decided to leave out the yarn, mainly to keep the cost down and also to leave the option to you, so you could either buy handspun yarn or use your own. I am also thinking of offering ready-made slippers as well which will be packaged in a lovely linen bag which would make a lovely gift for that special baby ….

Christmas Twenty Twenty

Featured

Is it that time already?

It is now the start of November, and we are still in a semi lockdown situation with COVID. We are all pretty fed up with the whole thing or starting to accept that this could be the ‘new normal’. I know that I don’t want to accept either option, but 2020 has been a year that we want to forget. It is hard to believe that Christmas is only a few weeks away and we may not be able to have our customary Christmas celebrations. As we may not be able to socialise, it will be a very quiet Christmas for many of us.

I have already started to accept that it will be a quiet Christmas and we may not have the same day planned as we usually would have. However, I am still planning on putting up my decorations and creating a lovely peaceful Christmas theme in the house, so we have something to look forward to.

I know I don’t want to be dwelling on what we are missing out on with the restrictions, BUT, focusing on What we are thankful for.

During the months coming up to Christmas I love making new decorations to put up in the house and even making Christmas themed gifts for friends and family. I really start to get into the whole Christmas spirit in this way. I thought I would share with you, photos from our past Christmases and all the handmade Christmas decorations I have up around the house. I take down all of my pictures on the walls and replace them with Christmas themed wall-hangings and pictures. The collection grows each year as I usually end up doing a new one (sometimes two or three) each year. Some of them are 15 years old. These are from when we moved to Northern Ireland, though I did bring one or two really special ones. It was nice starting again and building up the collection each year. Since I had the opportunity to ‘rebuild’ my Christmas collection, I decided that most of it would be handmade. Our tree decorations are all handmade over the years and they bring so memories each year as we decorate the year, as we had spent many an evening as a family enjoying the crafting and being together.

Christmas Decorations

Future Designs

I love to design Christmas designs/patterns. My favourite designs would be the Christmas mice that I did last year and they have proved to be very popular to everyone. I have plans to add to the collection and unfortunately I was unable to do the one I had planned next …. But I will be working on that one in the New Year to be added to the design collection. I know that I am a bit behind this year in releasing new Christmas designs but the year has crept up on me ….

I have quite a few Christmas themed designs that I did last year and never got round to actually releasing them so I thought it would be a great opportunity to do it this month and give you the opportunity to start making some new Christmas themed designs for either yourself or someone else. There is a good variety coming up, from Inktense/Stitchery designs; Redwork designs and machine piecing. I am teaching a Whitework workshop (hopefully) this month where I designed a special Christmas themed whitework design. I will be releasing this design in a kit form as well this month.

So there are plenty of new designs and projects to look forward to. I look forward to showing you sneak photos closer to their releases throughout the month of November.

Lest We Forget

Featured

Back in late 2019, I was asked if I would design something to celebrate VE Day, which was to be celebrated in May 2020, and then to teach it in several workshops. I was humbled and excited to be approached about coming up with a design to remember such an important occasion. 

I knew that I had to include the soldier and the well-known saying – Lest we forget – that we associate with Remembrance. I wanted to have poppies and also to bring Inktense colouring into the design. So, my design came to be.

So, fast forward to March 2020 and the world came to a complete standstill with the COVID-19 which meant that all planned workshops had to be cancelled. This was a difficult decision, but the world was going on an unknown journey and no one knew what would be the conclusion to it all. I know many thought it would be gone within a couple of months and life would go back to normal. Many would not have thought that we would still be in this semi lockdown and ‘new’ normal in October. 

Strangely enough, we can apply this to our current situation; So many people have died from this virus, many that should not have lost their lives. I believe that we should not forget those that have gone because of this virus.

But back to the design; With the workshops being cancelled, I had to think of other ways the design could be available to those that wanted to make it. So, the idea of kits came about and it has proved so popular, more than I could ever have envisioned. I have created two types of kits – uncoloured one, for those that want to do their own colouring with the Inktense pencils and a coloured one, for those that are not able to do the colouring. The coloured kits are hand painted by me and each one is unique, no two are the same.  

This panel would be lovely to hang on display every year to commemorate the fallen or even at any time. We are coming up to Remembrance Day, which would be great to have this panel ready for then. So why not get a kit and do one up for yourself or a friend so they can remember the fallen. 

Autumn and my Woolly Acorns

Featured

Well, its time for my second post. The team that is helping me or trying very hard to get me into a routine of creating interesting articles. Now, you all know me and I would rather be crafting and being creative than sitting at my computer. Below is my second attempt at writing a blog. 

Autumn is finally here; the nights are drawing in and, as summer fades away into memory the autumn colours are coming out. I love autumn with the leaves on the trees changing into gorgeous golden colours. And, the best part is the harvest of apples, blackberries and other autumn produce. 

Being able to bring autumn indoors is such a special treat, there is nothing that says autumn more than a collection of pumpkins, apples, berries and acorns. 

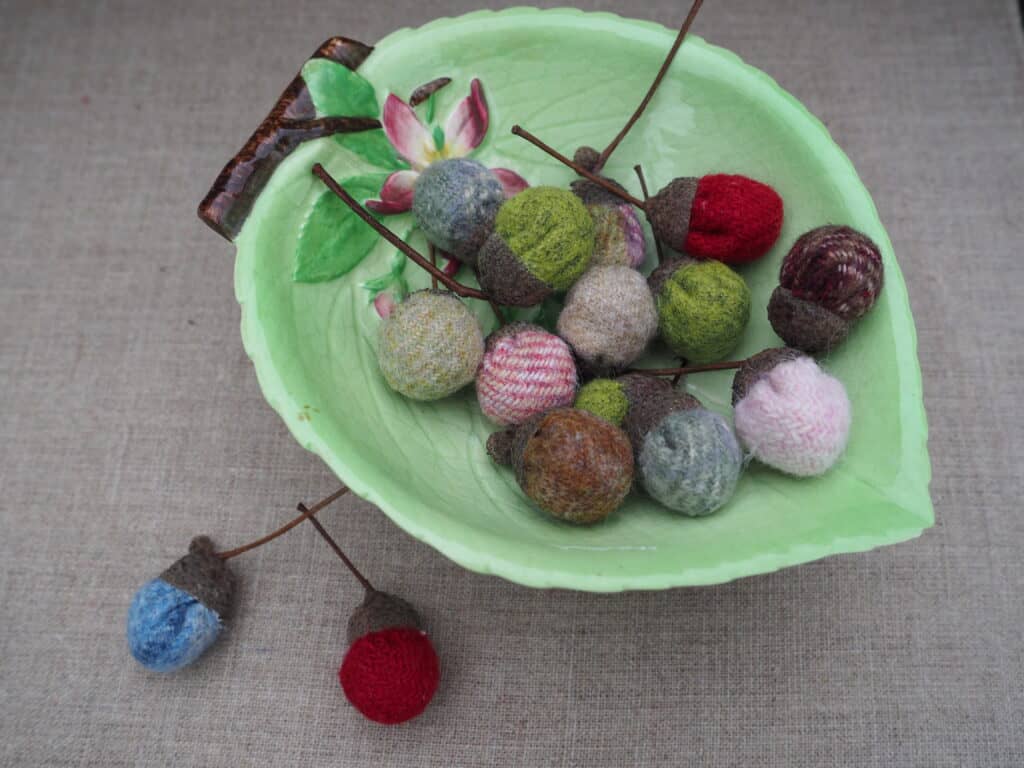
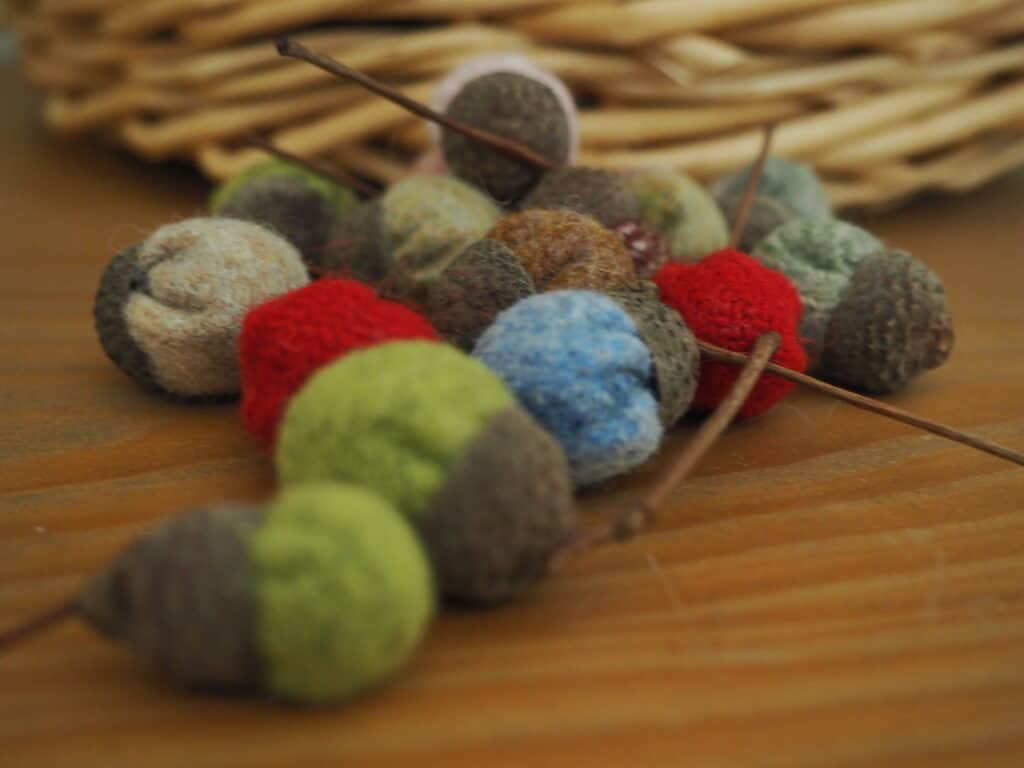
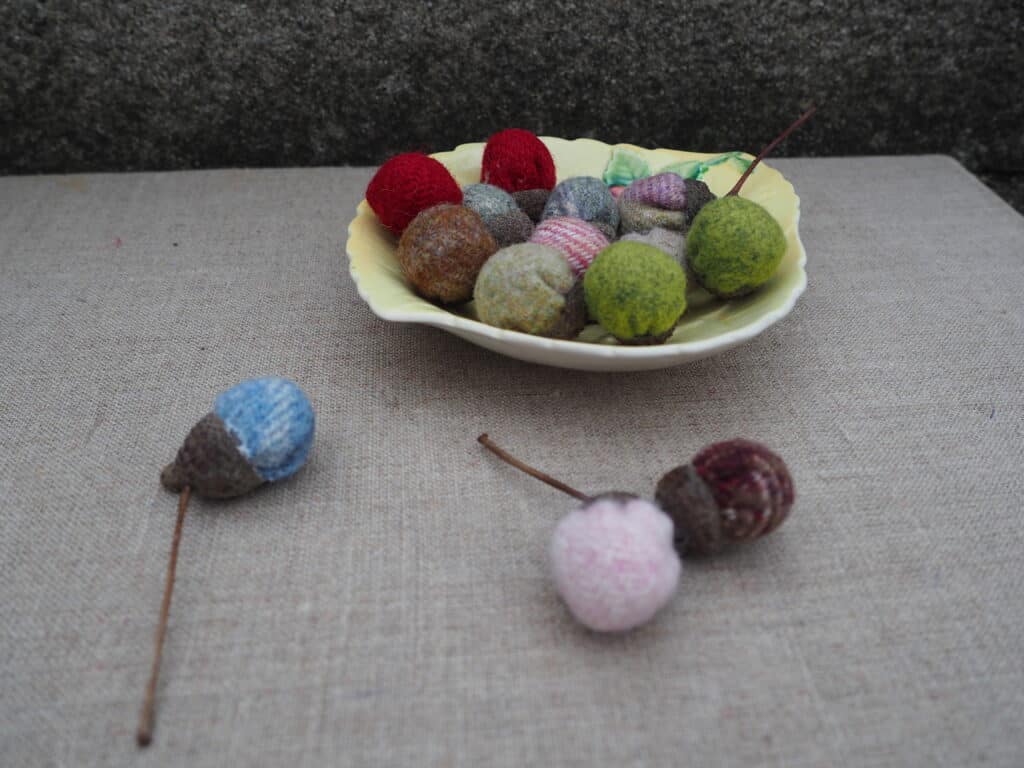
Woolly Acorns

I like quirky and unusual decorations to have indoors, ones that create conversations. For me, woolly acorns fit that bill. They are cute and different but are easy to make. They look great set in a vintage china dish or a rustic bowl. 

The woollen fabric that creates the acorns fits in well with the natural acorn caps. 

 I have created these woollen acorns into kits which includes the template, photo tutorial, stuffing, acorn caps and fabric to make 20 woollen acorns. The fabric in the kits are a mixture of colours and textures, so each kit is entirely different. I have limited kits, and once they are gone, there is no more. So why not grab a kit and have some fun creating your own woollen acorns. They are easy enough for children to make.