When I am asked to tutor workshops at various groups or organisations, I usually come up with a design following the request from the group facilitator. It can be fun to come up with a design once I have been given a theme or guidelines.
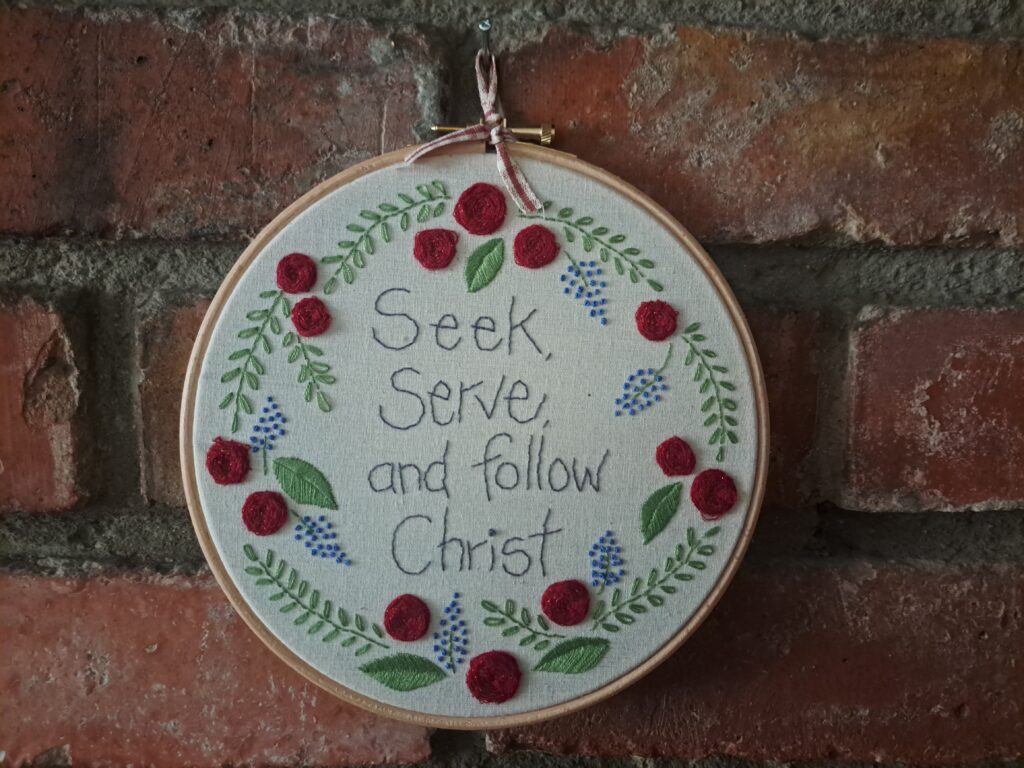
Back last year, I was approached by the local branch for Girl’s Brigade to teach needlework to a group of girls ranging from 13-18 years. The request was for a simple embroidery design that can be displayed in an embroidery hoop featuring the Brigade’s motto. It was quite daunting coming up with something simple enough and yet challenging enough for the group of girls. I came up with the simple round design featuring leaves, roses and bluebells, with their motto in the centre of the wreath.
It was a fun (and challenging) 3 classes to share the skill of needlework to the class of girls, many had never threaded a needle, and none had done needlework before. Many enjoyed the process and really immersed themselves into the needlework.
Girl’s Brigade design
When I shared photos of the design on Facebook, I had many messages from parents of other Girl Brigadiers that were interested in purchasing the kit for their daughters. I emailed the Head Office to seek guidance in selling the kits to other parents, but it was not forth coming. I could not offer this kit on my website. So in order to make the embroidery design available to the general public, my original design needed to be adjusted. I needed to put on my thinking cap.
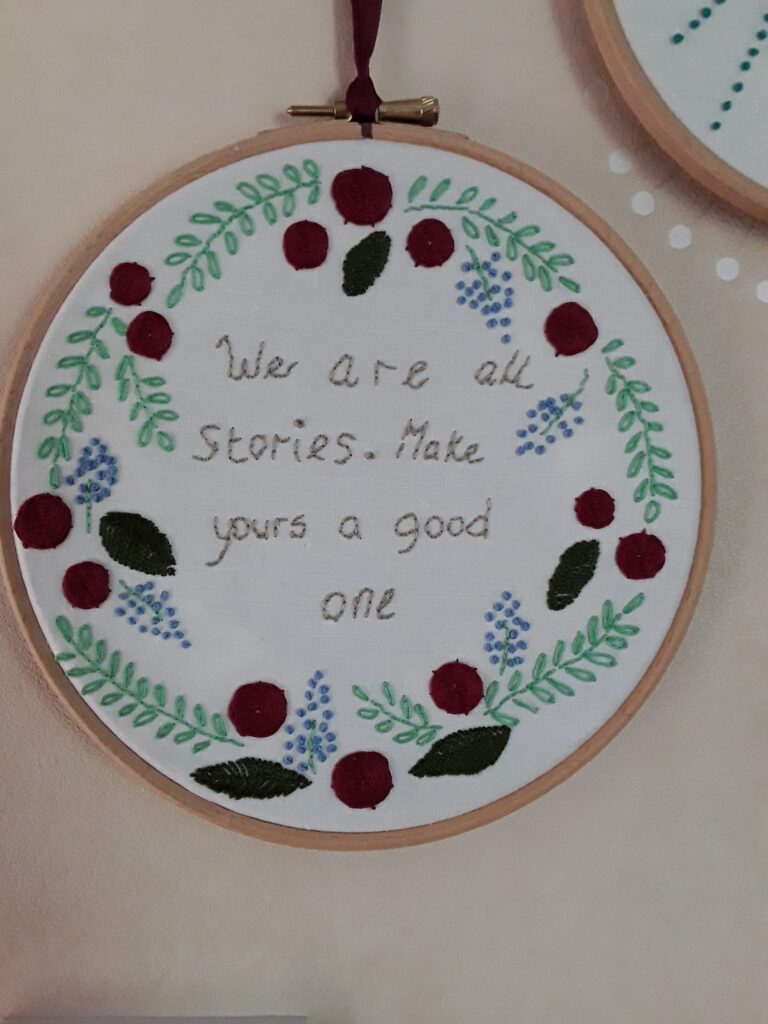
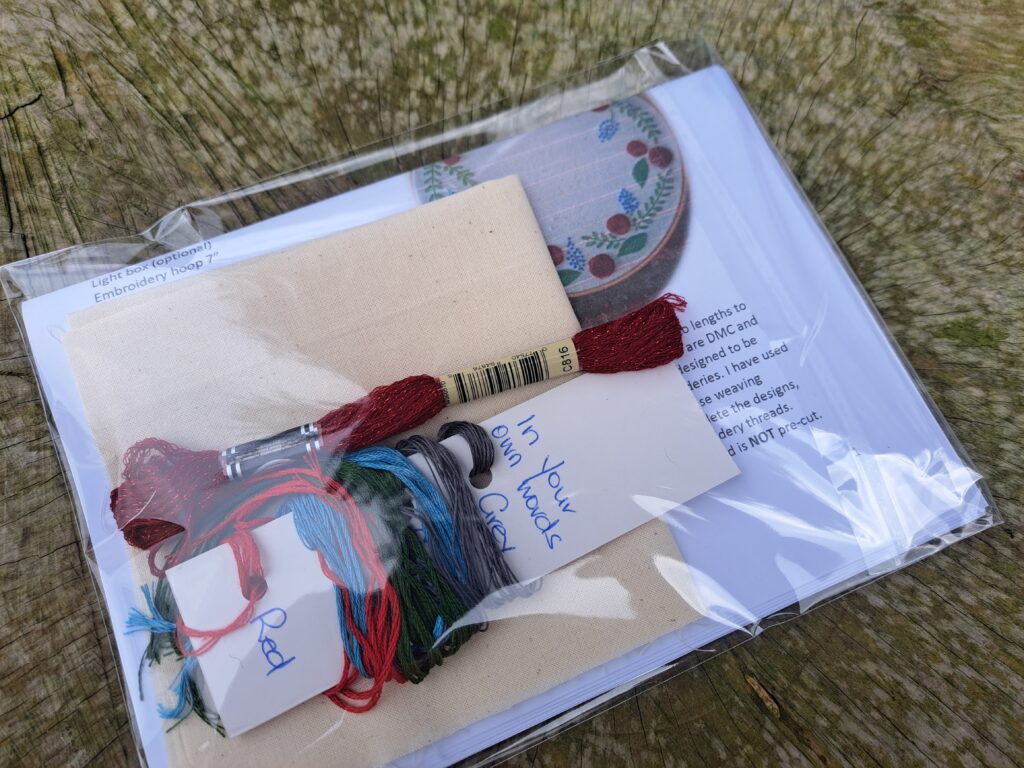
It was a lovely embroidery design, and it seemed a shame to see it put away and never to be seen on the website as a kit or pattern. This is when the concept of ‘In Your own Words’ came about. Why not create the pattern/kit of the embroidered floral wreath and let YOU add in your OWN words! This would then allow you to really personalise the embroidery design.
‘In your own words’ – Blank Canvas to personalise with your own saying/quote
In recreating the design in this way, really opened up so many possibilities. My testers had fun writing in their own favourite sayings or even using one of the sayings that were suggested in the pattern. What would you put into your design?
Tester’s sampleTester’s Sample
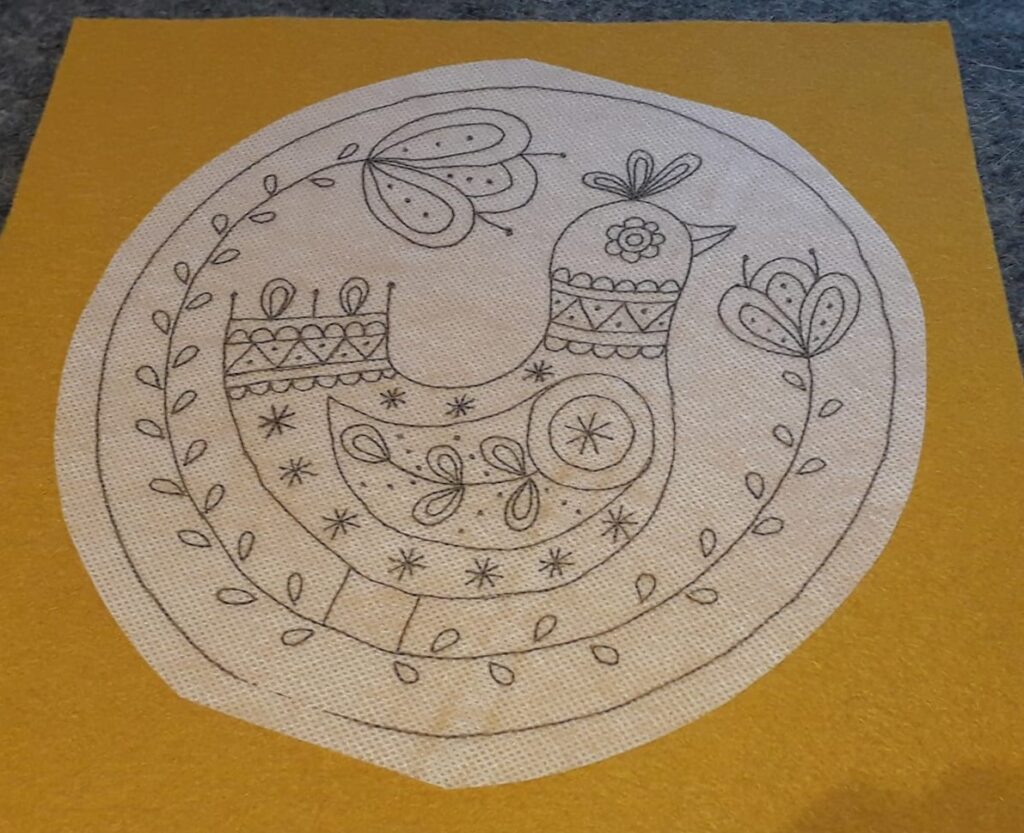
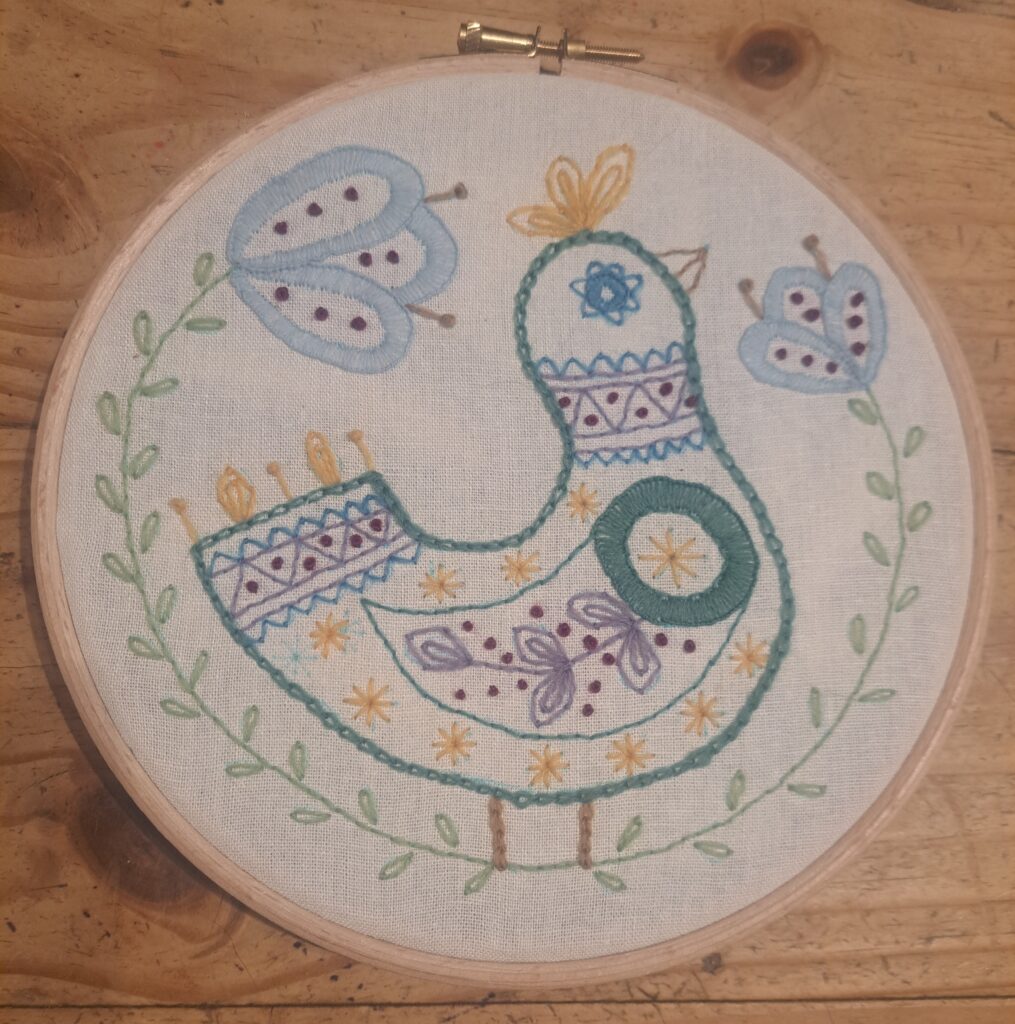
The second embroidery design to be created for an upcoming workshop was Folk Embroidery. I was approached by the organisation that they had had enquiries about Folk Embroidery and would I be interested in designing something and taking the workshop. I love a challenge, and this definitely was one. I had never really thought of Folk Embroidery, so I did some research online to get some guide lines. I then sat down one afternoon and did up some rough sketches and came up with the bird. At first it was slightly out of my comfort zone, as I had never really drawn up anything whimsical before. I have to admit it was fun to do, once I realised that the bird was NOT meant to be realistic, and I could play with colours and embroidery stitches.
Design template
This definitely was a FUN design to embroider, and I loved using the Appleton’s Wool Embroidery threads for my design. These threads are finer than wool tapestry threads and the colours are just amazing. The wool thread is what is normally used in creating Crewel Embroidery, but they were also perfect for creating this Folk Embroidery. They are the threads that are included in the kits.
Folk Embroidery – Bird – using wool embroidery thread
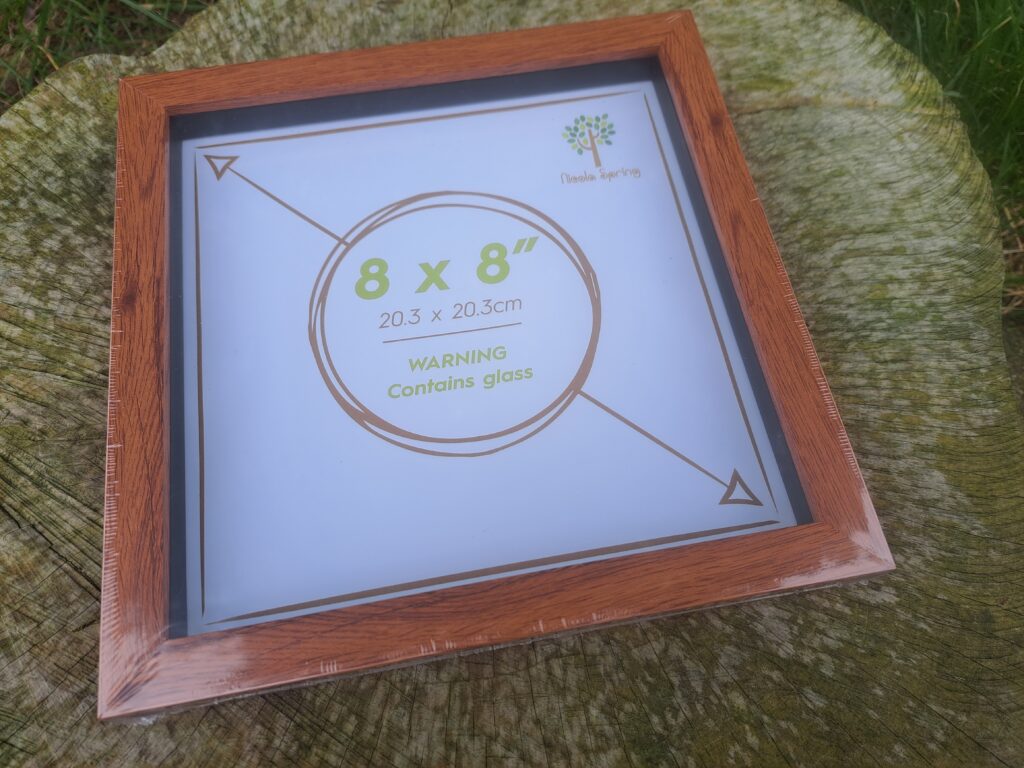
In coming to display my design samples, I was of two minds. The original designs for the workshops were designed to be displayed in the embroidery hoop that is used to stitch the design. The hoops make for a quick, practical and even cost effective way of displaying your finished embroidery. But sometimes it is even nicer to have your work framed to give it that touch of elegance (& also protect it behind glass).
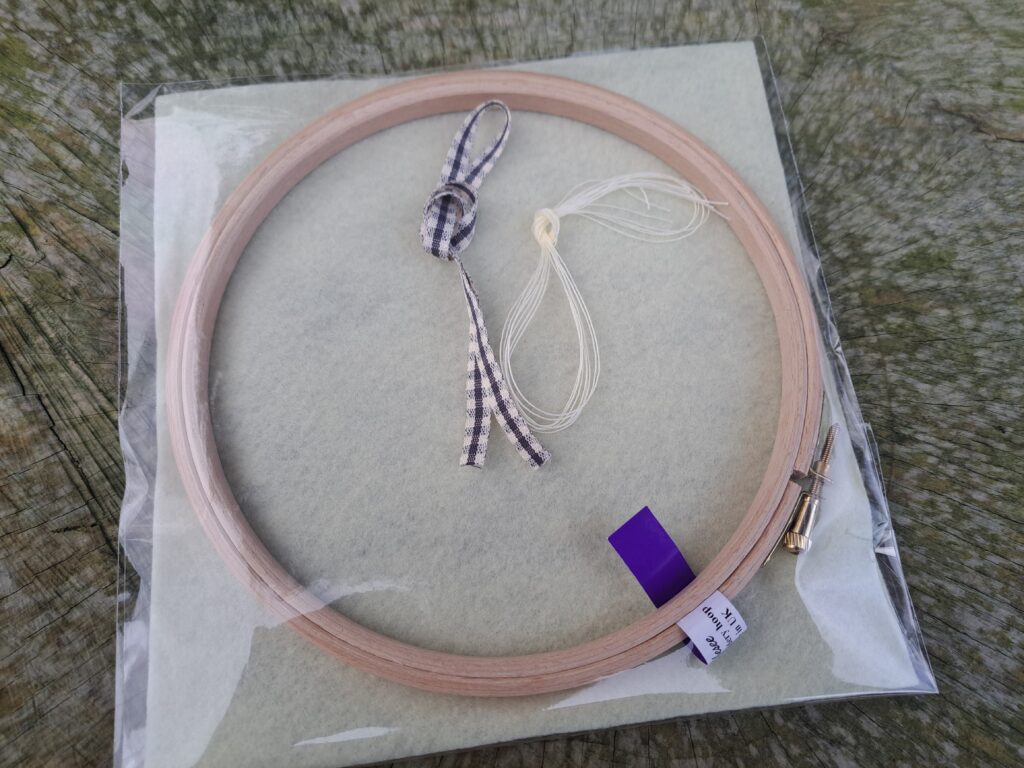
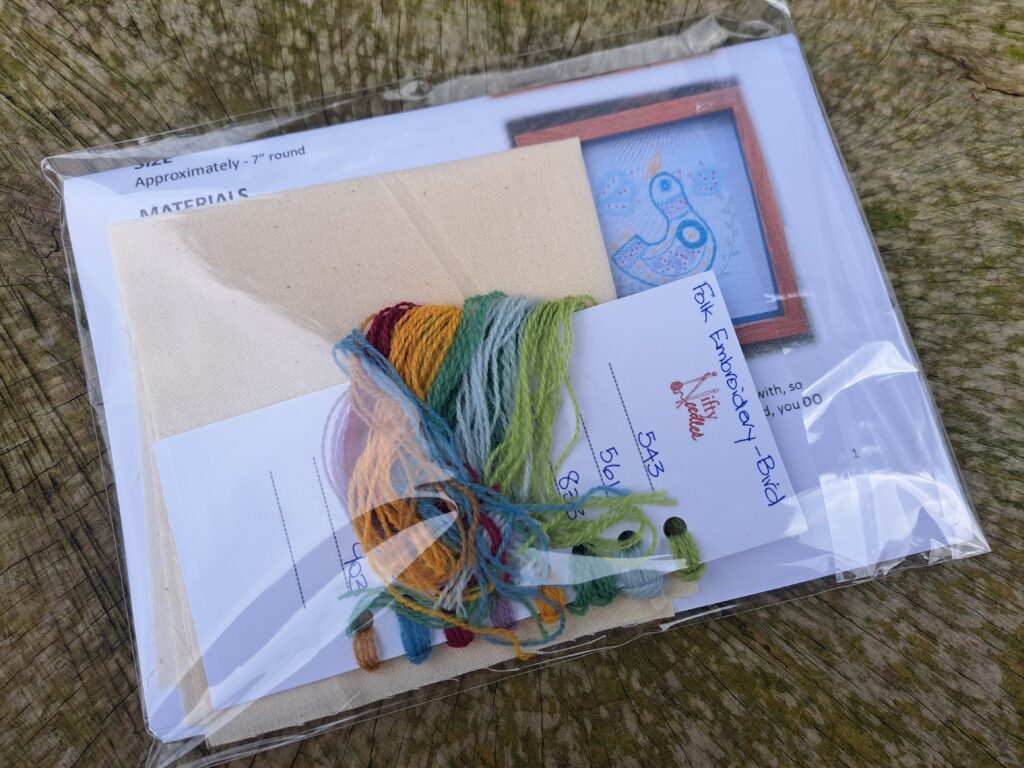
So, I decided that in making up the kits, I would have several kit options available. The fabric, threads and patterns for the designs are in one kit and sold as is. There would also be options to purchase the Hoop/Backing kit or a frame. This allows the purchaser to choose what they need or want. Many have hoops at home or wish to finish it in other ways. So why purchase a kit which includes the hoop and backing felt if you are not going to use it to complete your design? Just trying to give everyone as many options as possible….
Square frame with glassHoop and Felt Backing kitFolk embroidery kit contents‘In your own words’ kit contents
I am hoping this new way to offer kits for sale will work and open up the options for everyone. It was hard for me to decide if I wanted to create different designs that were to be displayed/framed on hoops or to have them in frames. Personally I prefer frames, so my work is protected behind glass, but then again, a hoop finish is easily done, and a collection of designs grouped on a wall make for a lovely display.
I have also released the patterns (in both PDF and printed format) for both the Folk Embroidery and ‘In your own words’ in case you want to use your own materials to create these lovely designs.
So, I hope you like my latest embroidery designs and maybe they will start you onto your own needlework journey…..
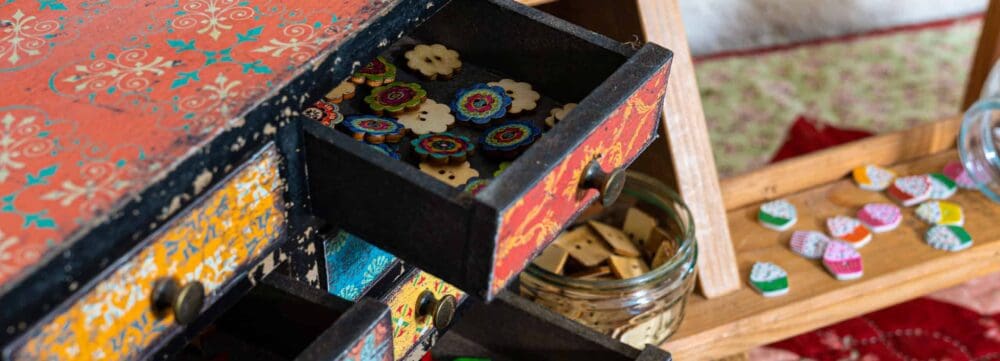
Over the past few months, I have had so much pleasure to be able to make and offer some truly unique needlework notions to you all. I have loved the part of spending time making them and ensuring that they are all different. It really is lovely to be able to work with beautiful needlework notions while we do our needlework and it is even more special knowing that they are handmade, not mass produced in a factory somewhere.
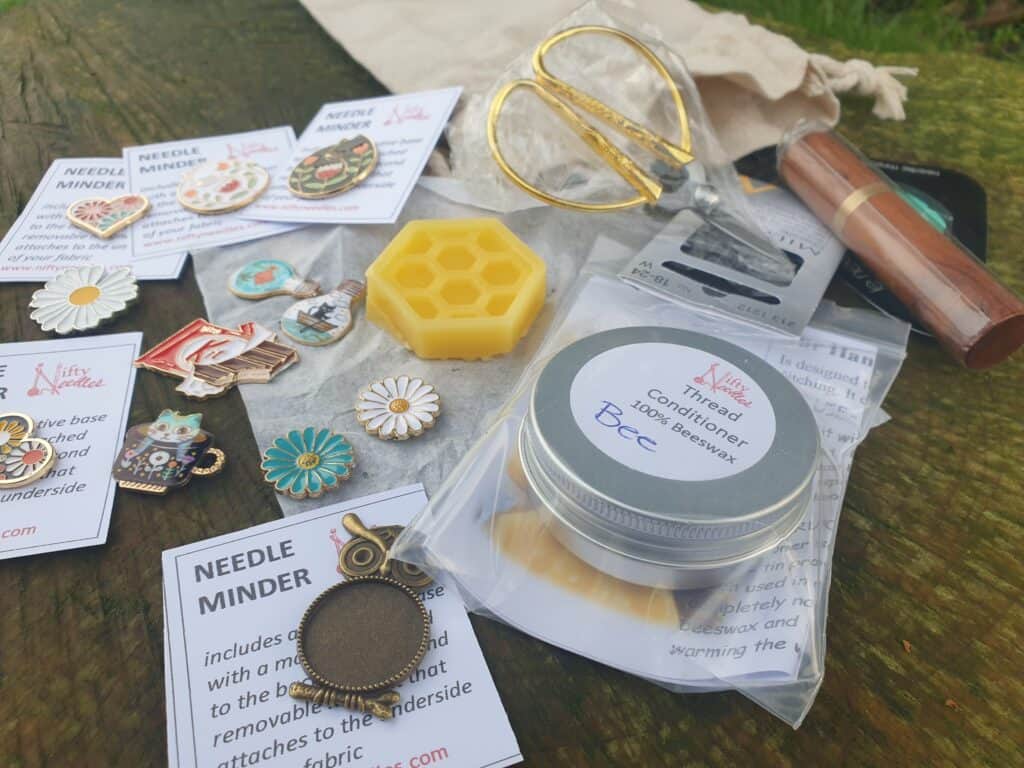
So far, I have added Thread conditioner made from 100% Beeswax to help keep your metallic thread from getting tangled or knotted. I have also made needle minders and scissor fobs.
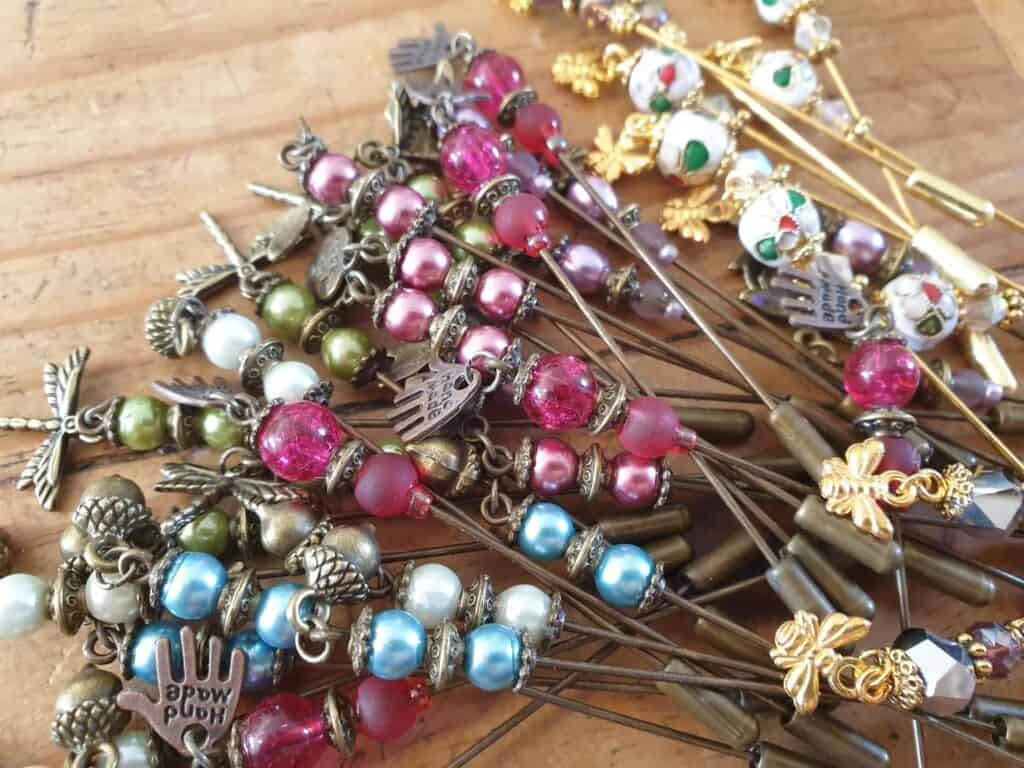
These are such truly stunning pieces and look too decorative to be practical. Yet, I assure you, they are totally practical – they just have the bonus to look extremely decorative.
So what are counting pins? And what are they used for?
Well …. If you do Cross Stitch or Blackwork, then these are the tools that you will be looking for in your needlework work basket, especially when you need to start counting squares. Basically these tools are needed when you need to count out stitches on your AIDA or evenweave linen fabric.
Really old cross stitch stitched by my grandmother for when I was born
I have been doing cross stitch since I was 7 years old (that’s too long ago) and I was taught to do cross stitch by my mother who had grown up doing it. I remember she taught me how to follow the chart, find the middle point, count how many squares to the bottom of the chart along the vertical midline and then count out to the right to find the starting point of where I needed to start stitching with my needle and thread.
I then had to count exactly the same squares/stitches on my fabric. At times it could be trial and error, finding the correct starting point and lots of recounting. There were no such things as counting pins to help you keep track. I usually used my needle that was threaded up, ready to start and just hope that I didn’t use count mid-way while counting down from the midpoint of the fabric and then out to the right to find where my first stitch needed to be.
I can remember that over the years, I had miscounted and a few of my pieces were really close to the left hand side as I had miscounted.
If you are cross stitchers, you are probably lost as to the way I am counting to get my starting point at the bottom right side of the piece. It was the way I was shown by my mother, and she was Dutch. She had been shown how to do cross stitch from her mother, my grandmother and I guess it was the way that they did cross stitch. Basically you started from the bottom right hand side of the design, working your way upwards and across to the left until you had completed the design. It seemed a logical process to me (I guess it being the only way I was taught). The stitches were also worked in columns going from right to left. You went up the column working the right slanting stitch and then coming back down the column to complete the cross stitches. It meant the needle was always facing the same way and it was easy to start the next column to the left of the column just completed. It was when I moved here and brought the English Cross Stitch magazines that I discovered that cross stitch was worked completely differently.
Starting to stitch at the bottom right hand corner and working top and across to the left to complete the design
I did so many cross stitches as I was growing up, working from the Dutch cross stitch charts that my mother had sent over from Holland by her family. Cross stitch was still relatively new in New Zealand, and I cannot recall seeing kits, patterns promoted while I was growing up in the 70’s.
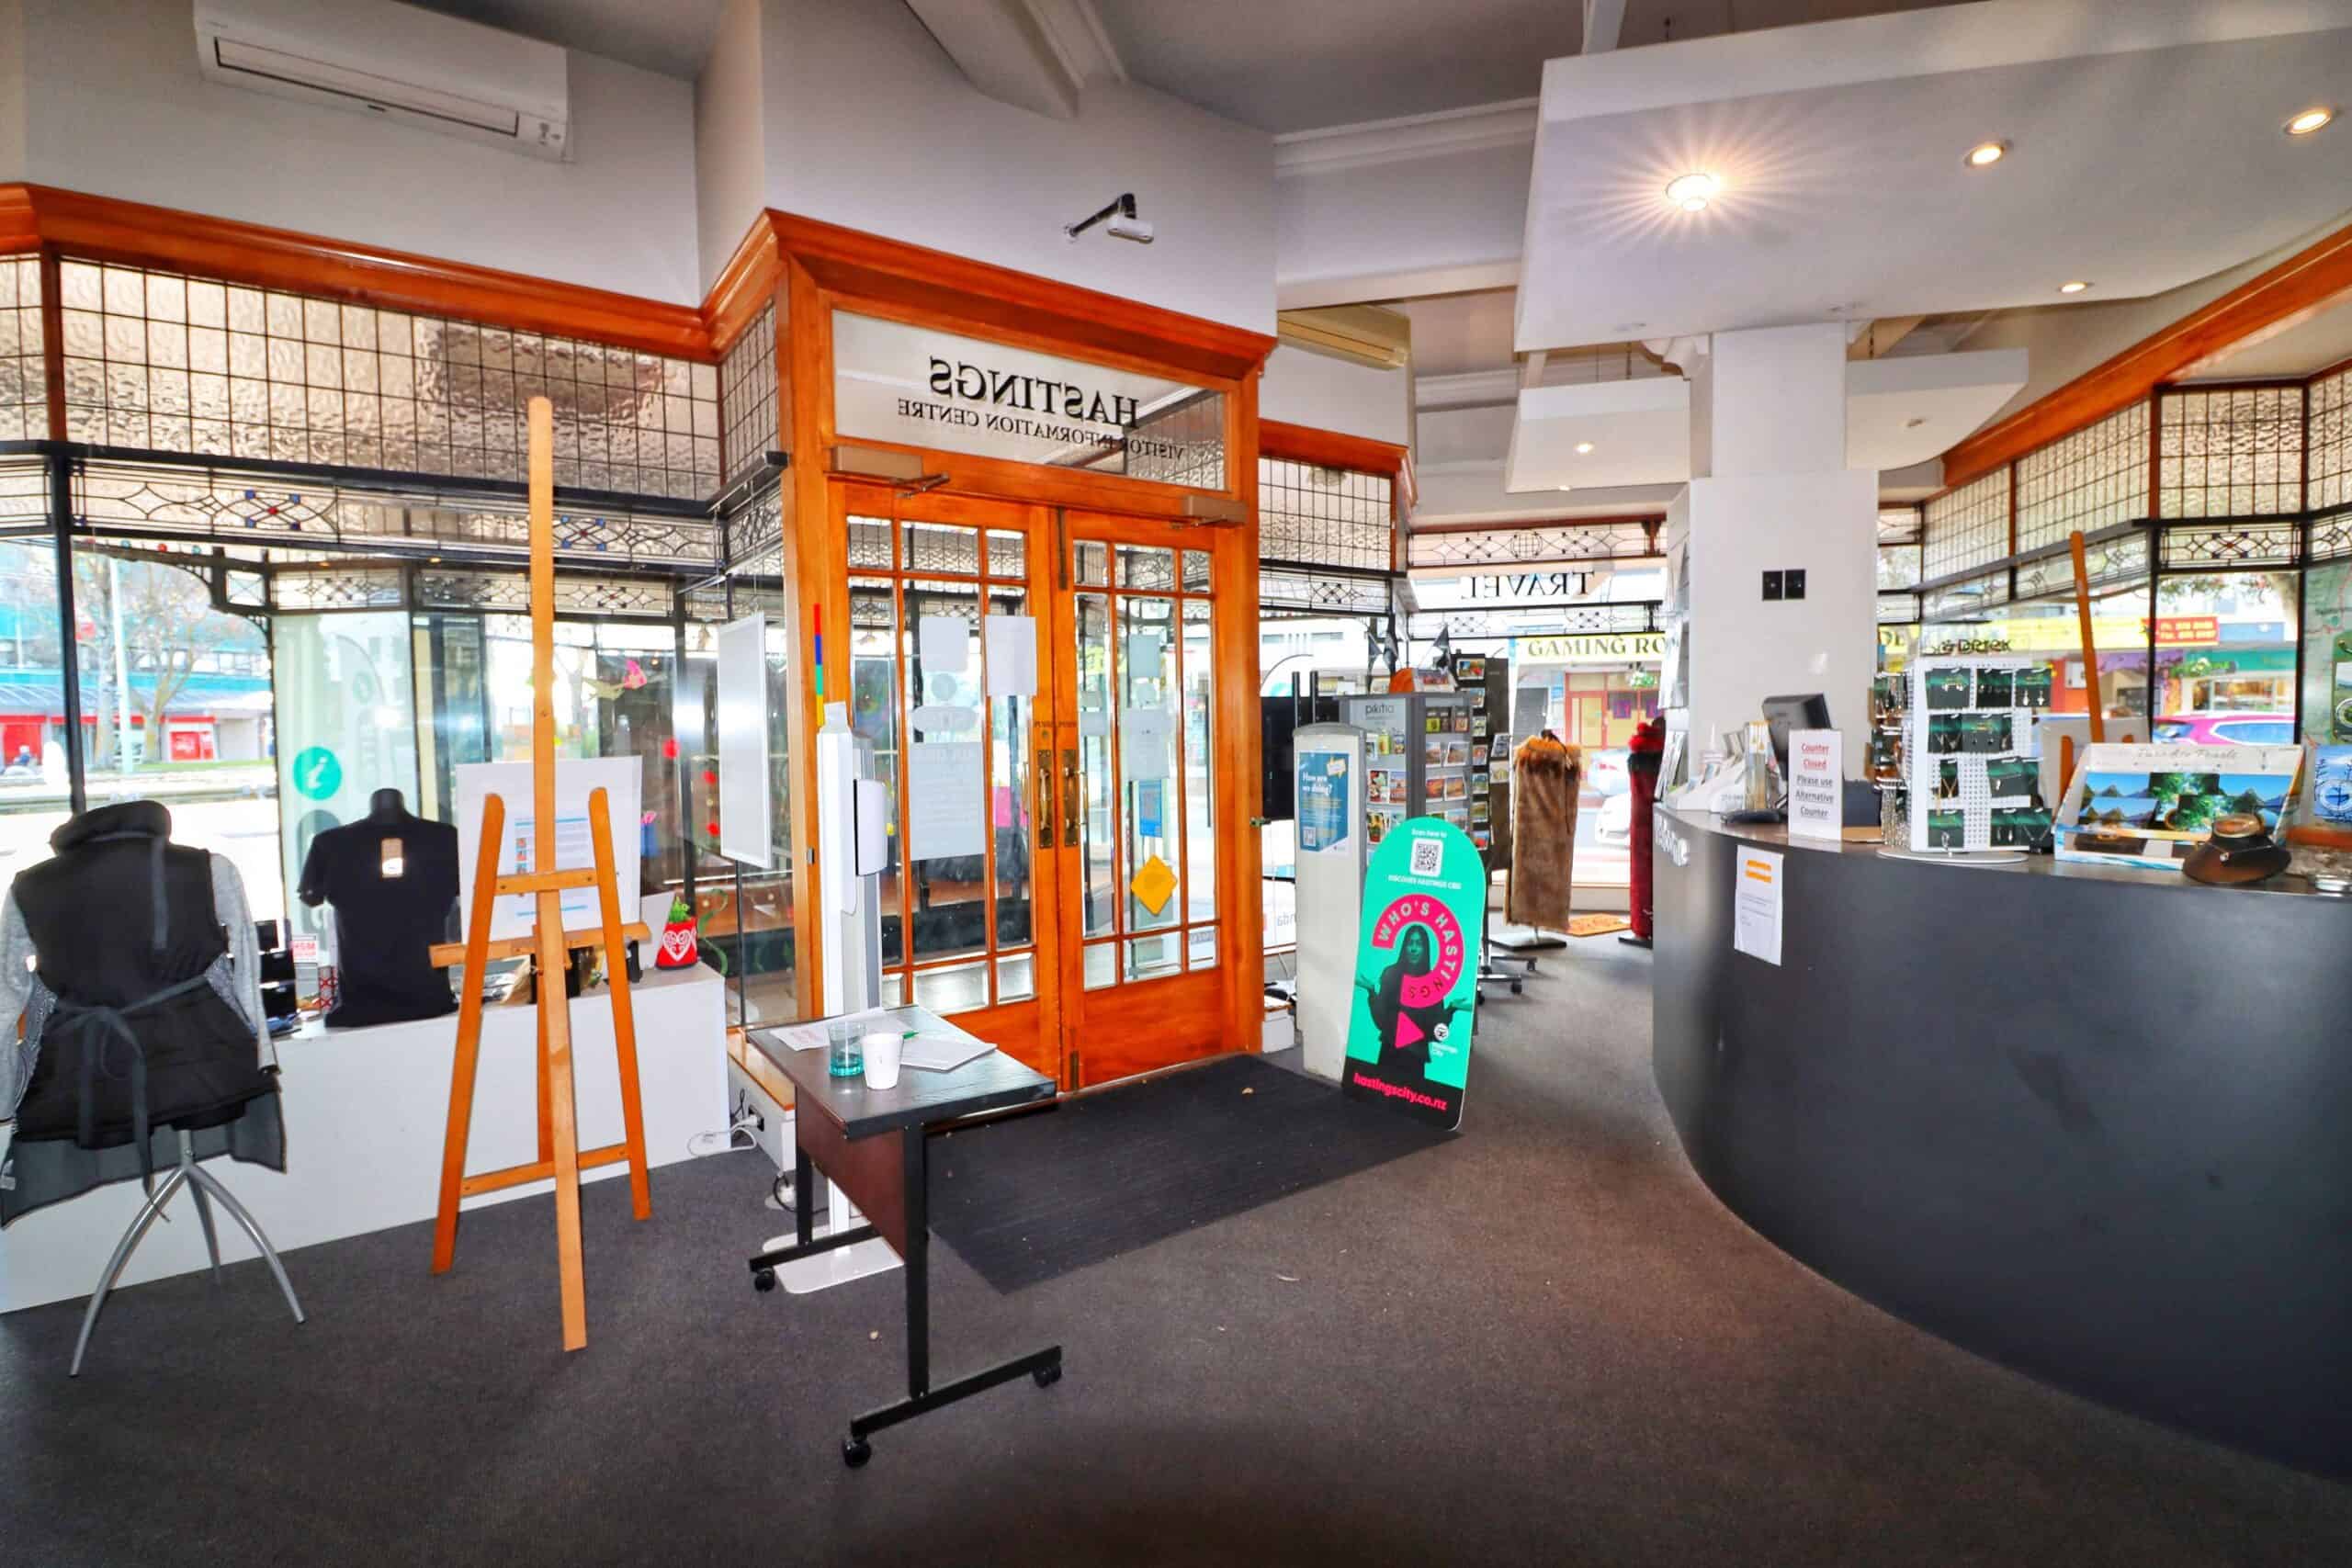
I remember my first job after I left school. It has an old department store, elegant but showing the wears of age, neglect and of times gone by. It had started as a family store back in the early 1900’s – grand wooden staircase going up to the first floor which was for Women’s wear – outerwear and underwear. Ground floor was for the menswear, haberdashery, and fabric dept (where I worked). There was a huge cellar that went underneath the entire store, I hated having to go down there to get extra stock, it really gave me the creeps! Who knew what lay in the depths of that cellar? Actually one year, staff found some forgotten stock which they used for an annual fashion show. It was a box of ‘fashionable’ swimwear (male and female) from the 1920’s.
The family had gone since sold it on to a local farming corporate business when I started there in the late 70’s after leaving school, but the old elegance was since visible, even though it was abit shabby. However, the wood panels and stained glass windows were still very visible and played an important role in the character of the building. My dept manager was a lovely elderly gentleman (past retirement when I started there in my teens) who had worked there from the early 30’s after leaving school when the family still owned it and could still remember the day of the Great Earthquake in 1931 and destroyed both neighbouring towns (Napier and Hastings). His stories of that day and how the store shook on its very foundations were fascinating. He had many other stories of the changes he had seen over the years. But more importantly, his knowledge of fabric and sewing will always stay with me, his words of wisdom still sound in my head at times. He was one of life’s true gentlemen and when I left the store to do other work, he wrote a glowing reference, which I still have today.
devastated in 1931 earthquakeRebuilt – photo taken in 1940’sThis was the fabric dept, now Tourist info after store was sold and dividedHow it looked in the 1970/80’s
I have really got side-tracked writing about the department store when I was really discussing cross stitch patterns. I was saying that there was not a lot of interest in cross stitch in New Zealand…. Well the department store does play a part in it. I remember we had a sales rep come round and he was showing us some of the latest products to arrive in New Zealand …. All the way from Holland. They were cross stitch kits … a new arrival into the country. I remember my dept manager saying that he really didn’t think they would take off and he didn’t order any for the store …. But my eyes grew wide … I fell in love with one of the designs …. And it was in Dutch! The rep and my dept manager offered it to me at wholesale! I jumped at the offer … it was the first ever cross stitch I had brought and a kit with all the threads and fabric included! I felt so special! Still a huge expense and took over half of my weekly wage! My mother, however, gave me a stern talking too when I got home about spending so much money on needlework.
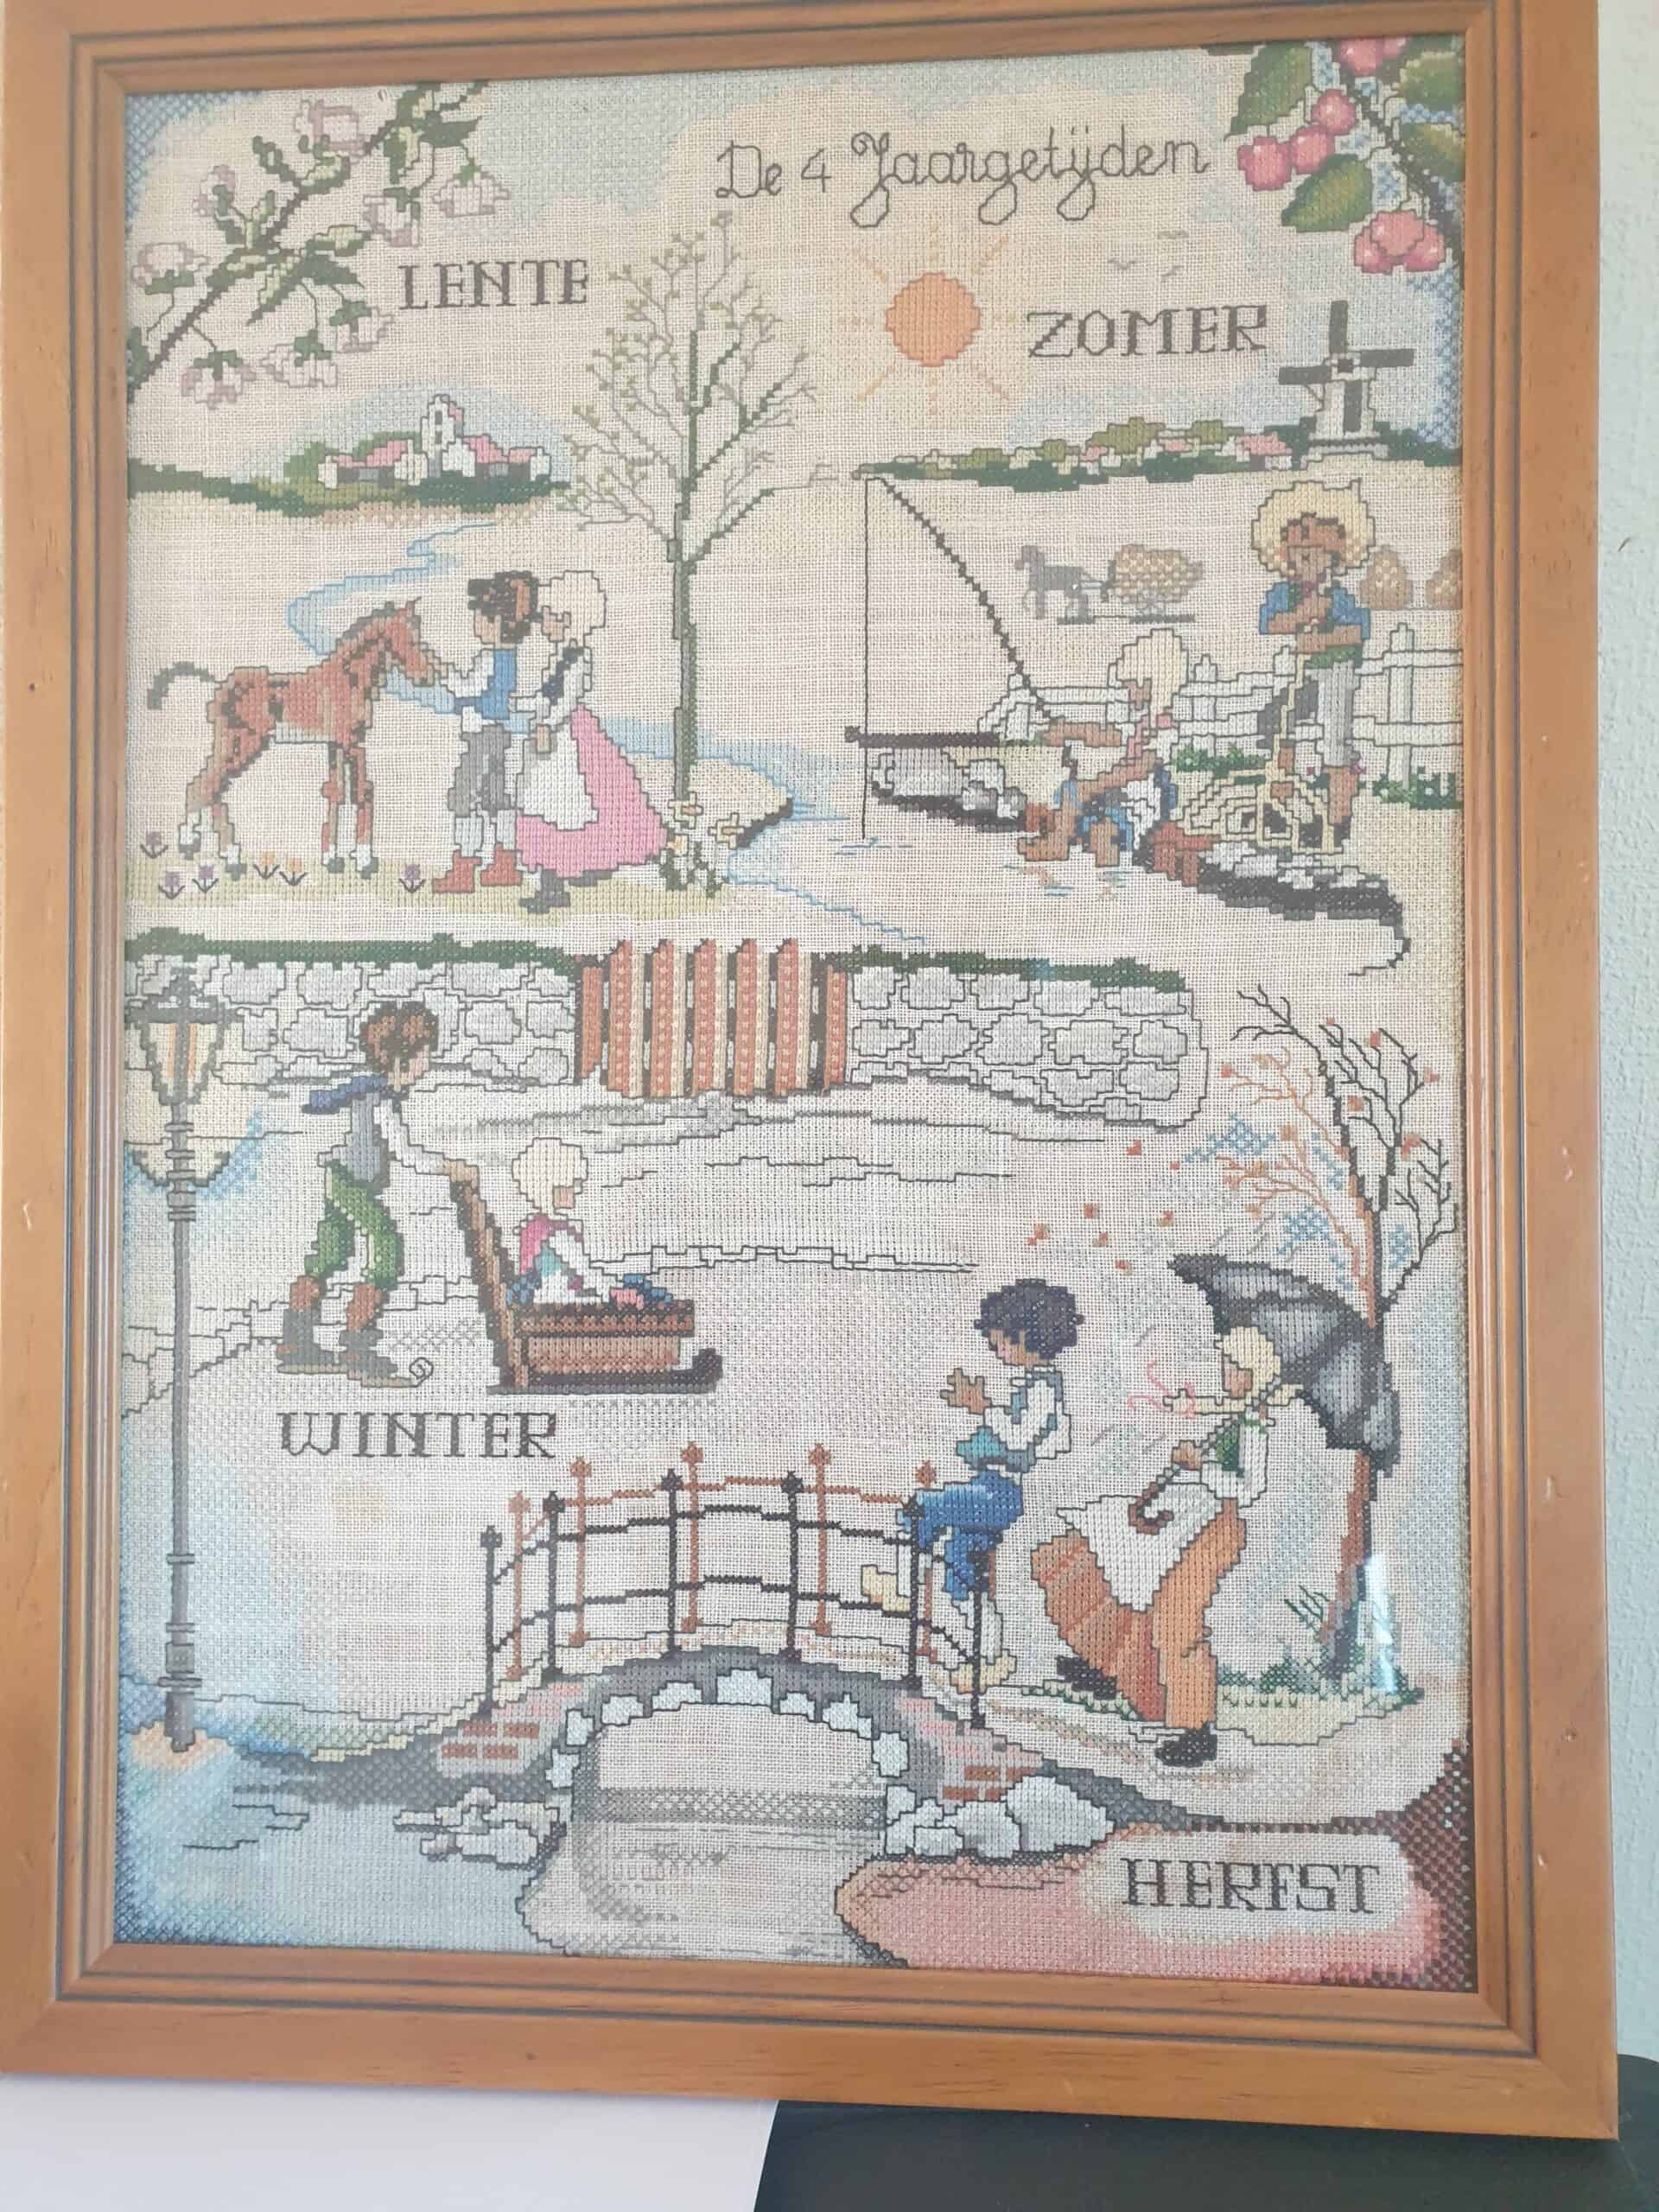
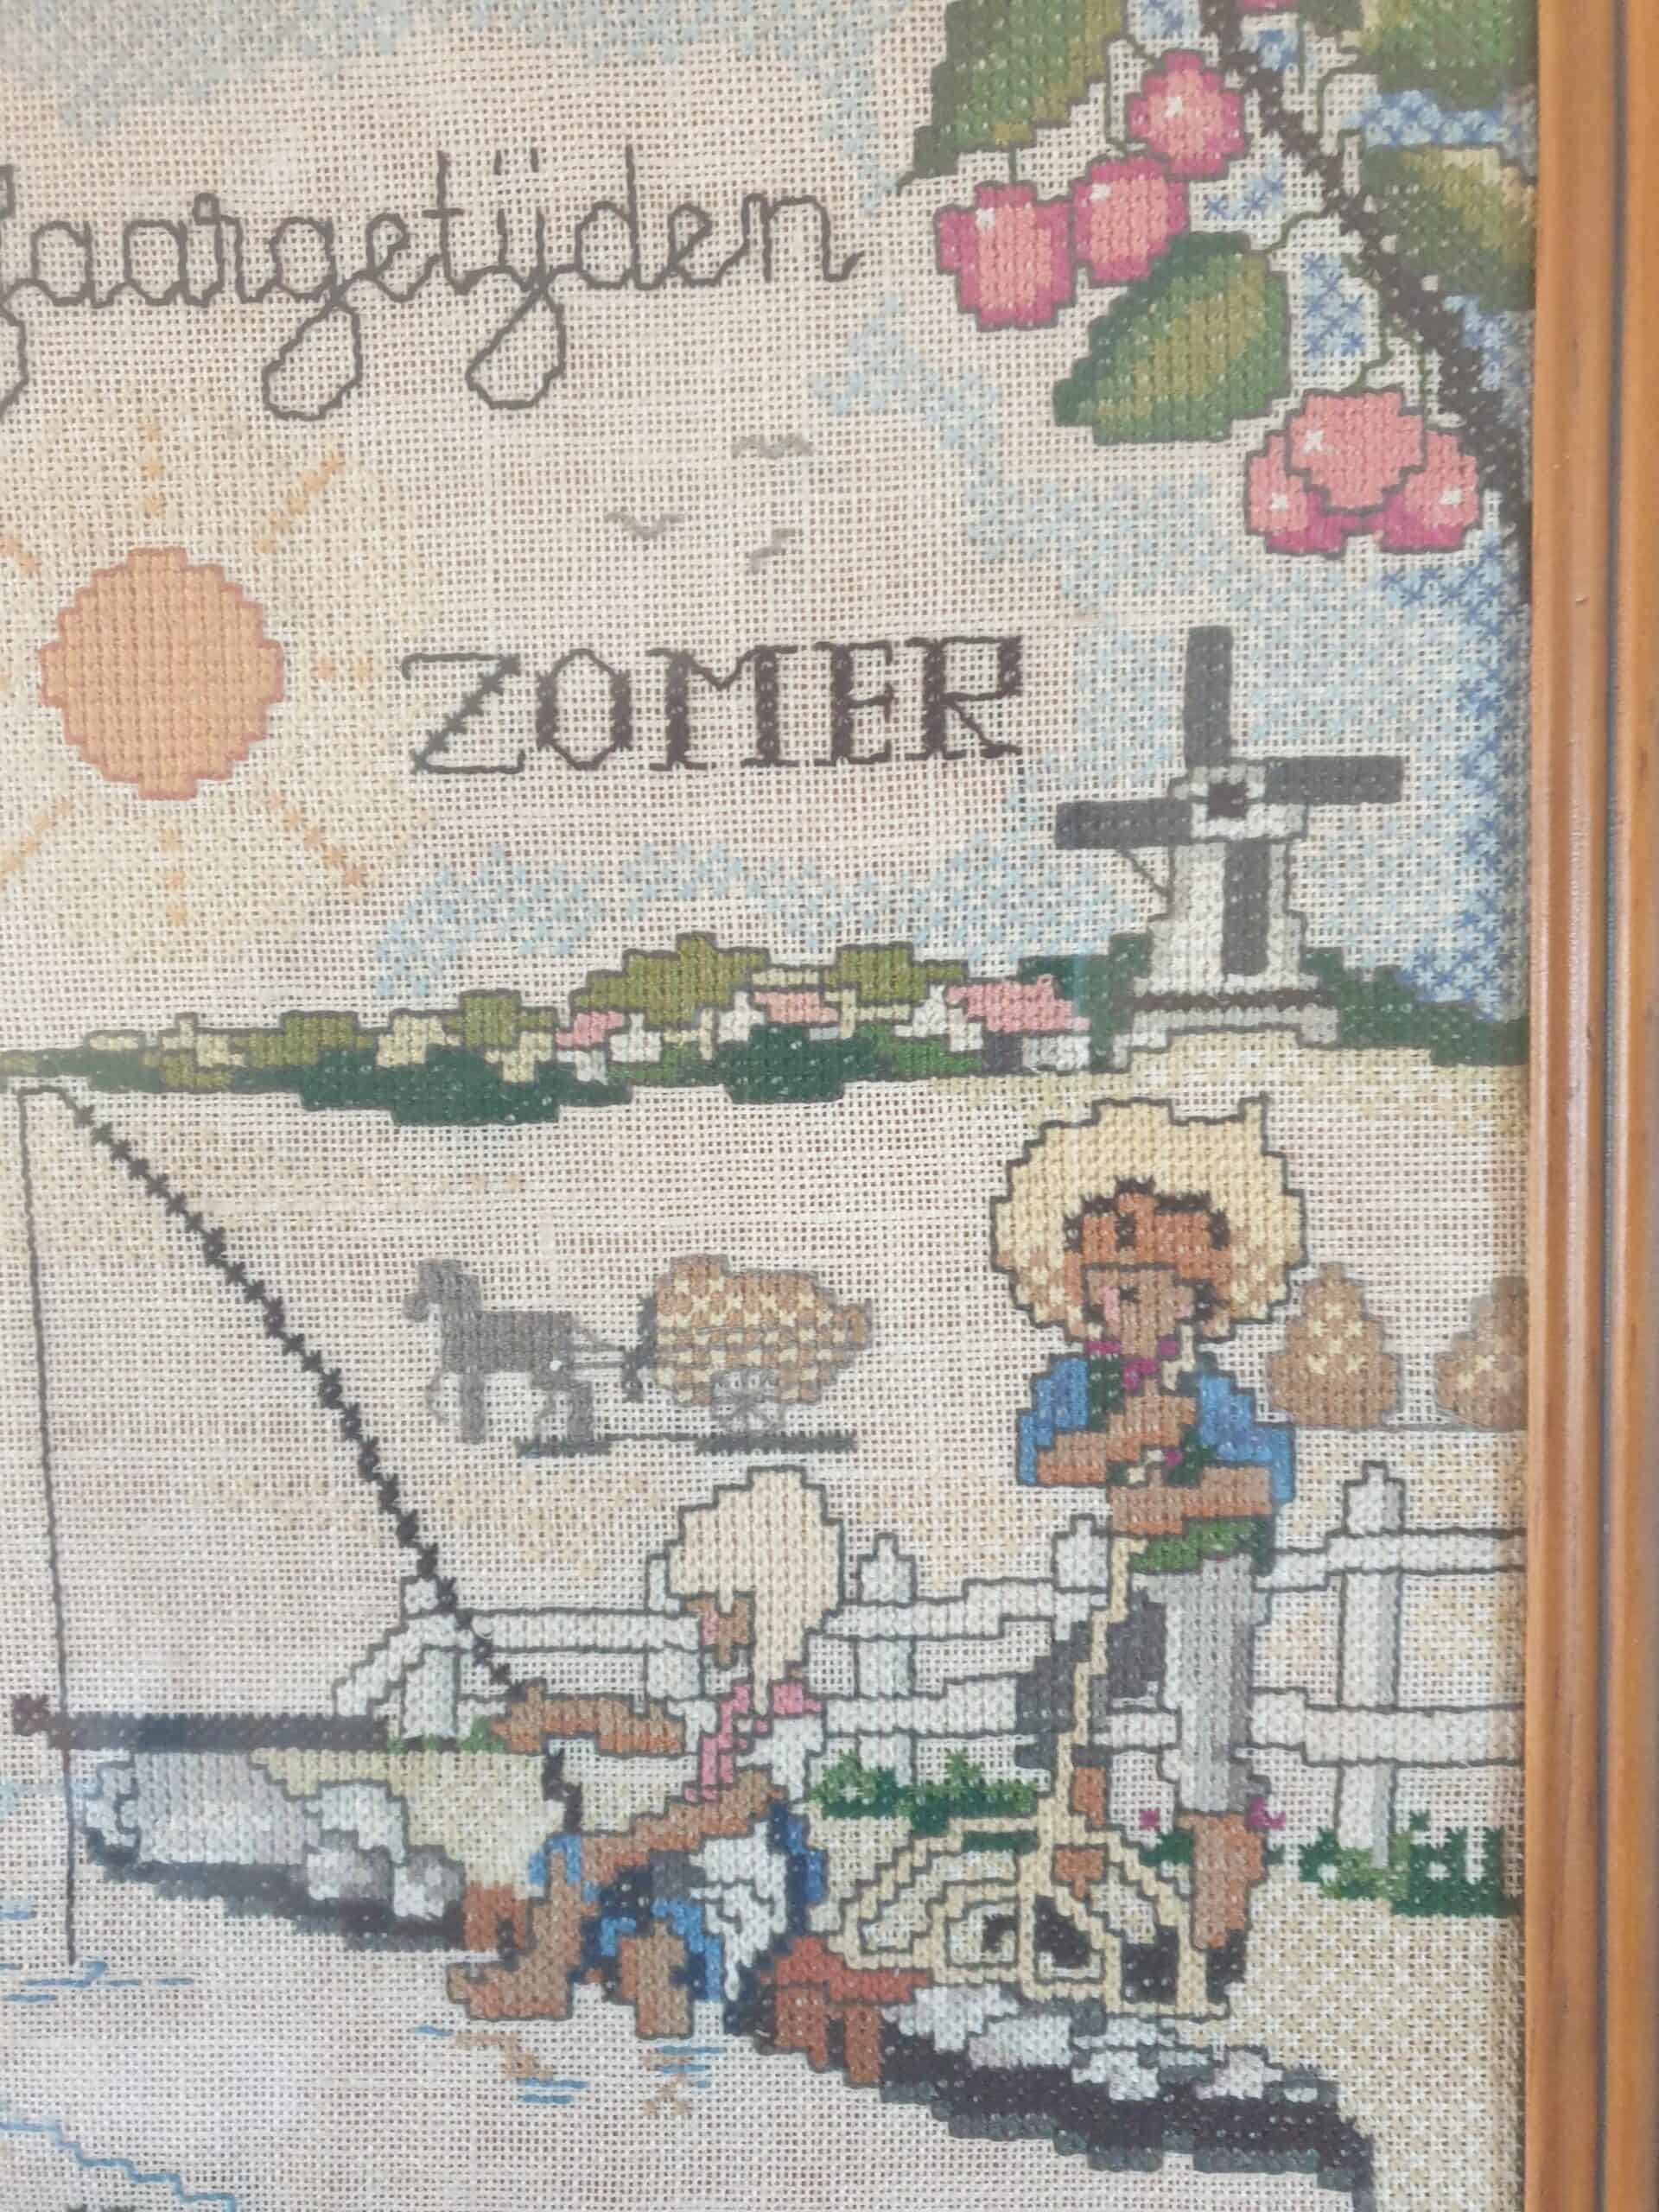
I worked on that cross stitch and loved creating each and every stitch. It was the largest piece I have even worked on, and it was my pride and joy. Would you believe that I still have that piece? It is framed and hangs on my landing and every time I look at it, I have so many memories …. How I came to get it, my first job after leaving school, the many, many months I worked on it and marvel on how it has survived all these years and travelled halfway round the world from New Zealand to Northern Ireland.
The four seasons cross stitchClose up of the stitches
From that Dutch kit, I have completed numerous cross stitches since then and they have graced the walls of my home. Some have long gone, given away or never came with me from New Zealand. Even with the countless designs I have stitched over many, many decades, I can honestly say that I have never come across the latest notion that I have launched on the website. When I discovered and read up about them, I knew that I just had to have these handy wee tools. They are a complete game changer and makes it so easy to count and start your work in the correct place. Over the years I have used pins or needles to help me count, but I have found that they can slip out or you need to secure them over a couple of holes which can be confusing. Pins/needles can also be quite small and awkward to hold with your fingers while counting out squares on fabric.
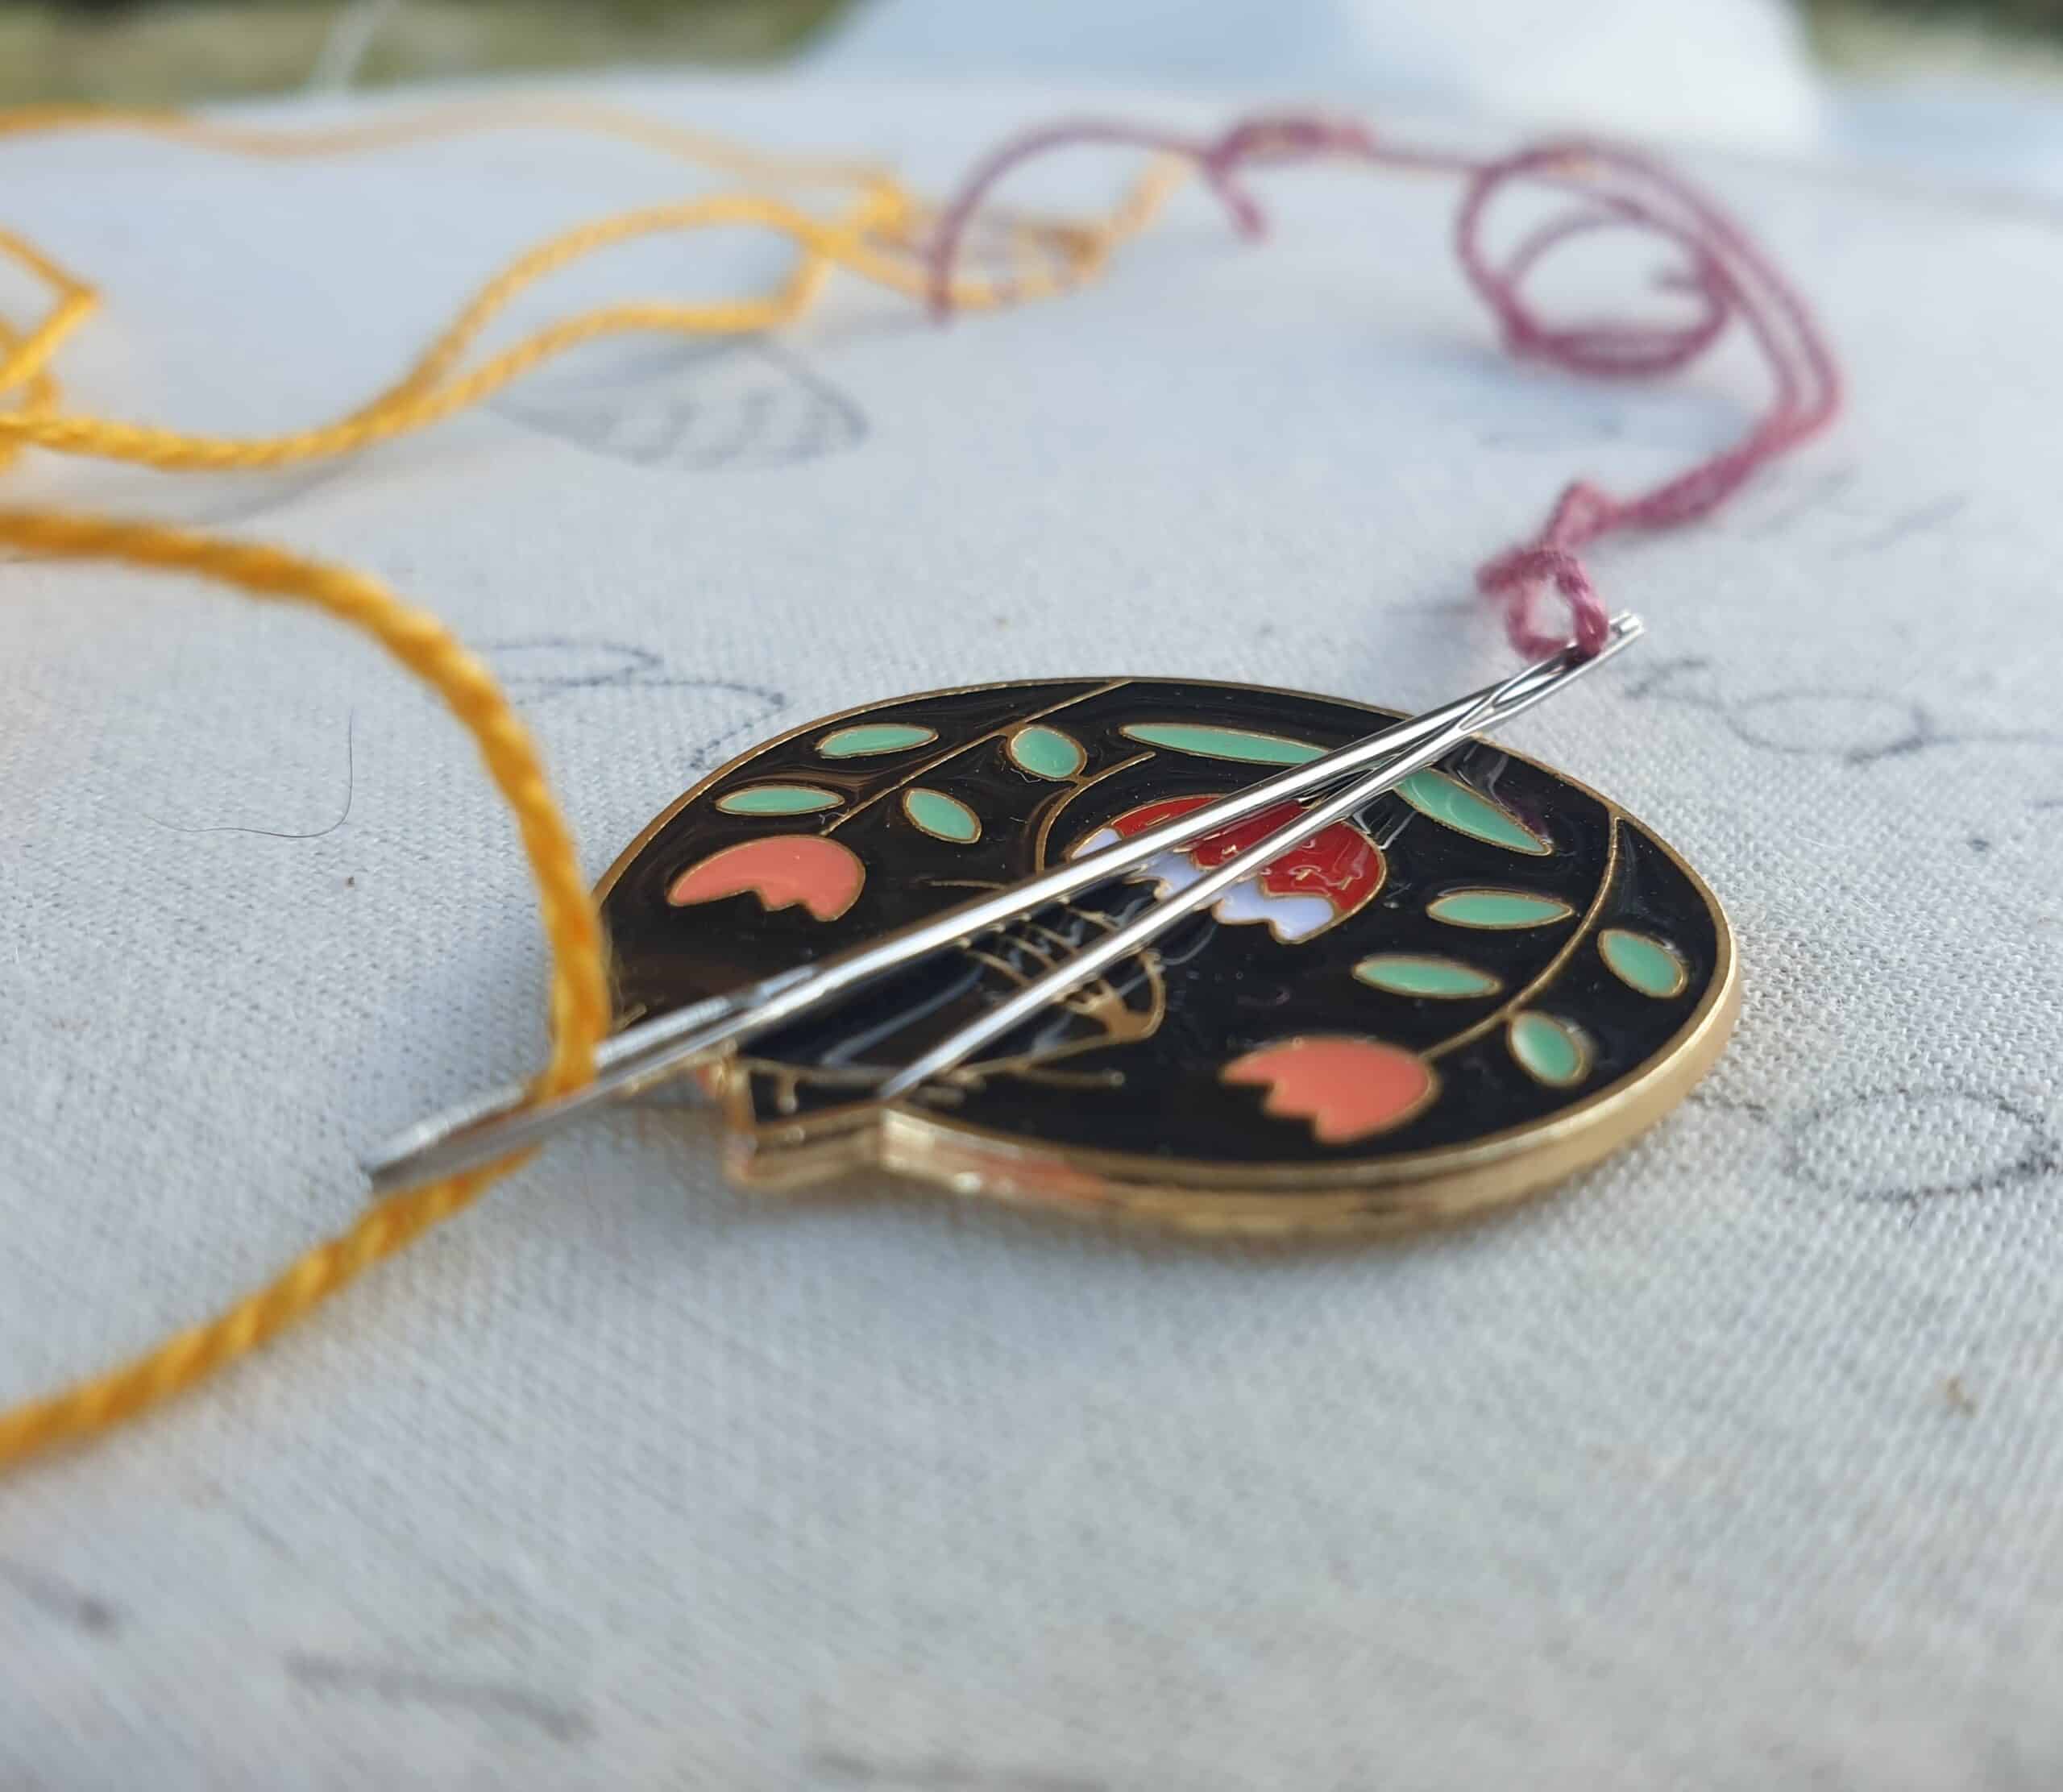
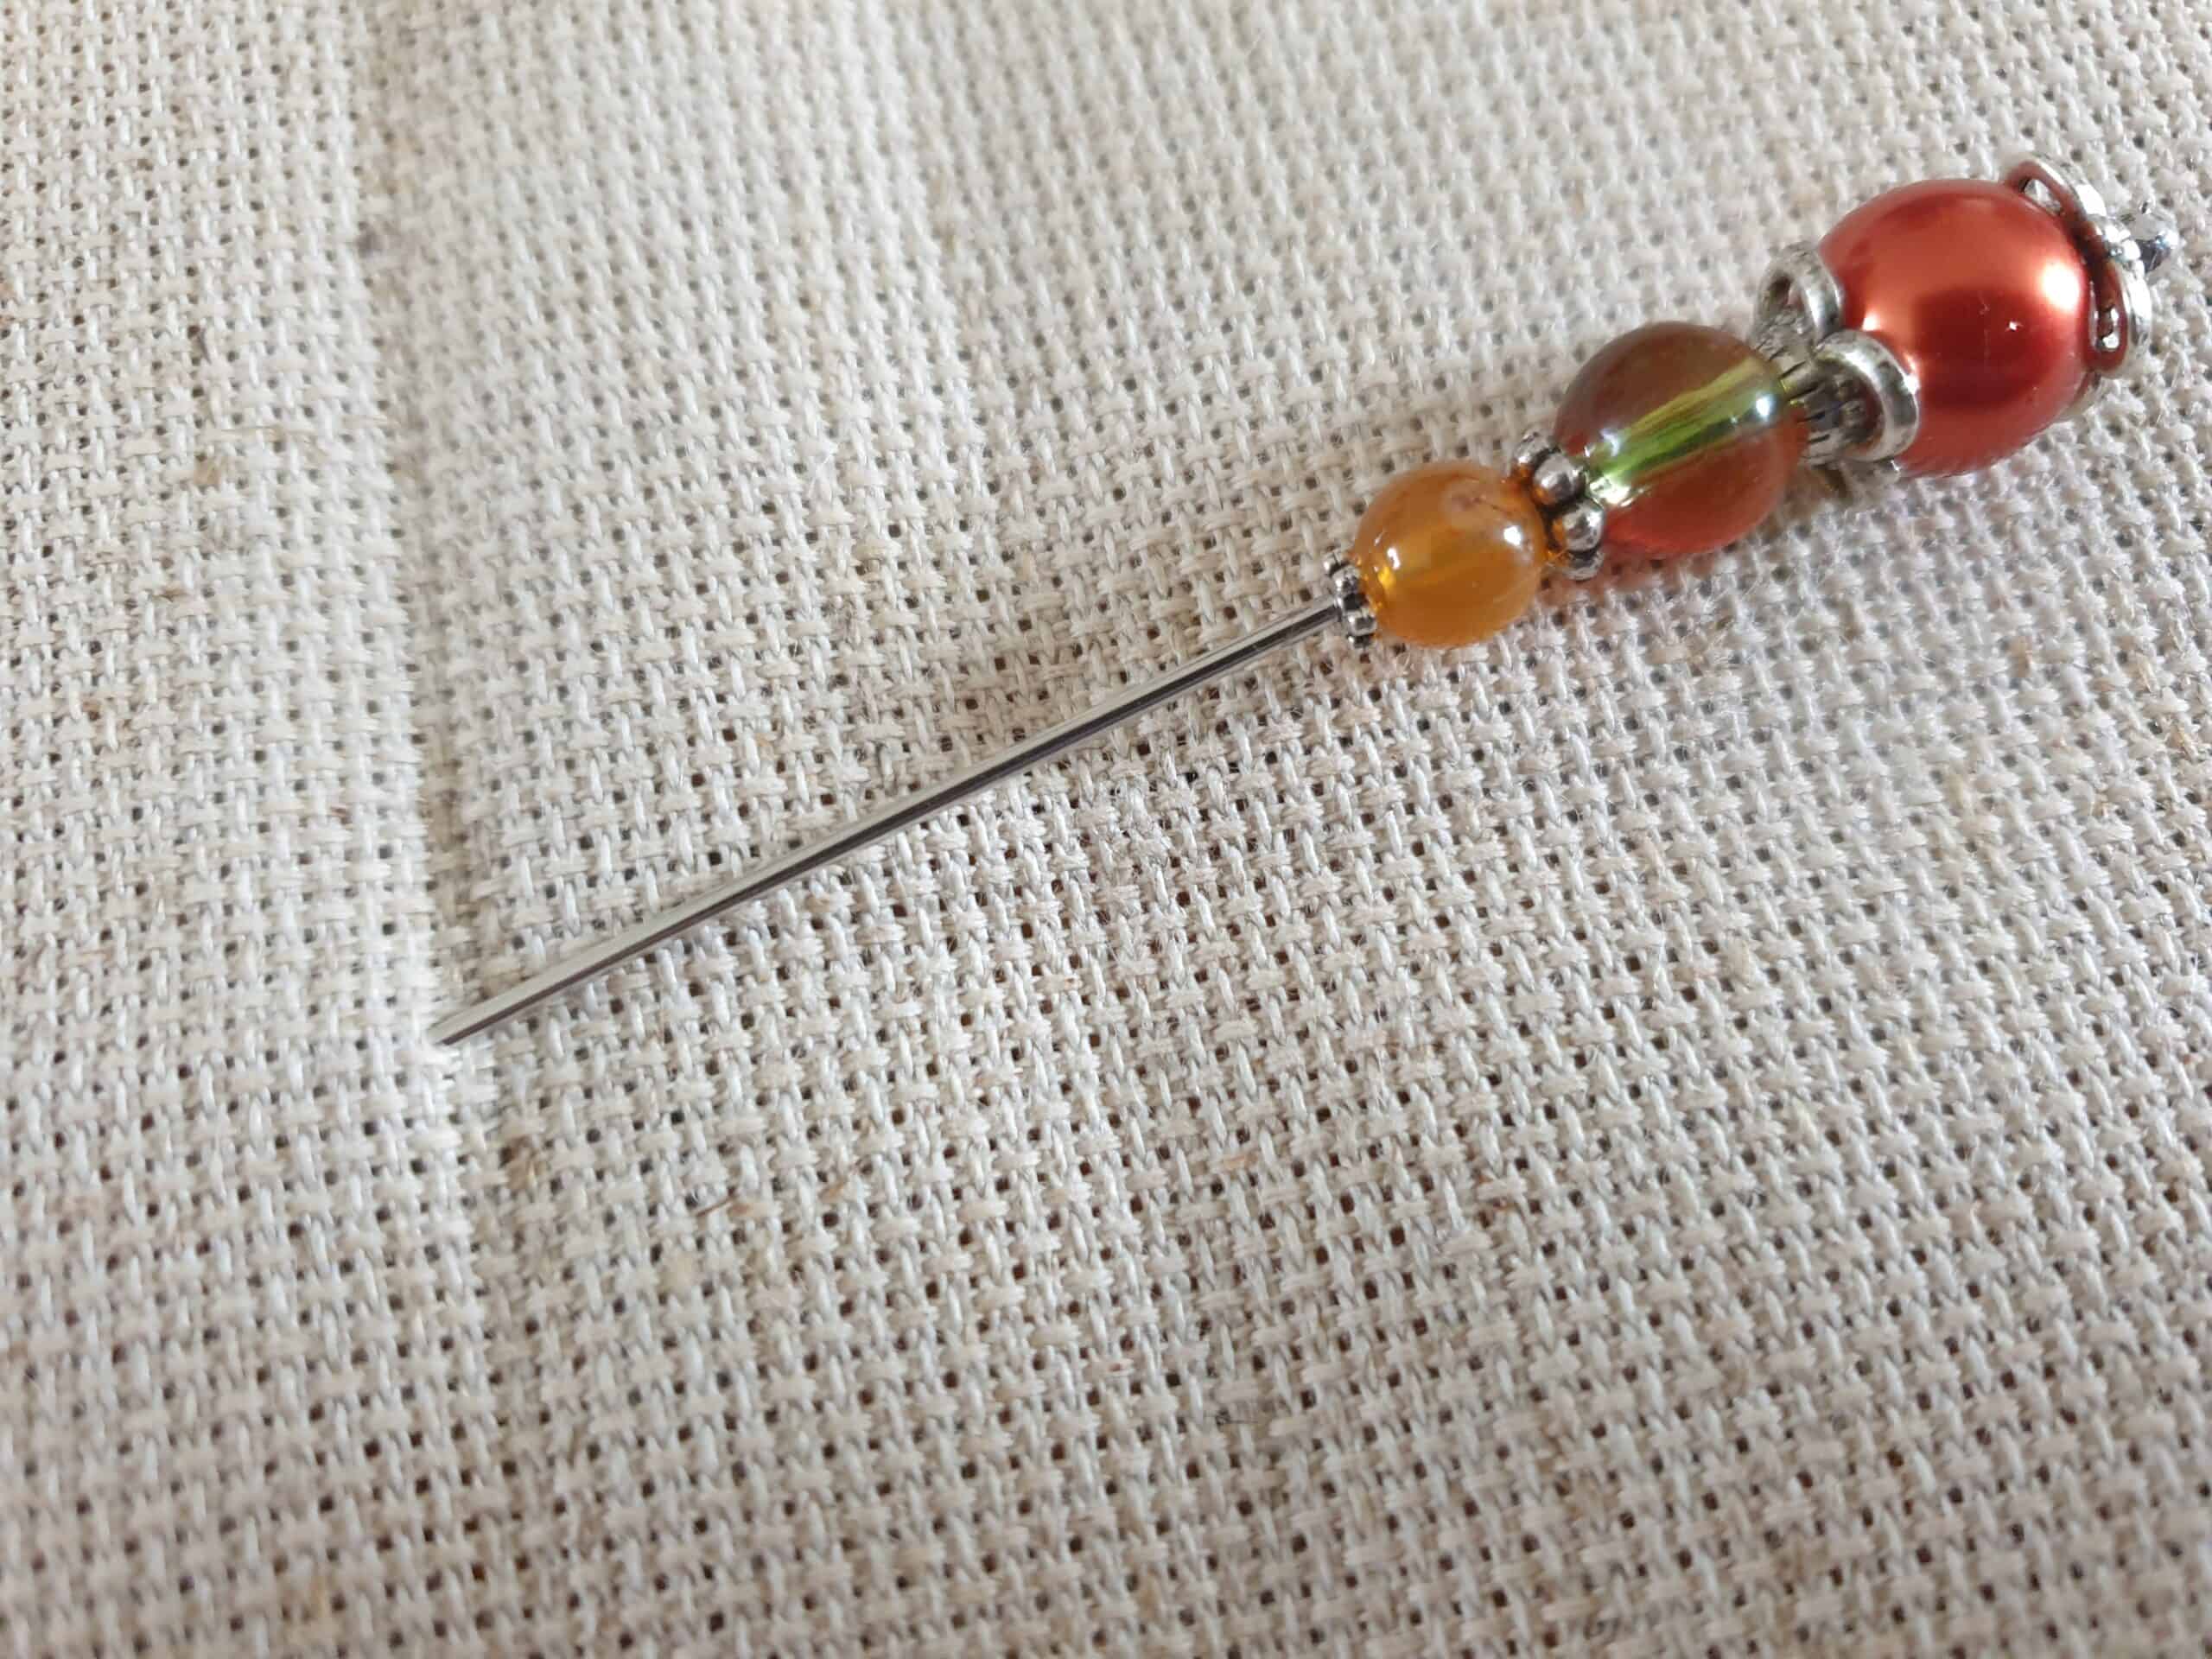
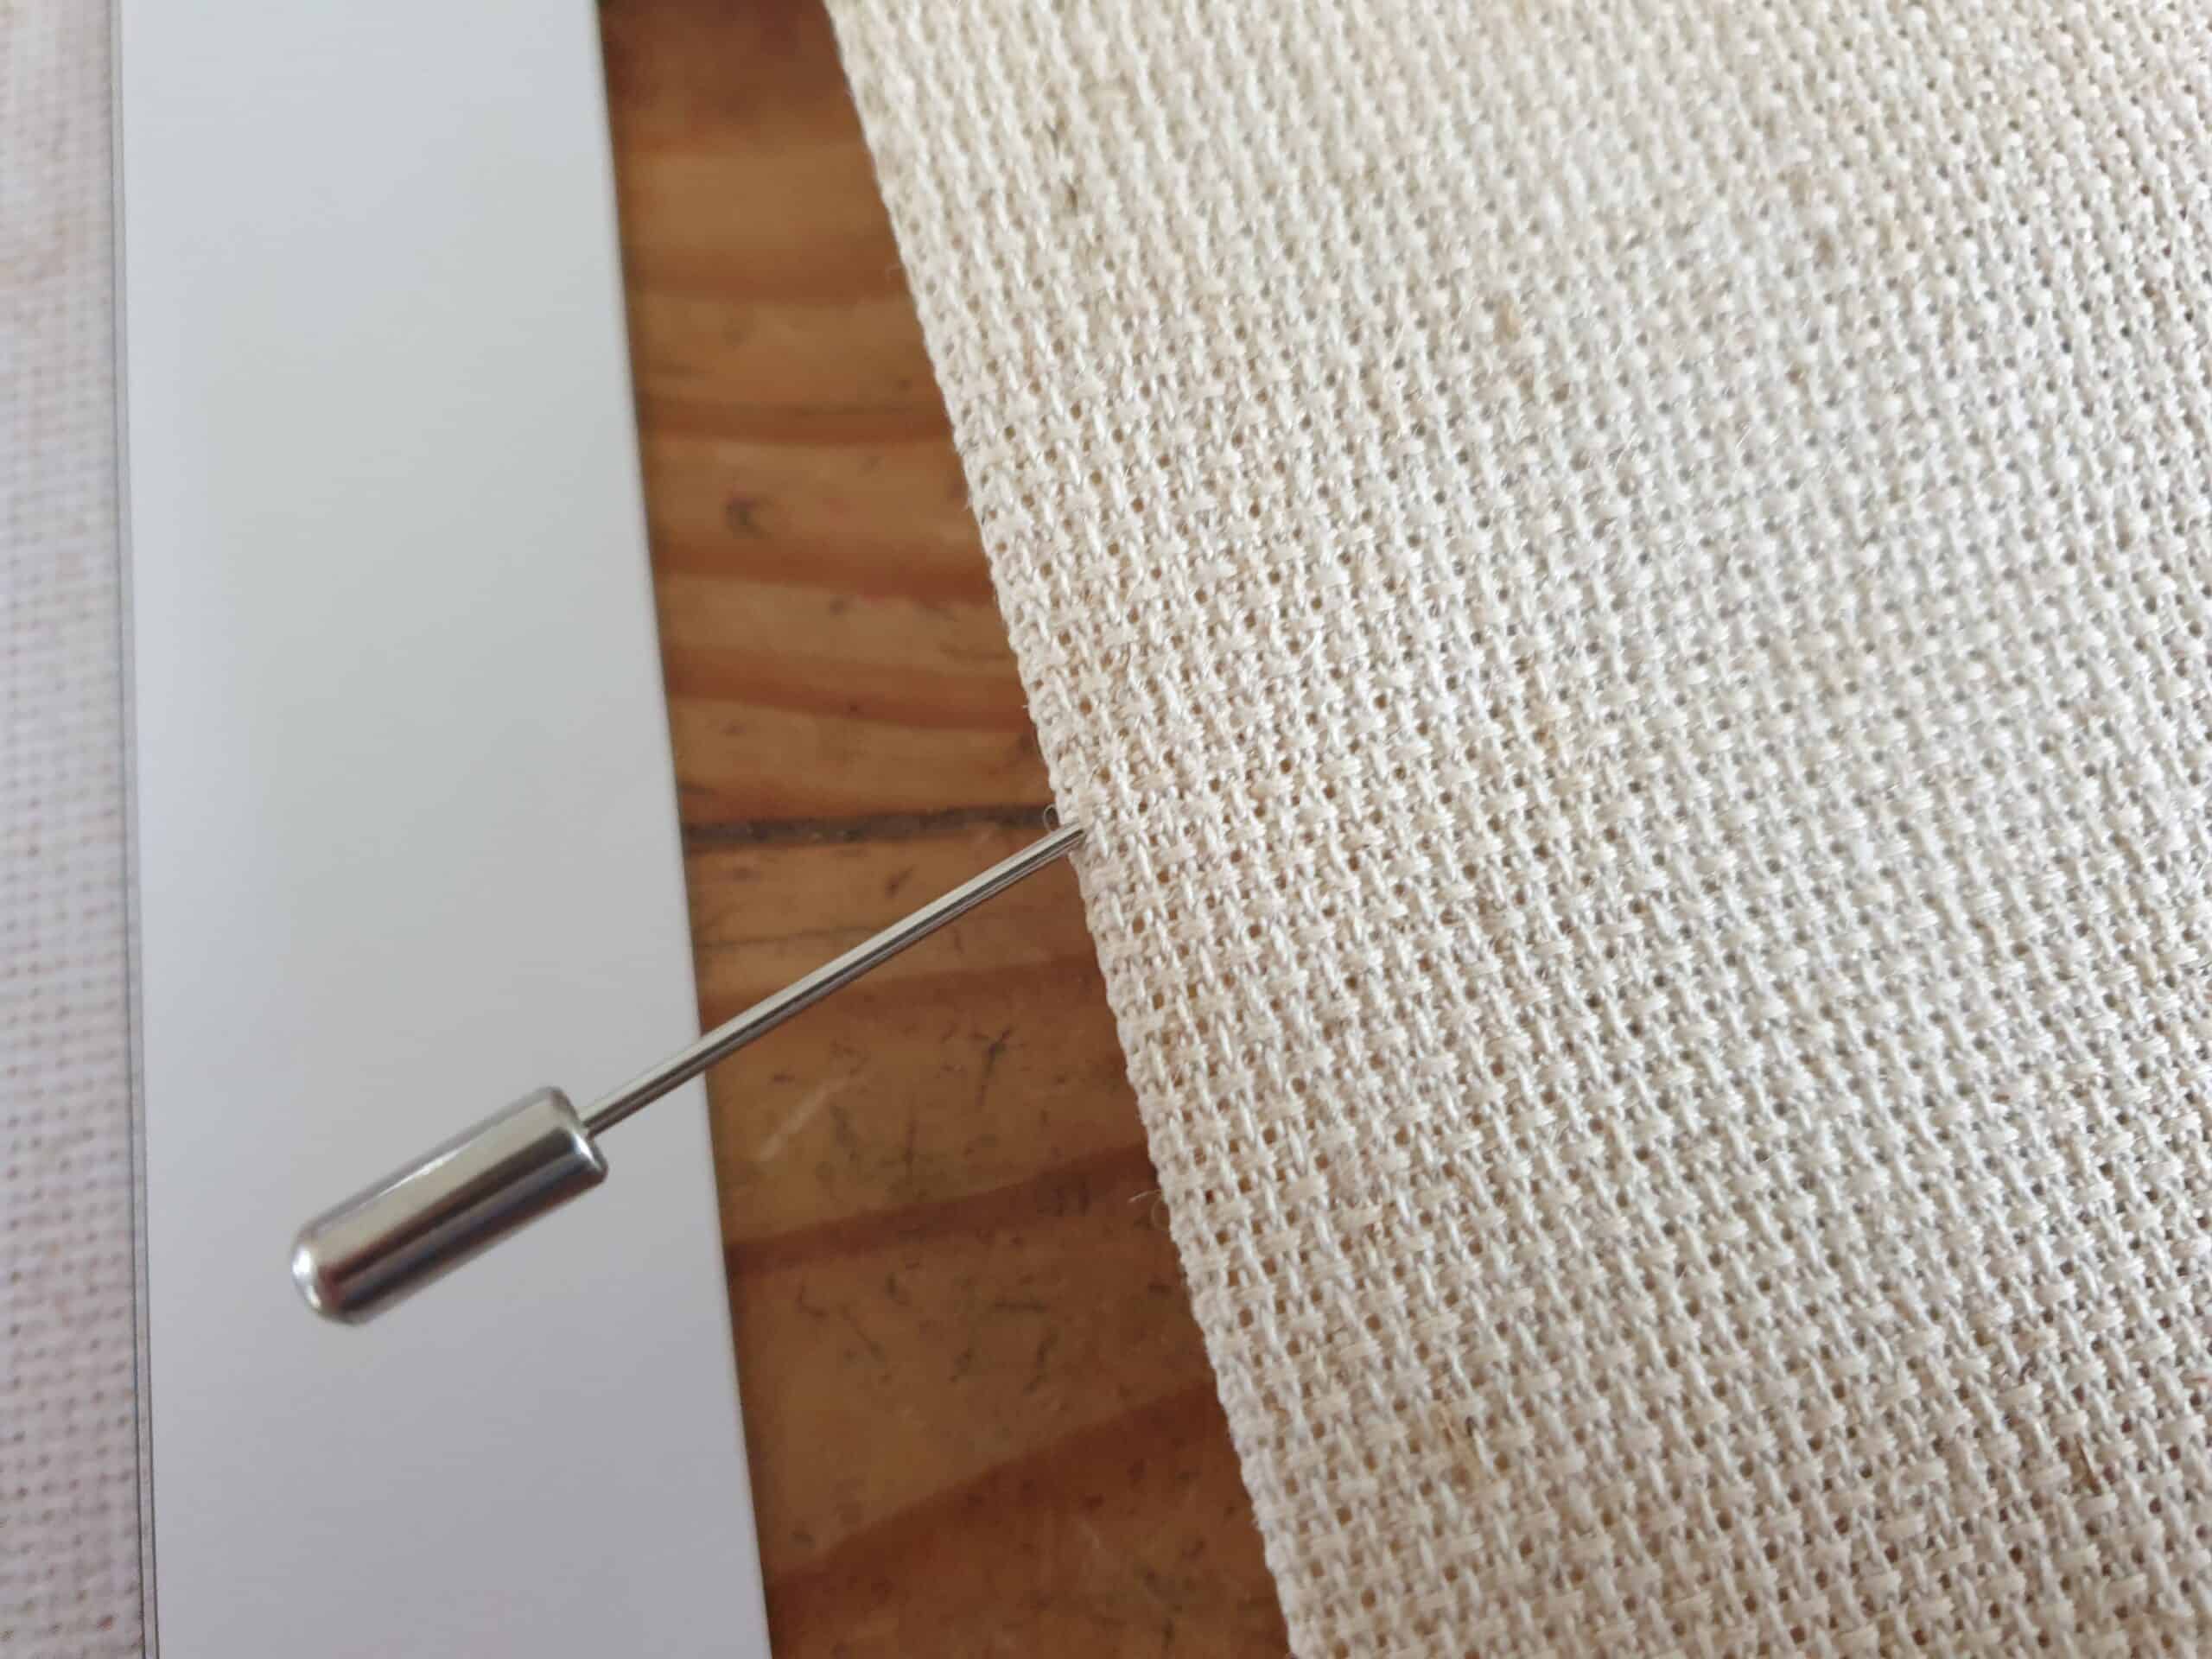
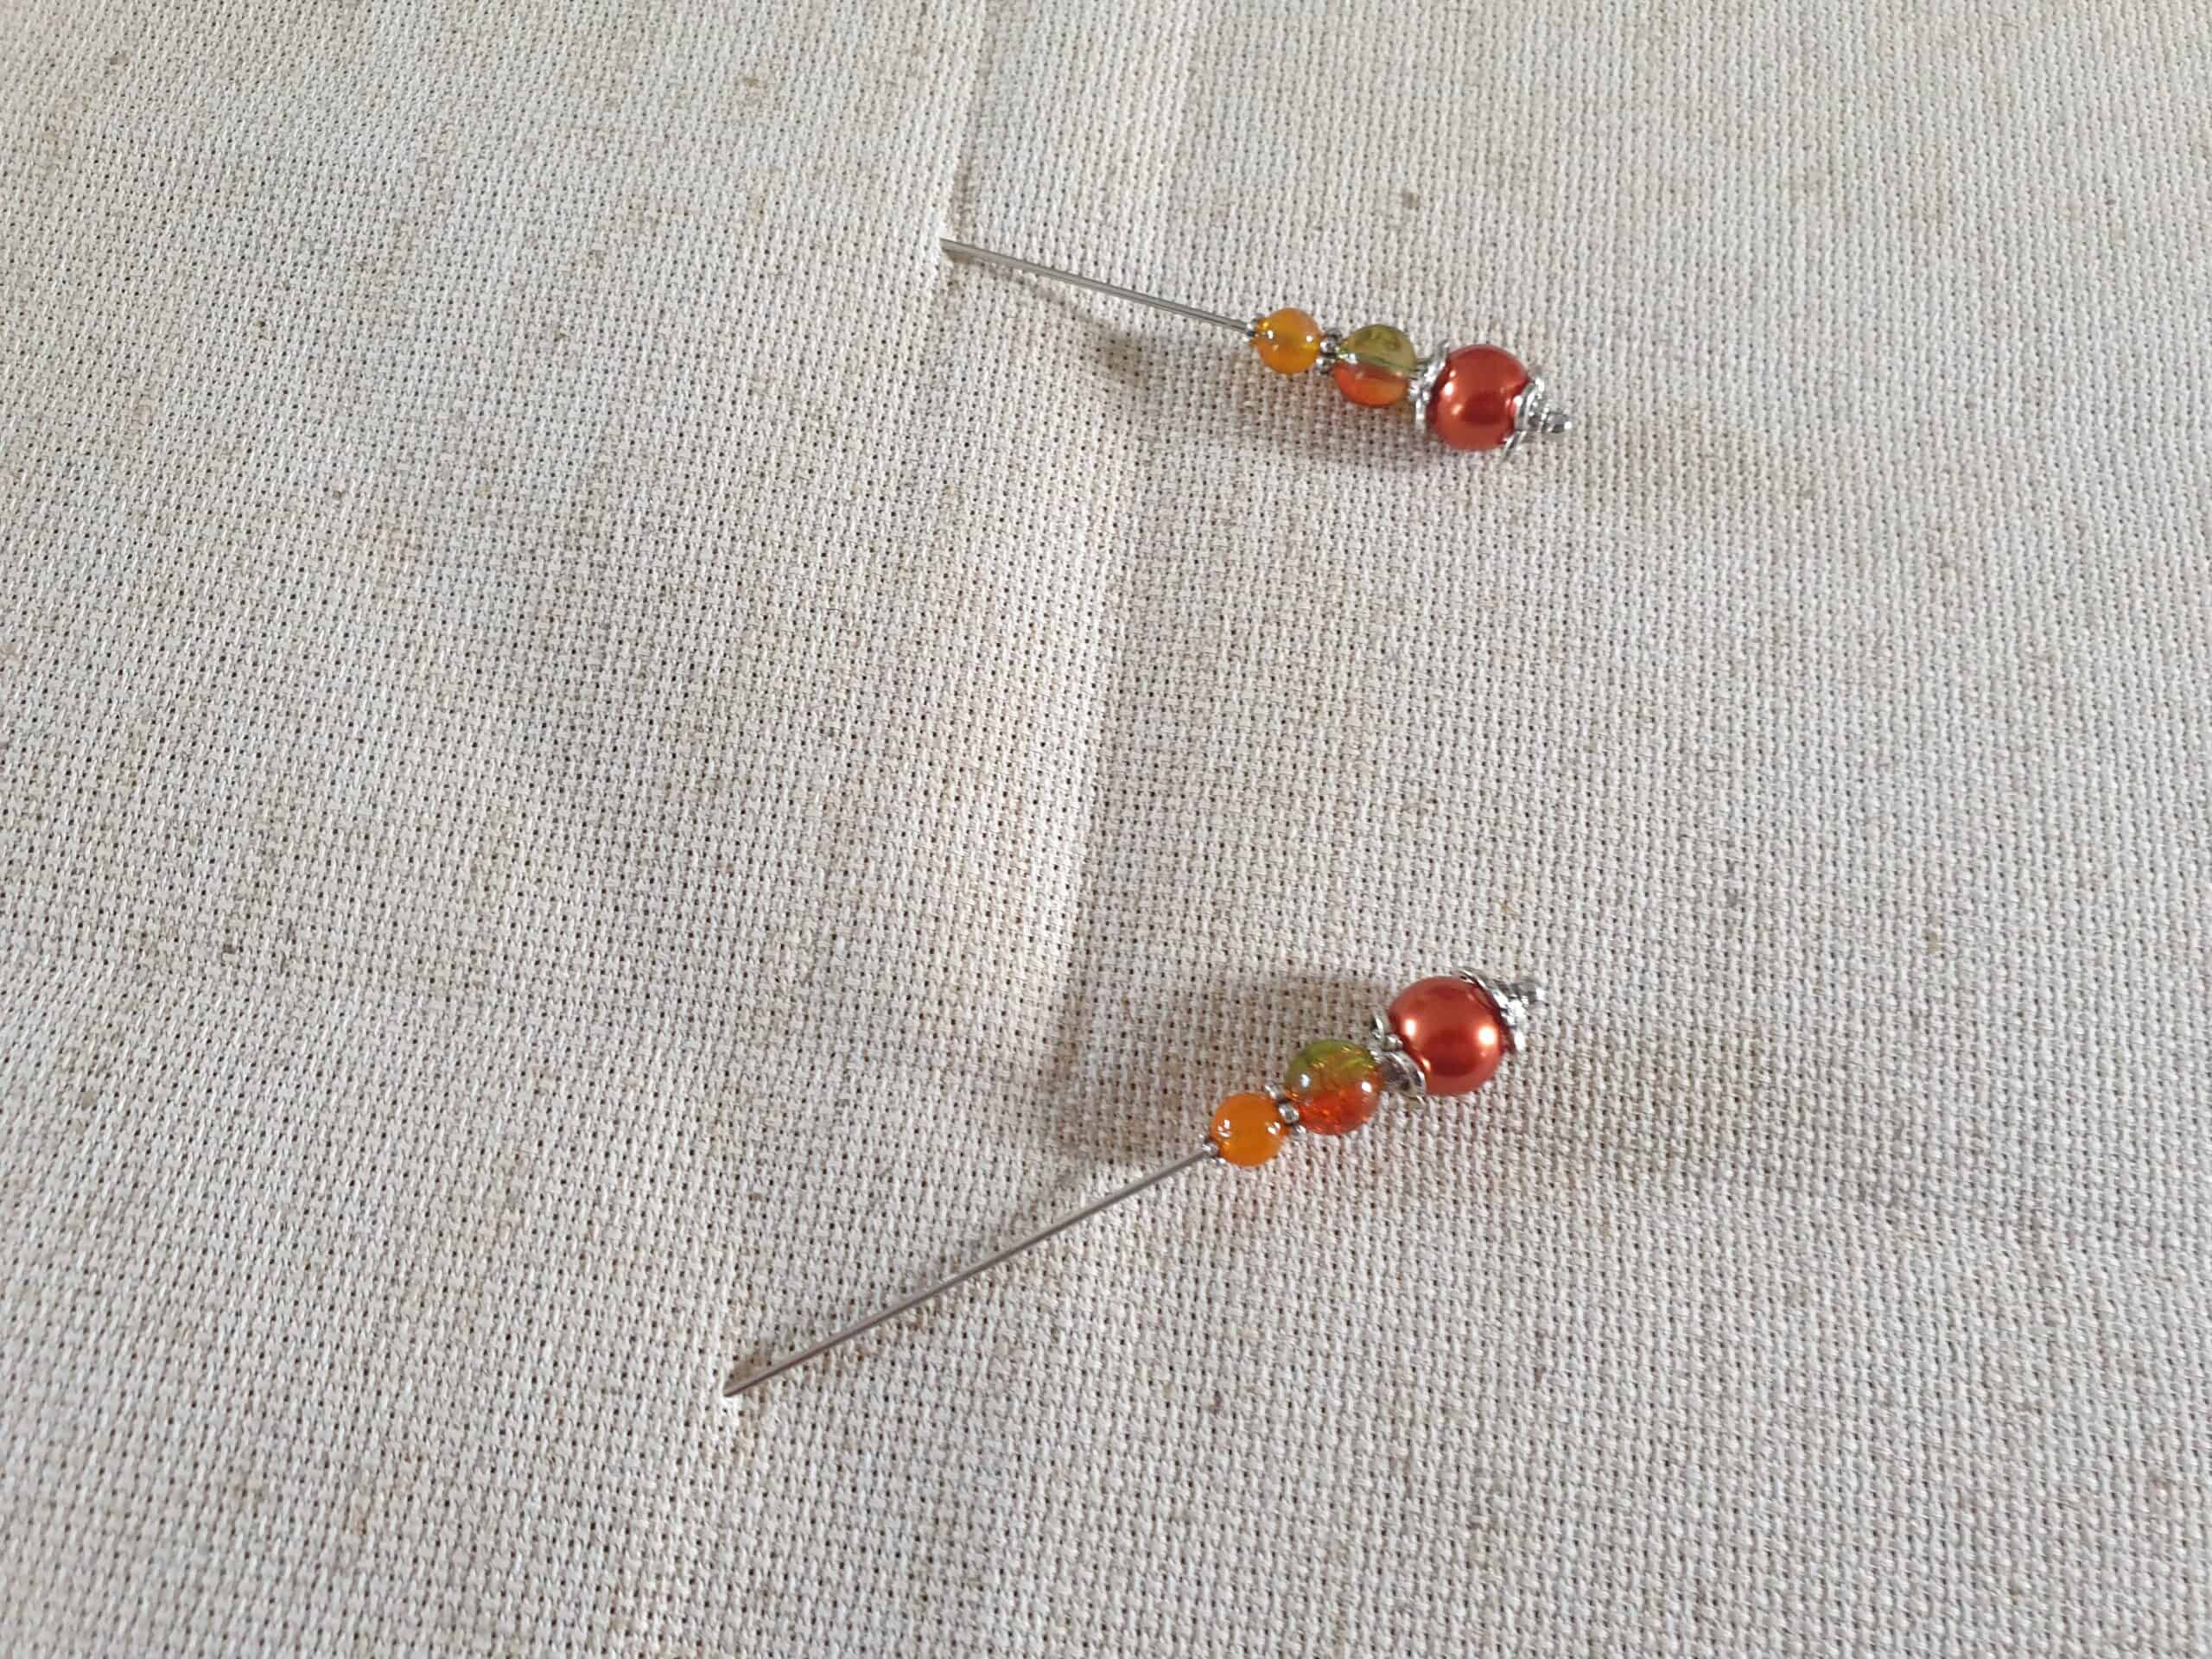
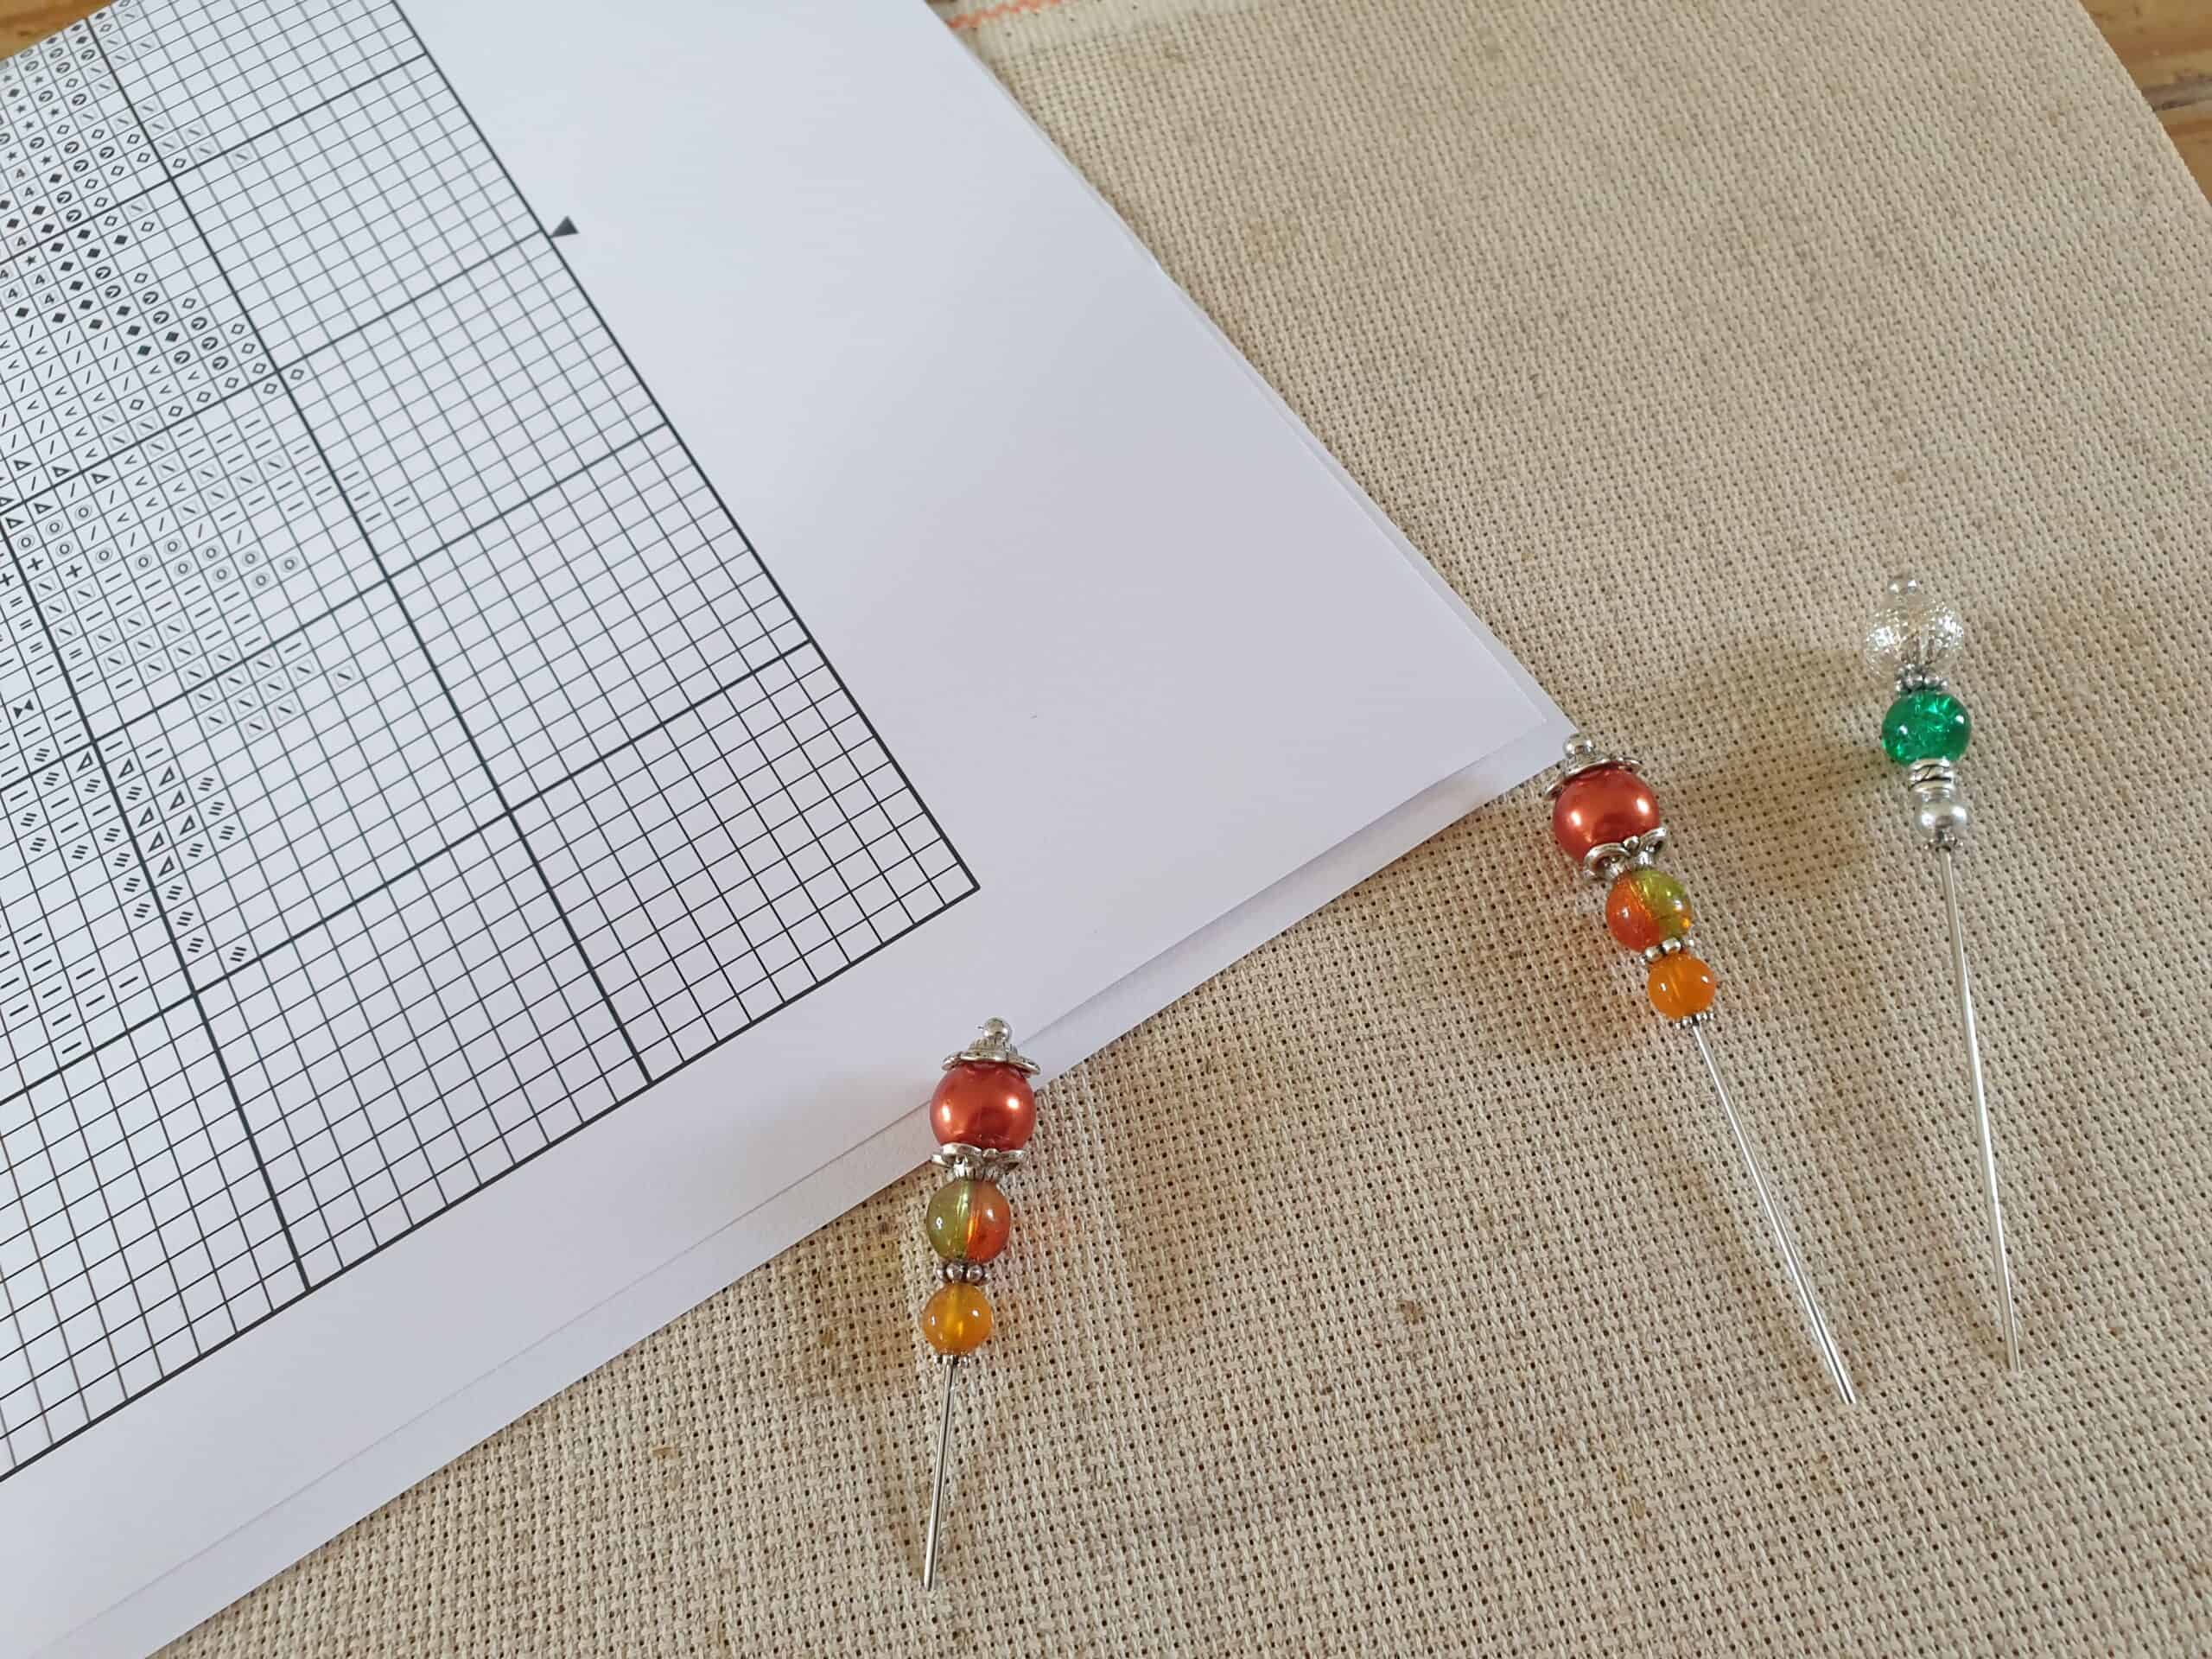
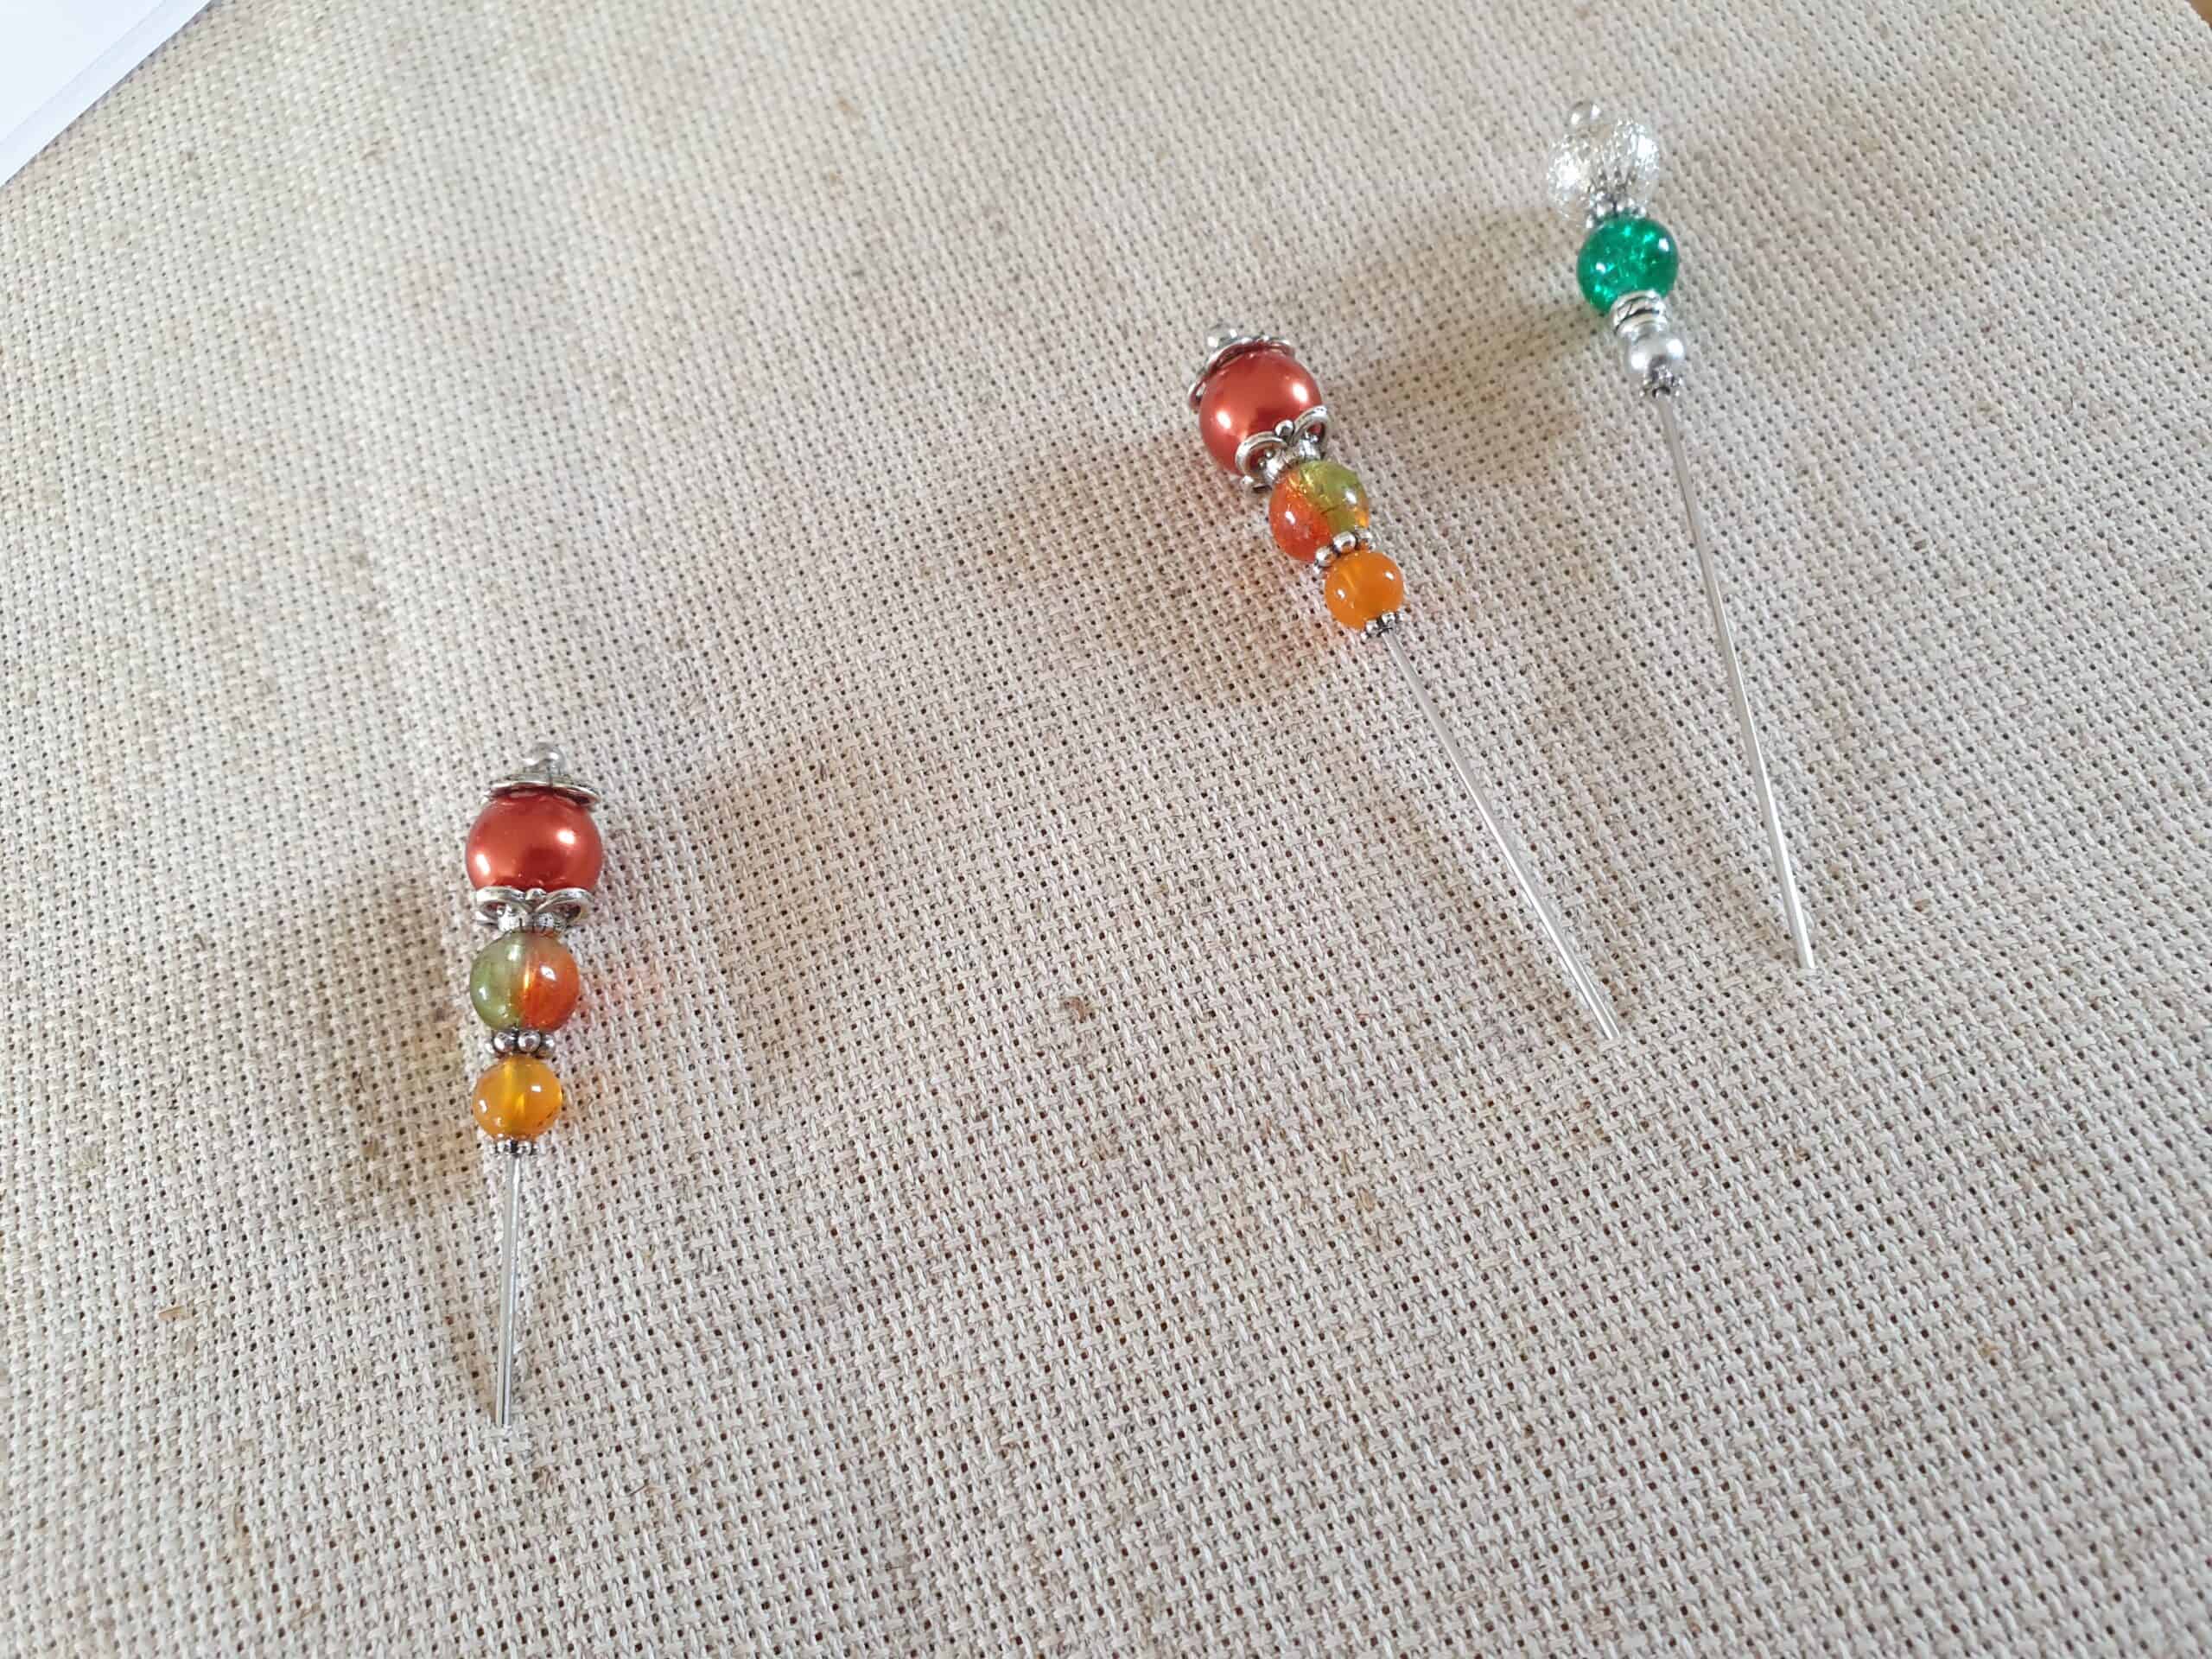
These counting pins are larger, have an extremely sharp point, but also have a cap to place on the end to secure into the fabric so they don’t fall out and also to protect your fingers from the sharp points. With having beads etc at the top of the pin, it makes it easy to hold them while you are counting out the squares on the fabric.
So how do you use the counting pins?
I mentioned above that I had been taught to start stitching in the bottom right corner and work my way across to the left to complete the design. Many others start in the middle of the design and work their way out and away from the centre until the design is complete. Whatever way you start your cross stitch, you still need to do some counting, and this is where the pins come in handy.
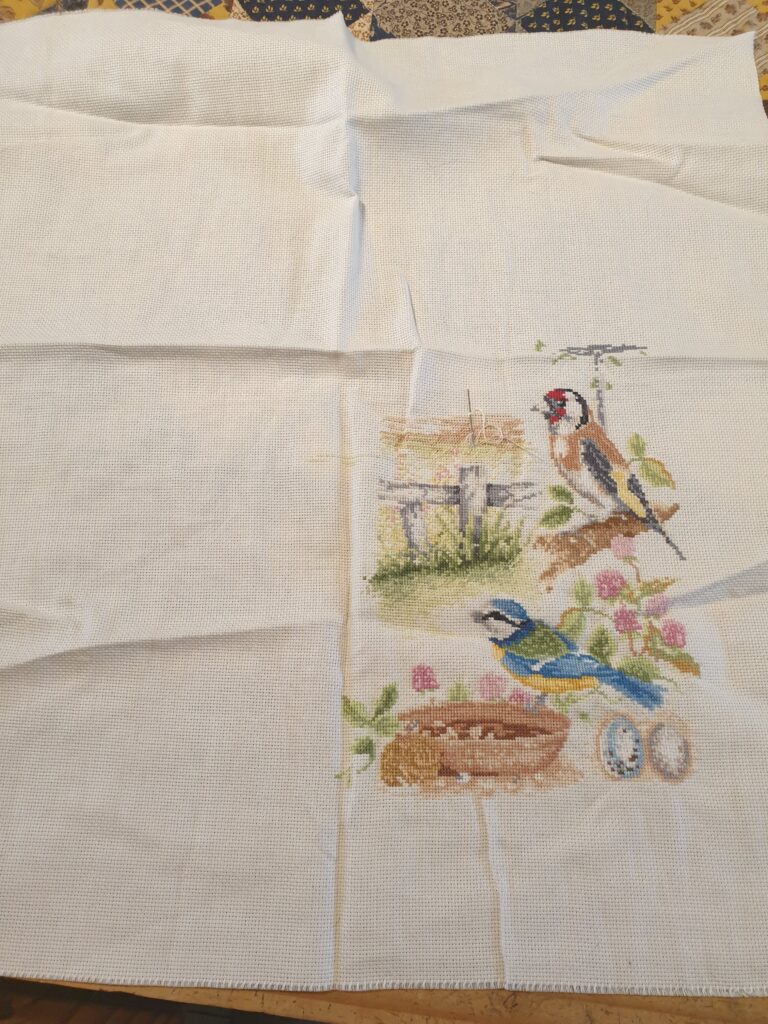
Cross stitch design to be started
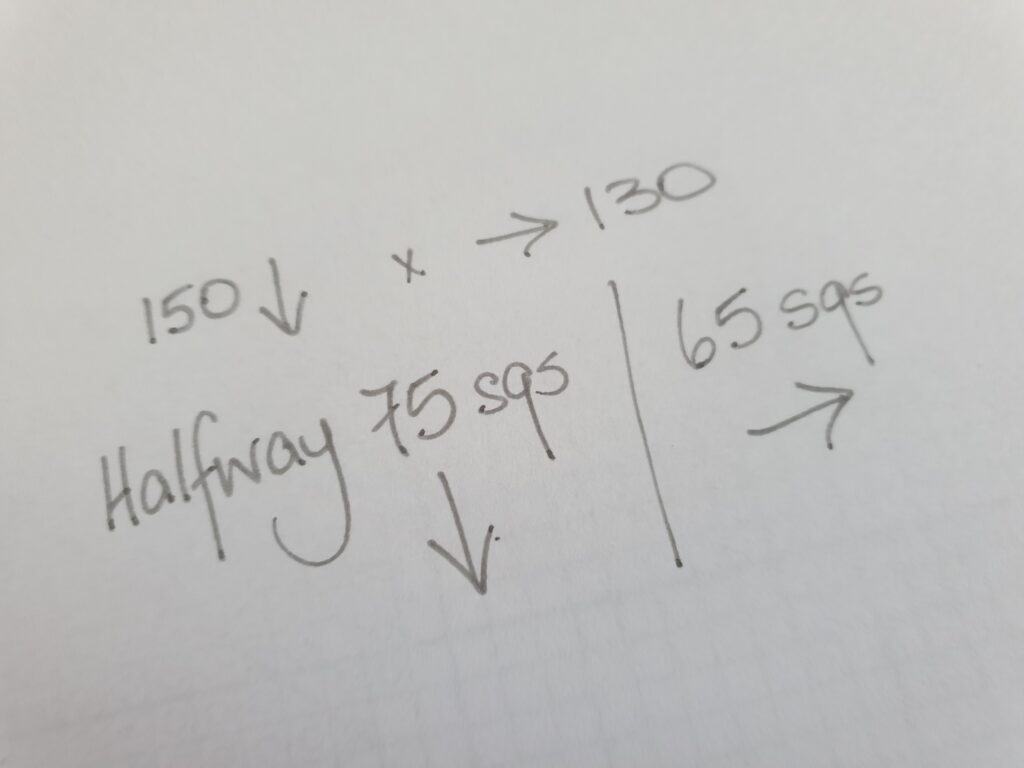
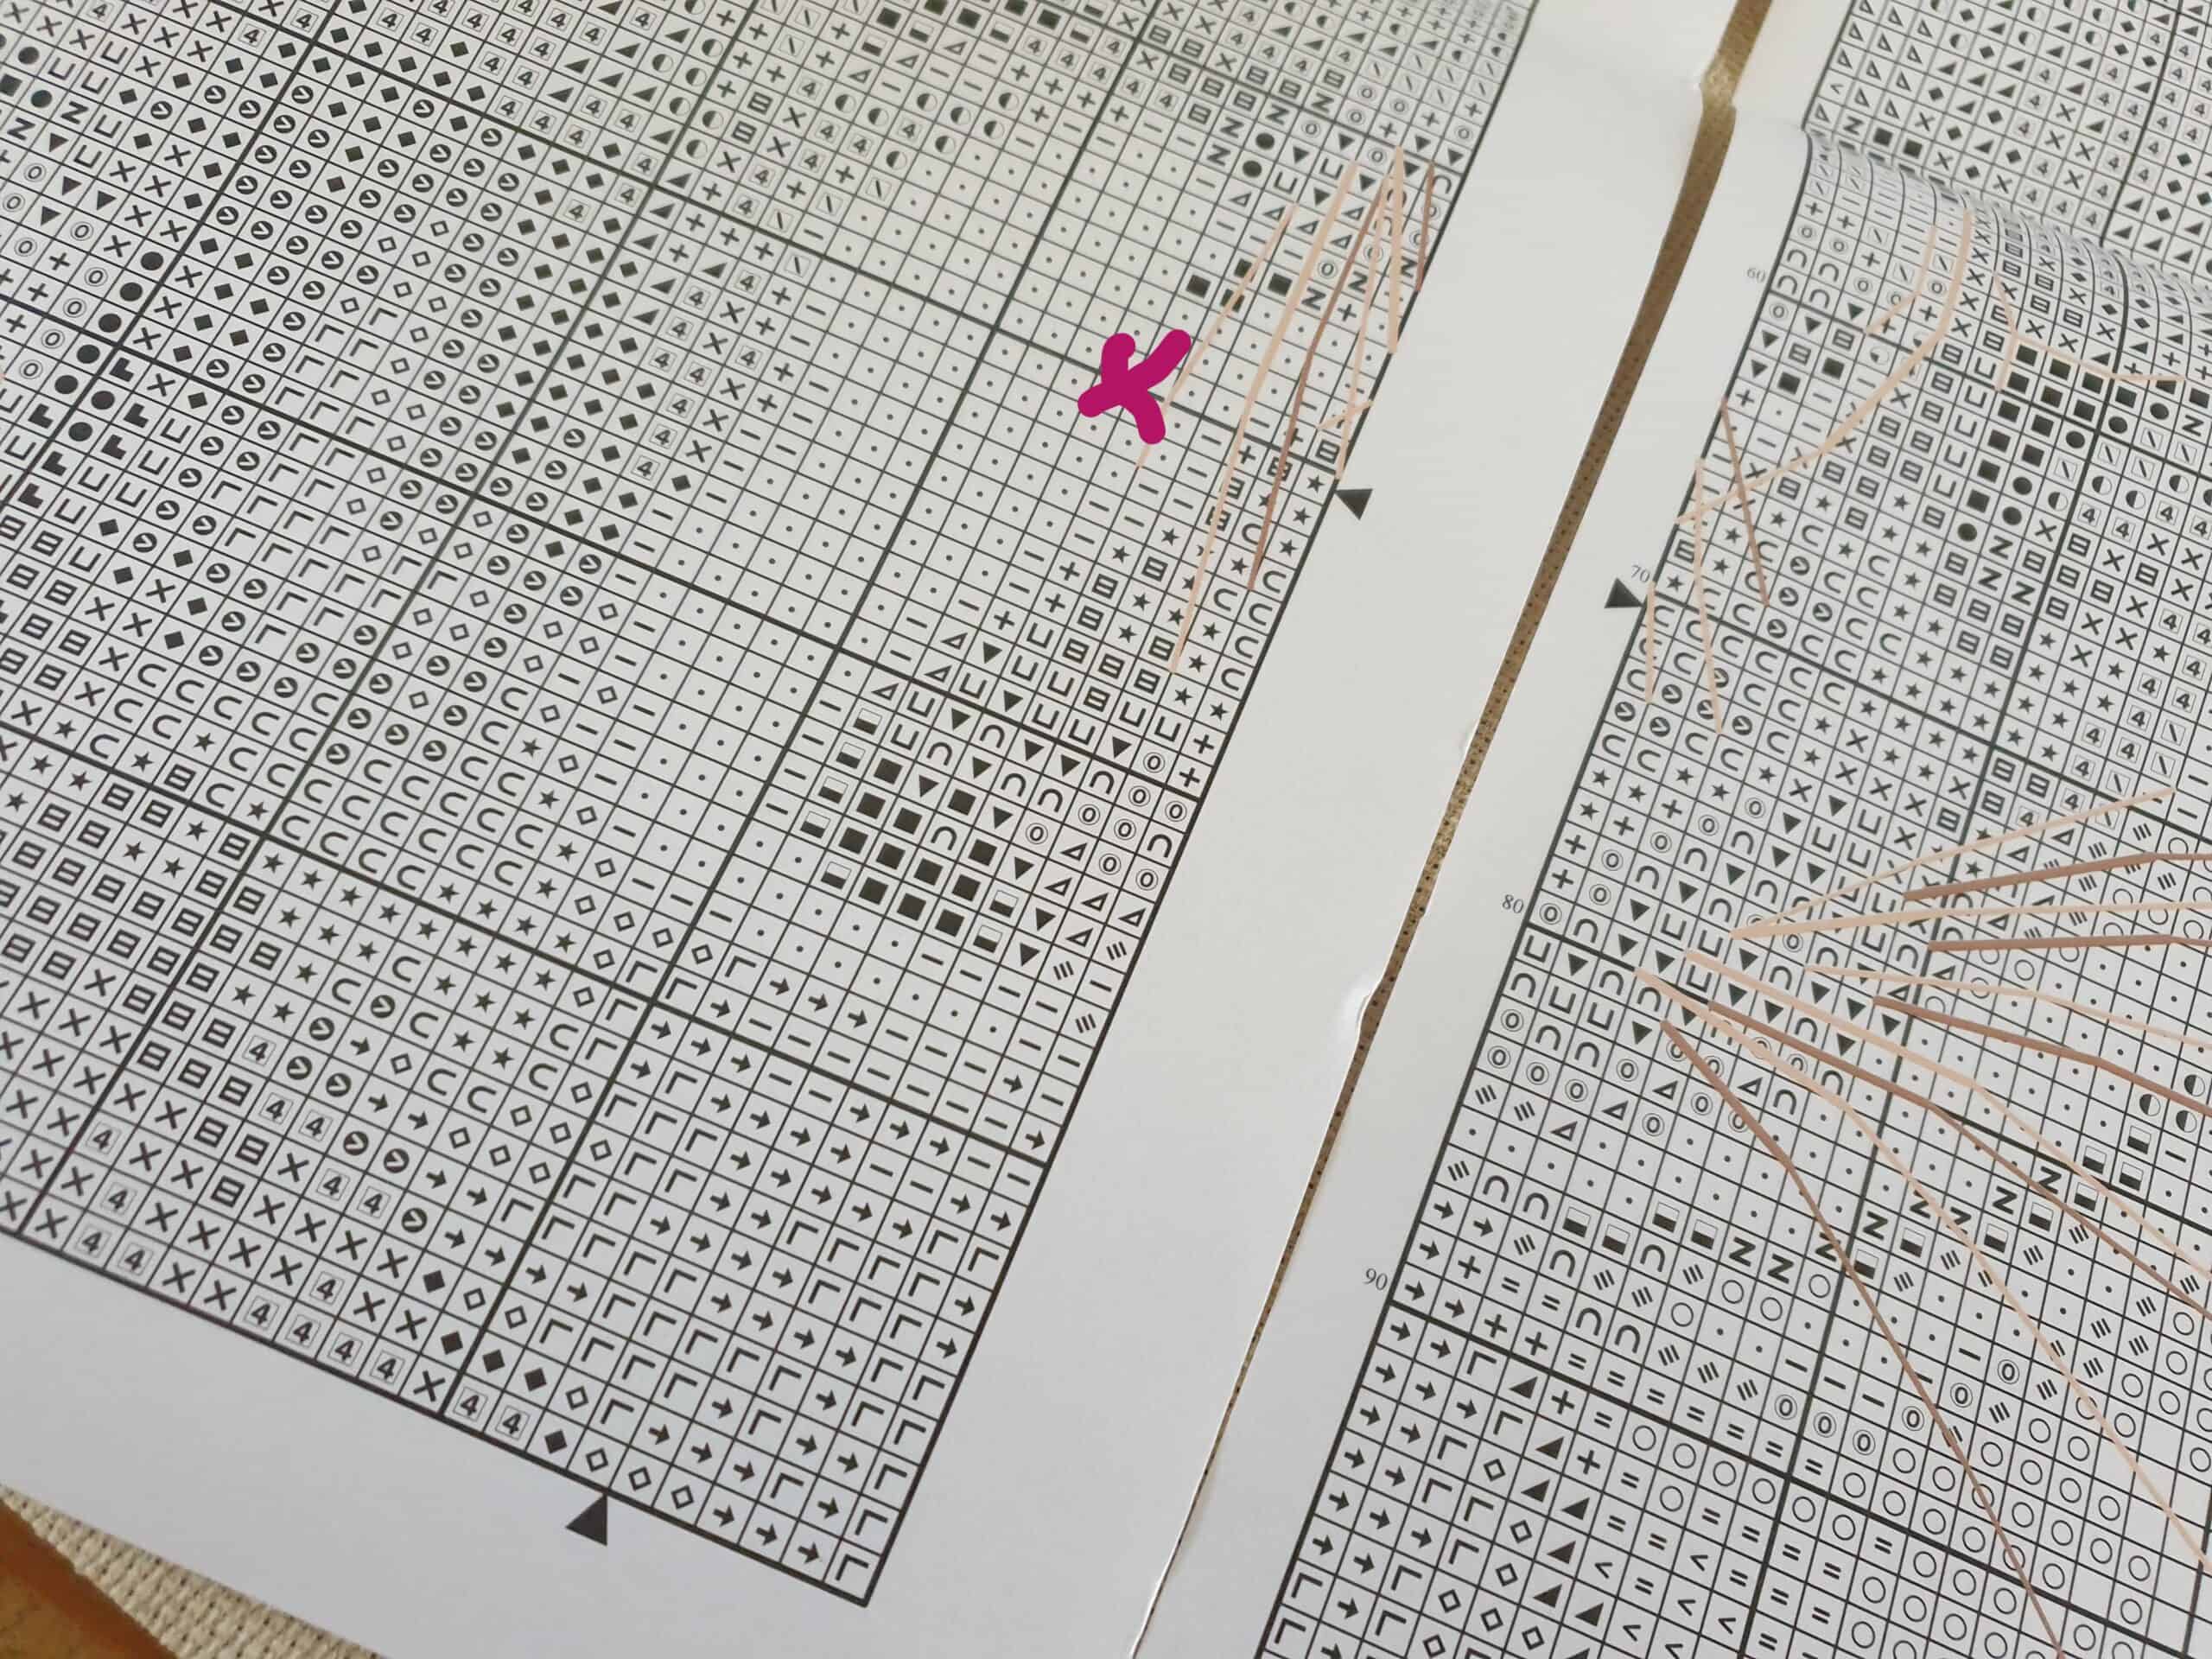
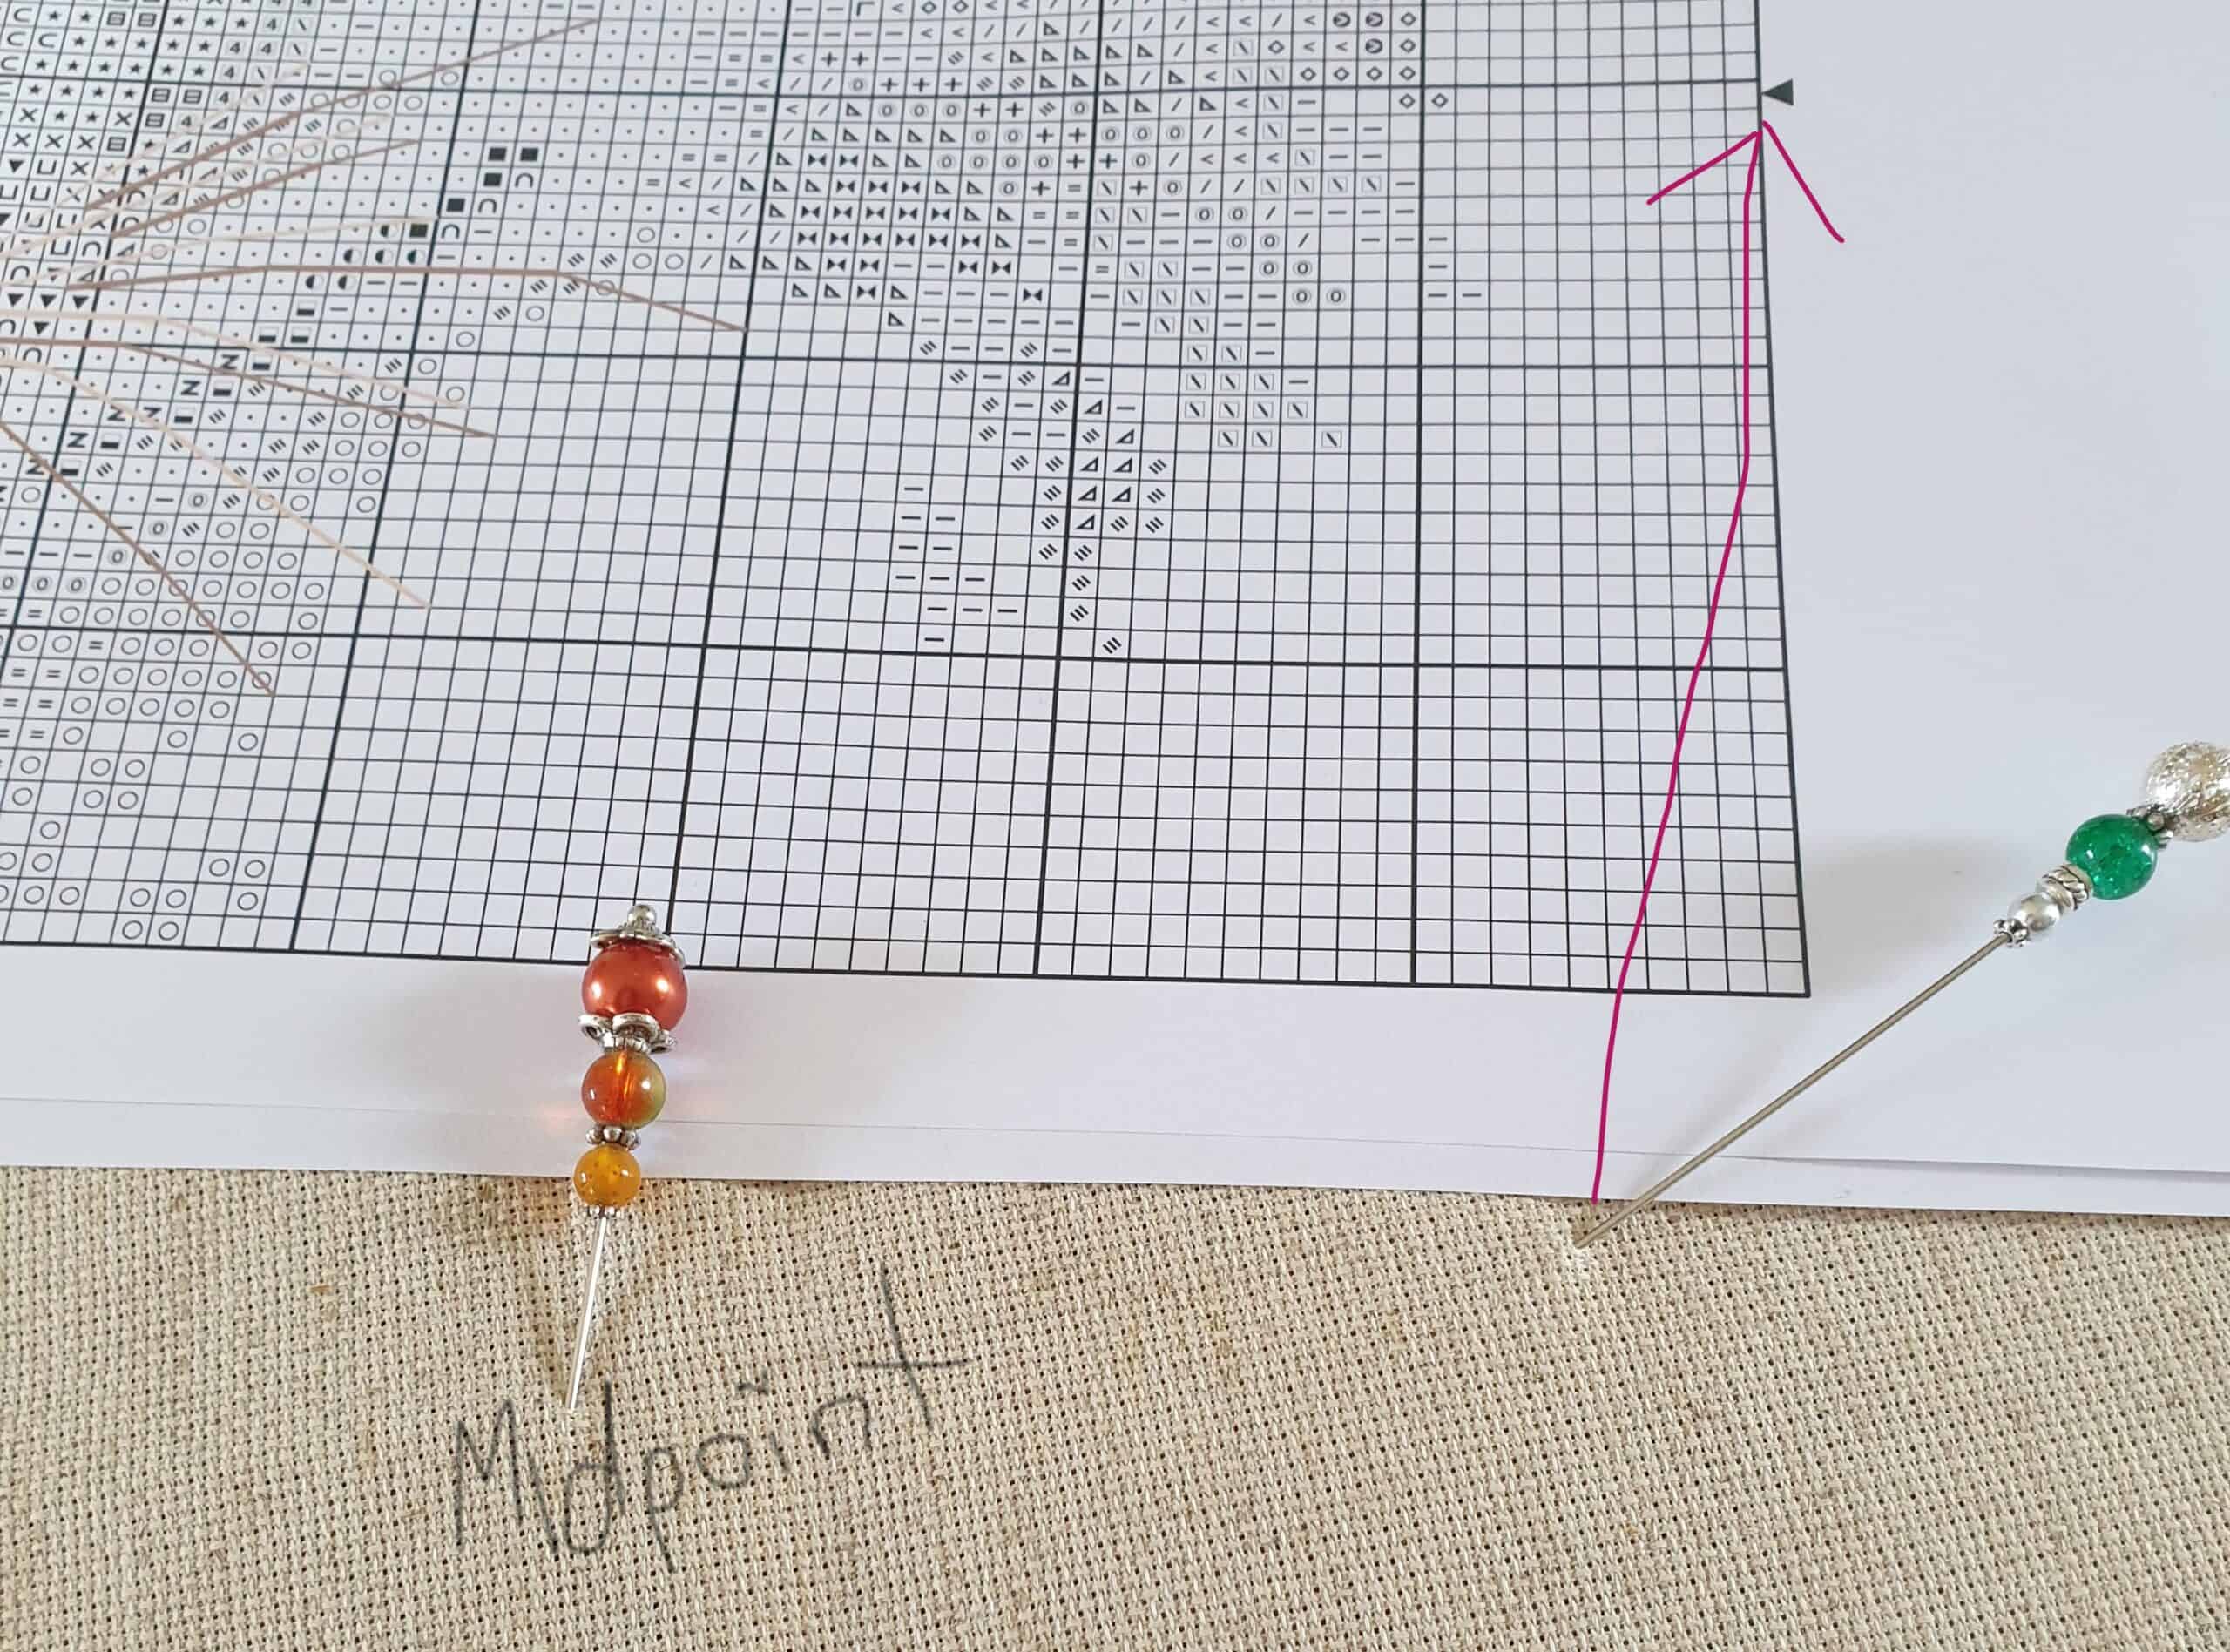
I started off a cross stitch design for Alyssa the other day. I am trying to encourage her to get into cross stitch and she chose this design of two foxes. I folded the AIDA fabric in half twice to find the mid-point on the fabric, so I knew where to start counting from. I found the middle point of the chart, well actually I looked to see how many squares there was in the design going down and across the chart. I halved those figures to get my counting figures for going down and to the right from the mid-point.
calculating the squares on the chart
I placed my first pin into the fabric which was the middle, taking the sharp point of the pin through to the back of the fabric and placed the cap onto the end of the pin so it was secure and would not fall out of the fabric.
Marking Centre point of design Securing the counting pin with the cap
So going from the mid-point on the fabric, I counted down 75 squares and placed a second pin into the fabric and secured it like the first pin. I now knew where the bottom of my design would finish.
X showing the mid point of the designtop pin is the mid point on the design and the bottom pin is showing the 75 squares down to the bottom of the chart
Now counting to the right from the pin, I counted 65 squares and placed my third pin (green counting pin) into the fabric. I now had the far right bottom corner square placed on the fabric.
showing 75 sqs down and 65 sqs across to right
As I mentioned before, I had always been taught to start there (but there are always times when rules need to be adjusted) and I looked to see where the first actual stitch was on the chart to begin stitching. On checking the chart, I came to the decision that it was not practical to start at the bottom corner as there really were NO stitches to be made there. They started more in the middle of the chart to the right. That was no problem. I still had my middle pin secure in the fabric. So I started counting my 65 squares from the middle pin going to the right as I had done at the bottom. The green beaded pin is the outer right side of the design.
counting 65 spaces to right
So now I had that marked, I was able to find the stitch that was the best starting point on the chart. This starting point is shown by the amber beaded pin just to the left of the green pin – 9 squares to the left of the outer right side and 1 square below the midway point. Since the counting pin is secure in the fabric, there was no fear that I would lose my starting point.
finding starting point from chart onto fabricpins secure in the fabric until ready to start
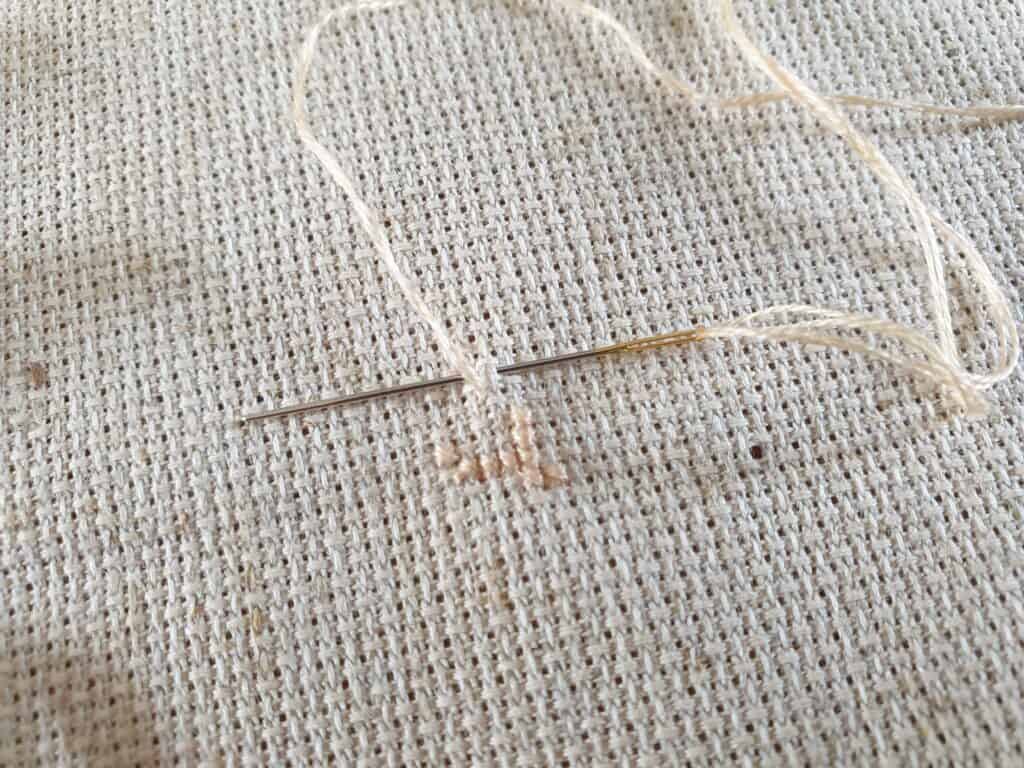
I remember in the past; I would find my starting point with my needle (as that is usually what I would have on hand as I was about to start stitching) and then had to remove my needle so I could thread it up with the correct thread colour. With no marker in the fabric it was so easy to lose the starting point, so I would sometimes wriggle my needle before removing it so it would make the hole larger, and it would be easy to spot (usually). Not good habits to have.
Starting to stitch
These counting pins are a game changer! I really don’t know how I managed without them for so long. I was actually wanting to start a new cross stitch just so I could use them! Rest assured, they are just not for starting a new project. Even while you are working on your cross stitch project, they are still very useful for counting. Remember the times you had to count out squares to go from one area that has been worked to a new area? There may be a big gap in the stitching as the fabric may be unstitched in the final design. I remember I have miscounted the squares to work a new area of stitches, only to discover further into the design, that I have miscounted by a square or so. It can be so frustrating! But these pins are handy for this, counting the squares and leaving them in the fabric until they are no longer needed. They even work great if you need to work a long line of stitches, just place the pin in where you need to finish up. You only need to count once and not worry about constantly having to count your stitches.
The pins are equally great for working on Blackwork designs. Basically, any needlework where you use either AIDA or evenweave fabric.
The hidden bonus of these notions? Well, they are decorative so make for truly stunning tools …. But …. When you aren’t using them for counting out your stitches on fabric …. They make for stunning shawl pins or just as a brooch to set off a jacket. They deserve to be shown off and not lie in your needlework basket. I love using mine to close my cardi which doesn’t have buttons or even to secure a shawl around my shoulders. They are basically dual purpose – handy needlework tools and decorative accessories for our outfits.
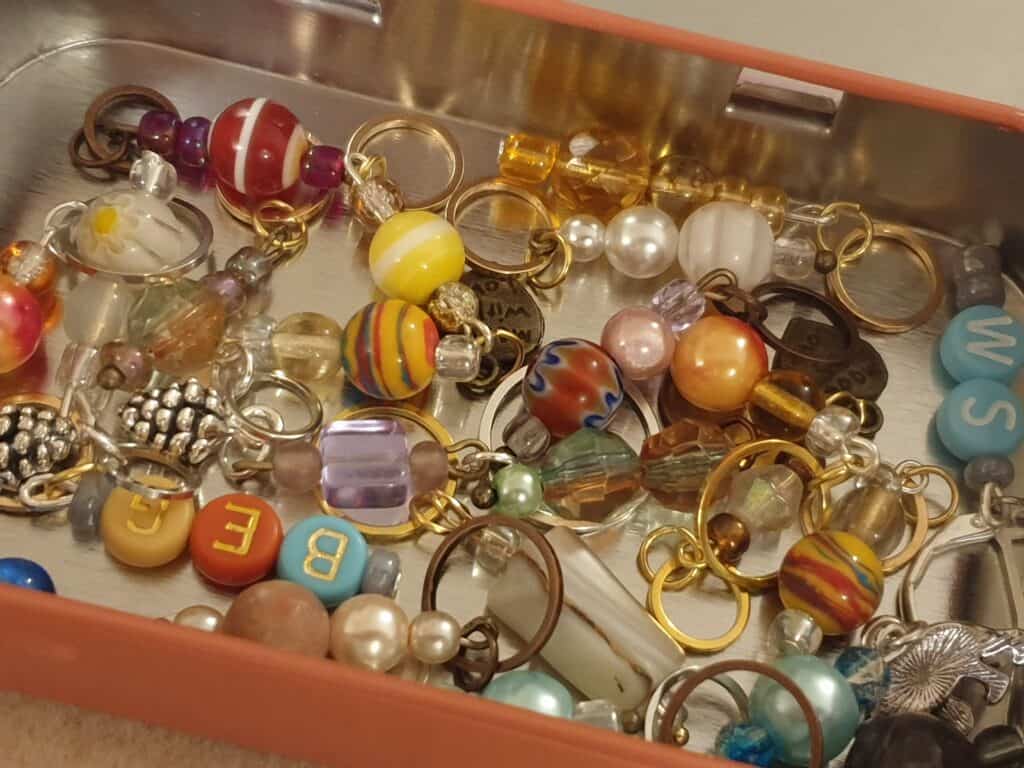
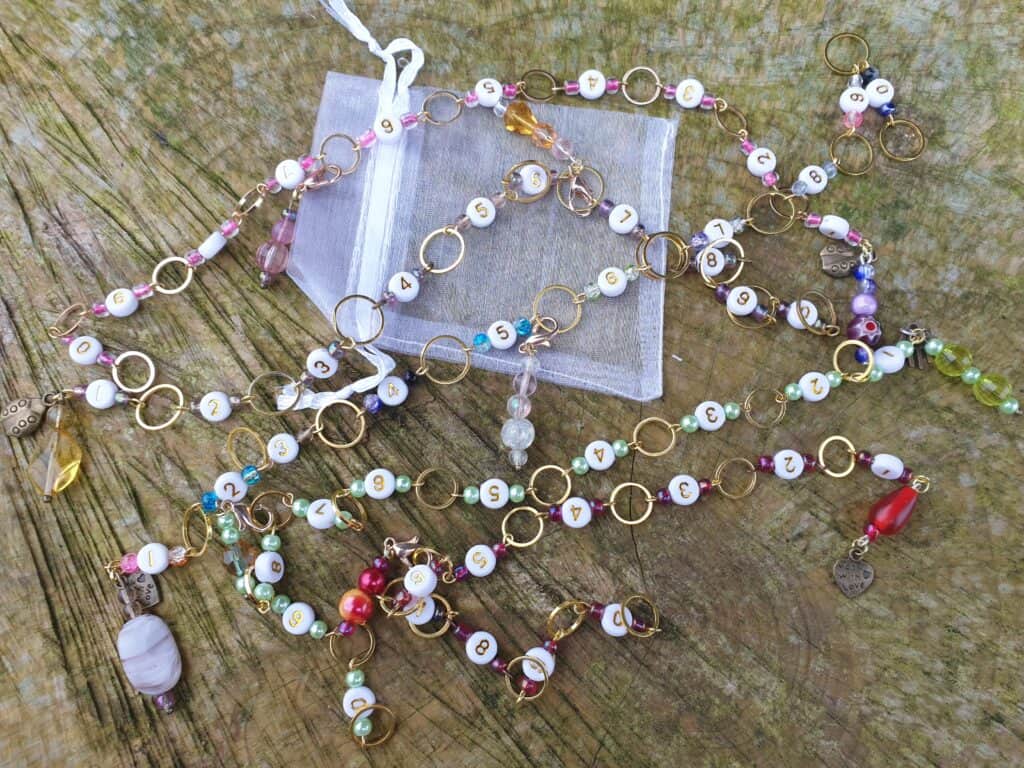
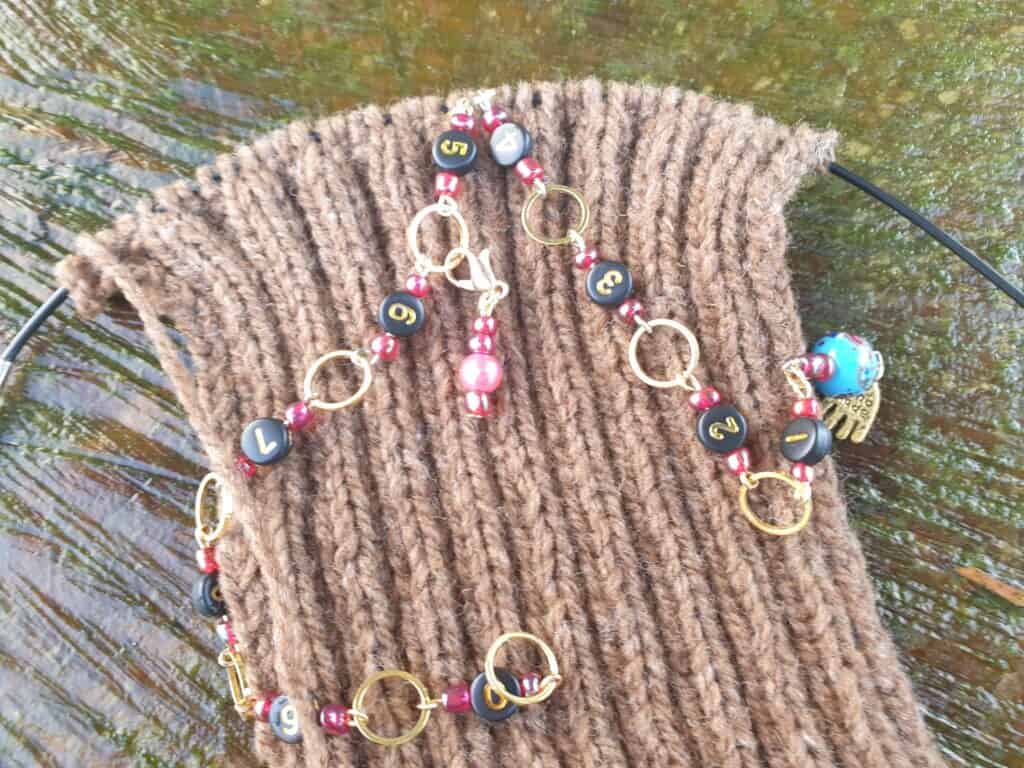
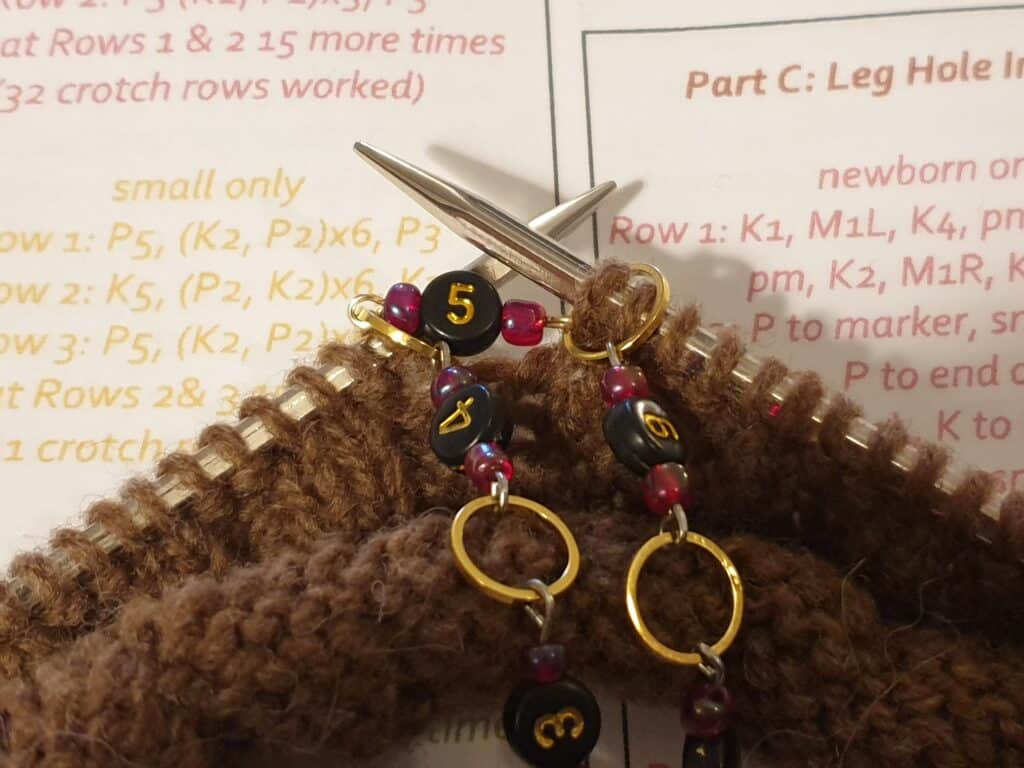
I have had so much pleasure in making our selection of stitch and progress markers. It is lovely to be able to use beautiful handmade notions when knitting and crocheting. I have been using mine a lot since Christmas and have found them so lovely to use.
The counting chain is one that I use a lot now and this notion has been a game changer when it comes to having to keep count of how many rows need to be knitted. You can read more on how to use this fabulous notion in my previous blog post.
I have a good selection of the chains on the website in a variety of ring sizes and colours. If you haven’t tried them yet, why not check them out….
Whiteselection of row counting chains
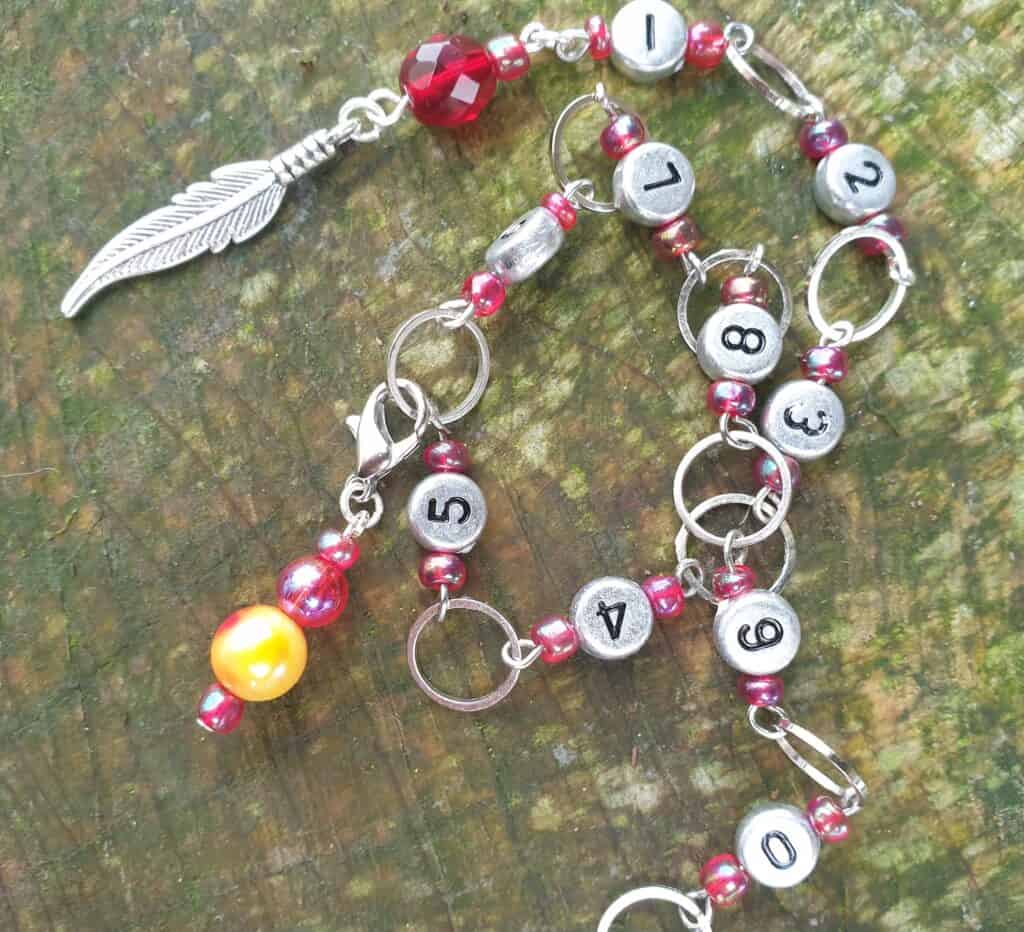
silver counting chain
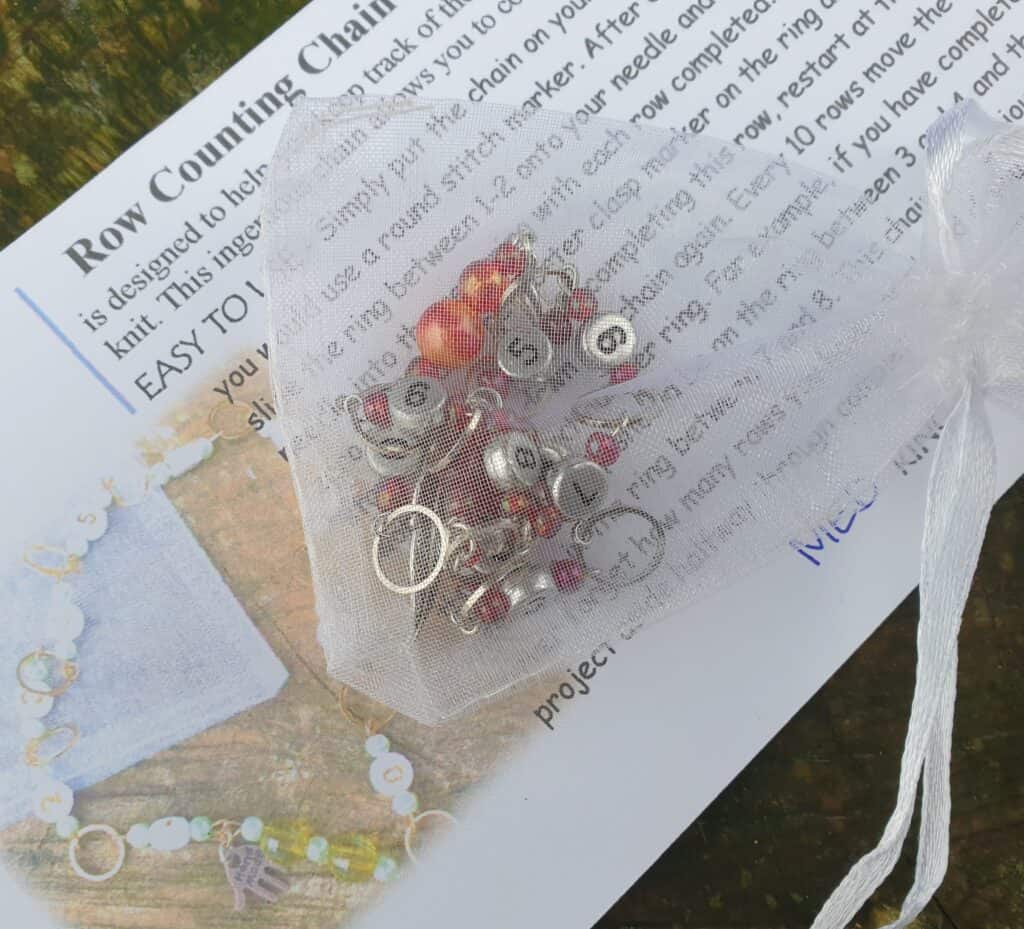
chain arrives in pouch with instructions
completed rows knitted and shown on chain – 56 rows
slipping new ring to the needle
I also have a few other counting themed notions in the pipeline for BOTH knitting and crocheting and hope to have those added to the website by February. But enough of the knitting notions – this blog is all about our new needlework notions.
In making the markers, etc, it got me thinking on what could I create for the needleworkers? What would be some lovely handmade notions that are ‘essential’ for when we are doing needlework? I was wanting to create a lovely unique range that would make perfect small gifts for the stitcher, and I got thinking about the items I like to have in my sewing box that is invaluable for when I am doing needlework. I am sure you could think of a number of notions in your sewing box that you could not be without.
Whether we do cross stitch, blackwork, embroidery, Redwork, white work, or other forms of hand stitching, I know that these three notions will become an essential part of your needlework kit. So, what are they?
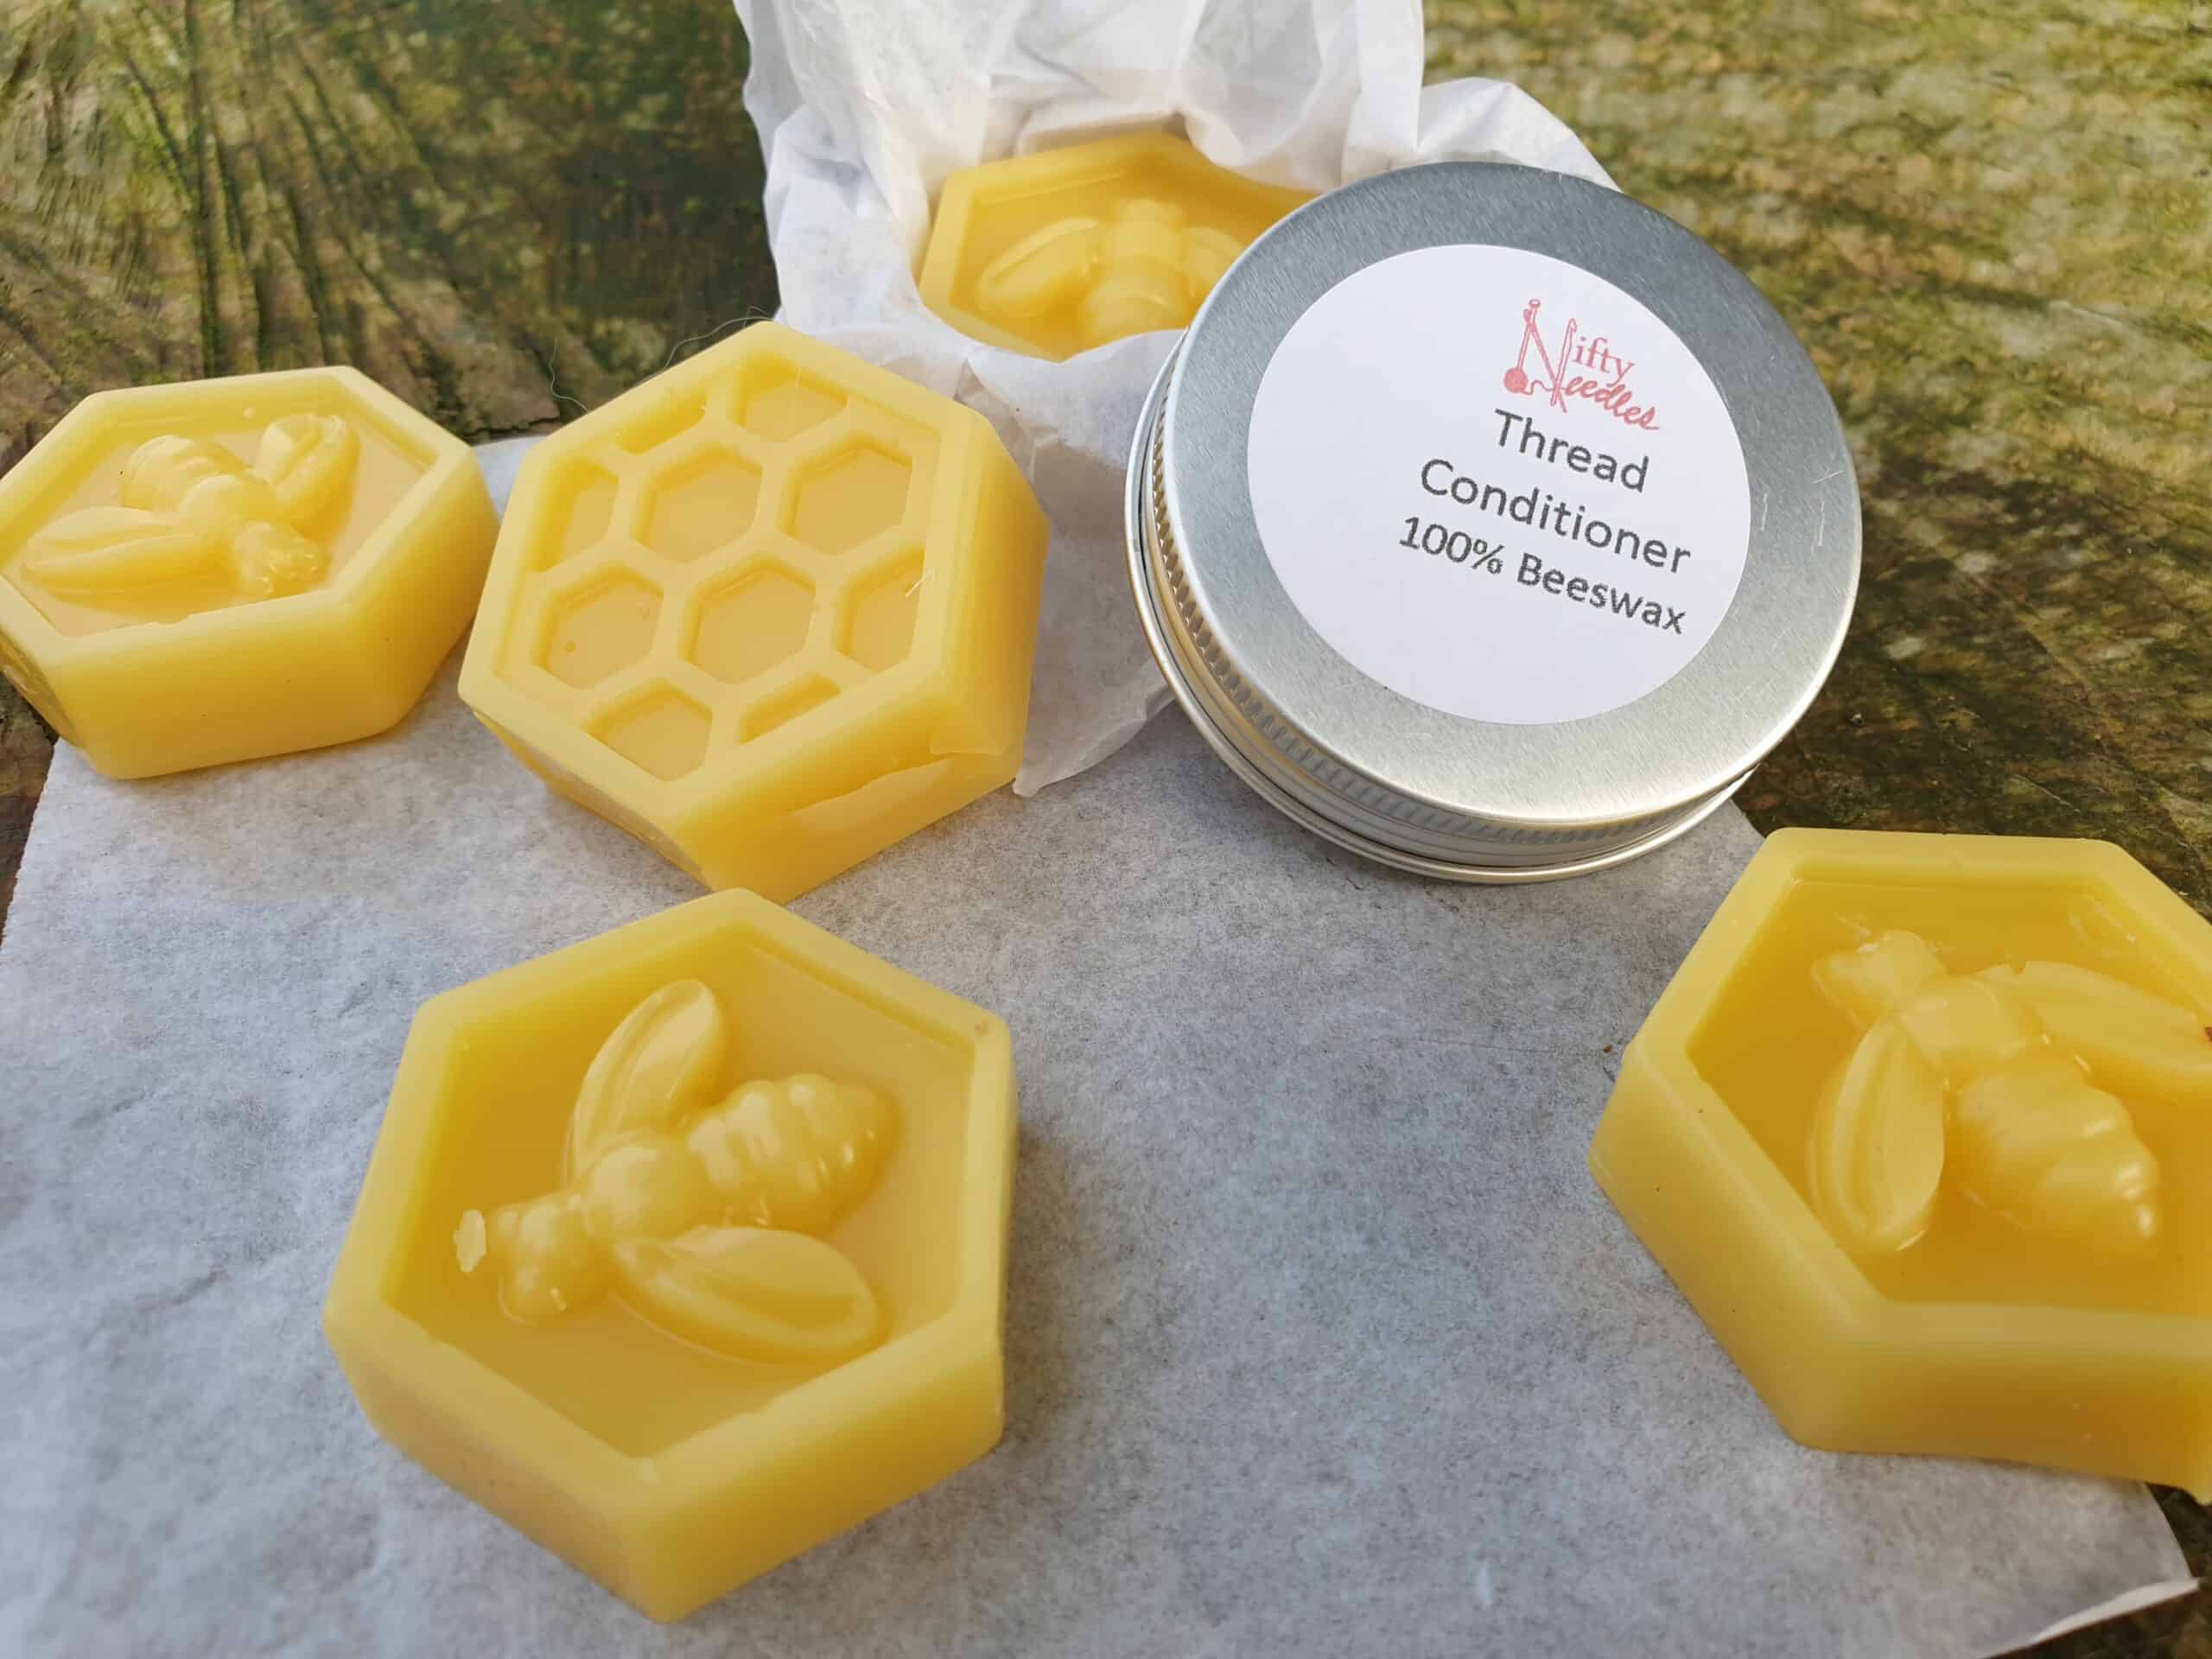
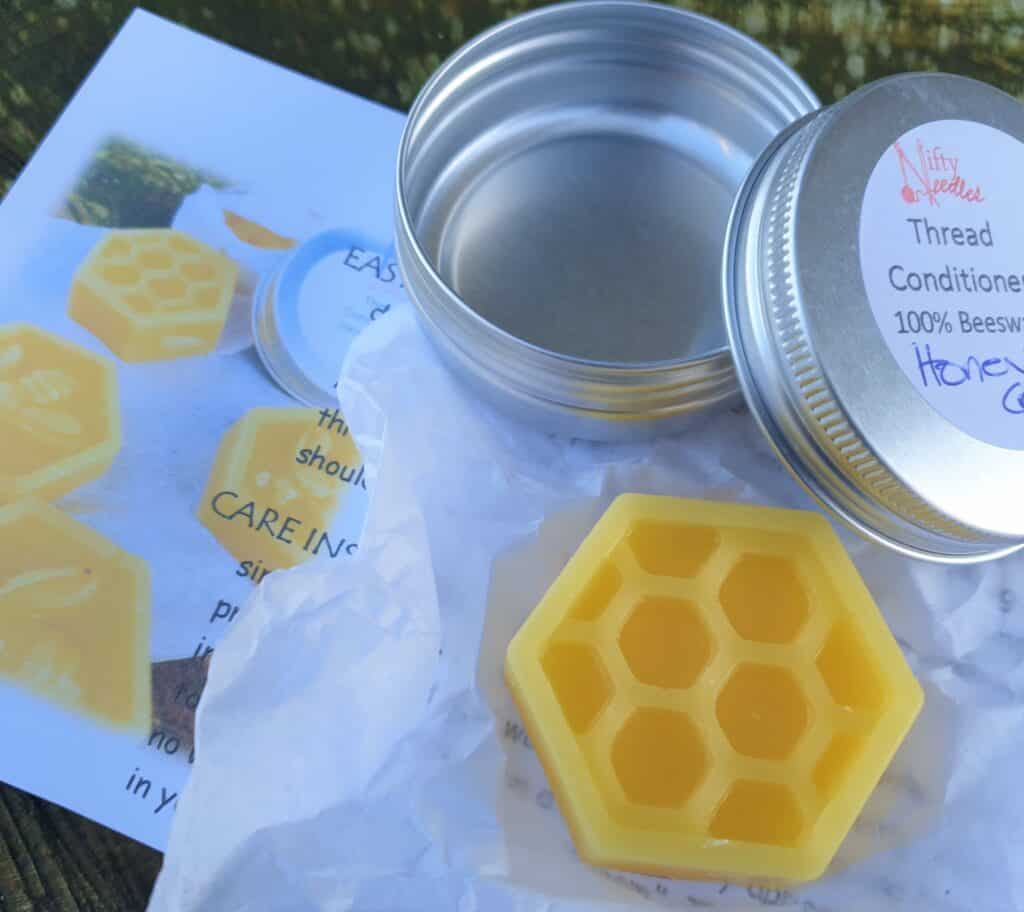
Thread Conditioner
Just what is thread conditioner? Well…. Have you ever experienced knotty or tangled thread? Using metallic thread and ending up fighting with it, having it get knotted or broken? Or are you like me, and just plain avoid using metallic thread as you know it is completely unworkable, no matter HOW stunning it looks in the finished project?
I was like that for many years. I loved the look of metallic threads in my needlework designs, BUT the very thought of actually having to work with it sent me into complete shudders and I would just not put it into my work. However, that changed quite a few years ago when I came across a product that came from America and was available through Amazon at a huge price for such a small item.
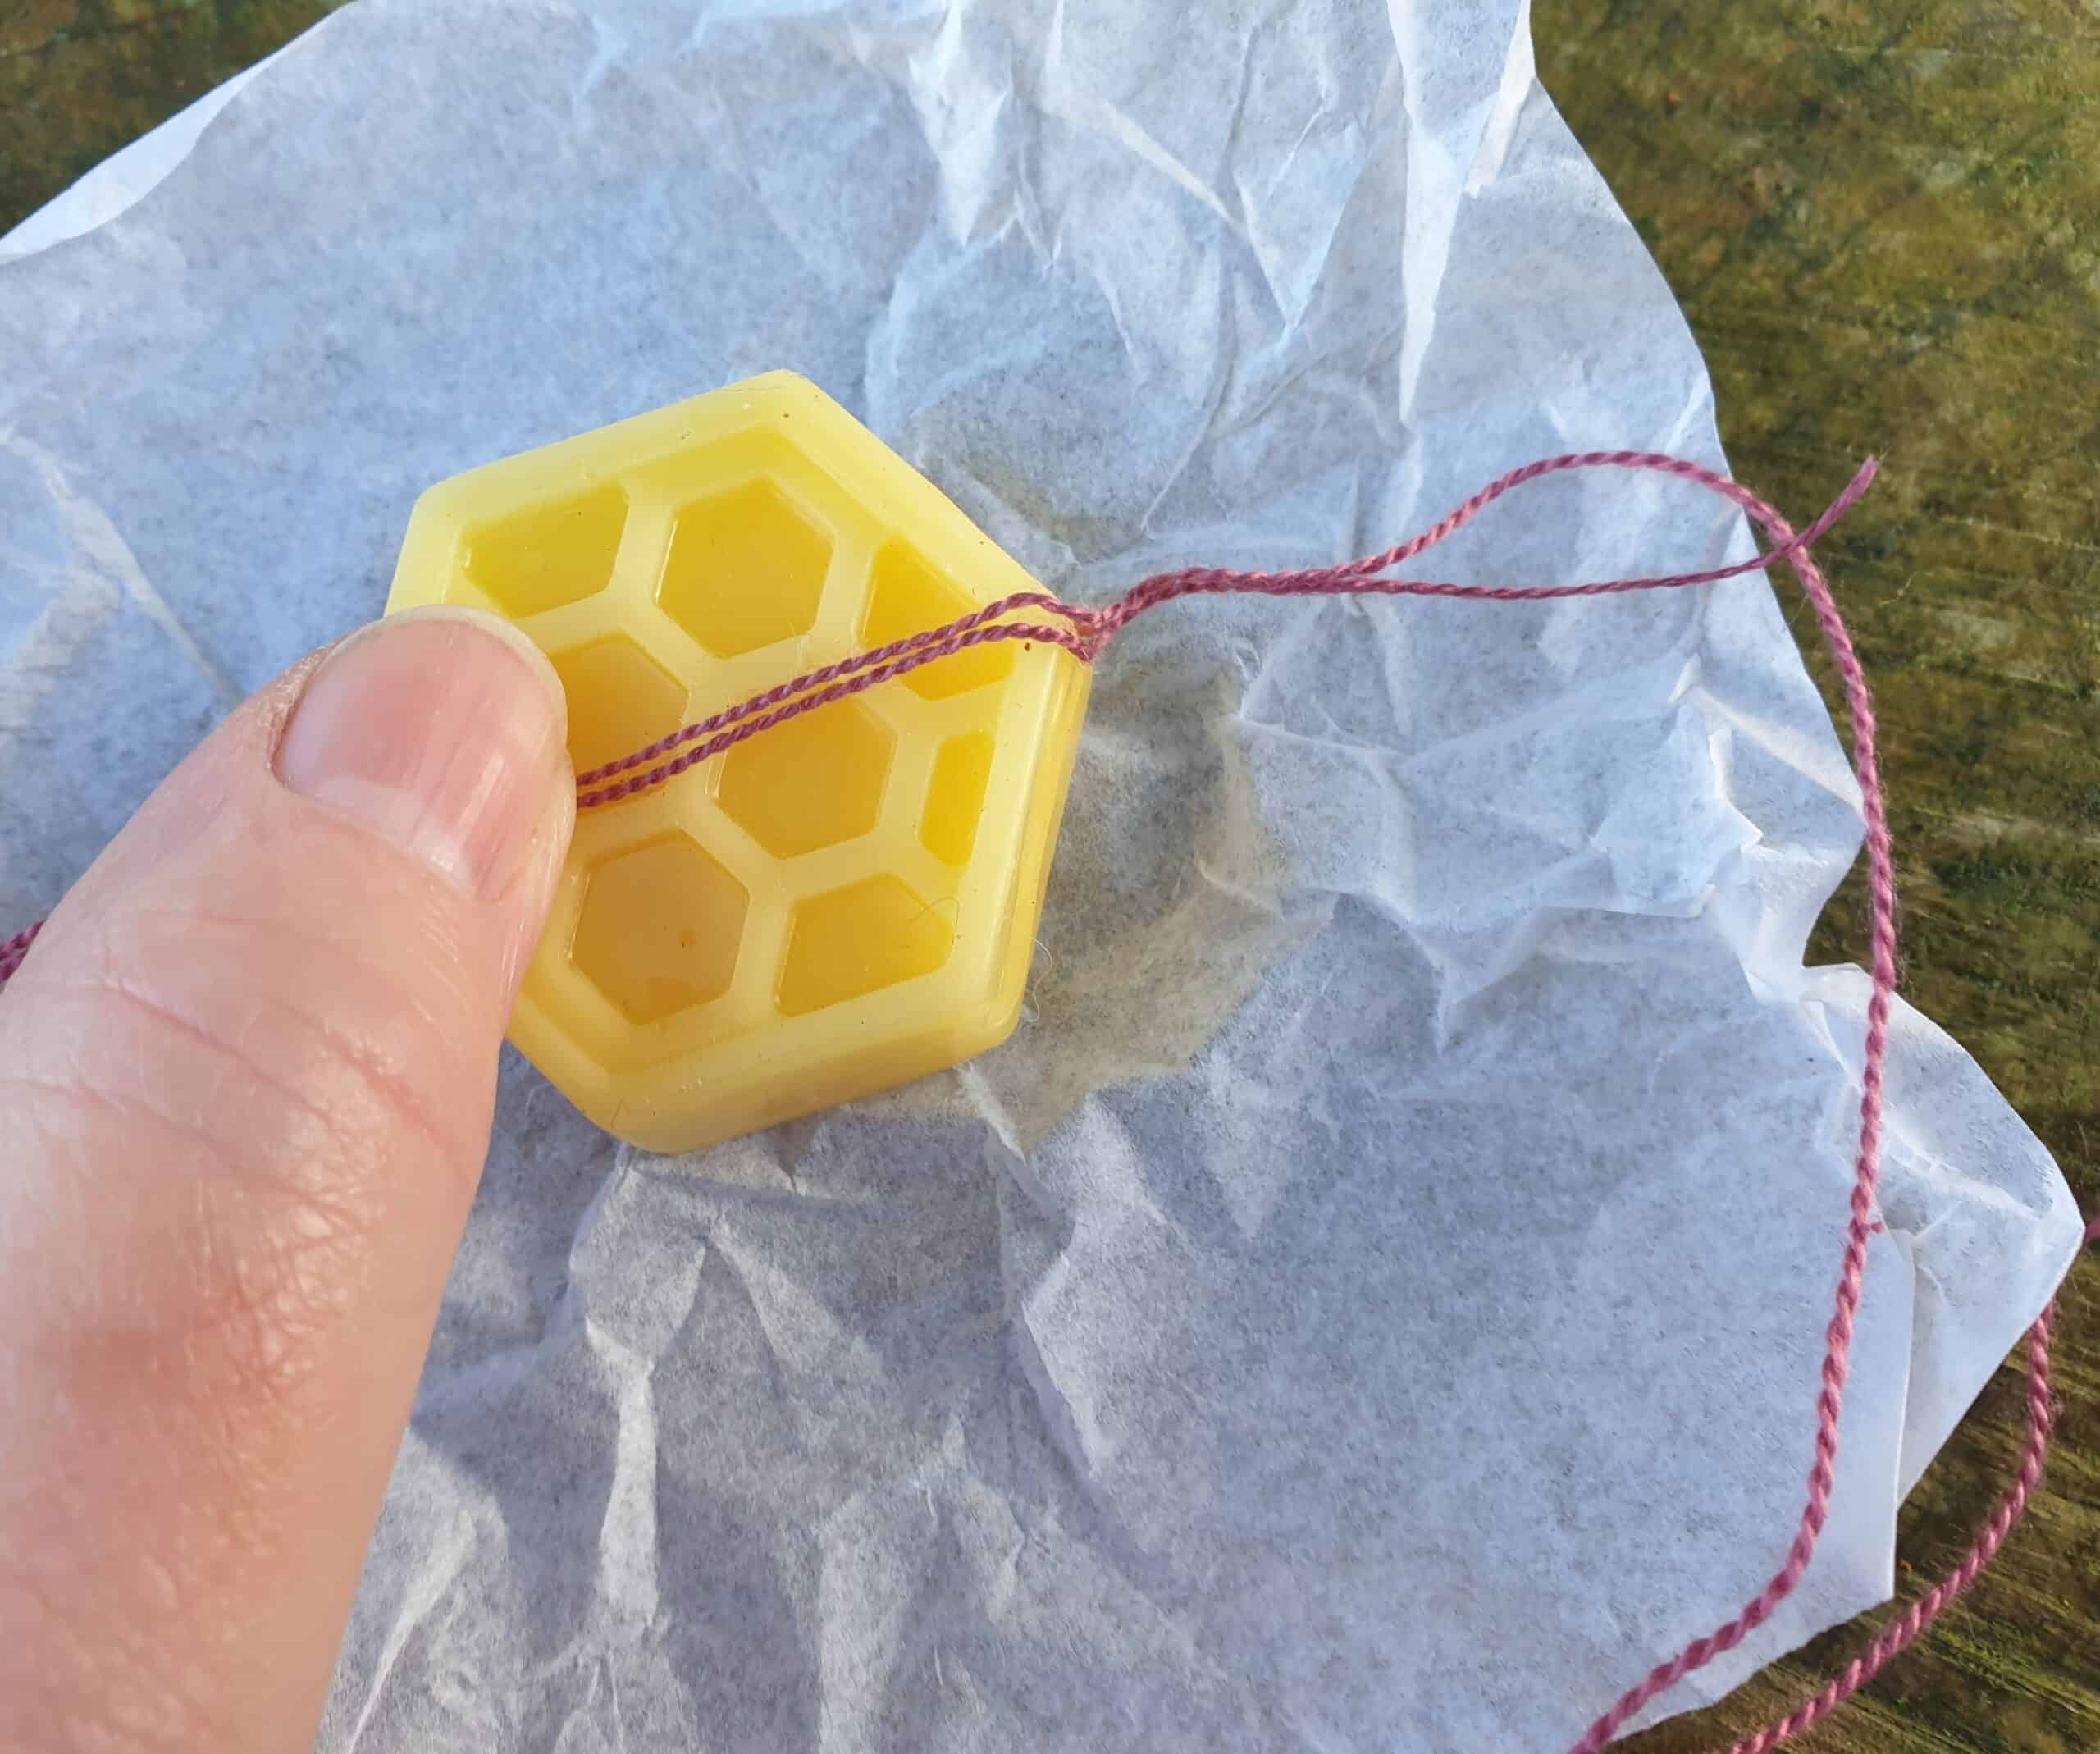
So how do you use it and what does the beeswax do to the embroidery thread? Basically, you pull your thread through the wax, and it helps stop the thread from getting tangled and really makes the metallic thread behave itself and is a pleasure to work with. It also helps to prevent the thread from fraying and strands separating. A real game changer!
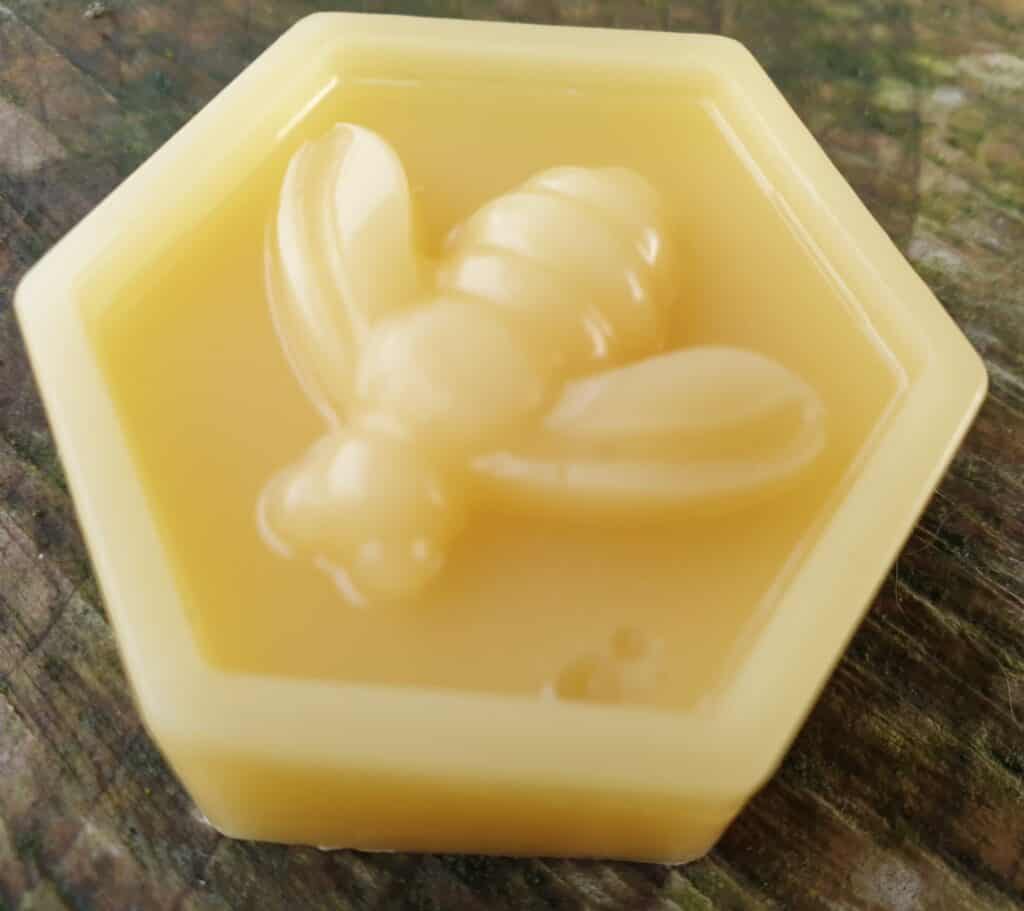
I got thinking on how these would be a nice gift idea, but I wanted them to be unique and handmade, not just a blob of beeswax in a plastic container. I did some research and have come up with my own handmade thread conditioner which is made from 100% bees’ wax. I poured the beeswax into cute bee themed blocks, and once fully set, each block is wrapped in tissue paper and kept in a small tin, which is perfect for keeping in your needlework basket. They also come with an instruction card on how to make the most of your thread conditioner.
I am also looking at maybe doing some with added essential oils to really help relax and de-stress you while you are stitching, or maybe some seasonal smells to set the mood of the season and you’re stitching. Let me know what you think ….
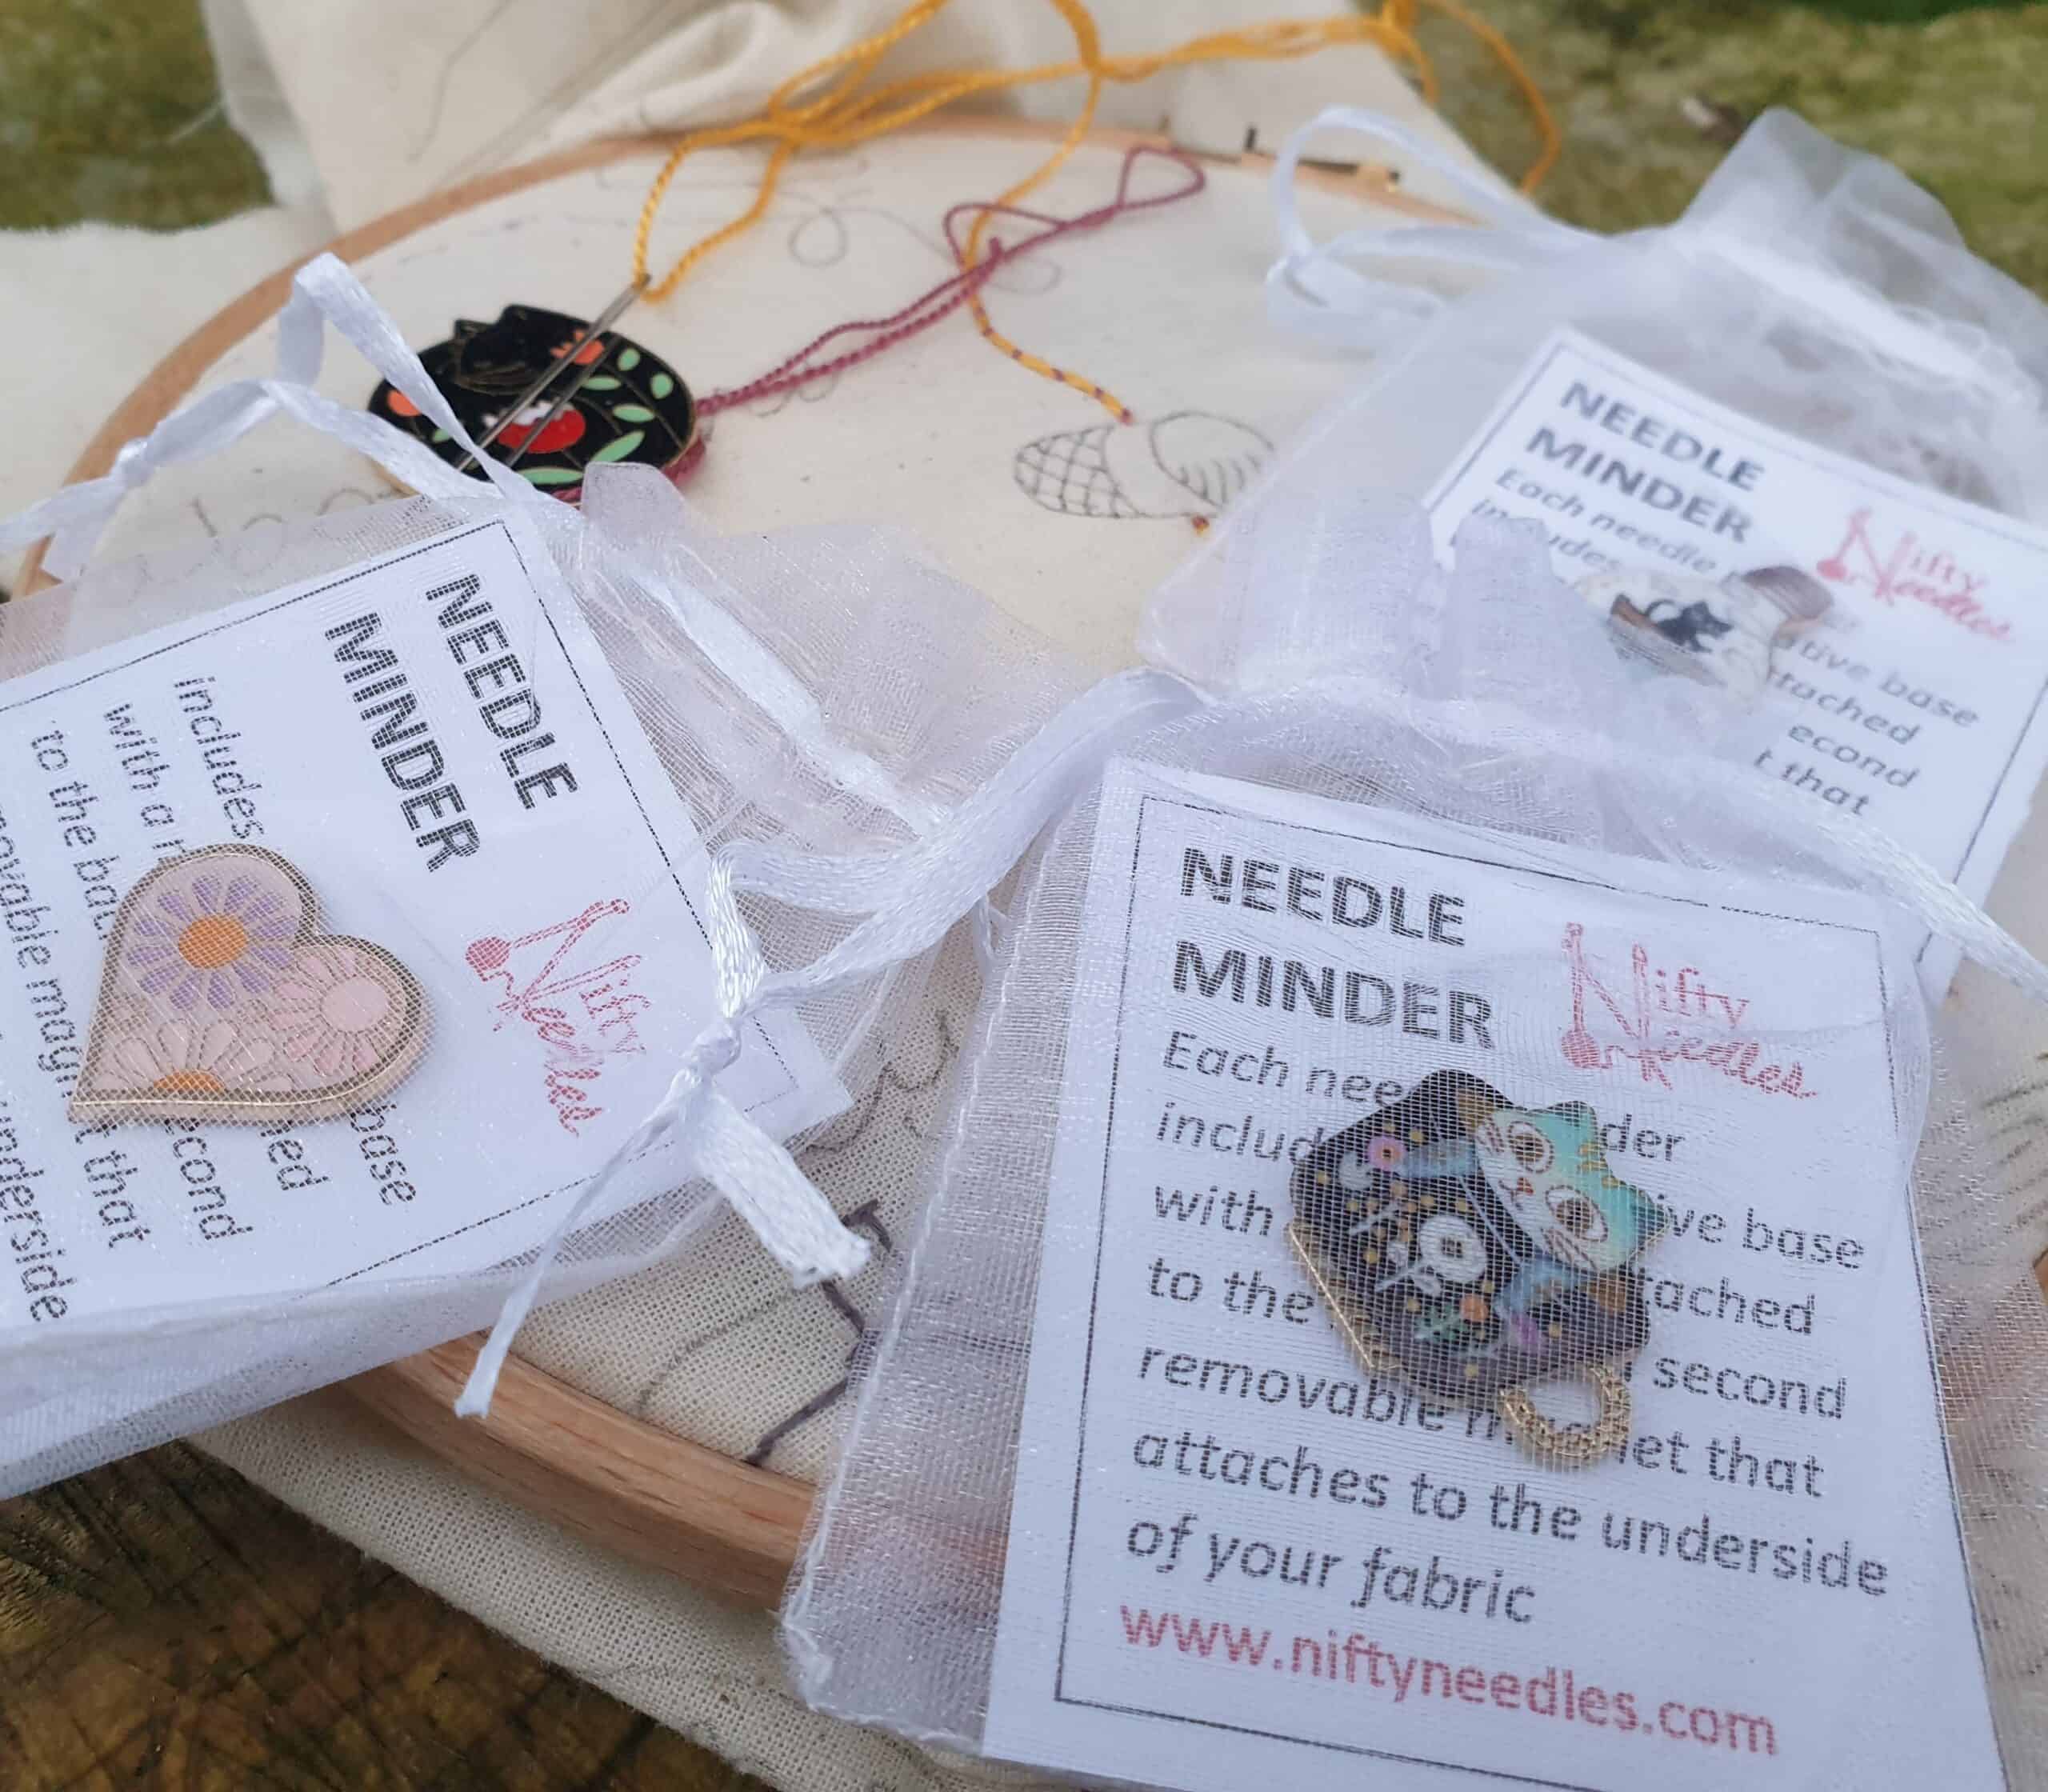
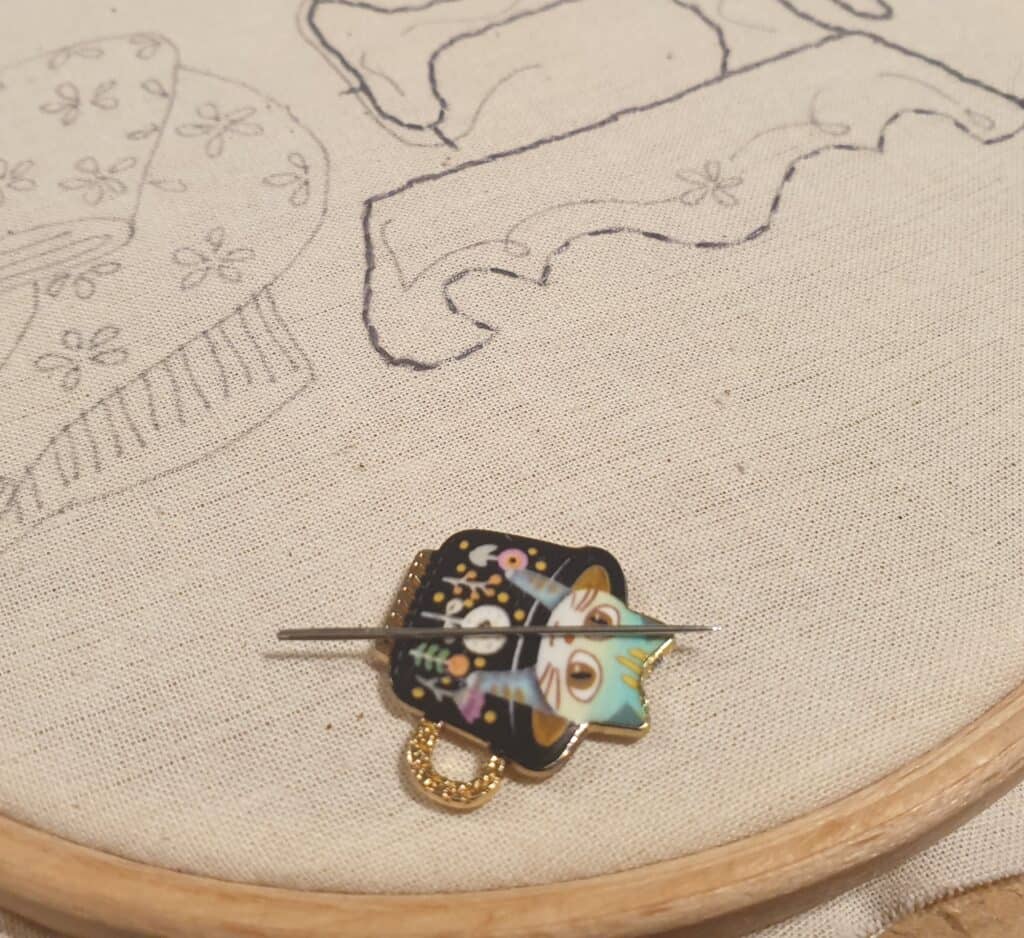
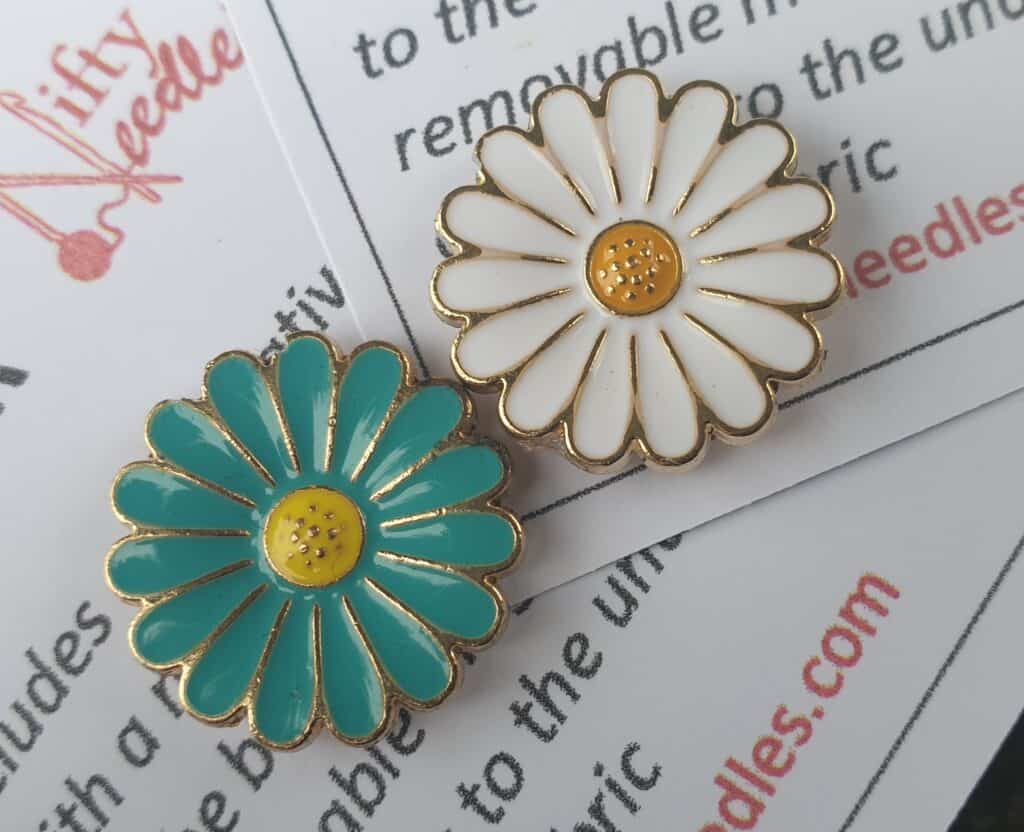
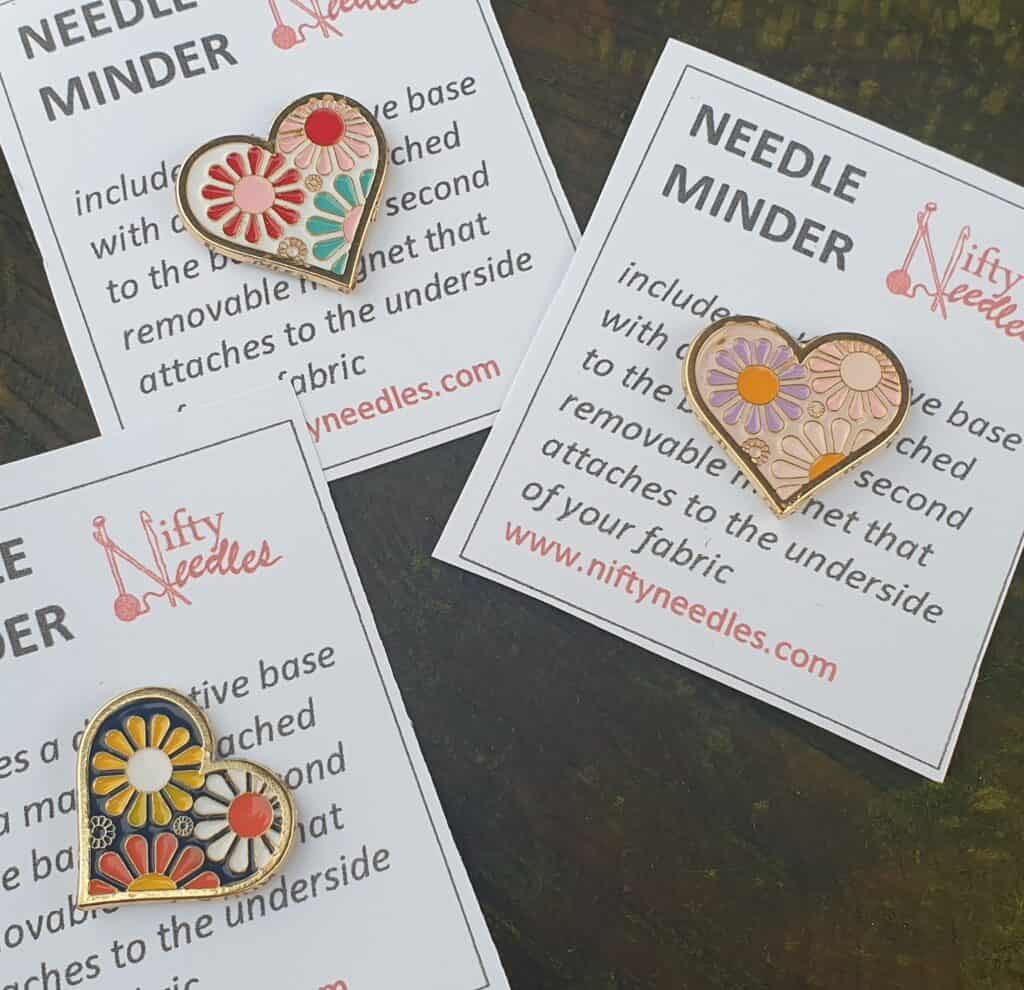
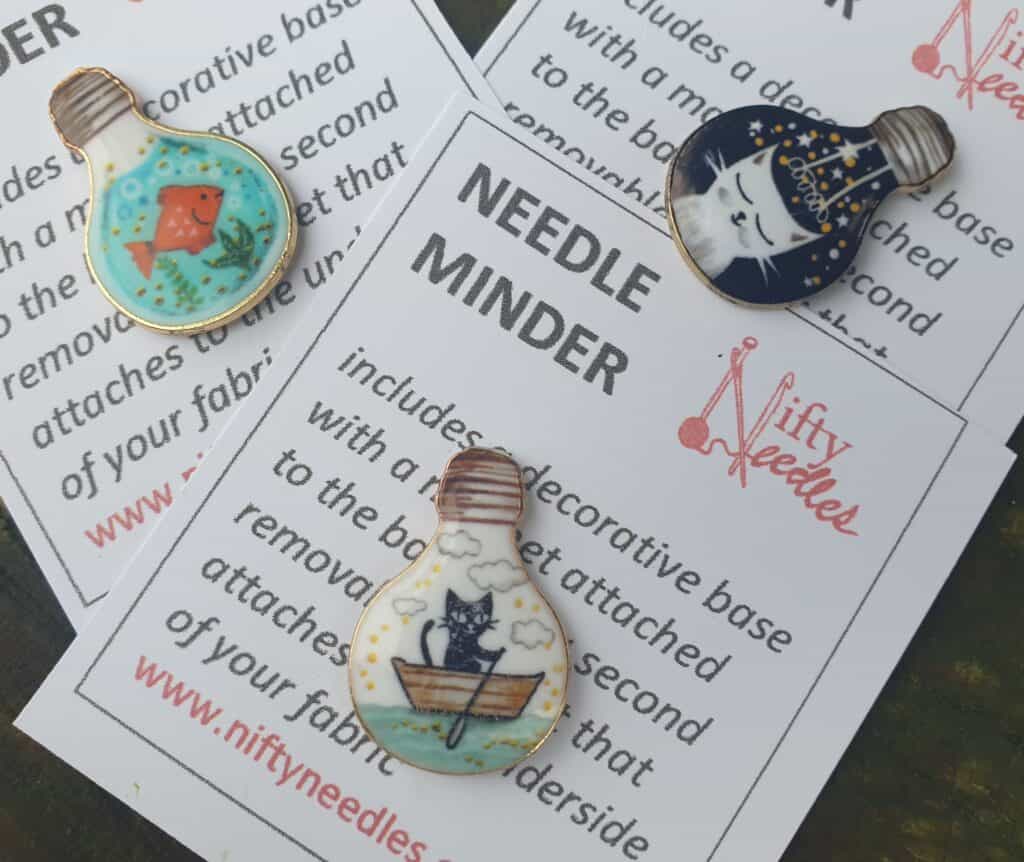
Needle Minders
So, how many can relate to misplacing your needle? Or are you guilty of ‘just’ piercing your needle into the arm of the chair so you can cut your thread and rethread it? How often have you had to dig through the back of the sofa to try and find the needle that dropped while you were just going to rethread it? The even thought of ‘accidentally’ finding a lost needle is even more frightening. I know I have experienced all of the above and it isn’t a nice feeling when you CAN’T find that lost needle and just pray and hope that when it is found it is not going to be with serious consequences.
I tried to get into the habit of sticking my needle into the fabric I was working on. It was not ideal, BUT it seemed better than piercing it into parts of the furniture. I am sure we have all found ‘lost forgotten’ projects that we were working on … ages ago …. Or maybe we inherited some half-finished needlework from another stitcher who started it many (many) years ago … only to discover that the needle that was placed ‘safely’ into the fabric had long since rusted the fabric and ruined the project. I have had a few half-finished projects gifted to me that had been started so long ago (and a few of my own) and the needle has rusted the fabric. I remember, I was taught NEVER to keep the needle in the fabric – but how often do we pay attention to what we are told to do?
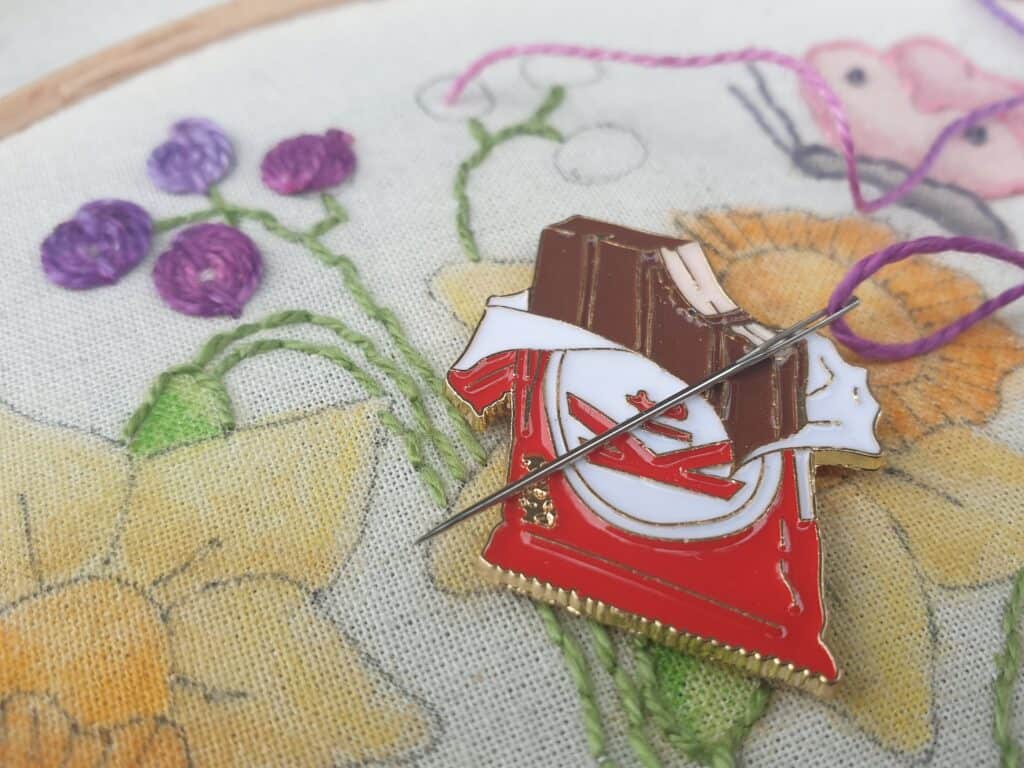
I must admit I was also abit sceptical on how secure they would keep the needle. But after using it and keeping my needle on the minder, in my project bag when not working on the stitching, it was brilliant to know that the needle would be exactly where I had left it.
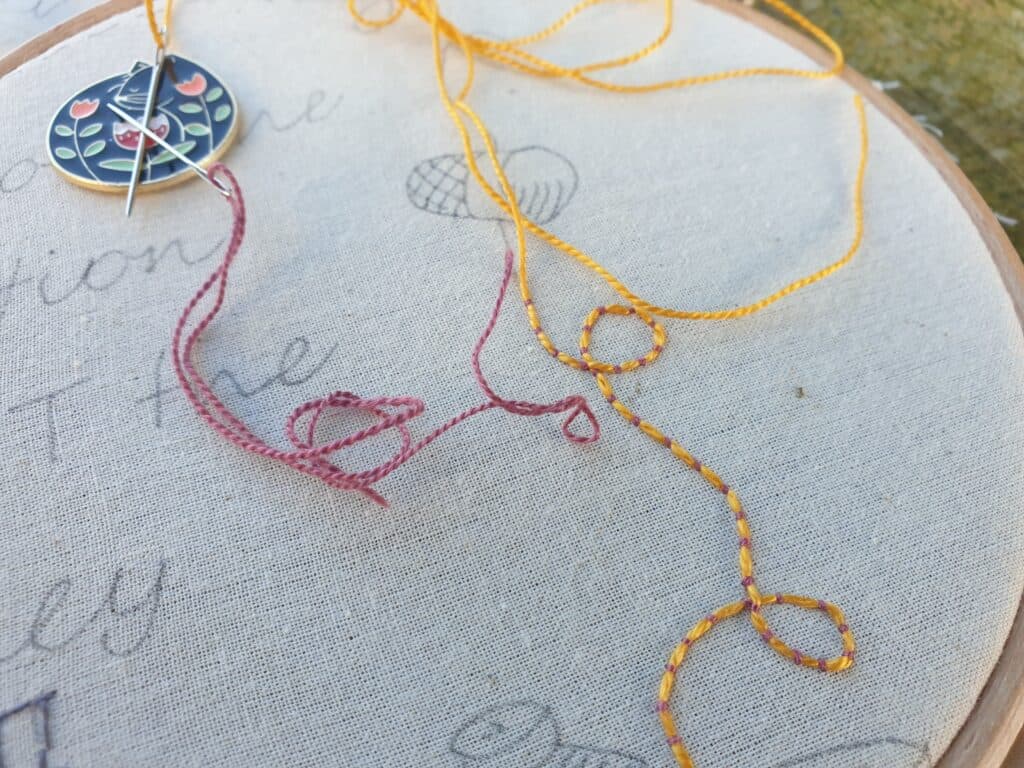
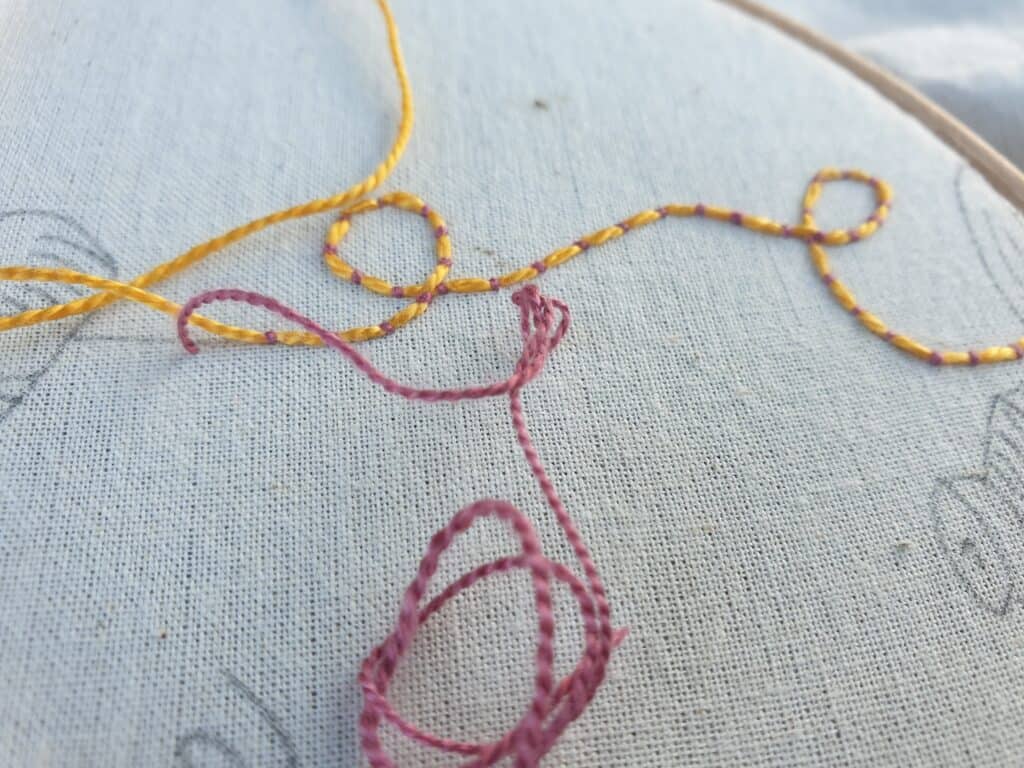
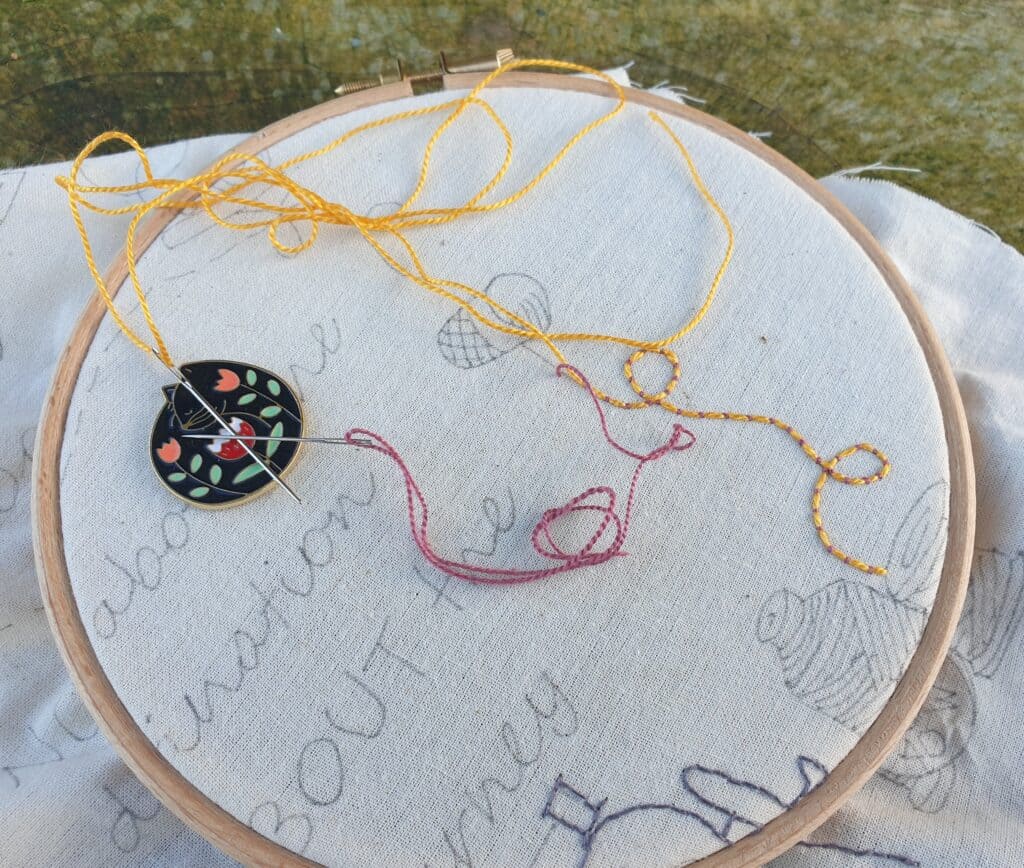
Sometimes, I need to change thread colour to work on a small section, but don’t want to unthread my current needle. With the needle minder, you can place the threaded needle onto the minder and know it is safe while you use the new colour and come back to the previous needle when needed and it is still threaded up ready to use. It is also handy when you are working a particular embroidery stitch where you would use two needles threaded up with two different threads, i.e.., Couching stitch. The couching stitch requires two threads – the foundation thread and then the thread to secure it. Usually you place the foundation thread along the desired line and secure it at both ends. I found that I prefer to have the foundation thread loose so I can move it as needed, especially if the foundation line is curved or longer than the working space in the hoop. This is where the minder came into its own, I was able to leave the foundation thread threaded onto a needle and kept safe (and out of my way) on the needle minder….
working with both threads
close up of couching stitch
keeping both needles safe when not in use
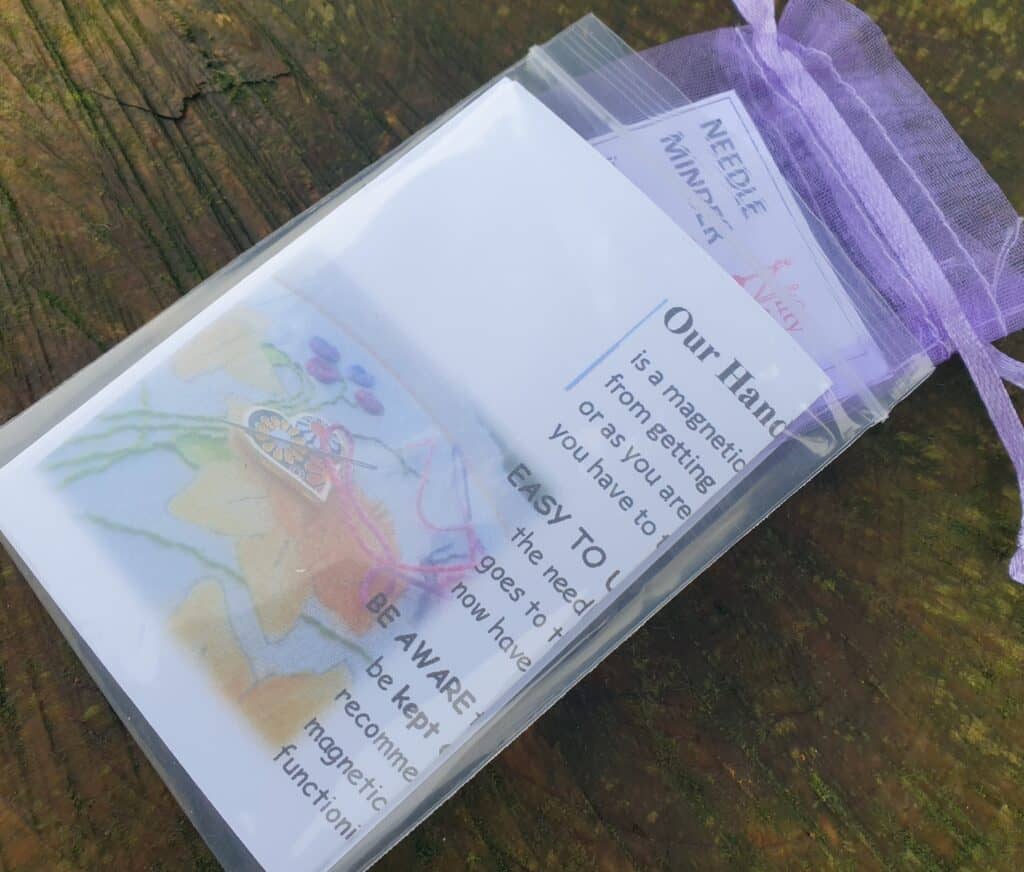
Needle minders can make a great gift because of the almost endless possibilities of designs. There is nothing nicer than having a cute and pretty notion that you can use while you are stitching. I currently have a small range of unique needle minders, but rest assured, I will be constantly expanding on the different designs. You can never have enough needle minders….
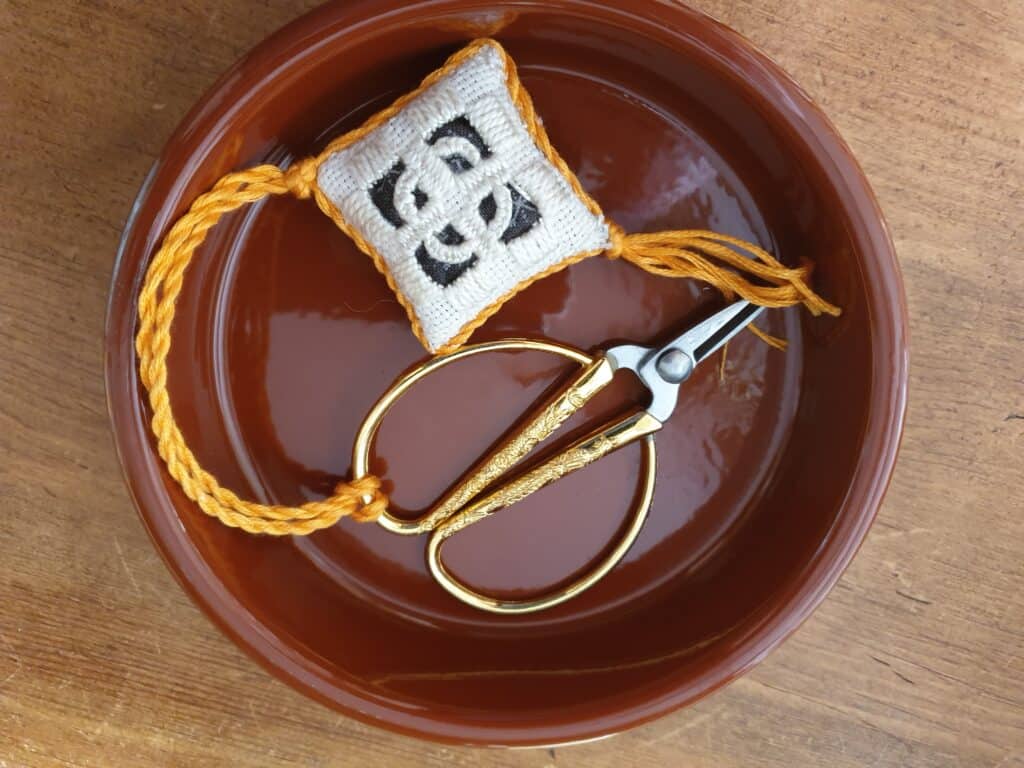
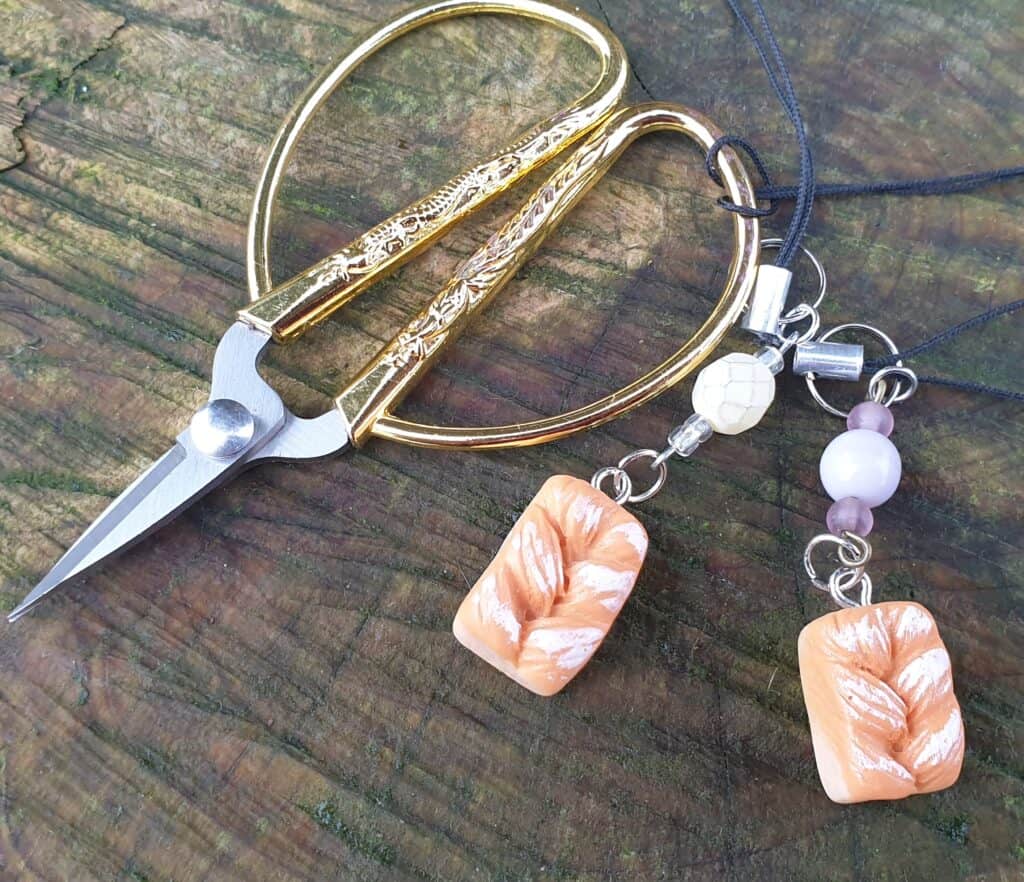
I love using small scissors when doing needlework. Lovely small scissors with an extra sharp and small blade. The small ones that are so easy to lose down the back of the sofa, right into the innards of the sofa. I have to confess that the other week I did my deep clean of the sofa where I sit and to my horrid, I found about 4 pairs of lost scissors, some I didn’t even realise I had misplaced! I try so hard to be good and keep them safe on my worktable beside the sofa, but … it is so much easier to just place them on the sofa seat beside me….
Our needlework ancestors had a lovely accessory to their scissors – scissor fobs. I had seen them years ago and wondered on how they would be useful …. However, a few years back I made one for a needlework course I was teaching. I have to say that once I had the fob on my scissors, I loved it and I rarely misplaced my scissors! – until the fob was taken off for some reason …. And then I misplaced the fob!
Another reason to have a scissor fob is so our scissors are easy to recognise. This is so true when we attend classes or retreats. I have lost count on the times I have ‘misplaced’ scissors at a class or gathering with other crafters …. It is second nature to borrow someone’s scissors as they are ‘on hand’ and it is just as easy to not pass them back straight afterwards. With a handmade fob attached to your scissors, they are now unique and not just your standard ‘blend into the crowd’ scissors. It is also a great way for family members to recognise that the scissors are for needlework and NOT to be used on paper!
With Alyssa coming home from tech those few months ago, asking about jewellery making and if I had done it before, it has revived a love for jewellery making without actually making jewellery.
I started into the progress and stitch markers and rediscovered my love of unique beads and charms and the satisfaction of creating unique lovely, yet practical items that can be used in crafting.
From those markers and counting chains I started to think on how the handmade jewellery items could be transported into my other craft loves …. Quilting and needlework …. I was searching for items that would make brilliant and unique gifts for the crafter and even for ourselves. There are times when we ALL need to treat ourselves to something pretty that doesn’t cost a fortune….
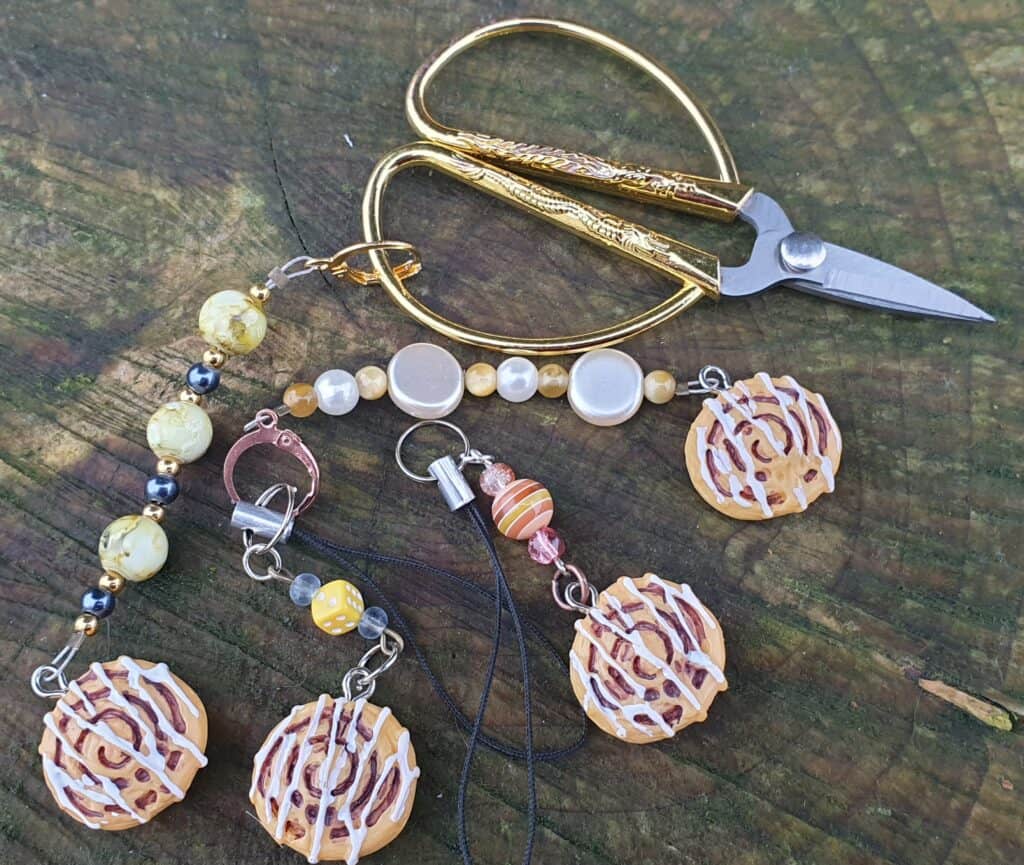
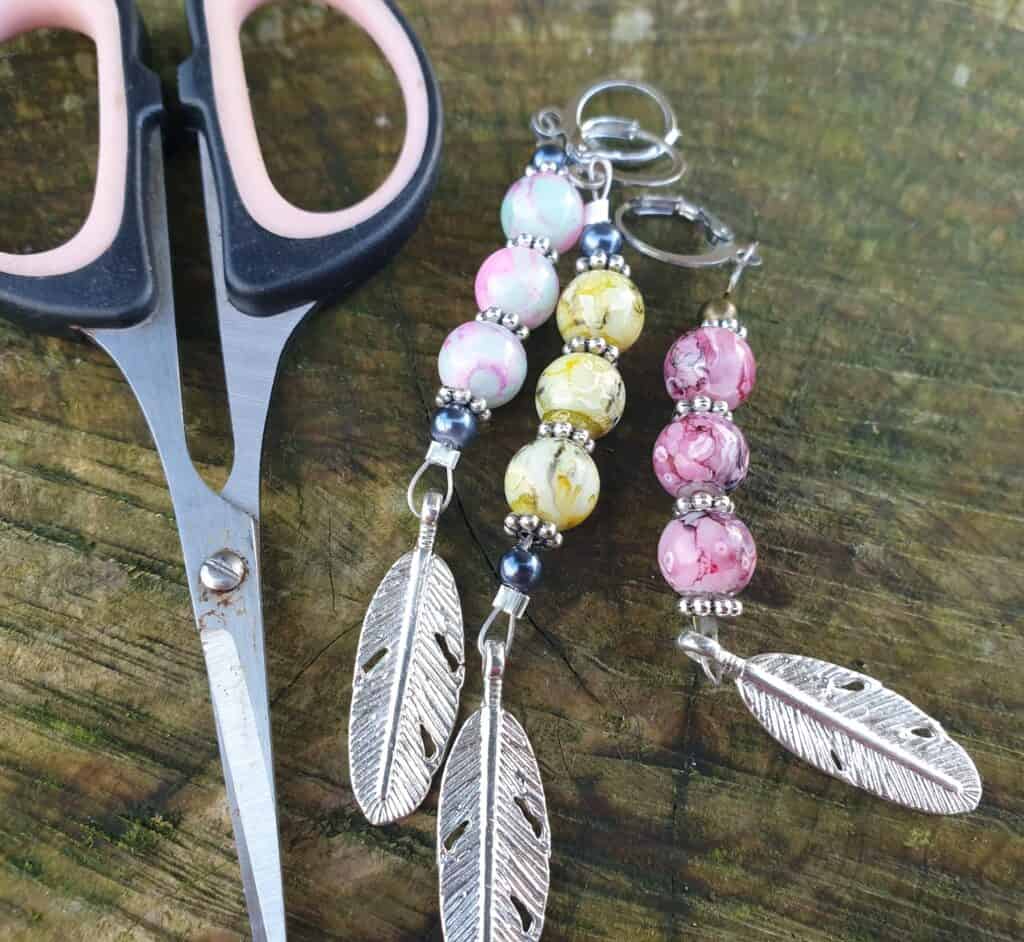
So the thread conditioner started …. And then the needle minders and creating a range of cute and different needle minders …. And now … the scissor fobs ….
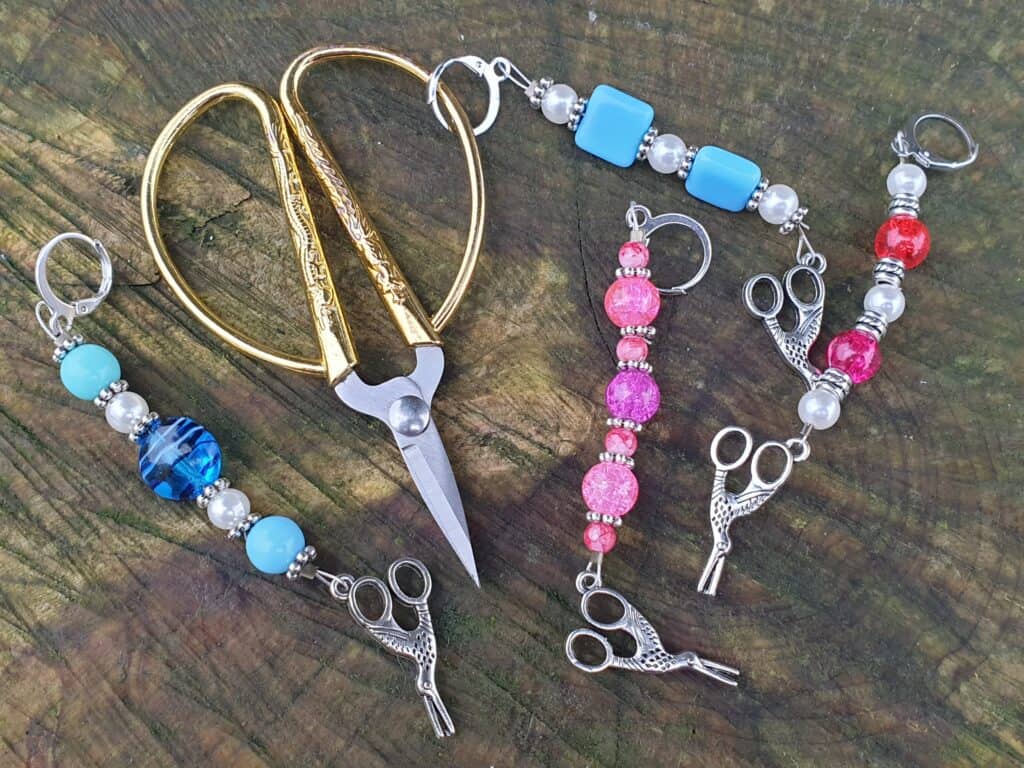
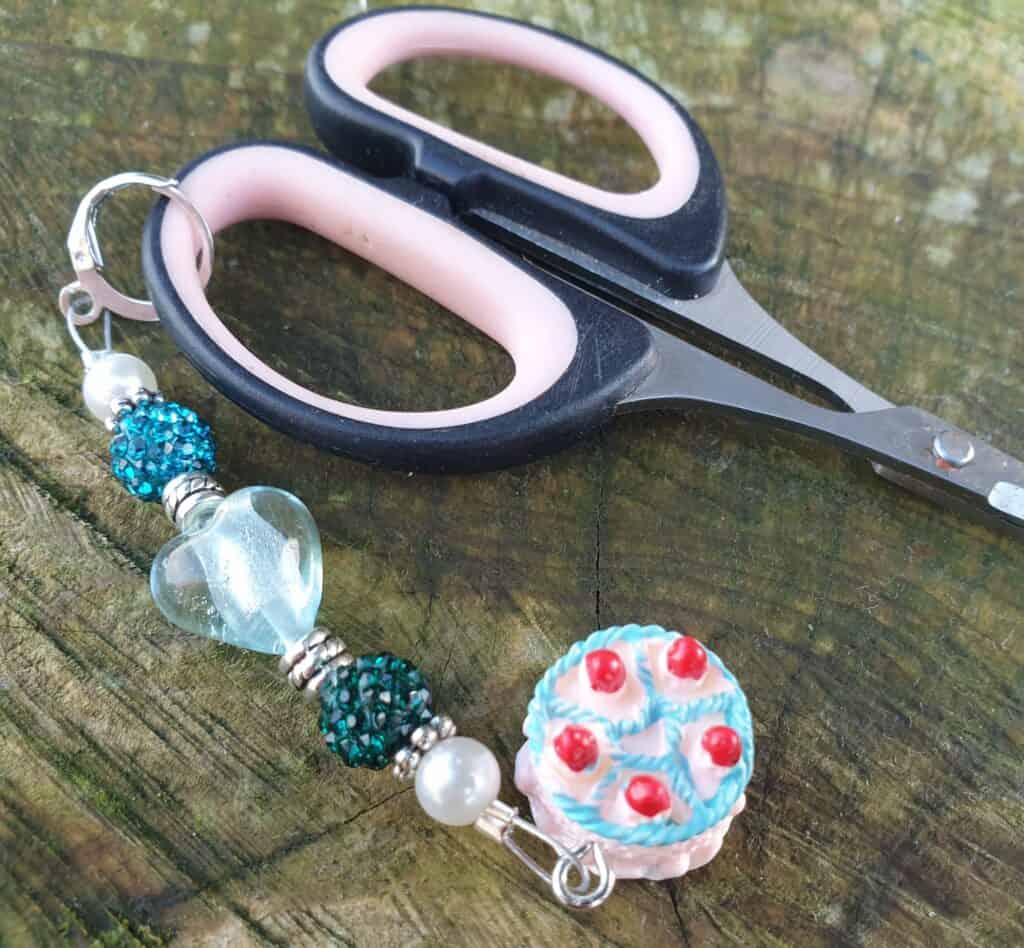
I have created a variety of different styles of scissor fobs from the simple charm fobs to the more decorative beaded fobs and even ones that can have your initial added into the fob….
As with all of my handmade crafting notions, each one is unique and handmade with care using quality materials. Many of the items are limited edition and cannot be repeated, which I feel makes them even more special.
So why not have a look through and let me know what you think of the new range of accessories for Nifty Needles….
Many years ago, a design concept formed in my head, one that I couldn’t let go, but was not sure of how to bring into realisation. Actually, I have to admit … that first seed was planted over two years ago.
Cross Stitch wallhanging
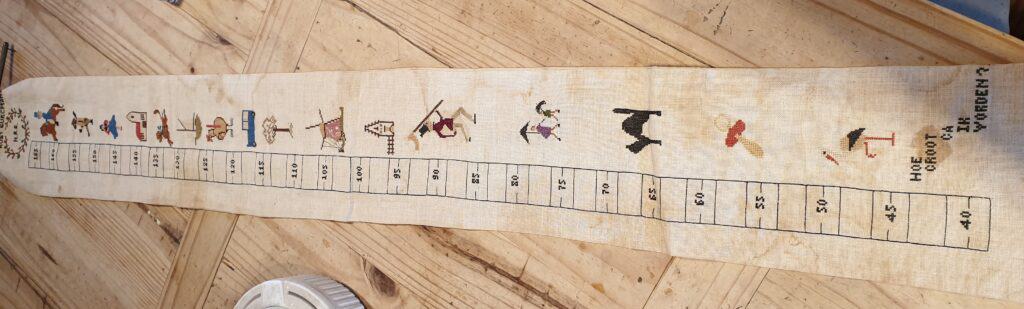
I remember in my childhood, my Oma (grandmother in Dutch) stitched a wonderful keepsake to celebrate the birth of my older sister and myself. Items that were made with her own hands and treasured. She stitched a growth height chart hanging for me, which always hung on my bedroom wall. I treasured it and was always intrigued how the writing on the chart was in Dutch – I couldn’t speak or read Dutch – but I learnt those words with pride – ‘Hoe groot ca ik vorden’ (How big can I get? I still have the chart, wrapped up and kept safe, as a reminder of my Oma who died over 30 years ago.
My older sister, received a stitched fabric book of nursery rhymes in Dutch. I am 5 years younger than her and I remember being little and wishing the book was mine as it was magical and could be touched and used, whereas my chart hung on the wall to look at, not to interact with. It is strange how we think when we are very young.
So, you are probably asking at this point, as to what these stitched keepsakes have in common with the embroidery sampler book? Well, even though I no longer want my sister’s fabric book, the concept of a fabric book stayed with me all these years. I always wanted to create a similar book (not necessarily in nursery rhymes) but a fabric book that would become a treasured piece of craft.
So moving many years forward, to about 3 years ago, the concept came to me again when I started to design embroidery designs and realising that it would be amazing to create a sampler book full of embroidery stitches. My head filled with ideas and issues of exactly how to put it into patterns so others could follow the tutorials and create their own embroidery sampler book.
Just over two years ago, I started to put the ideas down on paper and start thinking on embroidery stitches to go into the book. That was the hardest decision, there are literally hundreds of different embroidery stitches! So hard in fact, that I decided to create two different books – a short one with 36 sts and a longer one with the same 36sts and 24 more stitches. I can never do simple!! The next choice was even harder! I didn’t just want any embroidery sampler design where you stitch a line of that particular stitch. To me, it didn’t really give me any insight in the stitch. Yes, it showed you how to work that stitch, but you were then left with the issue – just what do you use this stich for? What can be created with this stitch?
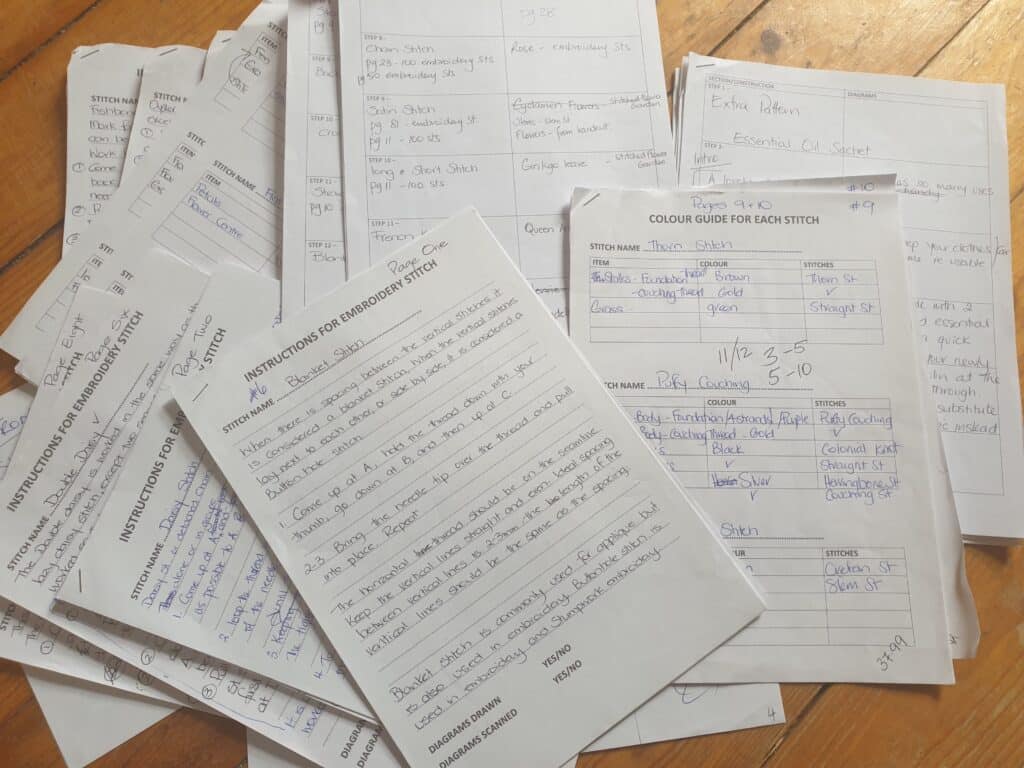
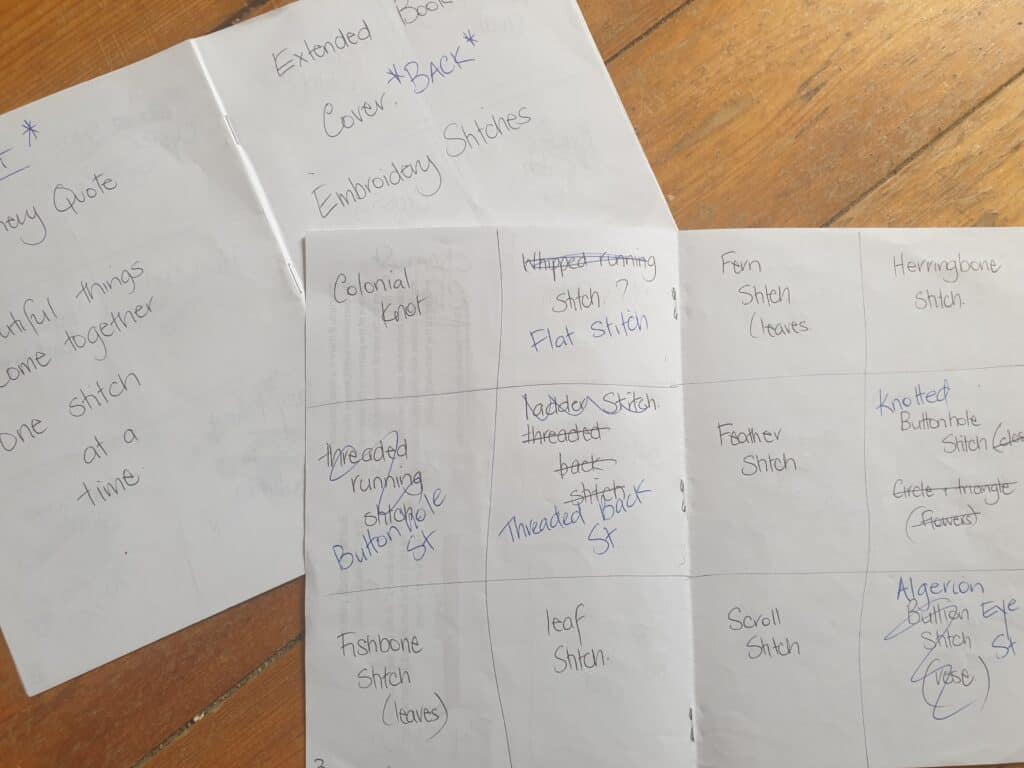
Draft Notes
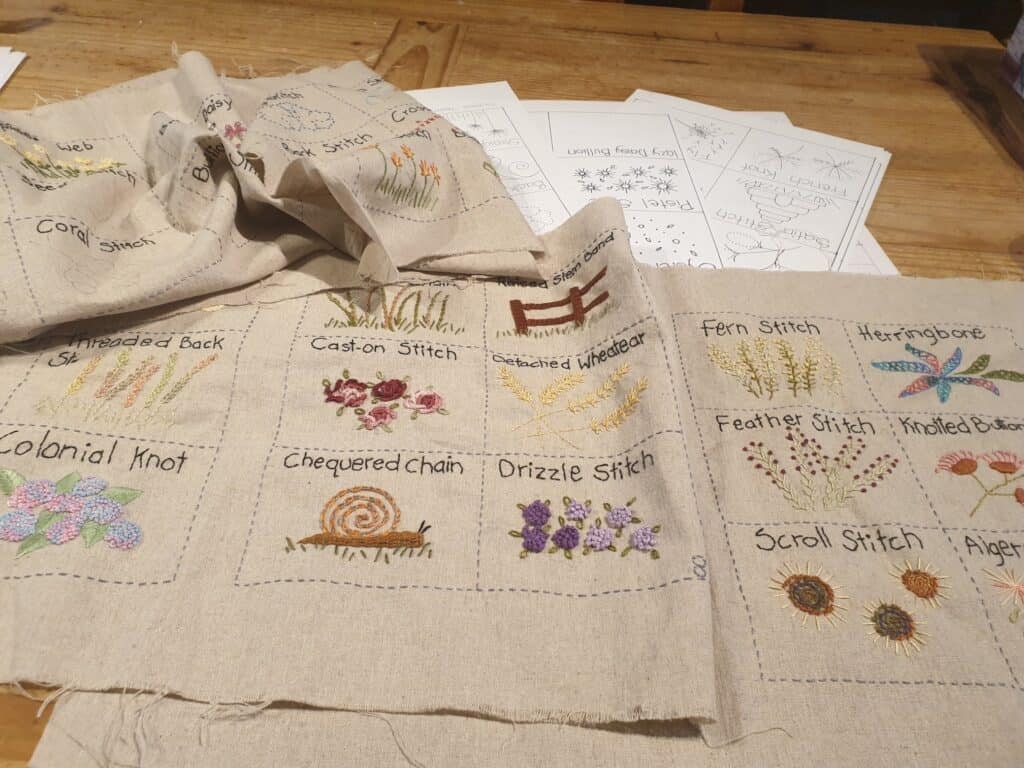
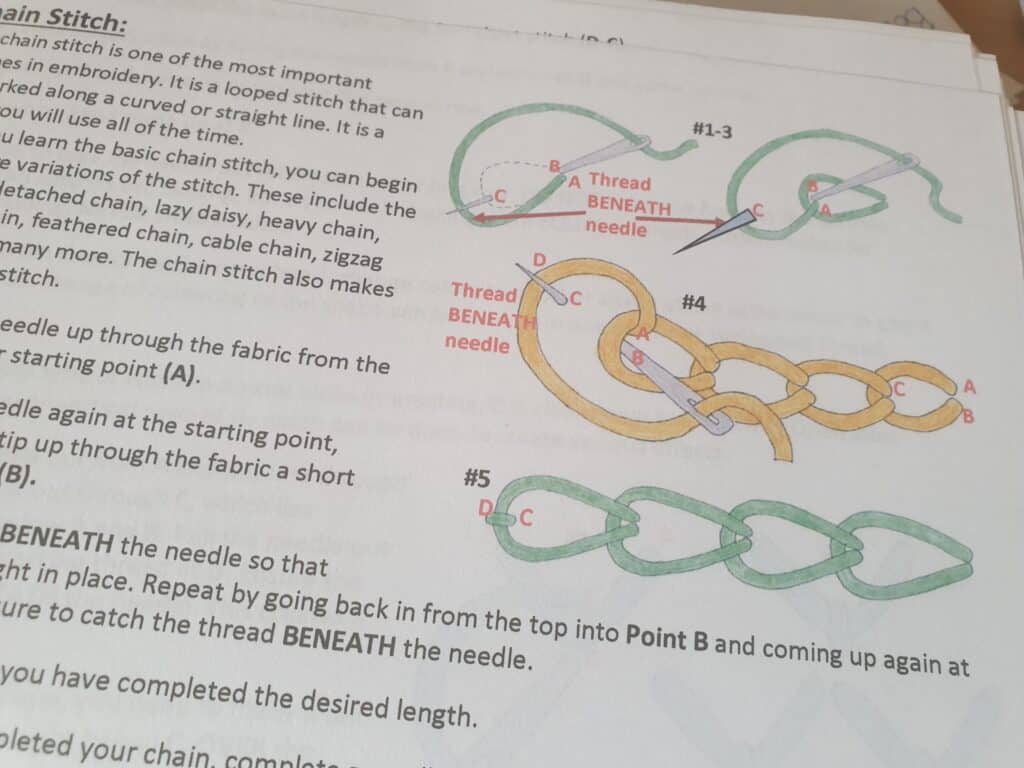
And so, the next issue came about. I had the list of the stitches I wanted to use in my two books. BUT, what and how do I design something simple with the particular stitch? My vision for the book was to have a theme. I then thought of what most embroidery designs feature ….. gardens. The stitches really did work well in creating floral designs. The birth of my embroidery sampler book concept came about. The books would focus on a garden theme and the stitches used would form some sort of garden/nature theme. It was challenging at times, to work the particular stitch into a design, but a lot of fun as well. With the theme decided upon, the next issue arose – what design would I use with each stitch? I am old school when it comes to coming up with designs – I prefer paper and pencil. I had already accumulated a good size paper trail with all my notes and design ideas. I had to have some way of keeping everything structured so I wouldn’t get too overwhelmed. At this stage, I was only concerned with what design each embroidery stitch would have. My notes got well used, and there was a lot of crossing out and redevising along the way. Once I was happy with the order of the stitches and the design sketches, though these got changed along the way, I created two paper books with the outline of the stitches and pages, just so I could see what the finished book would look like. I am a visual person and sometimes I need to have something physical in front of me.
Book Mock up
With the design notes and plans, I could now set about coming up with final design sketches and drawing these up into the final templates for each page. At this point, I still had not actually thought of how this would all go into a pattern, how do I write out the instructions for the book or the actual embroidery stitches? Those important factors, didn’t come into the equation at this time – I was focused on actually creating the book itself.
It is a difficult task when you set about writing and creating written pattern/instructions so someone can come along and follow the instructions to create their own sampler book from the written pattern. I really hadn’t thought that through. I started off with stitching the book, telling myself that the pattern content will come along. My initial thought was to create step by step photos of each stitch and that is how I started.
Two years ago, Alyssa and I went on holiday to Wales and I took my pages with me to work on during down time. It started off really great, but over time it has harder to remember to take step by step photos and ensure they were clear. I was still having issues with how the pattern should be written so it was not too lengthy but still clear enough for anyone to follow.
I came back from holiday, and continued to work on the pages. But it stopped shortly after as I really wasn’t happy with how it was progressing, I had a mental block on how to take the patterns forward. I put the pages in a tin and set them aside, with the intention, I would get back to it when I had a clear mind. Fast forward a year or so – I had pulled the pages out to show people every so often over the year and discuss what my ultimate goal was – and then promptly placed them back saying I will get back to them. I was still struggling with the pattern writing.
It even got to the point where I had ‘misplaced’ the fabric pages. They were not where I thought I had kept them safe. I tried not to panic over it, and soon ‘forgot’ about them.
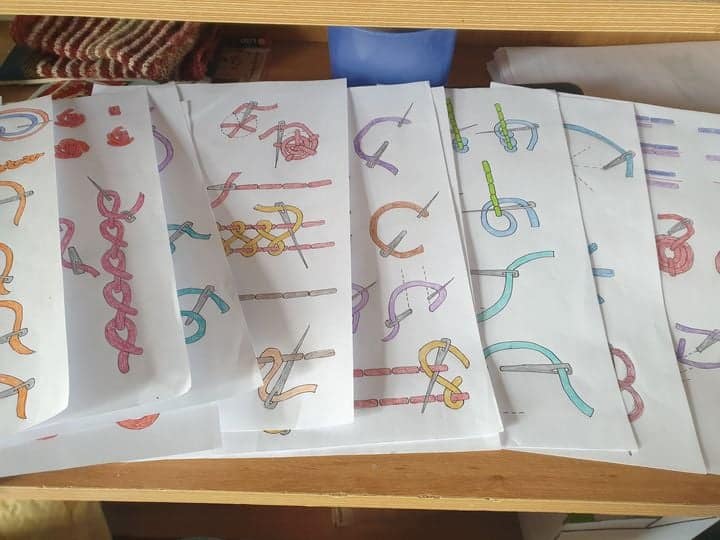
At the beginning of the journey, I had sent the first pattern to my testers who were wanting to do the project with me. They had their pages all prepared and ready to start stitching. I felt really bad, as I had put it all aside due to the mental blocks I was having with the patterns. Fast forward to the first lockdown – I devised a learn to crochet tutorial and I drew the diagrams and coloured them in. These instructions had great feedback and many found these diagrams easier to follow than photos. This got me thinking back to the embroidery sampler patterns and how it may be better to have coloured diagrams instead of photos which may or may not be in focus or the right lighting. With doing the crochet tutorial, I was able to move away from my mental block on the embroidery stitches.
Stitch diagrams
However, I still had the issue of locating my pages …. It didn’t help either when my testers asked if/when I was going to finish the sampler book….. so, with a confession and a promise to my testers …. And a frantic search around the house (several days in fact) looking to where my ‘safe’ spot was, I came up with nothing! Bring in Latisha, who offered to find them for me – and within 15 mins she had found them in the box of felt pieces! Heaven knows how or why they were in the bottom of that box! But, I was not going to get into solving that particular mystery, I was just so thankful that they had been found and I didn’t have to start making new pages …..
After not looking at the design notes and stitched pages for 2 years, it took a while for it to all come back …. I had noted on the paper books that the outside covers would have a saying on one side and name/year on the other. All of my notes on stitch designs, were all there and I had even written down all the stitch instructions, which I was so thankful for. I knew there was a reason why I put everything down on paper and keep it safe in a folder. Once I had gone over everything, I was able to look at the project with a fresh mind and the pattern instruction concept seemed to just flow and come together.
getting familiar with the notes and stitched pages
Maybe, I needed that time away to get it all right. I know that I felt better within myself this time round and the format of the pattern and instructions just seemed to come together. I even enjoyed drawing up the steps for the stitches and it seemed that with these diagrams, I was even able to rewrite the instructions so they followed the diagrams.
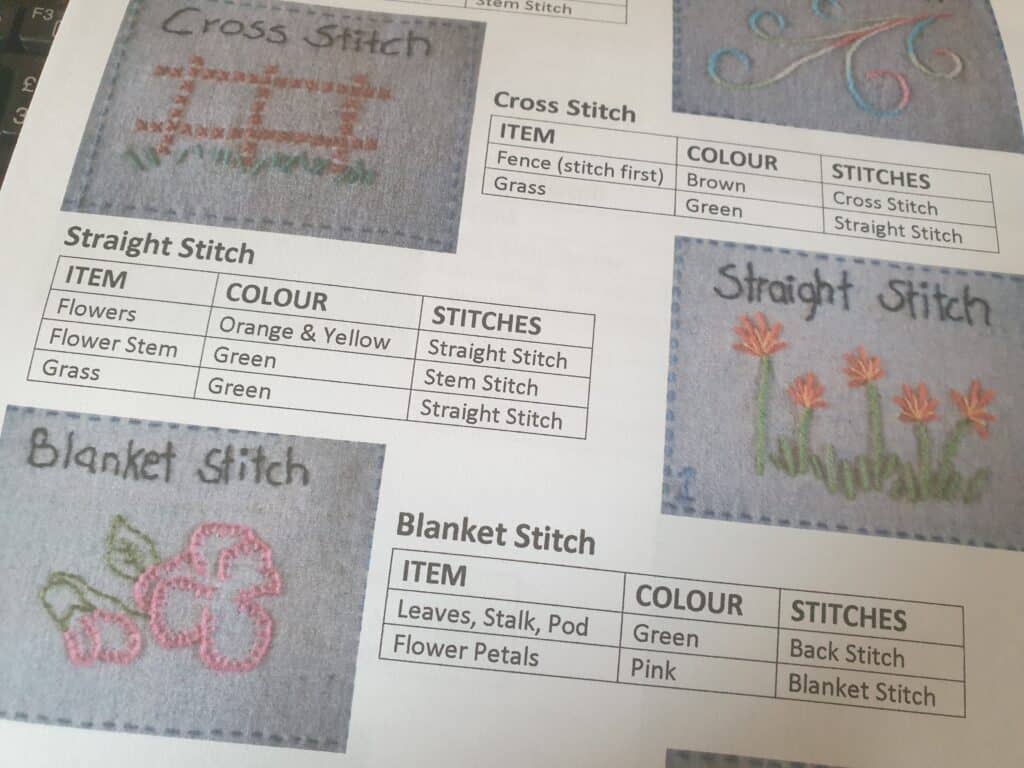
Stitch instructions and diagrams
It was still a lot of work – finishing the stitches in both books and writing up each part of the stitch design, the colour I used and the stitch that was used. It was a section of the pattern that evolved as I went along, trying to find a simple and visual way to lay out how each embroidery stitch design was created. Hopefully, with the structure I have devised in the monthly patterns, it has made it that bit easier to follow.
Stitch design instructions
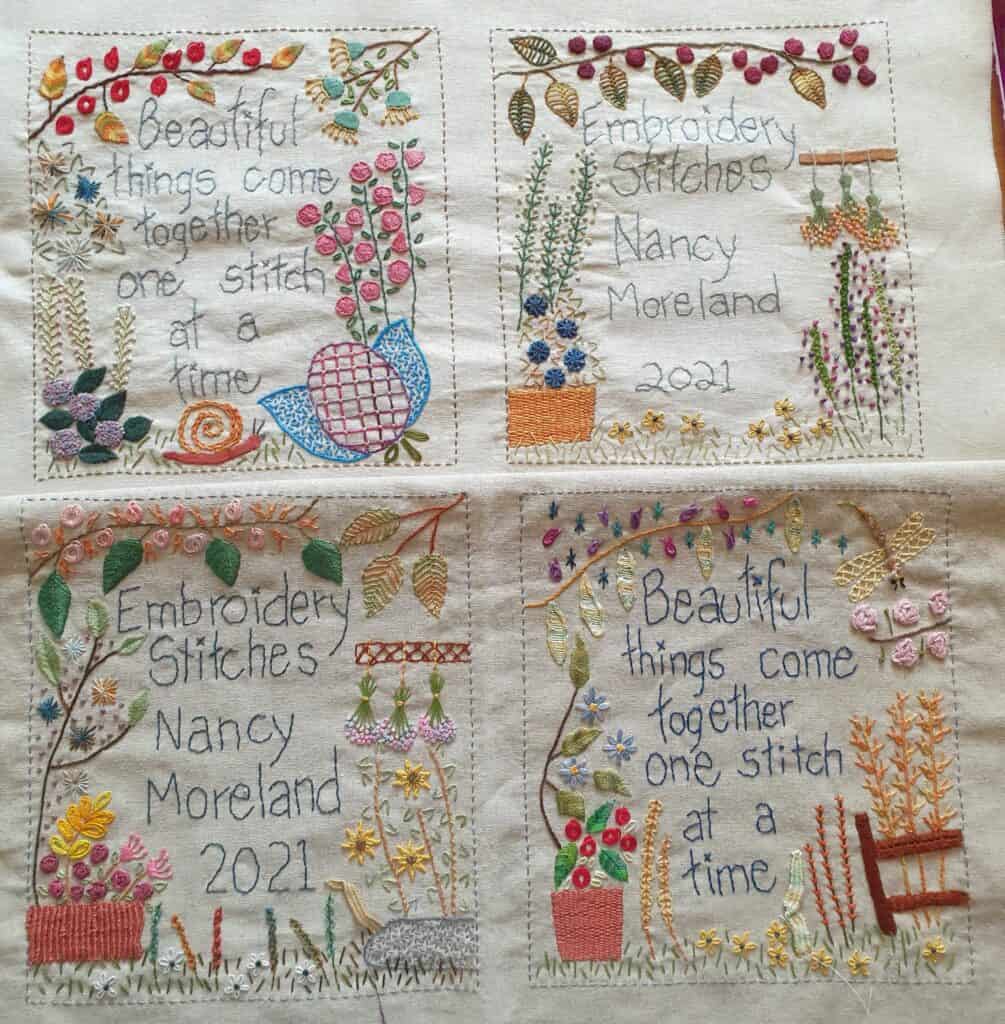
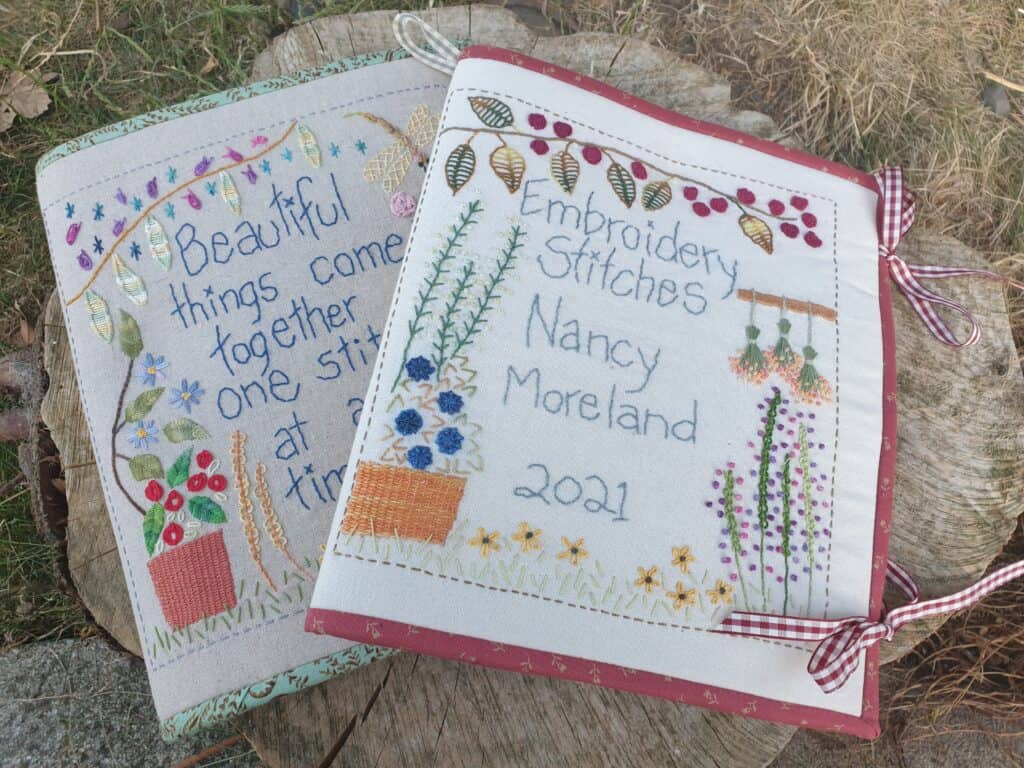
I still had to design the outer covers for both books and each one had to be different as both books used stitches that are learnt in that particular book. They were fun to come up with and the hardest decision was about which design should be on the front, and which on the back. That issue was never decided on, my testers all had different choices – so it was decided that the decision of what you would put on the front cover – The saying design or the title design – would be left up to you to decide! If everything in this sampler book was laid in stone for you to follow and create an exact replica of my book, there would be no fun or individuality on this embroidery journey.
outer cover designs
I have found that this embroidery sampler book journey has definitely evolved over the years. At the beginning, I have to admit I was really unsure on how to bring this project to fruition and make it perfect from the launch. Looking back, I am convinced that it needed that break in between …. I needed to grow as well. Sometimes we can have a seed of creation, but just don’t know how to execute it so it is exactly right. I needed the time to ponder over the pattern instructions so they were just right. The break also allowed for the concept to expand, at the start, I was just focusing on releasing the patterns … and had no thought or desire to have fabric kits, etc. So, the break allowed this to evolve and I was able to work on having kits available to purchase to support the sampler book. It has also allowed me to be able to offer the pattern for both left handers and right handers. I am so thankful for this, and fully believe that things happen for a reason and the two-year break was needed so I could bring this embroidery journey to fruition in the best possible way.
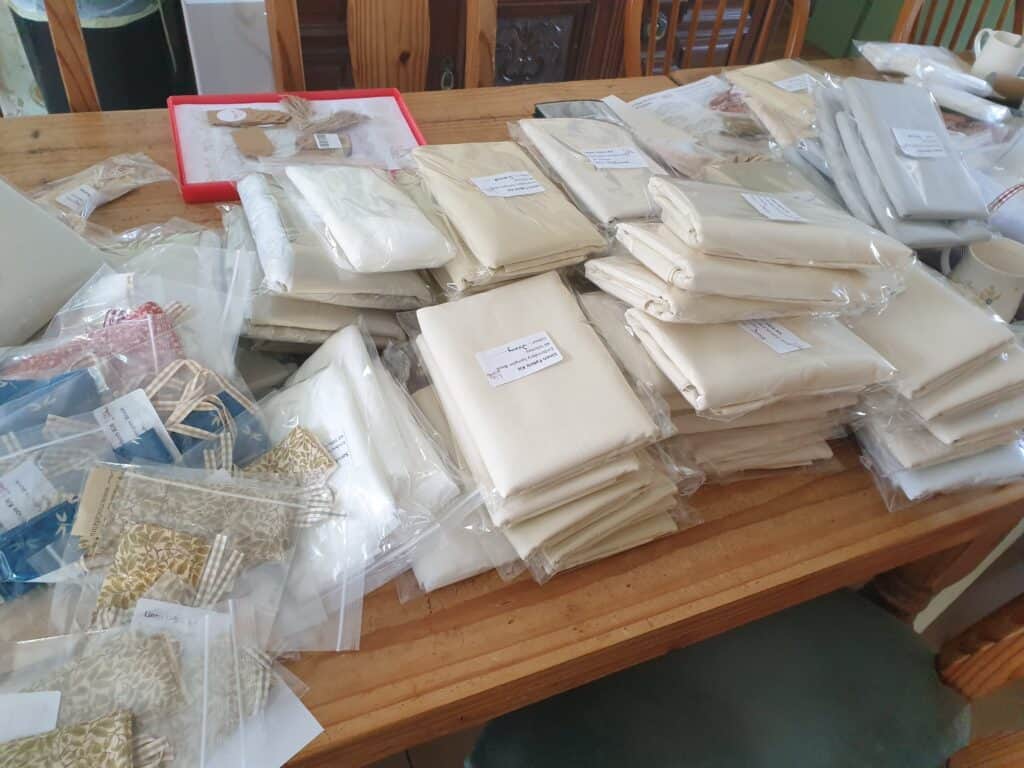
kit packing
So, how does this Embroidery Sampler Book monthly subscription work?
Each month a pattern will be released which will give you clear and simple instructions on how to create your chosen book. These can be saved in a folder for future reference. The first month will include cutting instructions for your ‘pages’ and how to ‘rule up’ each individual page to get the pages ready to start stitching the embroidery stitches in the following months.
Over the following months, you will receive 12 embroidery stitches to stitch into your book.
In the final month, you will receive the pattern, templates and instructions for the cover (front & back) of your book. These designs will incorporate all/most of the stitches you have stitches over the previous months. You will also receive detailed instructions on how to put your book together. The 36st sampler book is over 5 months and the 60st sampler book is over 7 months. There is NO pressure to complete each monthly pattern before the next pattern is released. This is your journey and you work along at your own pace. Alongside the patterns, I have started a Facebook group that is solely for the embroidery sampler book and it is a place where we can share our progress photos, ask for support and I can give extra advice for each monthly pattern and videos (if needed) on the embroidery stitch. https://www.facebook.com/groups/1981259928809348
This book will become a treasured heirloom, something to treasure for years to come. You will also learn some new and interesting embroidery stitches that you can incorporate in future projects.
So, are you wanting to join the embroidery journey? The first monthly pattern is available on our website, along with any kits that you may need/want to help with your journey in creating your very own Embroidery Sampler Book. I look forward to being part of your journey in learning new (& old) embroidery stitches
So, do you put the milk in the cup first? Or after you have poured the tea in?
It is strange how such simple questions can cause such a strong debate on the correct way to drink our national brew.
Today is the day when all the British and Irish tea lovers celebrate drinking tea. Although tea originated in China, tea is associated with the United Kingdom. This is because the British made tea a popular drink back in the 17th century. However, since tea was more than double the price of coffee, it was a drink strictly for the wealthy.
National Tea Day came about in 2016 to celebrate Queen Elizabeth the Second’s actual birthday and has since become an annual celebration for drinking tea, with Day events organised by tea companies, cafes, restaurants, tea rooms, in other words, by businesses that are engaged in making, producing or selling tea. It is the event where tea lovers can sample and buy new teas and learn the art behind brewing the best tea.
It is not only the British that enjoy their ‘cup of tea’, the Irish love the drink even more than the British. “Taking tea” has become an Irish custom that has been enjoyed for many centuries and today, the Irish are the heaviest tea drinkers in the world, beating the British by averaging 4-6 cups per day.
It wasn’t until the mid 20th century when an Irish businessman decided to import tea directly to Ireland and drop the middleman, England, that the tea consumption really made it big. Before then, tea drinking was expensive and only available to the rich due to having to buy the tea from the British. Drinking tea became a status symbol and hosting a tea drinking party at home really placed you on the ladder to social success.
So why is Irish tea so strong and drunk with plenty of milk? Well, back when the Irish had to buy the tea from the British, they received the cheaper quality tea, so milk needed to be added to cover up the taste. This meant that the Irish tea had to be brewed stronger than the English tea and this custom still exists today.
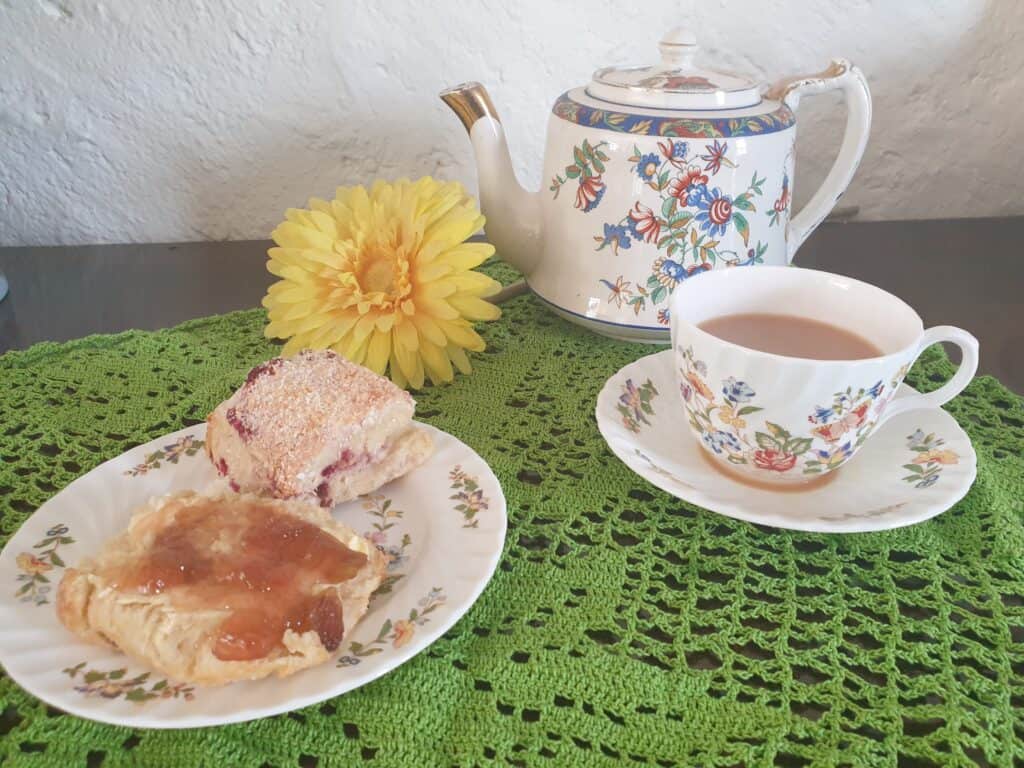
There is a definite ritual to the Irish tea making. Ideally the tea is brewed in a teapot, which had to be scalded beforehand by swirling boiling water around in it and emptied. Then one tea bag per person and ‘one for the pot’ (that is important!) is added to the tea pot, or if you are lucky enough to have loose tea, it is one teaspoon of loose tea per person and one for the pot. Let the tea steep 3-4 minutes, but no more than 5 mins! Pour suitable amount of milk into each tea cup and then pour the strong hot tea. And there is your perfect cup of Irish tea.
Irish Tea Ritual
I guess when you are fortunate enough to live in a damp and cold country like Ireland, a hot cup of tea is just the thing to warm the body and soul, making everything right with the world. Many a problem or crisis is fixed over many a ‘cuppa tays’.
I remember, when visiting households (and many for the first time) the first thing you would be offered, is a ‘cuppa tay’. Even though, I am not really a tea drinker, I felt that I couldn’t refuse and somehow had to suffer through the typical Irish tea, hoping I could refuse a second or third cup of tea. Drinking tea was the way that walls could be taken down, friendships formed and a mutual ground established – all over sharing a ‘cuppa tay’. Any time during the day was the perfect time to stop and have a cup of tea, and we cannot forget the biscuits and cake that went with the tea.
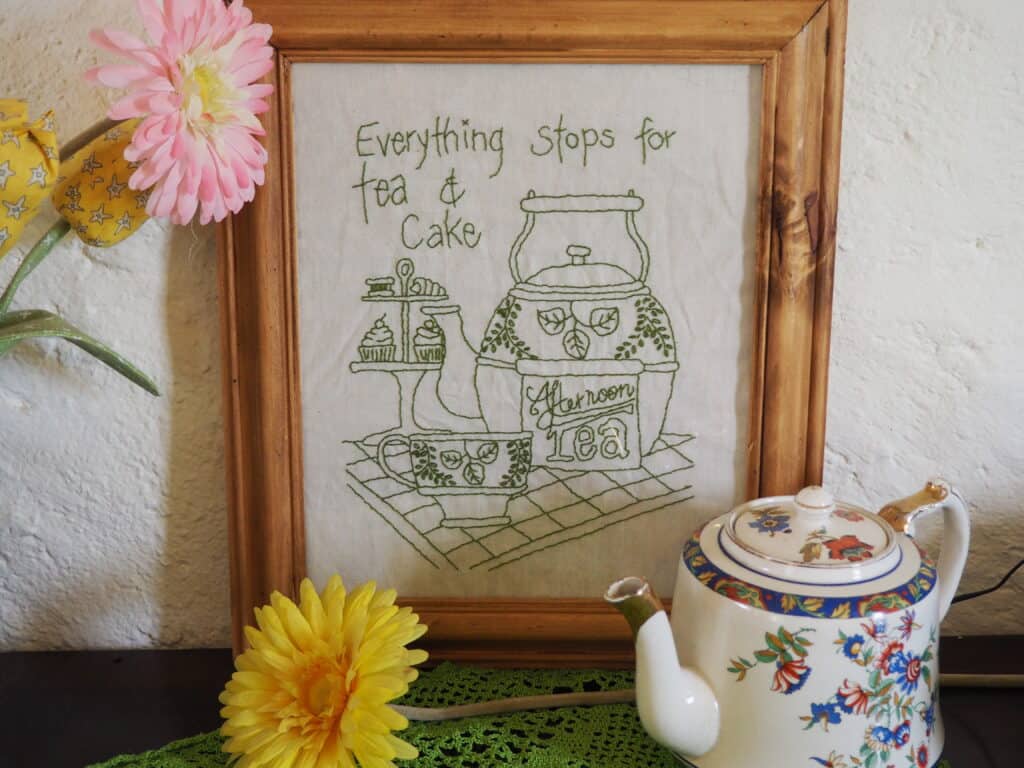
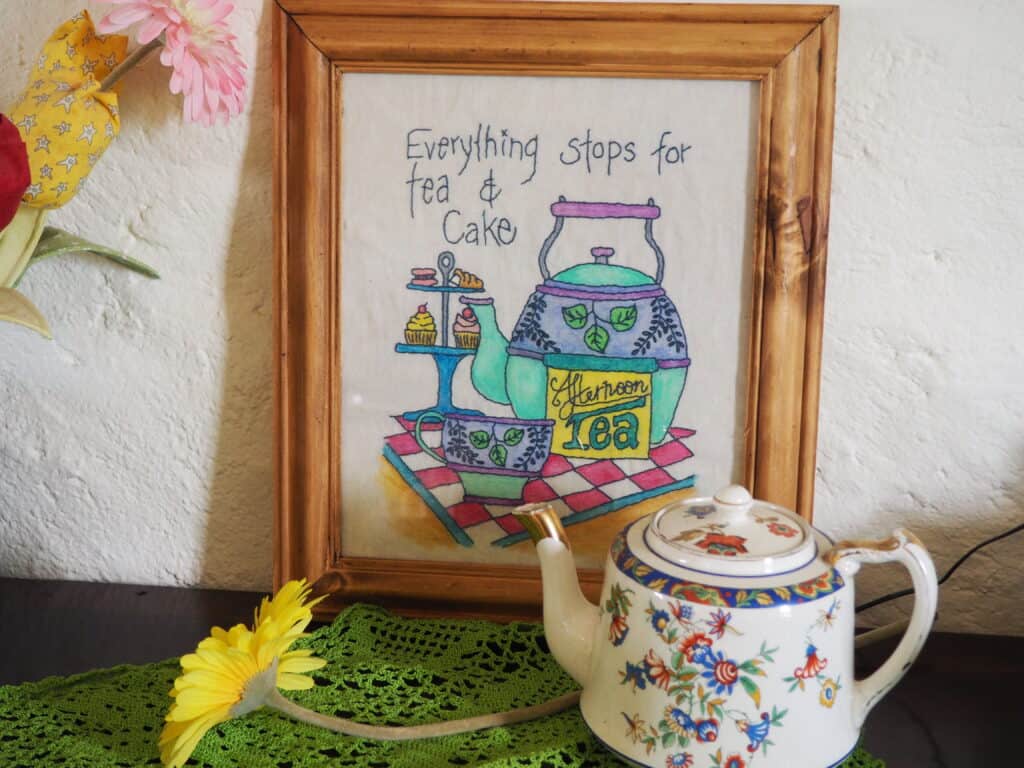
So, to celebrate National Tea day, I felt that launching my latest Redwork design was the perfect time. This design truly represents the social meaning behind drinking tea – ‘Everything’ does stop for Tea and Cake. We can’t forget the cake! The pattern (printed and PDF) is available on our website and we also have kits available. The kits come in a variety of different colour thread choices as well as the option of a pre coloured design.
Redwork Option
Inktense/Redwork Option
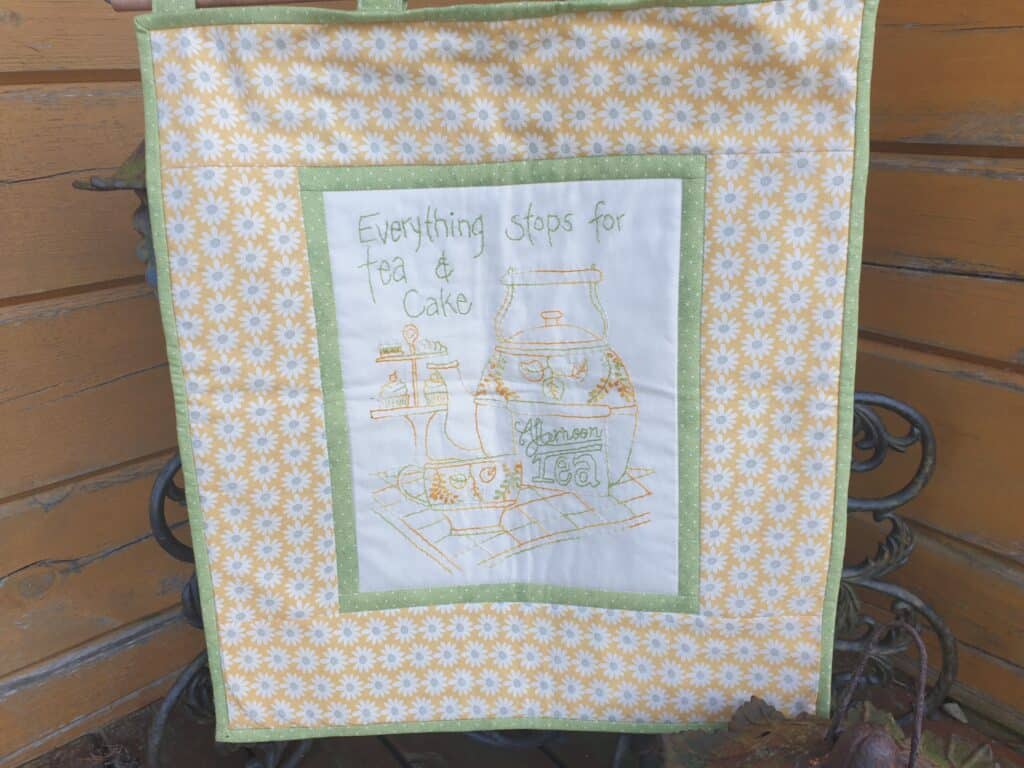
Redwork Wallhanging Option
This design would grace any kitchen/dining room wall all year round and remind us just important Irish tea is to our culture and customs. It is more than a cup of tea! It is the bringing together of strangers, forging families and friendships, solving problems and warming the body and soul.
So, do you pour the milk in first or after the tea is poured into the cup?
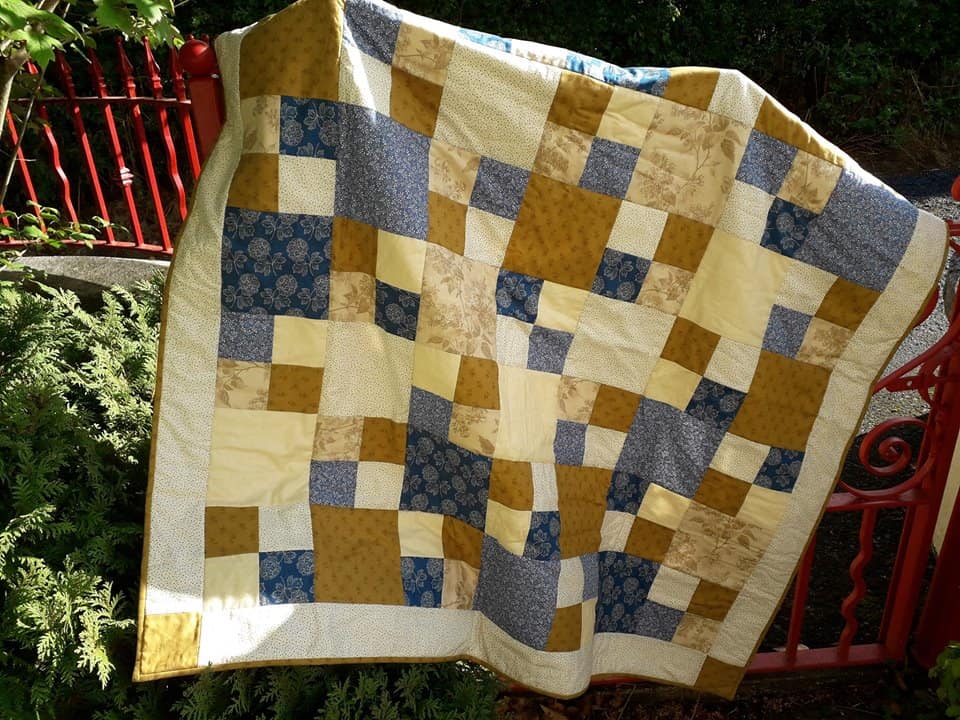
I have spent a few days working on a beginners’ quilt pattern. This pattern is a quilting beginner’s workshop in a written pattern. Creating this has taken me quite a few days as I had to rewrite the pattern I used in the Introduction to Quilts Workshop. This is a workshop I have held in recent years.
With this pattern I wanted to include all the tips and techniques I would teach and show in a workshop. It proved to take far longer than I thought! Basically, what should have been a simple and straightforward task turned into a mammoth piece of work taking about three days.
While writing out the hints and techniques to help you create your first quilt, I thought back to when I created my first quilt, over 25 years ago! Well, actually, I probably started my first quilt long before that (I am showing my age now).
When I left school at 16 years, I went to work for a Fabric shop in New Zealand. It was a terrible place to work, the owner was awful, working conditions were just as bad and the pay even worse However, due to my sewing experience in dress making, it was a dream job. I was surrounded by all of this fabric. One of our jobs was to cut off the label printed on the fabric, at the start of the role. It was about a ten-inch strip across the width of the fabric and this rejected fabric was placed under the counter. The fabric was all cotton; There was no such thing as quilting fabric or Quilting Shops back then. Those cut off strips piled up, and one of the perks was that we could take them home. I think the owner let us do it as he thought the ink would not come off. But I soon found out that the ink disappeared once it had been through a wash in the machine. So, why am I telling this story? Well, these piles of fabric started my adventure into quilting.
I had an old American quilting magazine at home and I admired all the handmade quilts in it. So being creative and young I decided that it would be a really good idea to create a handmade quilt for my Glory Box (or Bottom drawer) so I would have something for my marriage bed. Let me assure you, I had no plans for getting married nor anyone in mind, but I guess a young girl always had her dreams.
So at the tender age of 16 years, I decided to hand sew the quilt made from hexagons. I had to prepare and cut out the paper hexagons, cut out the fabric hexagons, tack the fabric to the paper hexagons and then hand sew them all together. I had plans for a double bed quilt, where it would hang down to the floor. I had never quilted before, knew nothing about how to go about it and there was no such things as quilting classes or shops but, I had the desire to make a quilt, something that would be treasured.
Well, I can assure you, it never graced a double bed. In fact, it lay half completed in a box for many, many years. That box of tacked hexagons, half completed quilt top accompanied me for many, many years, through various house moves. Even, after I got married, the quilt was still unfinished.
Fast forward about twelve to fifteen years or so and I discovered my boxed-up hexagon quilt still unfinished in a box. I decided that it was well past time for the quilt to be finished instead of lying in a box for another twelve years. It didn’t become a double bed size quilt, more like a lap size. But it was finished. I think back now with sorrow, thinking I no longer have that quilt, it was tattered and never made it with me on my journey here to Northern Ireland. I wish I had treasured it more. But I still carry those memories with me.
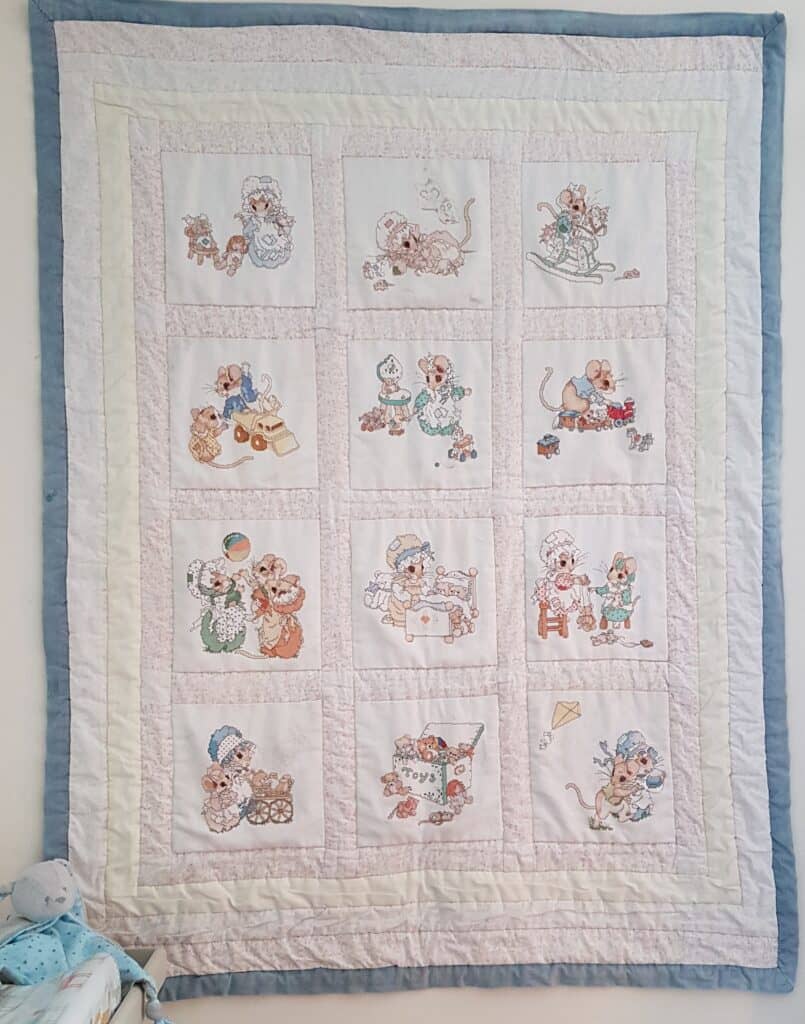
It did inspire me to sew more quilts, but on the machine, not by hand sewing! I was into cross stitching and I had this book of mouse designs that I was wanting to stitch for Latisha. This was when she was a toddler, but I didn’t want to frame them. That began my first venture into quilts. I made simple blocks, then pieced them together and made it into a quilt. I was self-taught and quilt making was totally new for me. I didn’t have the tools needed, or the techniques and I didn’t even know what tools I needed. I began my quilting journey on my own, learning, using books borrowed from the library. There was no internet, google or YouTube back then. It was still the Dark ages.
I learnt by my mistakes and went by my gut feeling. Latisha still has that quilt after 15+ years. It is a bit faded and worn but still very much a treasured item. It now graces the wall of Lucas’s bedroom.
From that very first quilt, I wanted to make more. There was still no quilt classes or quilting fabric shops. I think the nearest one to me was a seven-hour drive away. There was no online shopping either. So, all I had was the one fabric shop, you know the one that I worked in after I left school, and their selection was more for dressmaking rather than quilting fabric. So my only option was searching local Charity Shops and finding clothes that had very little seams and was 100% cotton. It is amazing what treasures you can find in those Charity Shops. These were also the places that I found old wool blankets (the type that we used to have on our beds, before duvets). They were usually cream and 100% wool. They made a brilliant option for the wadding, as there was nowhere to buy wadding. The upside was that the woollen blankets made the quilts warm in the winter (there was no such thing as central heating, I am really showing my age now).
I remember finding a stash of lovely Japanese patterned cotton fabric in a charity shop. From this stash I made a large double bed size quilt for Latisha to take to university. It had a large woollen blanket for the wadding and kept her warm for many years at her various accommodations. She even brought the quilt over here when she moved over from New Zealand. That quilt bears many battle scars, but it is still doing its job.
While looking into quilting and the history of it, I found that during the pioneer days, quilts were made from old clothes and old blankets. I was just reliving those traditions without knowing it, making quilts from old clothes and blankets to give them new life. I have made quilts from curtain fabric, chintz and whatever I could find. I was self-taught and created quilts with what I had on hand. My skills would not have been the best and I made many mistakes. I read book after book to improve my skills. I didn’t know about ¼” foot, applique, machine piecing and other tips to improve my quilt making.
Going forward a few years and I am now in my mid to late thirty’s and I discovered that there was a quilting guild in the area. It was in a historic House and gardens in the village I grew up in and I had spent many years exploring the grounds. At one time I even joined their painting group when I was a teenager. Wanting to learn more about quilting, I nervously went to one of their meetings, eager to learn new skills from them. It would be easy, after all quilters and crafters are all friendly helpful people that would welcome me gladly. I still remember, very vividly, stepping into that room of strangers Twenty years ago. I very nervously asked if it was possible to join as I was interested in quilt making. I was confronted with questions. What is your experience? Have you done quilting before? I answered that I had been sewing since I was 9 years old, did dress making and recently started to make a few quilts.
“Oh, what do you use to make your quilts?” I told them about my finds at Charity shops and how I made my quilts.
“Heavens!! That is not quilting! Quilts are only made with the proper Quilting materials!”
There was no warm welcome, no instant friendships. Basically, I had broken all of the Quilt Police Rules! I left and vowed never to put myself in that position again, deflated because I chose to do quilting my own way. It was the start of the journey into learning how to do quilts MY way, teach myself and reach my goal of showing others how to sew and quilt.
I have learnt so much along the way of my journey and I can honestly say I am still learning. Quilting techniques and tools are constantly improving and I have found, that what I knew and did ten to twenty years ago is NOT what I do now. I look back at my first quilts, I have a slight shudder to myself when I look at my mistakes and lack of techniques. But this is all part of the process and I am proud of what I have achieved and how far I have come. I have learnt the tricks and techniques, but I will never say that I need to stop learning. Learning is always an ongoing process. I will always treasure those first quilts, the ones where I didn’t use a rotary cutter, mat and ruler – they just weren’t round back then, but I would never think of NOT using them now. Why go backwards in the journey of making quilts? They make it easier to get accurate cutting, so anything that makes it easier is the best.
So, after that journey back in time, I now come to the purpose of what I started in the beginning of this post. The rewriting of a pattern for your very first quilt creation, to begin your journey in quilt creating.
When I teach workshops, I like to share the tips and cheats that I have learnt to creating a quilt easier. The tips on how to correctly press your seams and why, how to pin and the importance of pinning so that you can ensure all seams and points meet up as they are meant to.
I learn things from experience, for instance, my first experiences in layering quilts and having disasters due to the three layers not working together, ending up with huge wrinkles when I do the quilting to hold the layers together. Not using the right tools or materials did not help either, so I have shared how I have overcome the issues, so you can enjoy the process of layering and quilting.
Basically, this tutorial pattern is like having me looking over your shoulder guiding you through making your first quilt. I usually get that from my students “I wish I could have you at home looking over my shoulder, telling me what to do.” So, if you have always wanted to make a quilt but have been putting it off due to not knowing how to go about it, having no classes to attend and just need the hints and tips to improve your quilting experience, then this tutorial pattern is a great place to start.
Valentine’s Day generally goes unnoticed in my household. This is due to it just being Alyssa and myself. However, going through my planner so I can plan designs and kits to important dates or celebrations I came upon Valentine’s day. Valentine’s day is not a celebration I have ever designed for, but I thought with the way 2020 went and with what we are facing similar this year, I thought we all need something positive and maybe a bit of romance to focus on. I think most (if not all of us) will be in a lockdown and will not be able to book that romantic getaway or dinner. Like most of last year’s celebrations, Valentine’s Day 2021, is going to be different.
So, while doing up my quarterly planner for 2021 my brain went off track, which isn’t unusual when I am sitting down to do admin and paperwork. I far prefer to be creative, so I started to ponder on what would be nice to do for Valentine’s Day, something that would not only last one day but be a message all year round and show how important relationships are.
As I started put some sketches onto paper, my thoughts went onto the true meaning of Valentine’s Day. I think we all know that it is the day when couples show each other their affection in one way or another, be it with flowers, card or a dinner out. Mostly it has become a pure commercial gain as, coming up to Valentine’s Day roses double in price, restaurants create special Valentines specials, at ‘special’ rates. But, when and how did Valentine’s Day come about?
It got me thinking, so I carried out some online research (while I should have been doing my quarterly planning for the business) and I came up with some interesting facts which I thought I would share with you.
There are several legends to the origin of Valentine’s Day and to find out more, we need to go far back into history, right back to the 3rd century A.D. to ancient Rome when Emperor Claudius II ruled. Apparently, Claudius decided that single men made better soldiers so he outlawed marriage for young men. A priest, called Valentine, found the law to be unjust so he secretly continued to perform marriages. When Claudius discovered what Valentine was doing, he ordered that Valentine be put to death.
Another legend is that a bishop called Saint Valentine of Terni, was the true namesake and was also beheaded by Claudius II for helping Christians escape from prison. According to the legend, Valentine fell in love with his jailor’s daughter and before he was beheaded, he sent her a card signed “from your Valentine”. From this sad card came the phrase that is commonly used on Valentine cards today.
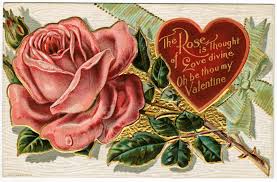
Though we may never know exactly who was the true Valentine, these legends all portray a very heroic and romantic figure. By the middle ages, Valentine became one of the most important Saints to be worshipped. It later became a festival to celebrate the coming of spring which included fertility rites. In 1375, the English poet, Geoffrey Chaucer became the first to record St Valentine’s Day as a day of romantic celebration with his poem ‘Parliament of Foules’. In the 1400s, it became popular to send written Valentine’s cards. King Henry VIII was known to send them to his wives.
By the 17th and 18th century it was common to celebrate St Valentine’s with handwritten letters and cards and in 1900, cards started to be commercially printed and sold. However today, it has also become very commercial with sending cards, flowers, presents or having a romantic dinner.
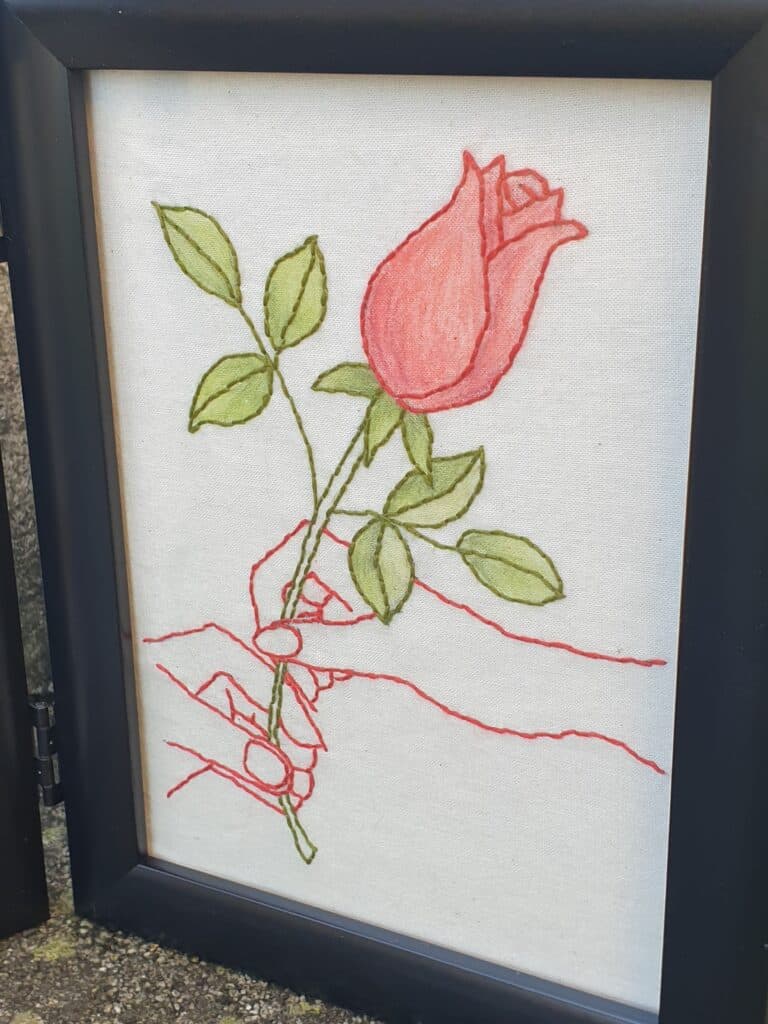
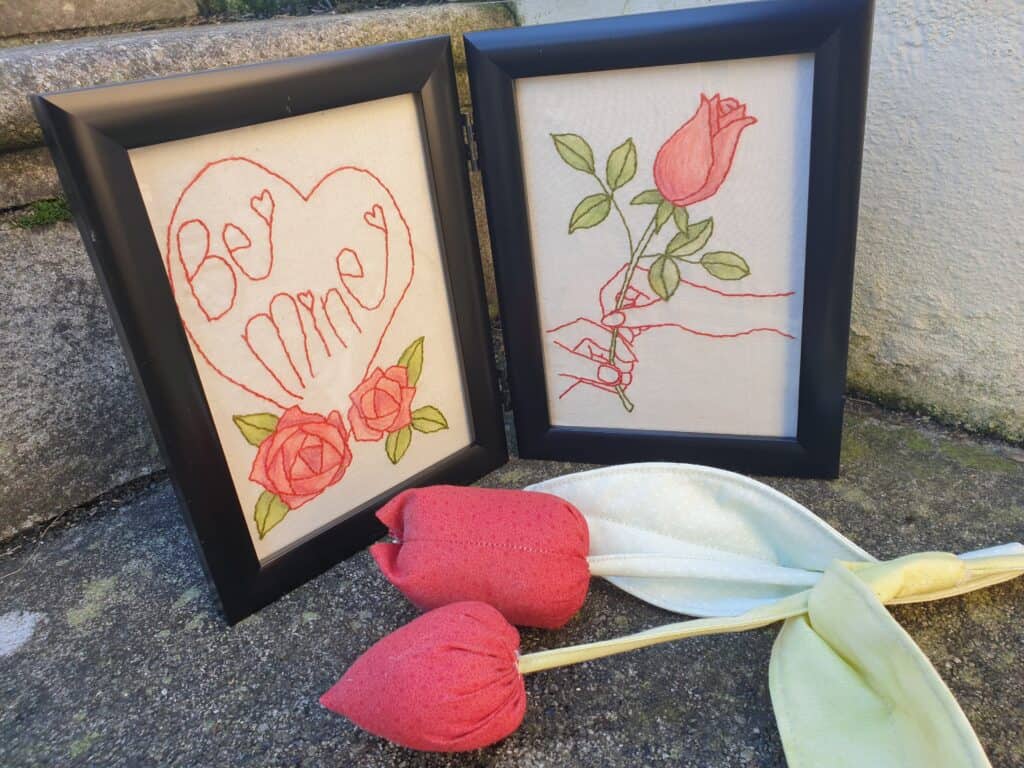
So, pondering on suitable designs, I knew that I wanted something that was a symbol of lasting love but also gave a simple message of love and affection. I thought on how to display the design. I wasn’t keen to make it a card format as I felt that would make it look like a temporary project. I wanted it to be a bit different and to create an everlasting expression of love and admiration. Why should our display of affection be limited to just one day?
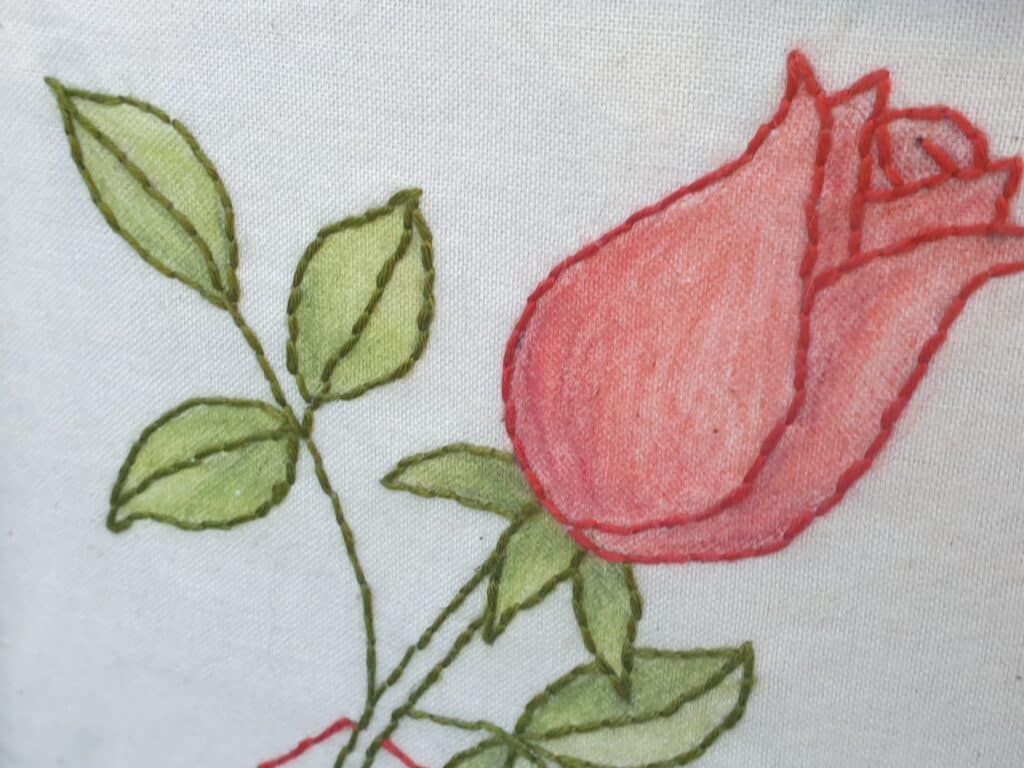
When we think of Valentines and love, we think of the colour red with red hearts and red roses. I felt that those were important to be included in the design. I also felt that the design would be more striking done in a simple Back Stitch using a red thread. It really couldn’t be any other colour. The symbol of love is a red rose, and what is more appropriate to show affection is the giving of a red rose to another, hence the two hands holding the red rose. I wanted the roses to really stand out by colouring them red, which then brought on the next process – do I paint the leaves green or leave them uncoloured. I decided to colour them green, which brought out another problem. I had planned on stitching the designs in red thread completely, but I felt that the red thread would look out of place if stitched around the green leaves. So, I stitched the leaves and stalk green and the rest of the design in red. I didn’t want the hands coloured, as I wanted the rose to be the focal point in the design. At times it is hard to know exactly what the design will look like when finished. Especially when you have a design or look in your head. So, I went with my gut instinct and just did it. I wanted the two designs to be in a twin frame so that it could be displayed indefinitely and became a permanent statement of love and affection. I think I actually made the right choice in bringing in the green thread into the design, it really makes the roses stand out and that is what I wanted.
This romantic design is not just limited to one day, it can easily be left out on display all year. This design would also make a lovely personal wedding gift. You could easily include and stitch the wedding date and their names. This would be done simply by leaving out ‘Be mine’ in the heart and writing or stitching the names of the couple and the date of the wedding under the hand in the bottom right-hand space. This design really leads to quite a few possibilities.
As a celebration of Valentine’s Day, I am offering the PDF pattern as a free download and the printed pattern will be on special for £4.00 from the website till the end of February. I am also offering kits for you to stitch you very own Valentine’s message. This kit will contain the printed pattern, threads, needle and calico which will have the design traced on and the roses coloured in ready for you to start stitching start away.
I hope you all have a lovely Valentine’s Day; in whatever way you choose to celebration or acknowledge it.
With the launch of my latest kit design, I thought I would write about it and some of the background. If you have been following my blogs, I volunteered to write this without any prompting from the team.
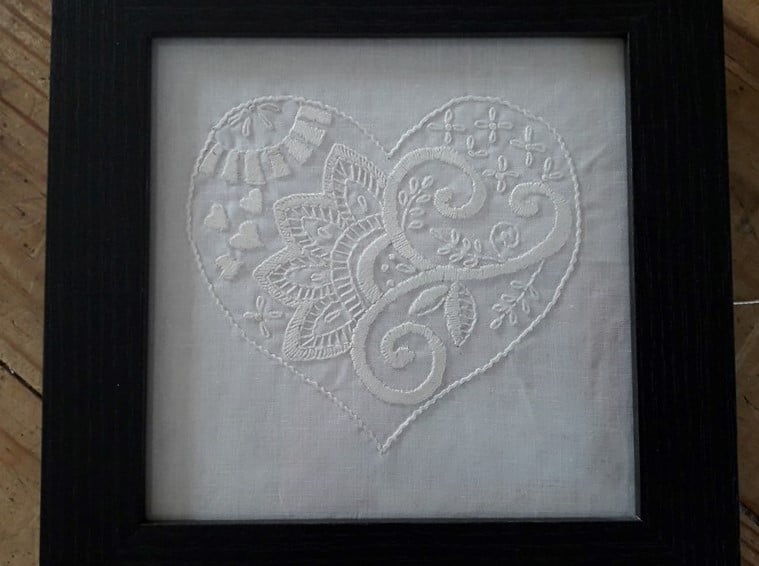
Early last year, a hen party approached me to do a small workshop on Whitework. This workshop was my first time doing a craft workshop for a group of ladies at a hen party. They wanted a small craft session and had asked me to design a suitable Whitework design for the Bride to be and then show everybody how to do the needlework. This was a fun task, coming up with a suitable design with the guidelines being – the Bride to be loved ‘folksy’ designs and to keep in line with a wedding.
So, the design that came together for that workshop was my “Floral Heart” design. I did not think that when I designed it for the hen party group it would have proved as popular as it has this year. With lockdown and not being able to hold workshops, I developed kits which enabled everyone to try out new crafts at home. The Floral Heart continues to be one of the most popular needlework kits.
Later the same year I was asked to facilitate a six-week course covering Traditional Needlework. This got me thinking about the different methods of needlework and the history of each one. It was an interesting project and even though I had done lots of needlework in the past, it was great to get more in-depth with each one and the history of each craft.
Whitework was one of the crafts that I was teaching and it is such an elegant embroidery. It is funny how there are different names for the different types of needlework and yet they use the same stitches at times. Redwork uses the same stitches (at times) and yet it is different from Whitework.
The Origin of Whitework
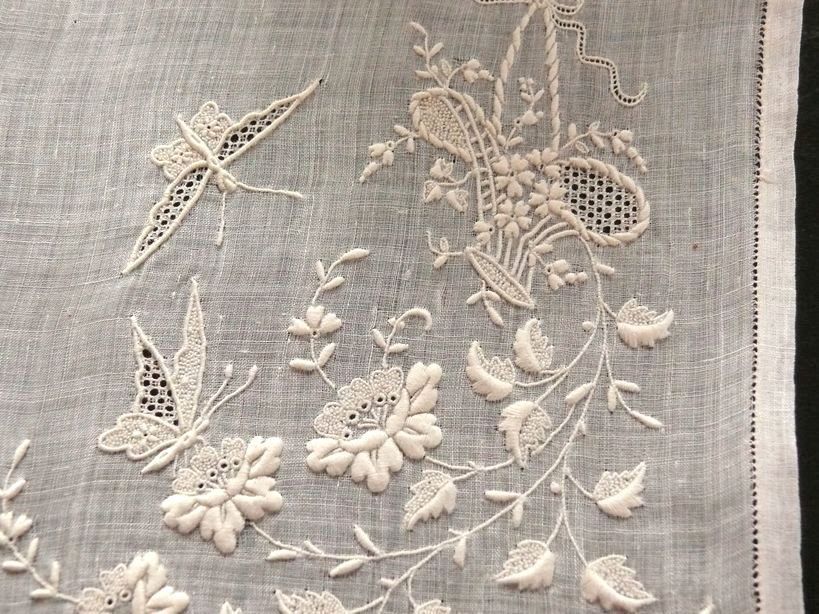
Whitework embroidery originated in India and China, then became popular in the West during the 15th century. It refers to any embroidery technique in which the stitching is the same colour as the foundation fabric. Whitework was traditionally worked with white thread on white fabric and used for church linens, underwear, bridal and christening wear. It is also the forerunner to the fabric Broderie Anglaise which is a whitework needlework technique consisting of embroidery, cutwork and needle lace. I am sure many of us remember wearing dresses or shirts made from Broderie Anglaise.
It seems that many countries or regions have their own form of Whitework. Ayrshire work, a form of Whitework used mostly for christening gowns was developed in Scotland during the 19th century. Ireland also has their own form of Whitework which is known as Mountmellick and has quite a distinctive finish to the Whitework as it had a crocheted edge to the work. There is also drawn thread work, pulled thread work, Hardanger, just to name a few, which are all really connected back to Whitework. So really Whitework covers such a range of different needlework techniques.
Various techniques were employed to make the stitches stand out against the white background. The type of thread that is used to help give it the look, is a Perle cotton or Coton a border. This thread tends to be thicker than 6-stranded embroidery cotton and has a matt finish which sets off the white embroidery against the white fabric.
Vintage Whitework
Whitework Designs
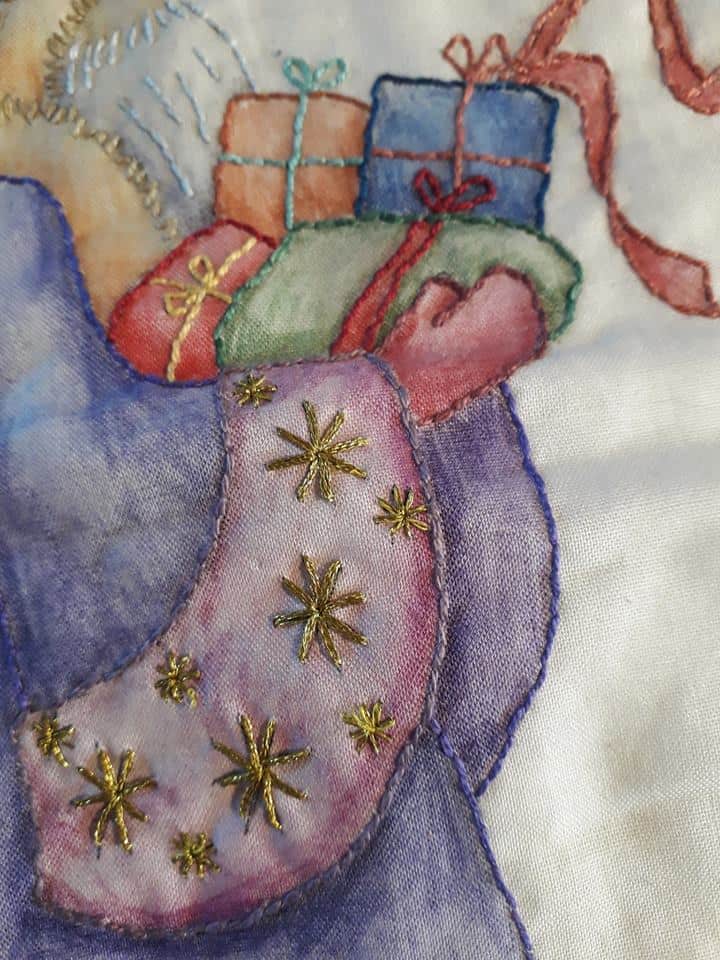
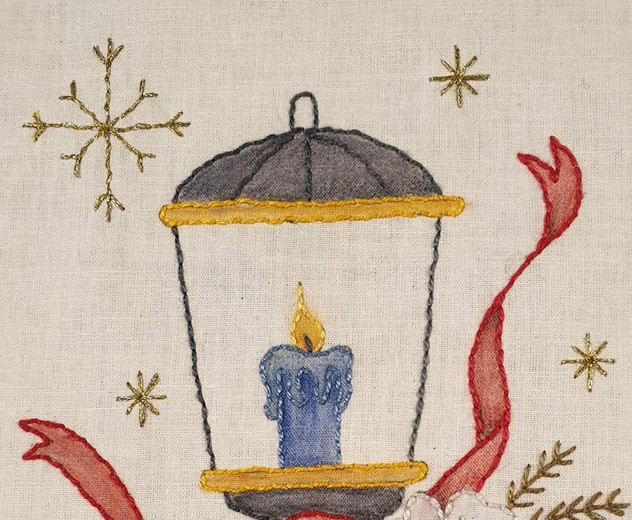
With teaching the Whitework to groups, I designed a few simple designs which proved to be a great success. With lockdown this year and not being able to conduct workshops, I decided to release kits and the two whitework designs that I had taught previously, proved to be very popular as kits. It is great to see how popular this needlework is and it got me thinking of how elegant Whitework would be with a Christmas theme. It was also due to the fact that I had been asked during the year to teach a Christmas whitework class during November. I think we were all hoping that lockdown would be over and workshops could resume as before. Unfortunately, that workshop was cancelled due to restrictions being in place. However, I was able to teach it to another group which was great to be able to do. The class stitched one of the designs and thoroughly enjoyed learning the techniques.
After that workshop, I came home and decided that the design would be lovely in a free-standing frame and have two different designs. Which is what I did, I wrote the pattern and decided on the stitches to be used and stitched the two designs up in the white cotton and added a bit of sparkle in the design by using silver thread to stitch the stars. It certainly adds that bit of elegance into a simple needlework design and I will be displaying it with pride over the Christmas period.
Christmas Kits
So, in time for Christmas, I am releasing the kits to make these two whitework designs. They would make great presents to give to someone, or even for yourself so you can make the designs to display in your home over Christmas. The kits contain everything you need to stitch the two designs. I also have them available in pattern form. The anchor Coton a Broder and metallic silver thread is also available online, along with the freestanding duo black picture frame to complete your two whitework designs.
If you enjoy needlework and hand stitch, I know you will enjoy stitching these two whitework Christmas Lights.
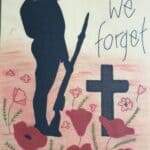
Back in late 2019, I was asked if I would design something to celebrate VE Day, which was to be celebrated in May 2020, and then to teach it in several workshops. I was humbled and excited to be approached about coming up with a design to remember such an important occasion.
I knew that I had to include the soldier and the well-known saying – Lest we forget – that we associate with Remembrance. I wanted to have poppies and also to bring Inktense colouring into the design. So, my design came to be.
So, fast forward to March 2020 and the world came to a complete standstill with the COVID-19 which meant that all planned workshops had to be cancelled. This was a difficult decision, but the world was going on an unknown journey and no one knew what would be the conclusion to it all. I know many thought it would be gone within a couple of months and life would go back to normal. Many would not have thought that we would still be in this semi lockdown and ‘new’ normal in October.
Strangely enough, we can apply this to our current situation; So many people have died from this virus, many that should not have lost their lives. I believe that we should not forget those that have gone because of this virus.
But back to the design; With the workshops being cancelled, I had to think of other ways the design could be available to those that wanted to make it. So, the idea of kits came about and it has proved so popular, more than I could ever have envisioned. I have created two types of kits – uncoloured one, for those that want to do their own colouring with the Inktense pencils and a coloured one, for those that are not able to do the colouring. The coloured kits are hand painted by me and each one is unique, no two are the same.
This panel would be lovely to hang on display every year to commemorate the fallen or even at any time. We are coming up to Remembrance Day, which would be great to have this panel ready for then. So why not get a kit and do one up for yourself or a friend so they can remember the fallen.
To provide the best experiences, we use technologies like cookies to store and/or access device information. Consenting to these technologies will allow us to process data such as browsing behaviour or unique IDs on this site. Not consenting or withdrawing consent, may adversely affect certain features and functions.
Functional
Always active
The technical storage or access is strictly necessary for the legitimate purpose of enabling the use of a specific service explicitly requested by the subscriber or user, or for the sole purpose of carrying out the transmission of a communication over an electronic communications network.
Preferences
The technical storage or access is necessary for the legitimate purpose of storing preferences that are not requested by the subscriber or user.
Statistics
The technical storage or access that is used exclusively for statistical purposes.The technical storage or access that is used exclusively for anonymous statistical purposes. Without a subpoena, voluntary compliance on the part of your Internet Service Provider, or additional records from a third party, information stored or retrieved for this purpose alone cannot usually be used to identify you.
Marketing
The technical storage or access is required to create user profiles to send advertising, or to track the user on a website or across several websites for similar marketing purposes.