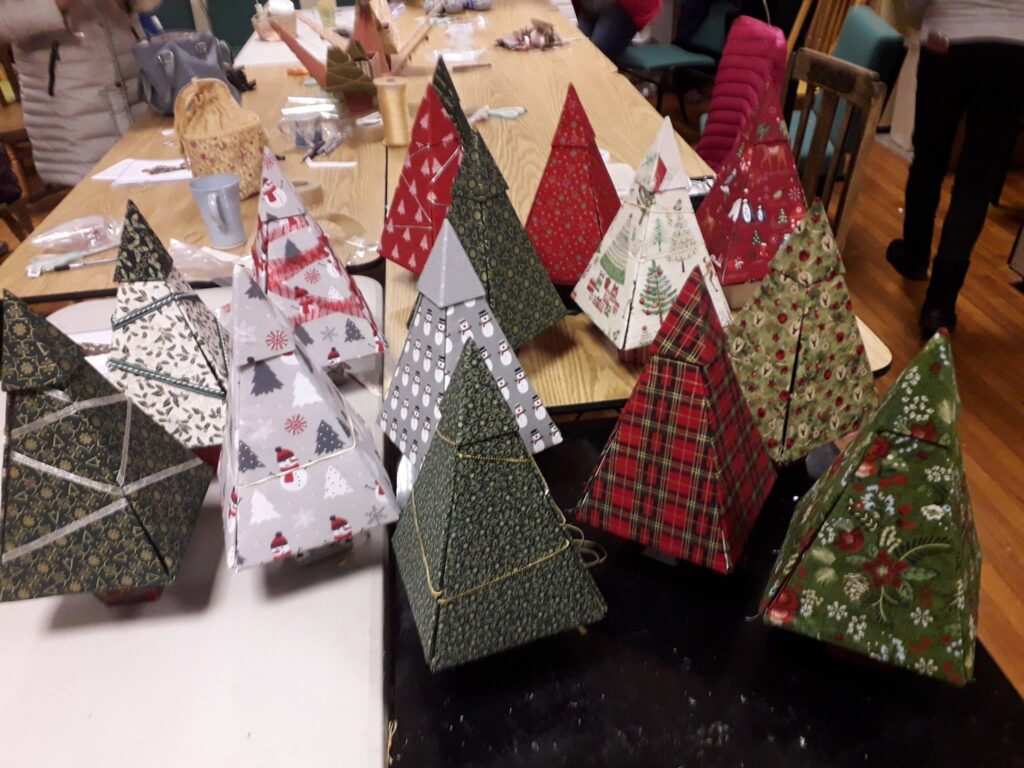
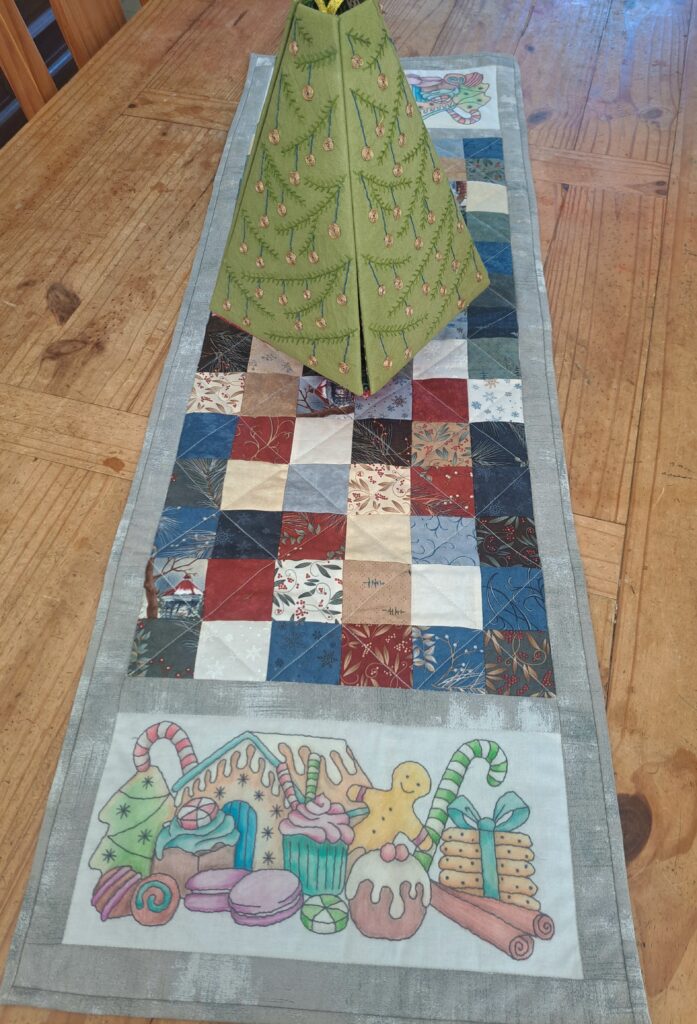
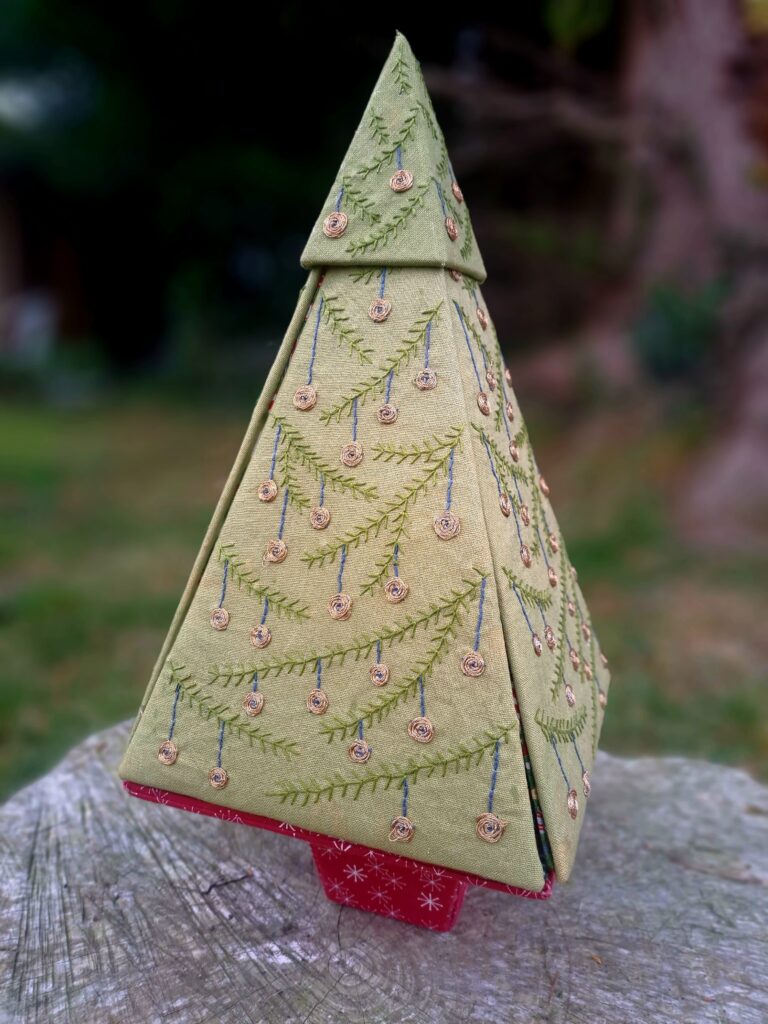
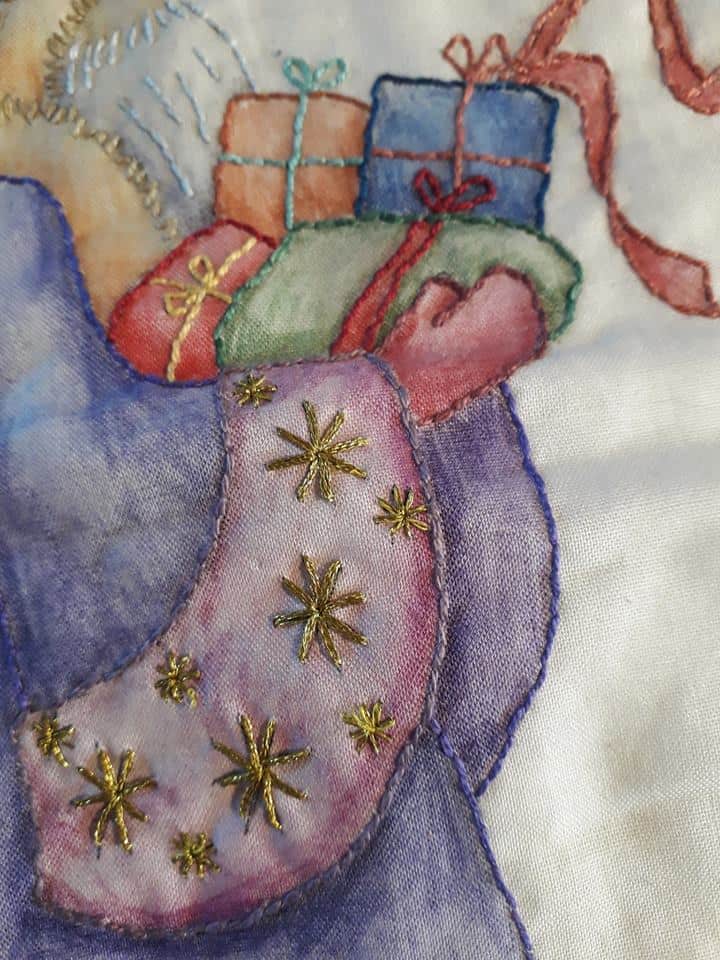
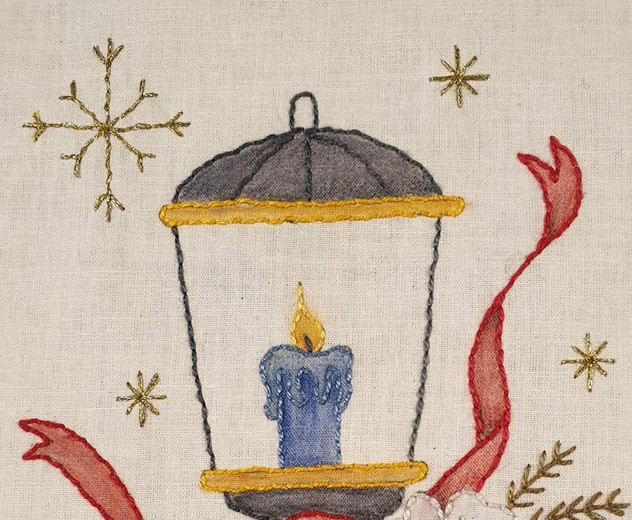
Back last year …. A few months before Christmas … I had this idea of an embroidered Opening Christmas Tree decoration. I had made a fabric version of it years before and even ran a workshop on it. The original kit came from Pinflair, and I spoke to them about my idea of doing an embroidered version of the tree. The fabric trees were lovely to make and really did make a stunning centrepiece on the table over the Christmas period.
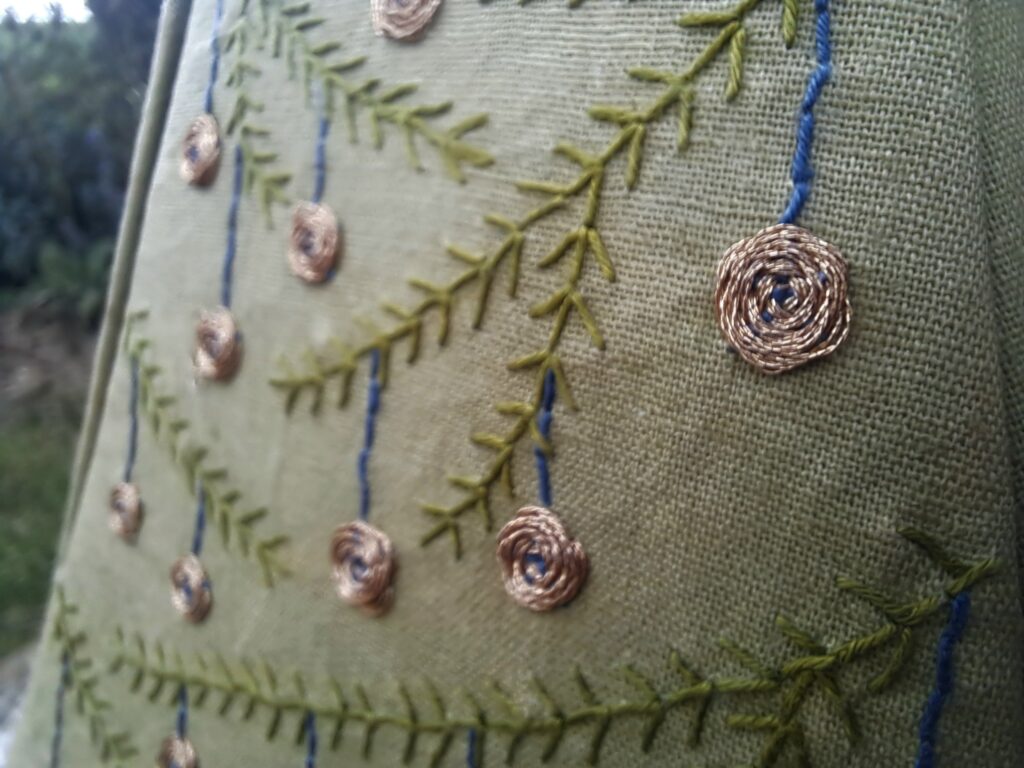
So … I put pencil to paper and came up with a few sketches …. Simple fir branches and baubles using simple embroidery stitches and metallic embroidery thread on a lovely linen to create something special.
I finished the embroidery, made up the tree sample while taking photos of each step. I then wrote the pattern, got it proof read and tested to see how easy it was to follow. I then shared the photos on Facebook to gauge on how much interest there would be in making the tree and having kits available to purchase. The next step was to get in touch with the fabric wholesaler to see about getting in the linen fabric. With 6 weeks to go till Christmas, I thought there would be time enough. I had ordered (& received) all the precut board templates to make the tree. However, the colour that I wanted for the tree was not in stock in the UK warehouse and needed to be ordered from the States which meant a delay. It finally arrived 2 days before Christmas, which was seriously too late for last Christmas. Lesson learnt. I guess it really is important to plan Christmas makes well in advance.
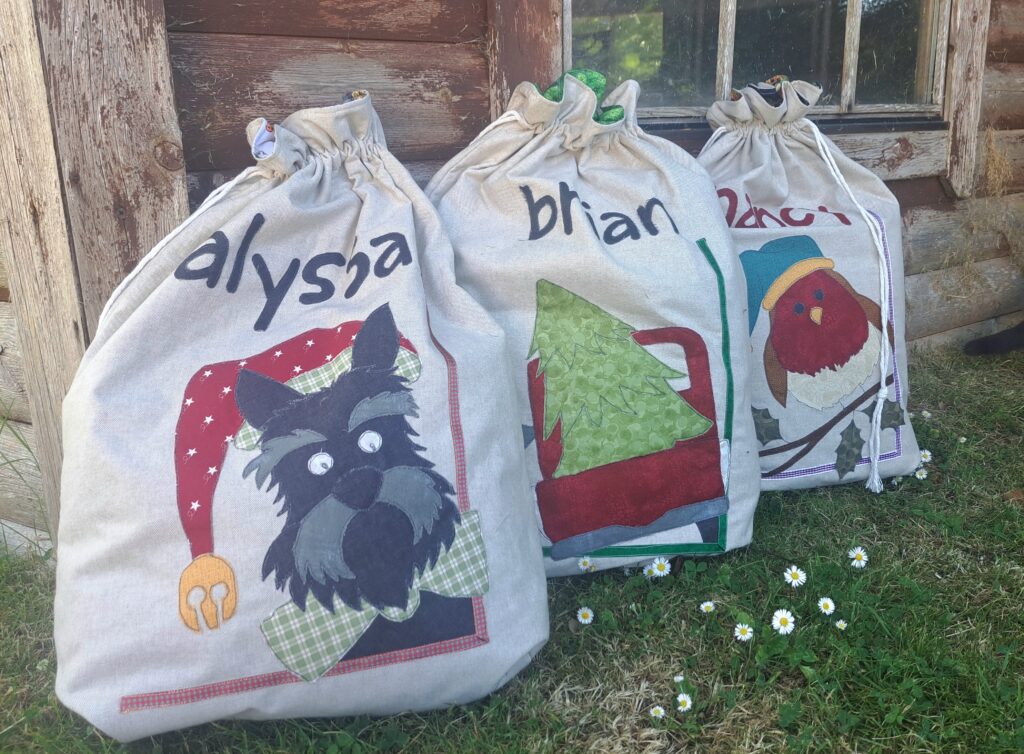
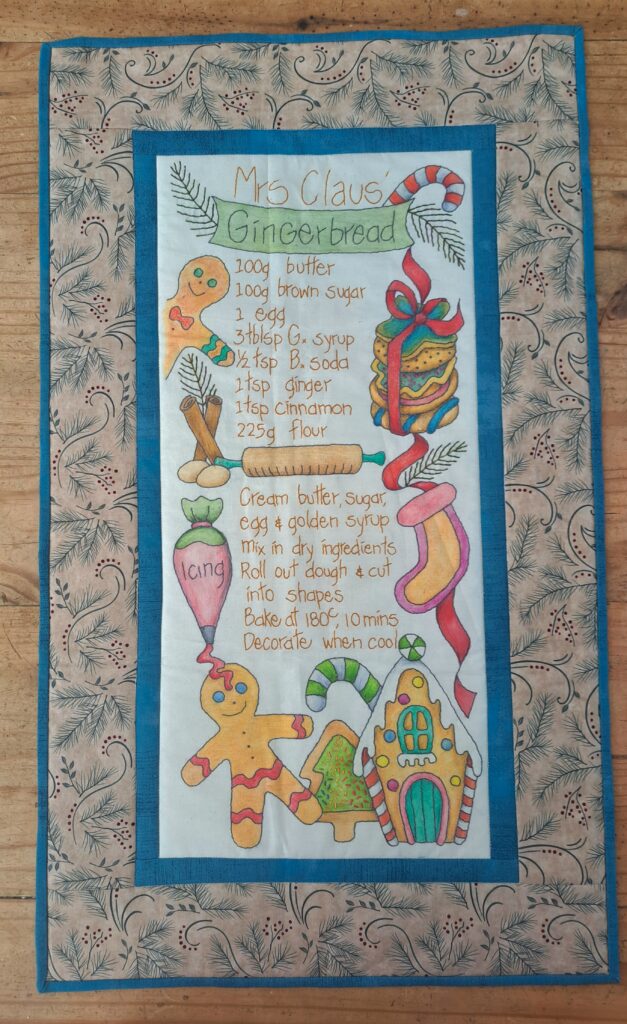
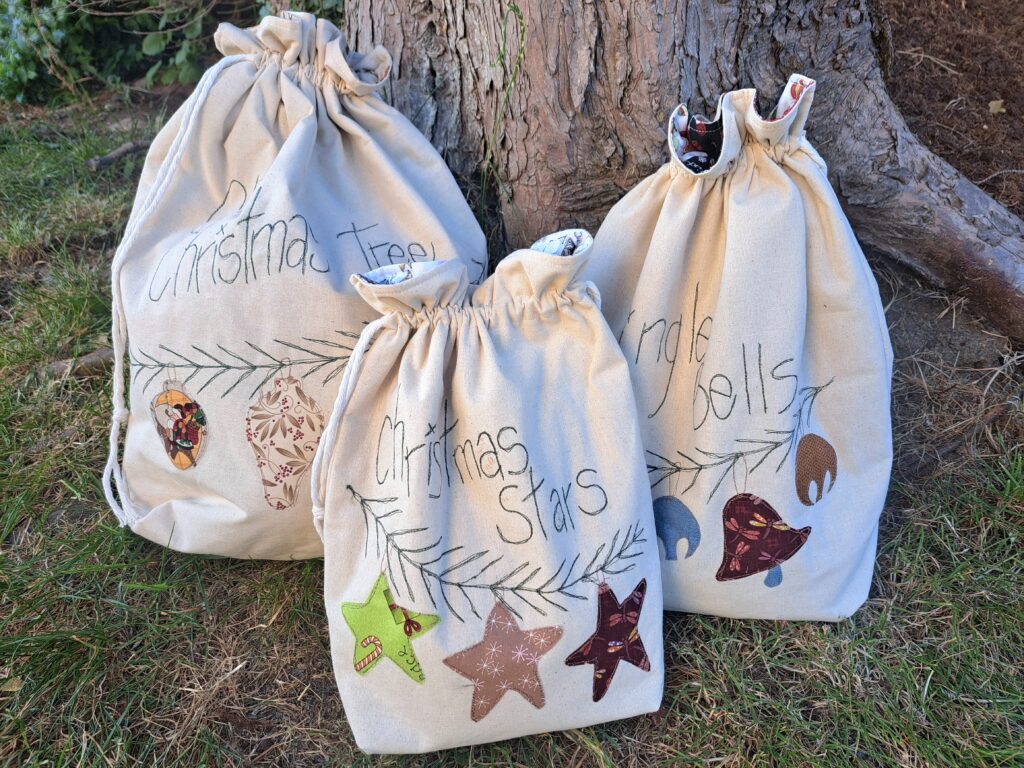
So, the templates and other pieces for the kit were put on hold. Christmas 2022 came and went, and no one really wanted to start making up Christmas trees in the spring. I decided to put the kits, etc aside until the autumn and launch them at the Quilt Fayre last week. It seemed the ideal time to launch the kit as I was also launching the Santa Sacks and my other Inktense Christmas designs then as well.
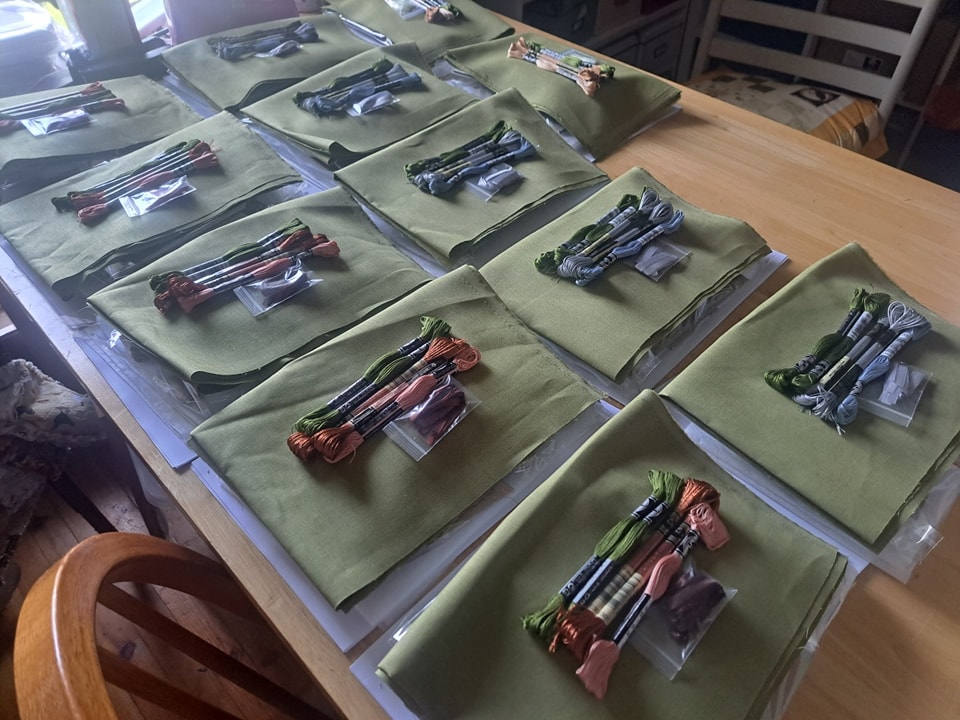
I made up the kits with four different colourways. The colourways refer to the colour of the baubles on the tree branches – 4 different colours of metallic thread. There is Red Copper, Bronze, Silver and Gold. My sample was made using the Bronze metallic thread.
The kits include 19 page tutorial with step by step instructions and colour photos to make creating your tree easy, the precut board templates to make the tree, shirting and gummed paper tape for assembling the tree, wadding, washable stabiliser for the front of the linen to show the embroidery lines, linen fabric, ribbon hinges and the embroidery threads for the embroidery. All you need to provide is the bookbinding glue and fabric for the internal/trunk of the tree.
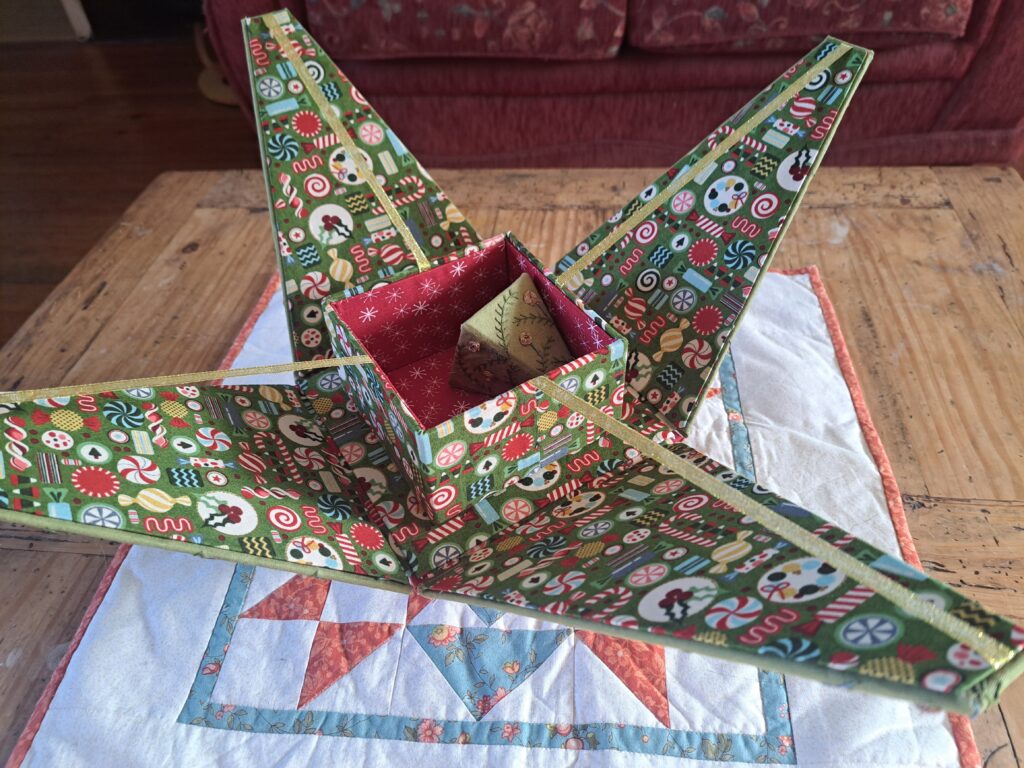
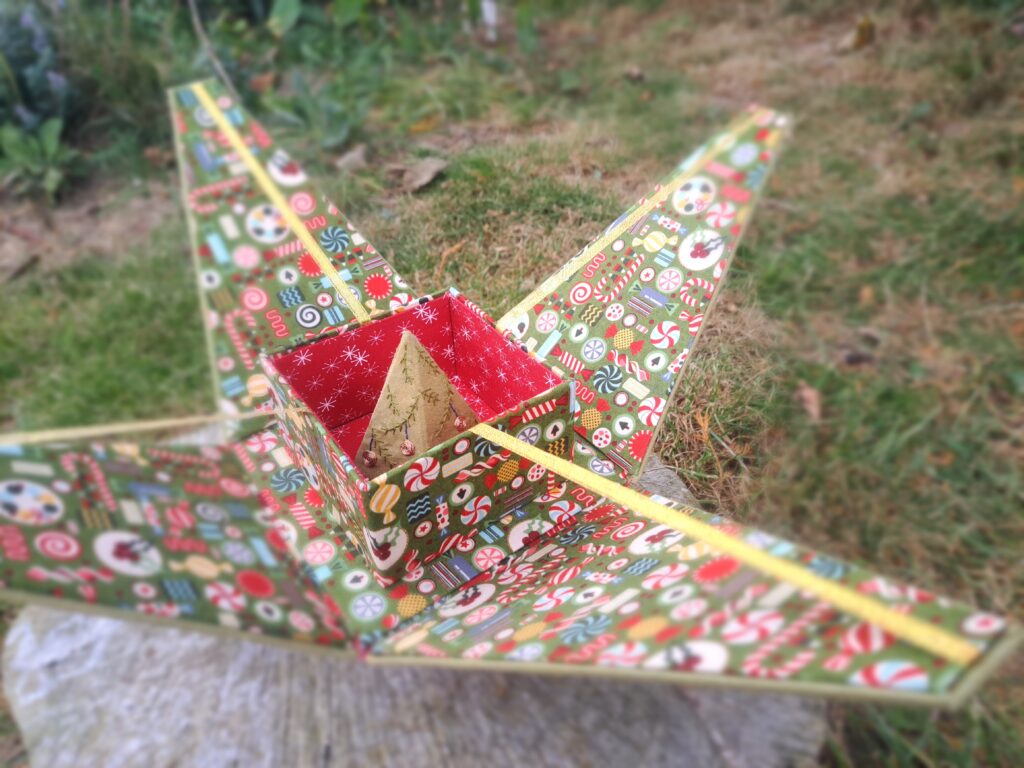
This tree really is such a special and stunning addition for your Christmas décor and will be lovely to bring out each year and fill with chocolates or sweets.
I guess the hardest choice is …. What colour baubles will you choose for your tree …. Or what fabric will you choose for the interior of your tree ….
So, with Christmas being only about 100 days away …. Now would be a good time to purchase your kit and you will have enough time to make your very own opening Christmas Tree to adorn your table this year….. These kits are limited ….
When I am asked to tutor workshops at various groups or organisations, I usually come up with a design following the request from the group facilitator. It can be fun to come up with a design once I have been given a theme or guidelines.
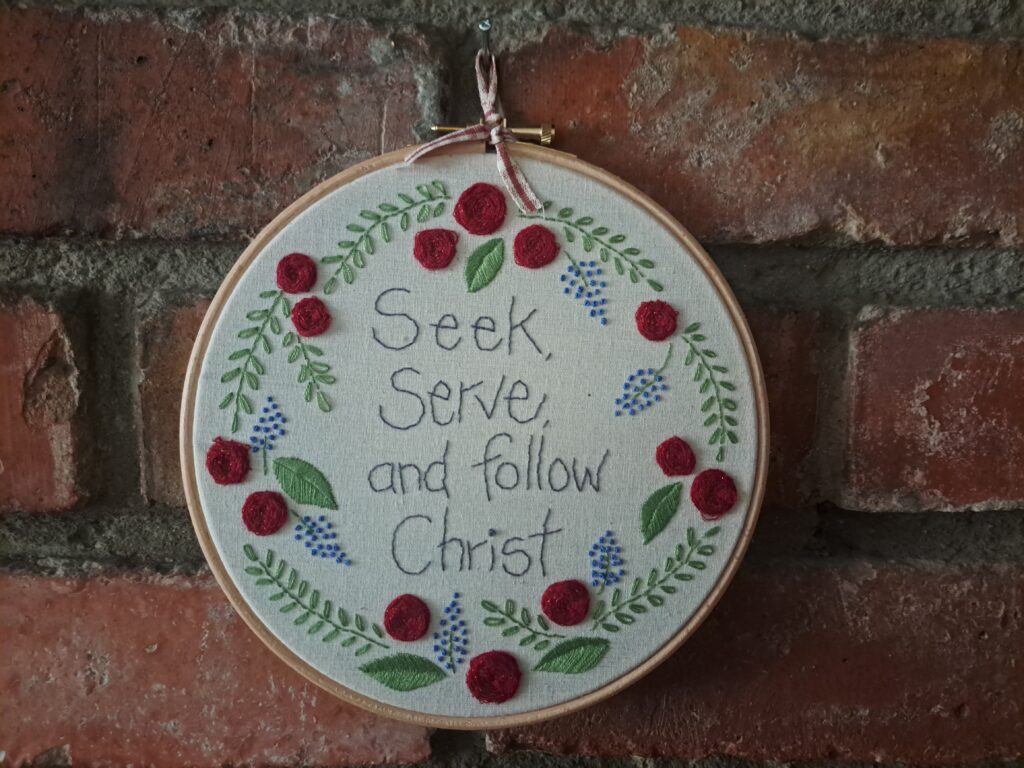
Back last year, I was approached by the local branch for Girl’s Brigade to teach needlework to a group of girls ranging from 13-18 years. The request was for a simple embroidery design that can be displayed in an embroidery hoop featuring the Brigade’s motto. It was quite daunting coming up with something simple enough and yet challenging enough for the group of girls. I came up with the simple round design featuring leaves, roses and bluebells, with their motto in the centre of the wreath.
It was a fun (and challenging) 3 classes to share the skill of needlework to the class of girls, many had never threaded a needle, and none had done needlework before. Many enjoyed the process and really immersed themselves into the needlework.
Girl’s Brigade design
When I shared photos of the design on Facebook, I had many messages from parents of other Girl Brigadiers that were interested in purchasing the kit for their daughters. I emailed the Head Office to seek guidance in selling the kits to other parents, but it was not forth coming. I could not offer this kit on my website. So in order to make the embroidery design available to the general public, my original design needed to be adjusted. I needed to put on my thinking cap.
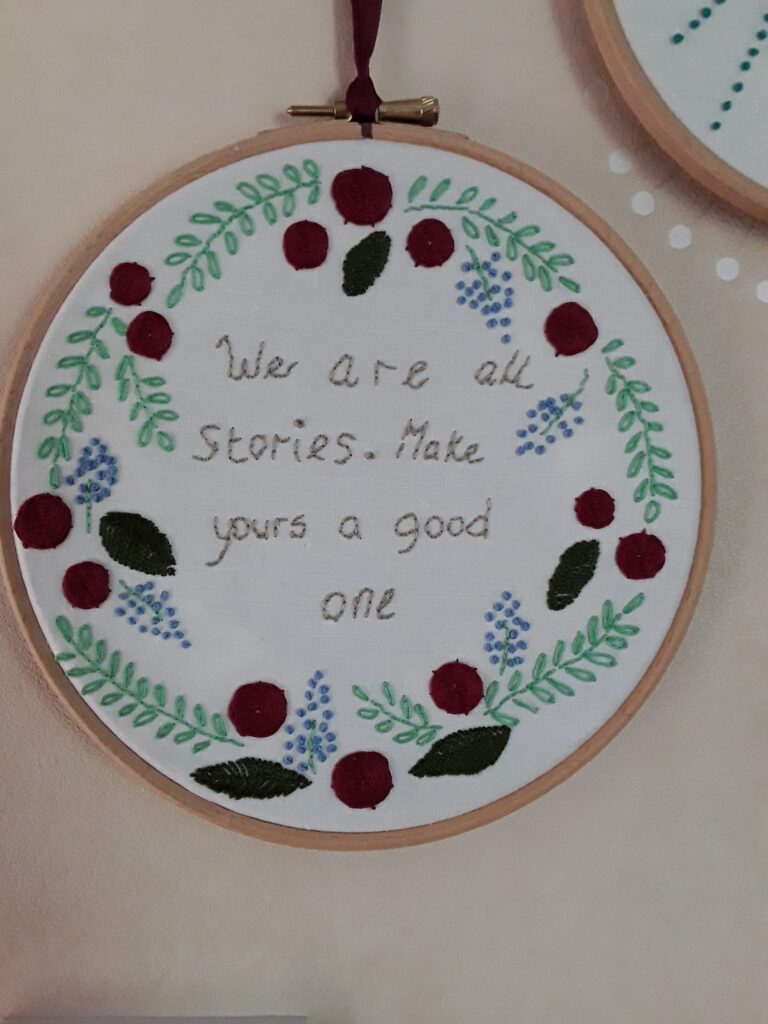
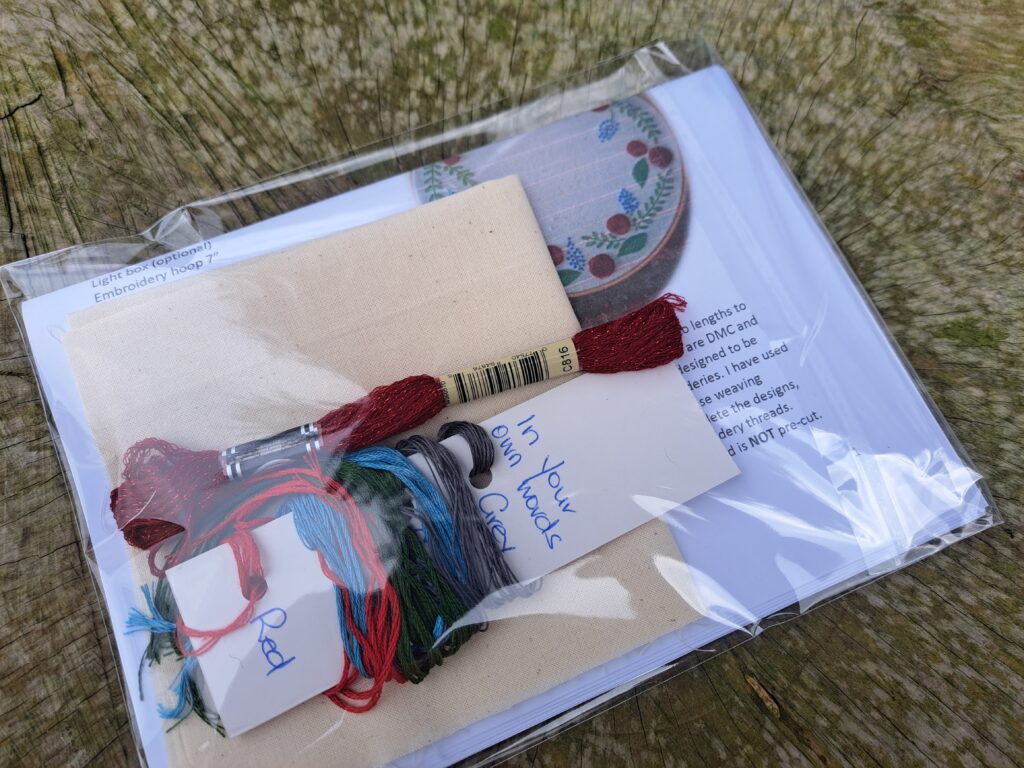
It was a lovely embroidery design, and it seemed a shame to see it put away and never to be seen on the website as a kit or pattern. This is when the concept of ‘In Your own Words’ came about. Why not create the pattern/kit of the embroidered floral wreath and let YOU add in your OWN words! This would then allow you to really personalise the embroidery design.
‘In your own words’ – Blank Canvas to personalise with your own saying/quote
In recreating the design in this way, really opened up so many possibilities. My testers had fun writing in their own favourite sayings or even using one of the sayings that were suggested in the pattern. What would you put into your design?
Tester’s sampleTester’s Sample
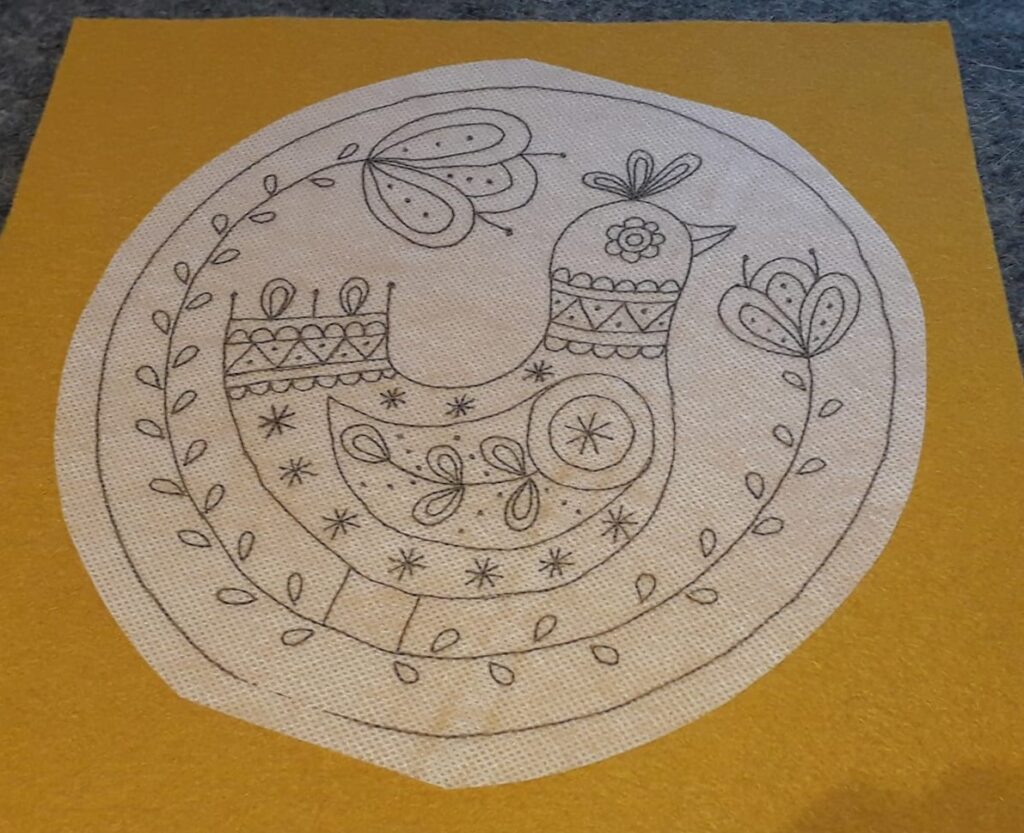
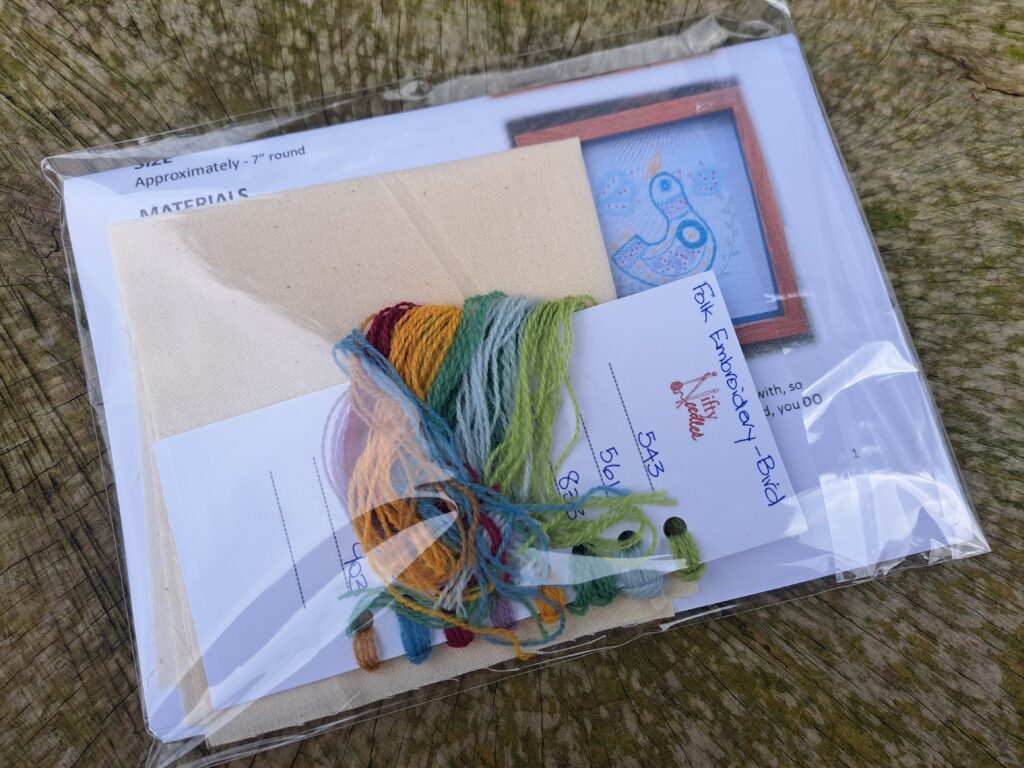
The second embroidery design to be created for an upcoming workshop was Folk Embroidery. I was approached by the organisation that they had had enquiries about Folk Embroidery and would I be interested in designing something and taking the workshop. I love a challenge, and this definitely was one. I had never really thought of Folk Embroidery, so I did some research online to get some guide lines. I then sat down one afternoon and did up some rough sketches and came up with the bird. At first it was slightly out of my comfort zone, as I had never really drawn up anything whimsical before. I have to admit it was fun to do, once I realised that the bird was NOT meant to be realistic, and I could play with colours and embroidery stitches.
Design template
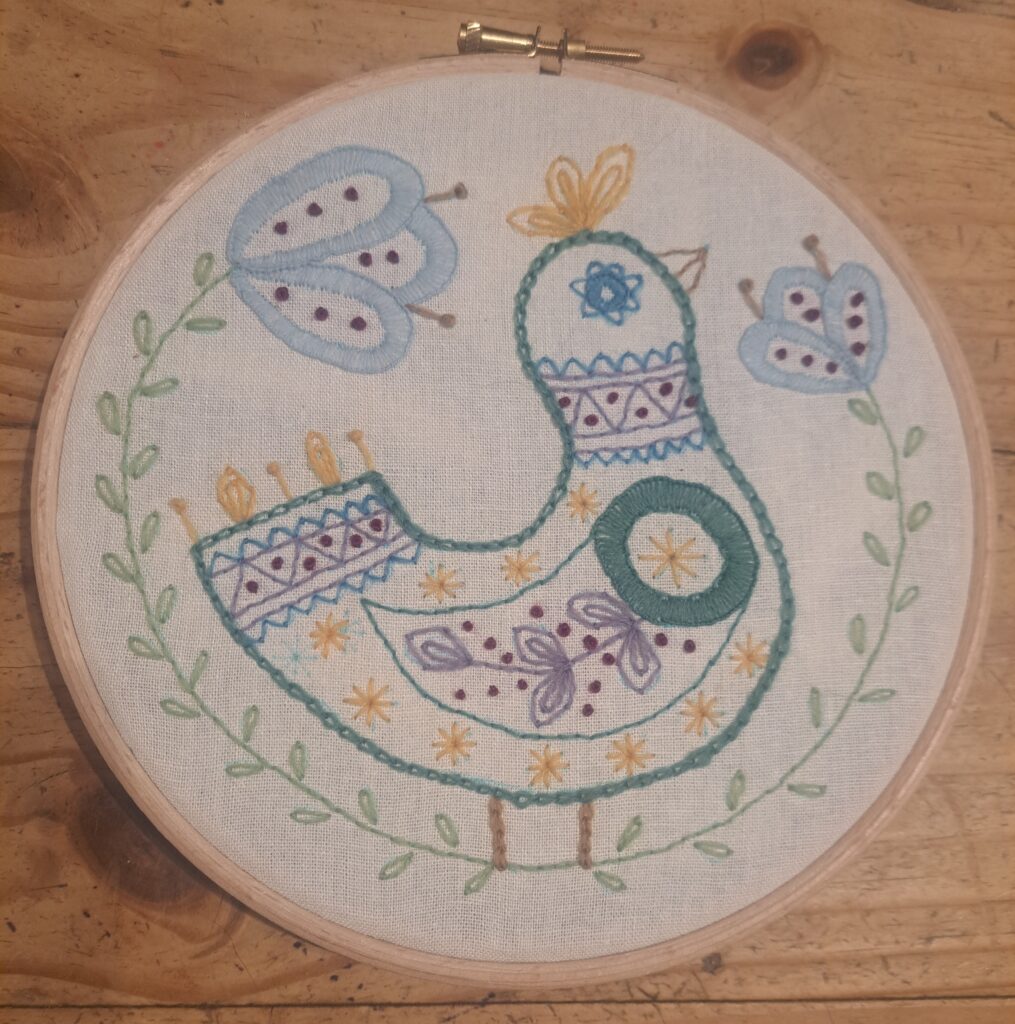
This definitely was a FUN design to embroider, and I loved using the Appleton’s Wool Embroidery threads for my design. These threads are finer than wool tapestry threads and the colours are just amazing. The wool thread is what is normally used in creating Crewel Embroidery, but they were also perfect for creating this Folk Embroidery. They are the threads that are included in the kits.
Folk Embroidery – Bird – using wool embroidery thread
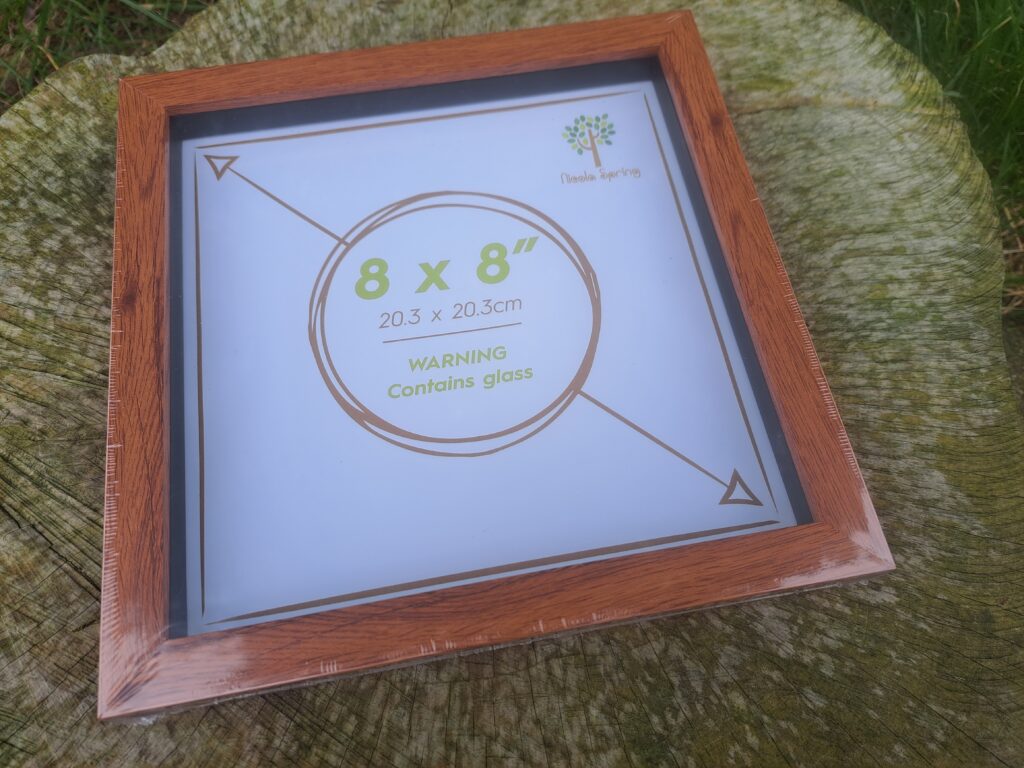
In coming to display my design samples, I was of two minds. The original designs for the workshops were designed to be displayed in the embroidery hoop that is used to stitch the design. The hoops make for a quick, practical and even cost effective way of displaying your finished embroidery. But sometimes it is even nicer to have your work framed to give it that touch of elegance (& also protect it behind glass).
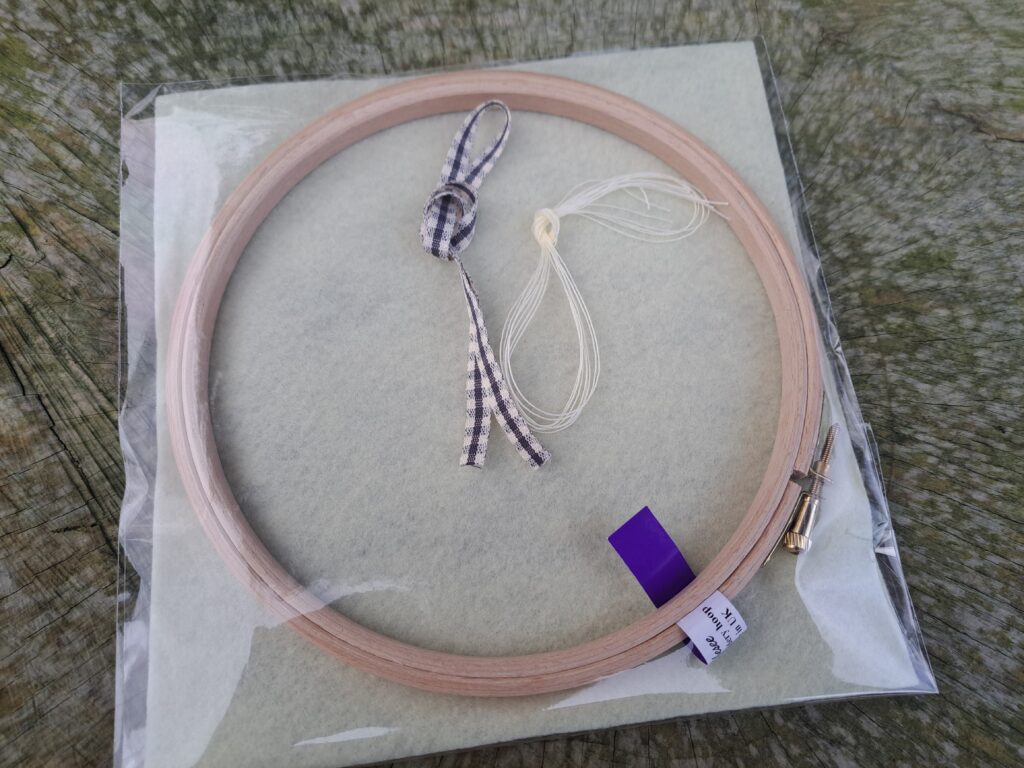
So, I decided that in making up the kits, I would have several kit options available. The fabric, threads and patterns for the designs are in one kit and sold as is. There would also be options to purchase the Hoop/Backing kit or a frame. This allows the purchaser to choose what they need or want. Many have hoops at home or wish to finish it in other ways. So why purchase a kit which includes the hoop and backing felt if you are not going to use it to complete your design? Just trying to give everyone as many options as possible….
Square frame with glassHoop and Felt Backing kitFolk embroidery kit contents‘In your own words’ kit contents
I am hoping this new way to offer kits for sale will work and open up the options for everyone. It was hard for me to decide if I wanted to create different designs that were to be displayed/framed on hoops or to have them in frames. Personally I prefer frames, so my work is protected behind glass, but then again, a hoop finish is easily done, and a collection of designs grouped on a wall make for a lovely display.
I have also released the patterns (in both PDF and printed format) for both the Folk Embroidery and ‘In your own words’ in case you want to use your own materials to create these lovely designs.
So, I hope you like my latest embroidery designs and maybe they will start you onto your own needlework journey…..
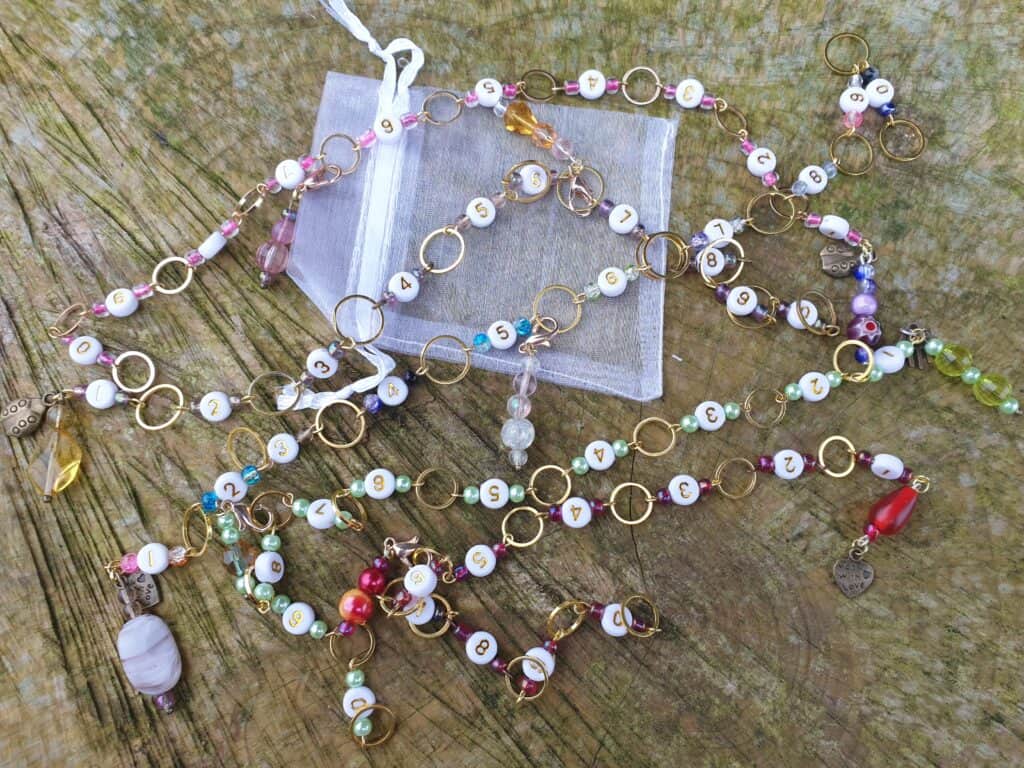
I have had so much pleasure in making our selection of stitch and progress markers. It is lovely to be able to use beautiful handmade notions when knitting and crocheting. I have been using mine a lot since Christmas and have found them so lovely to use.
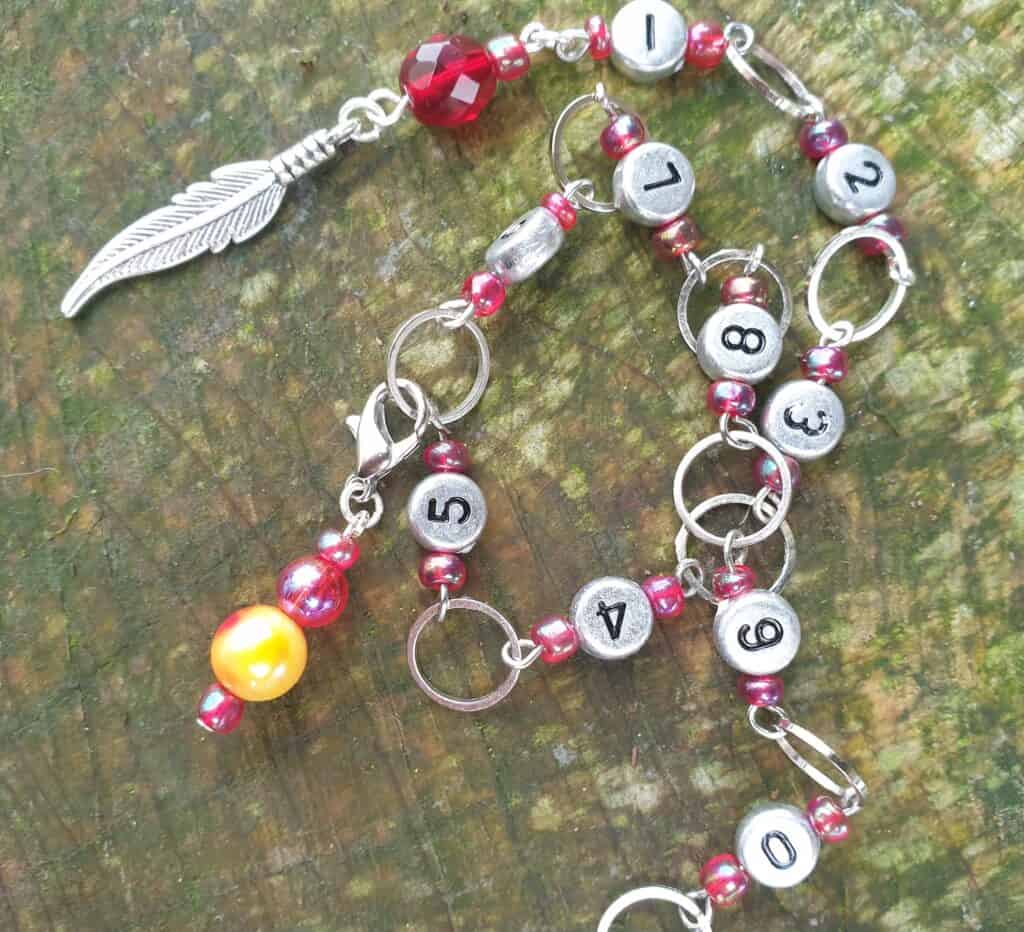
The counting chain is one that I use a lot now and this notion has been a game changer when it comes to having to keep count of how many rows need to be knitted. You can read more on how to use this fabulous notion in my previous blog post.
I have a good selection of the chains on the website in a variety of ring sizes and colours. If you haven’t tried them yet, why not check them out….
Whiteselection of row counting chains
silver counting chain
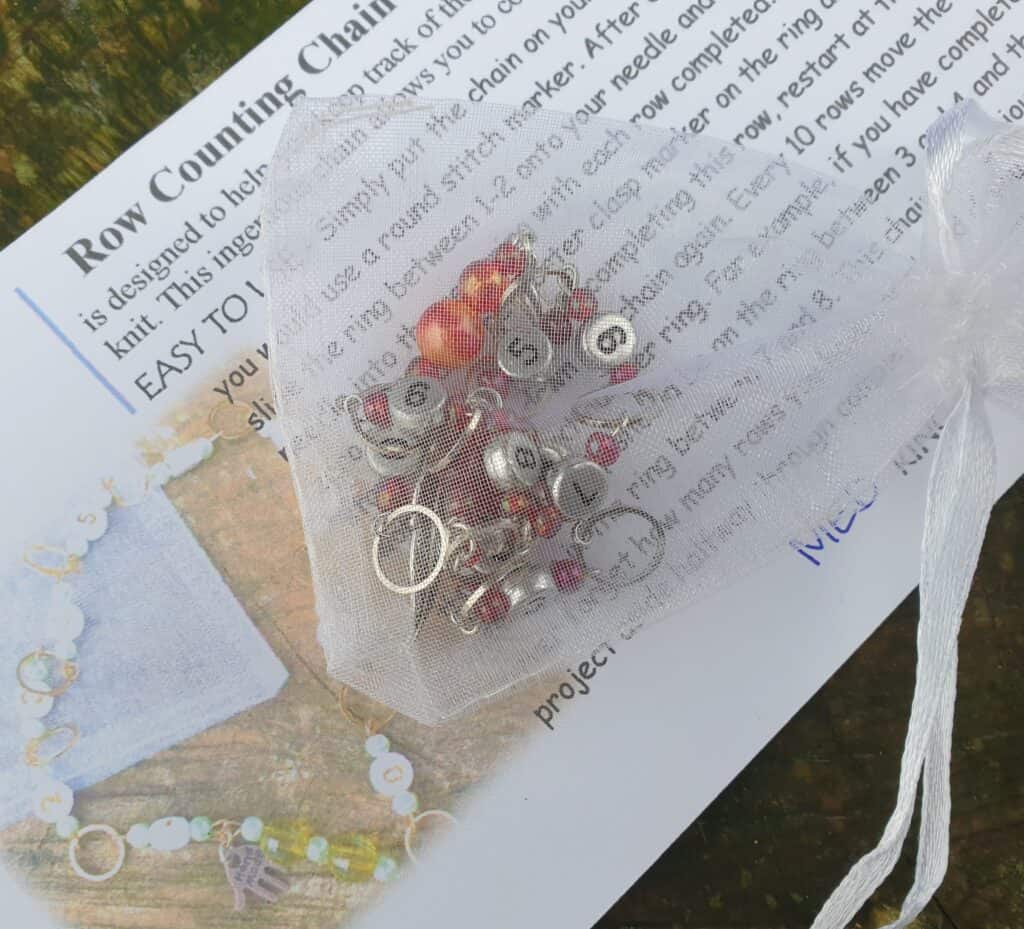
chain arrives in pouch with instructions
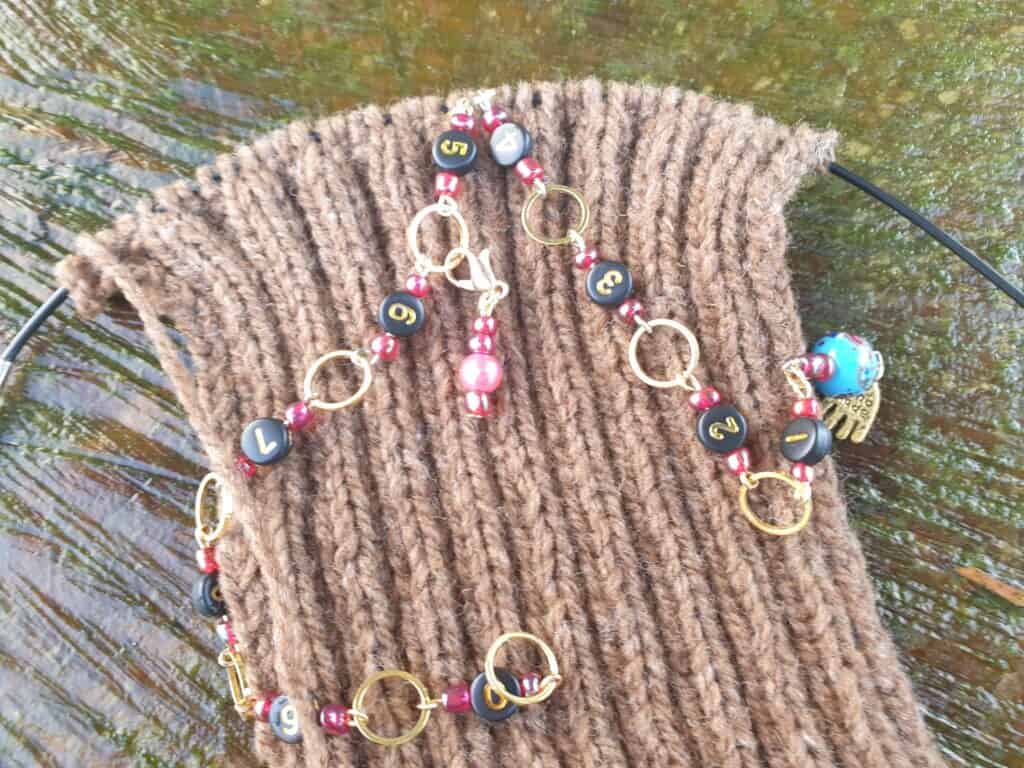
completed rows knitted and shown on chain – 56 rows
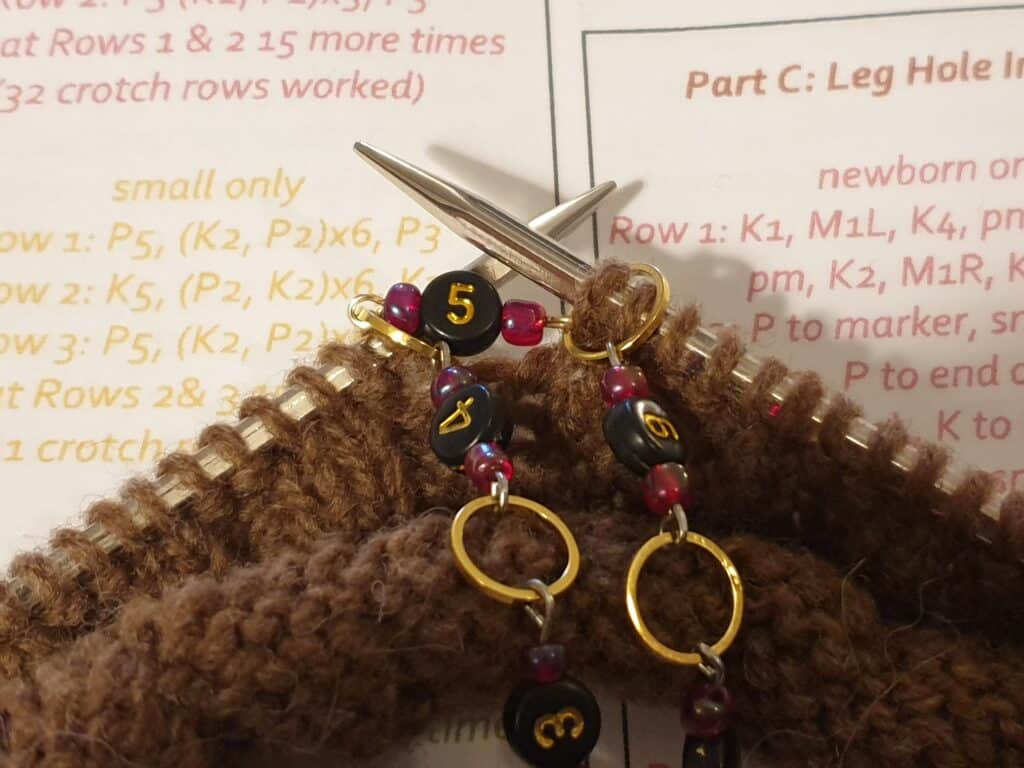
slipping new ring to the needle
I also have a few other counting themed notions in the pipeline for BOTH knitting and crocheting and hope to have those added to the website by February. But enough of the knitting notions – this blog is all about our new needlework notions.
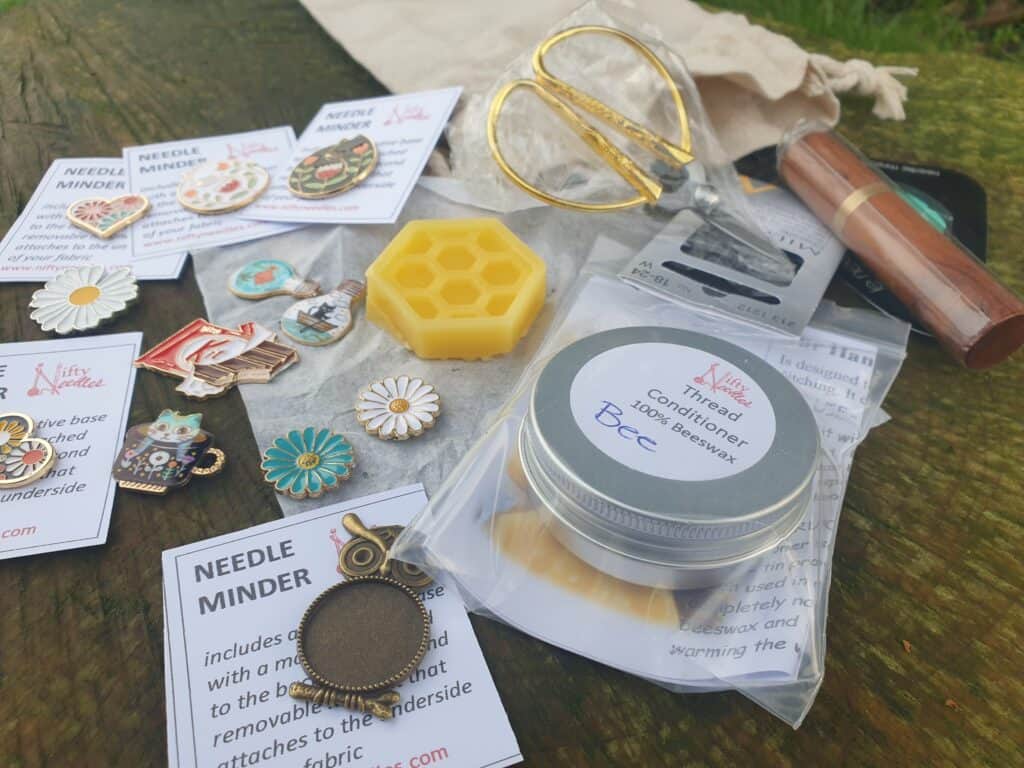
In making the markers, etc, it got me thinking on what could I create for the needleworkers? What would be some lovely handmade notions that are ‘essential’ for when we are doing needlework? I was wanting to create a lovely unique range that would make perfect small gifts for the stitcher, and I got thinking about the items I like to have in my sewing box that is invaluable for when I am doing needlework. I am sure you could think of a number of notions in your sewing box that you could not be without.
Whether we do cross stitch, blackwork, embroidery, Redwork, white work, or other forms of hand stitching, I know that these three notions will become an essential part of your needlework kit. So, what are they?
Thread Conditioner
Just what is thread conditioner? Well…. Have you ever experienced knotty or tangled thread? Using metallic thread and ending up fighting with it, having it get knotted or broken? Or are you like me, and just plain avoid using metallic thread as you know it is completely unworkable, no matter HOW stunning it looks in the finished project?
I was like that for many years. I loved the look of metallic threads in my needlework designs, BUT the very thought of actually having to work with it sent me into complete shudders and I would just not put it into my work. However, that changed quite a few years ago when I came across a product that came from America and was available through Amazon at a huge price for such a small item.
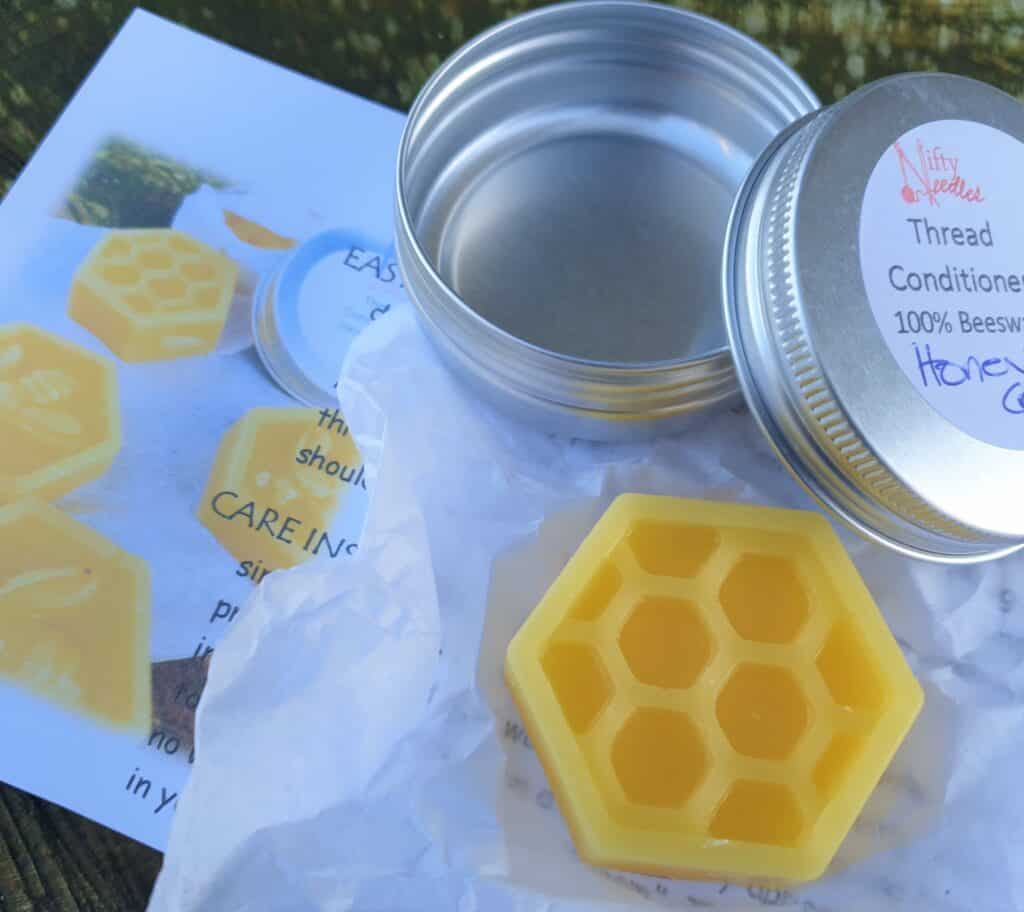
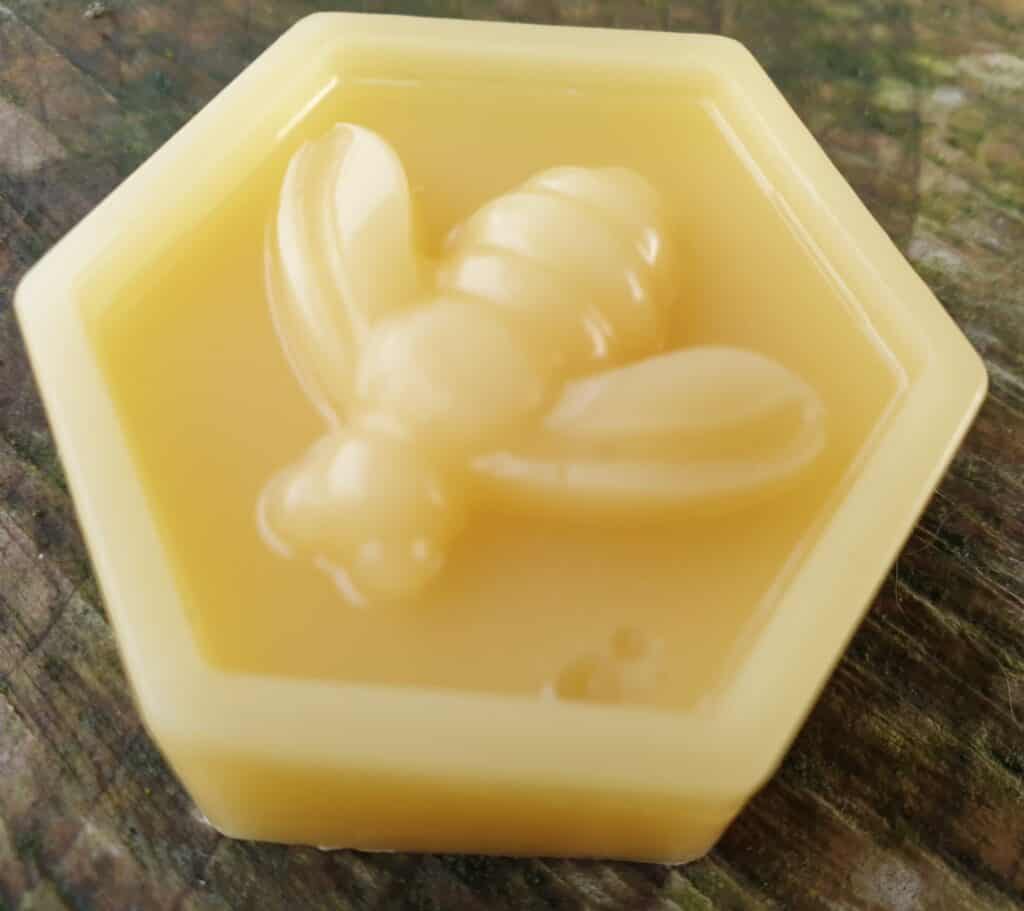
So how do you use it and what does the beeswax do to the embroidery thread? Basically, you pull your thread through the wax, and it helps stop the thread from getting tangled and really makes the metallic thread behave itself and is a pleasure to work with. It also helps to prevent the thread from fraying and strands separating. A real game changer!
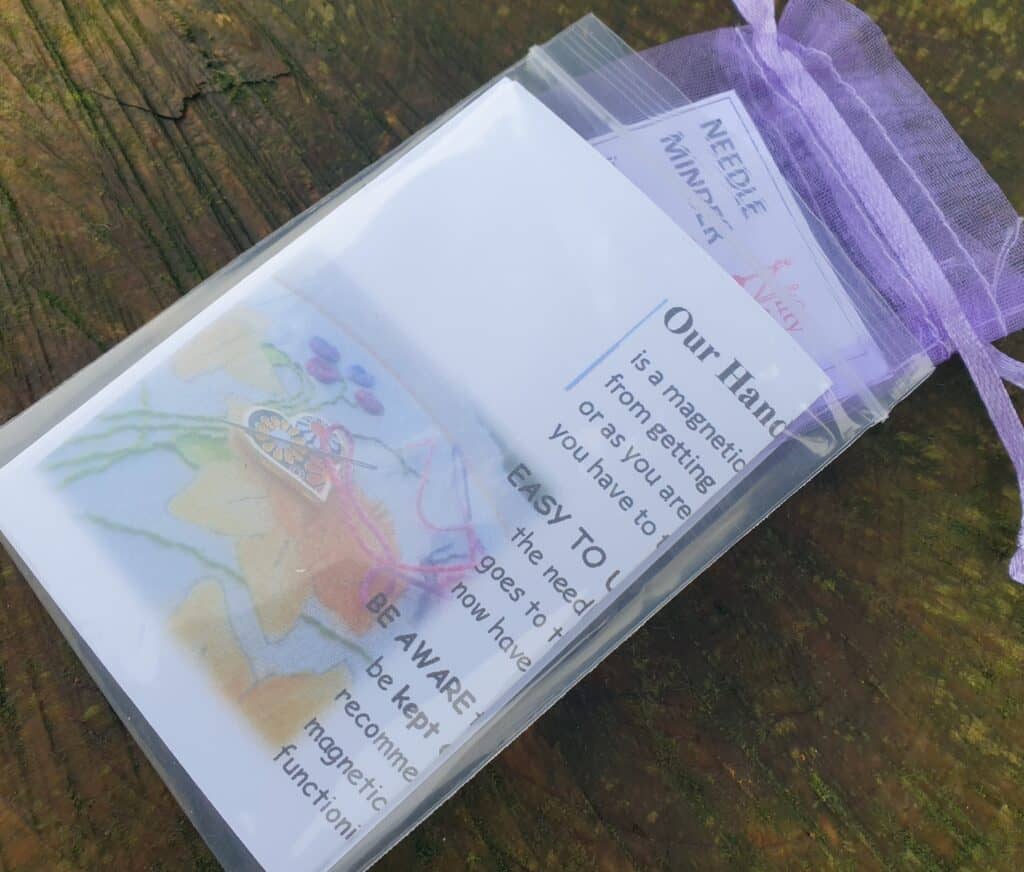
I got thinking on how these would be a nice gift idea, but I wanted them to be unique and handmade, not just a blob of beeswax in a plastic container. I did some research and have come up with my own handmade thread conditioner which is made from 100% bees’ wax. I poured the beeswax into cute bee themed blocks, and once fully set, each block is wrapped in tissue paper and kept in a small tin, which is perfect for keeping in your needlework basket. They also come with an instruction card on how to make the most of your thread conditioner.
I am also looking at maybe doing some with added essential oils to really help relax and de-stress you while you are stitching, or maybe some seasonal smells to set the mood of the season and you’re stitching. Let me know what you think ….
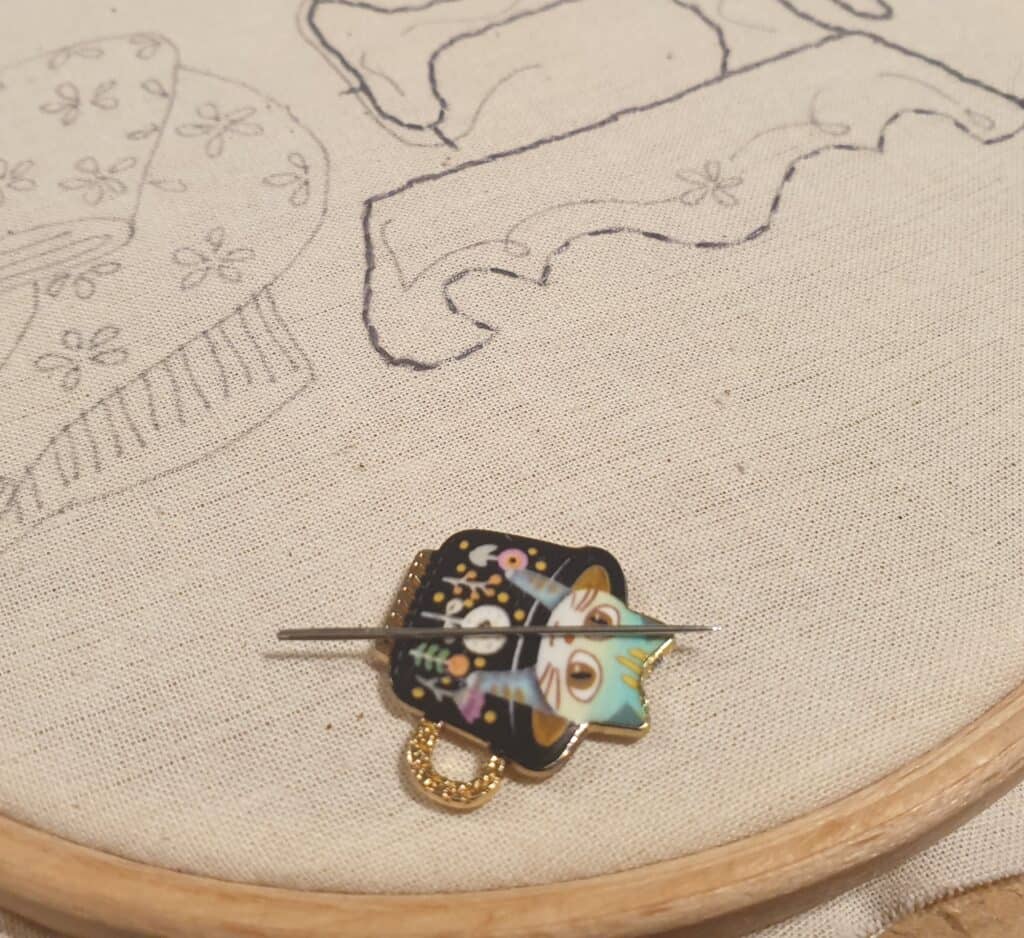
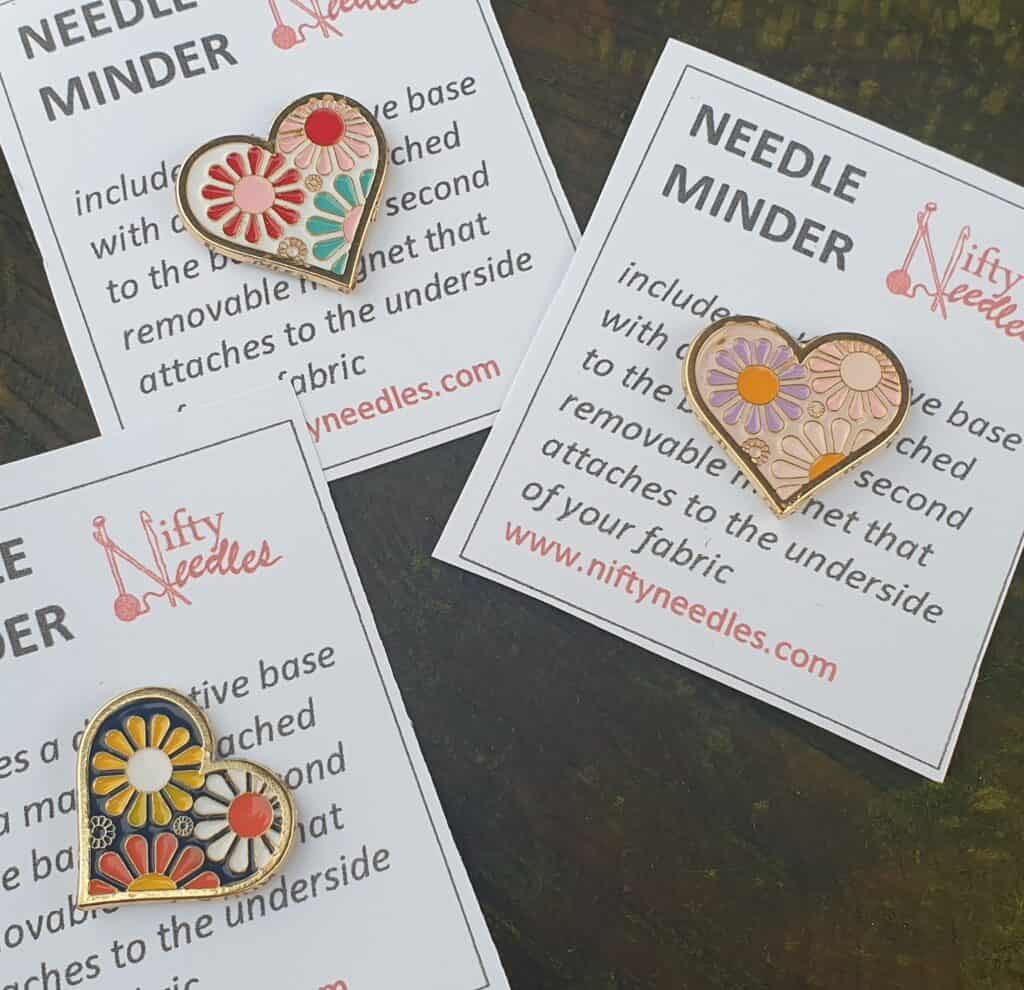
Needle Minders
So, how many can relate to misplacing your needle? Or are you guilty of ‘just’ piercing your needle into the arm of the chair so you can cut your thread and rethread it? How often have you had to dig through the back of the sofa to try and find the needle that dropped while you were just going to rethread it? The even thought of ‘accidentally’ finding a lost needle is even more frightening. I know I have experienced all of the above and it isn’t a nice feeling when you CAN’T find that lost needle and just pray and hope that when it is found it is not going to be with serious consequences.
I tried to get into the habit of sticking my needle into the fabric I was working on. It was not ideal, BUT it seemed better than piercing it into parts of the furniture. I am sure we have all found ‘lost forgotten’ projects that we were working on … ages ago …. Or maybe we inherited some half-finished needlework from another stitcher who started it many (many) years ago … only to discover that the needle that was placed ‘safely’ into the fabric had long since rusted the fabric and ruined the project. I have had a few half-finished projects gifted to me that had been started so long ago (and a few of my own) and the needle has rusted the fabric. I remember, I was taught NEVER to keep the needle in the fabric – but how often do we pay attention to what we are told to do?
I must admit I was also abit sceptical on how secure they would keep the needle. But after using it and keeping my needle on the minder, in my project bag when not working on the stitching, it was brilliant to know that the needle would be exactly where I had left it.
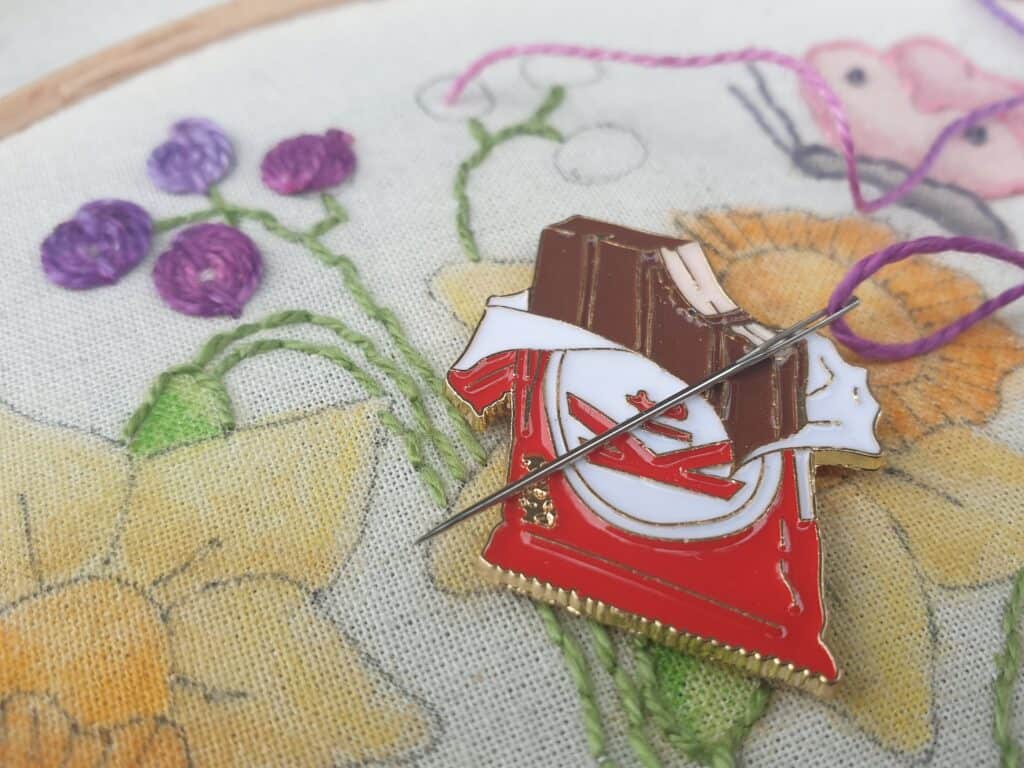
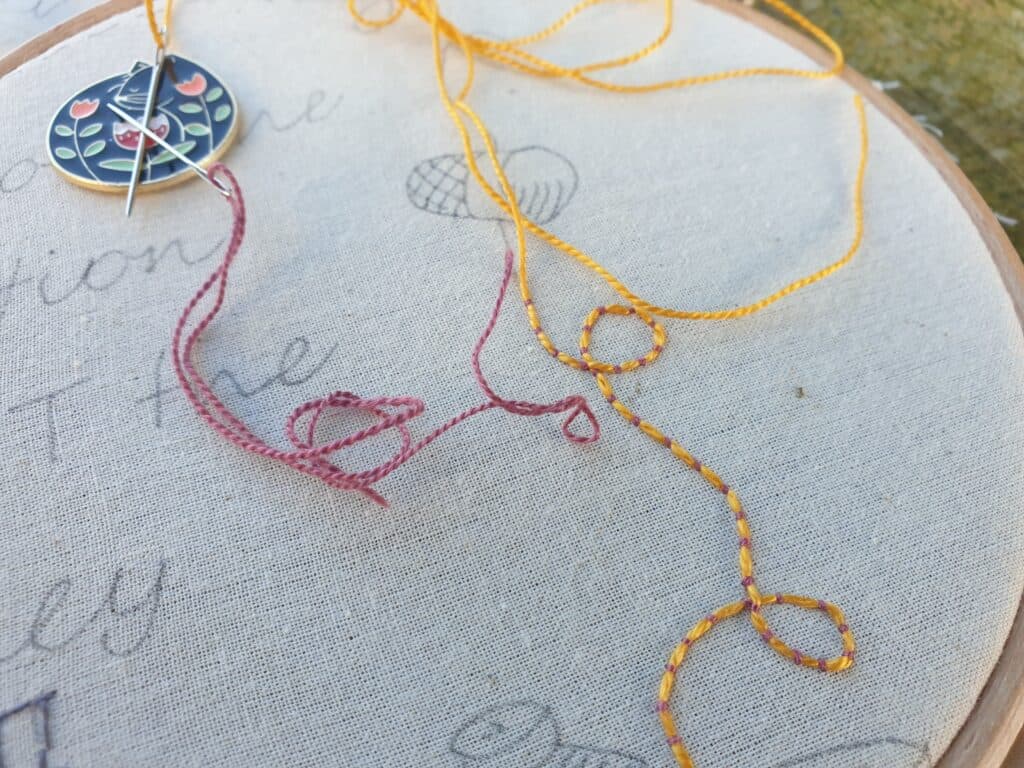
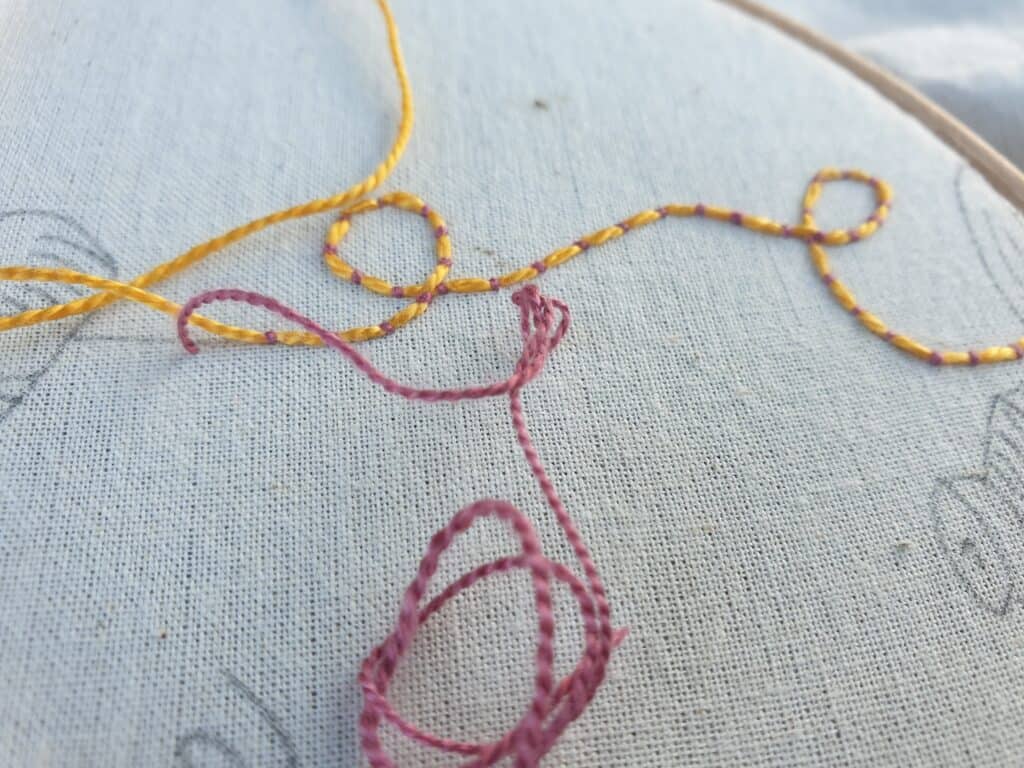
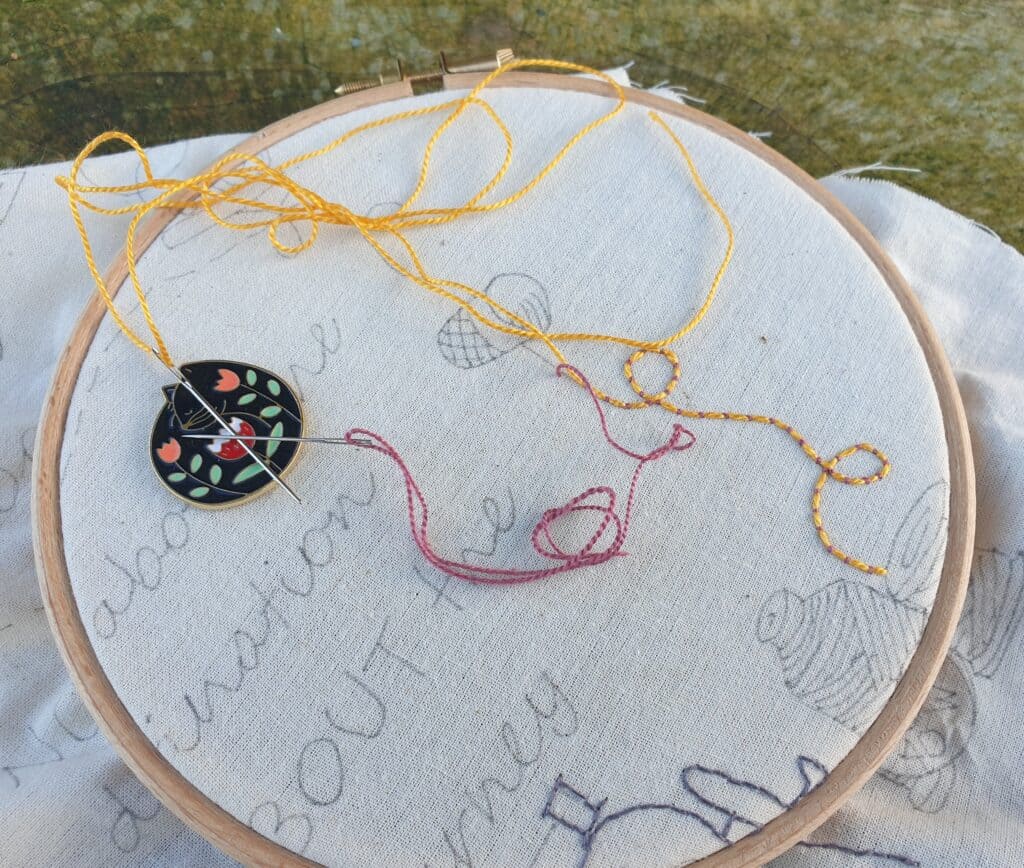
Sometimes, I need to change thread colour to work on a small section, but don’t want to unthread my current needle. With the needle minder, you can place the threaded needle onto the minder and know it is safe while you use the new colour and come back to the previous needle when needed and it is still threaded up ready to use. It is also handy when you are working a particular embroidery stitch where you would use two needles threaded up with two different threads, i.e.., Couching stitch. The couching stitch requires two threads – the foundation thread and then the thread to secure it. Usually you place the foundation thread along the desired line and secure it at both ends. I found that I prefer to have the foundation thread loose so I can move it as needed, especially if the foundation line is curved or longer than the working space in the hoop. This is where the minder came into its own, I was able to leave the foundation thread threaded onto a needle and kept safe (and out of my way) on the needle minder….
working with both threads
close up of couching stitch
keeping both needles safe when not in use
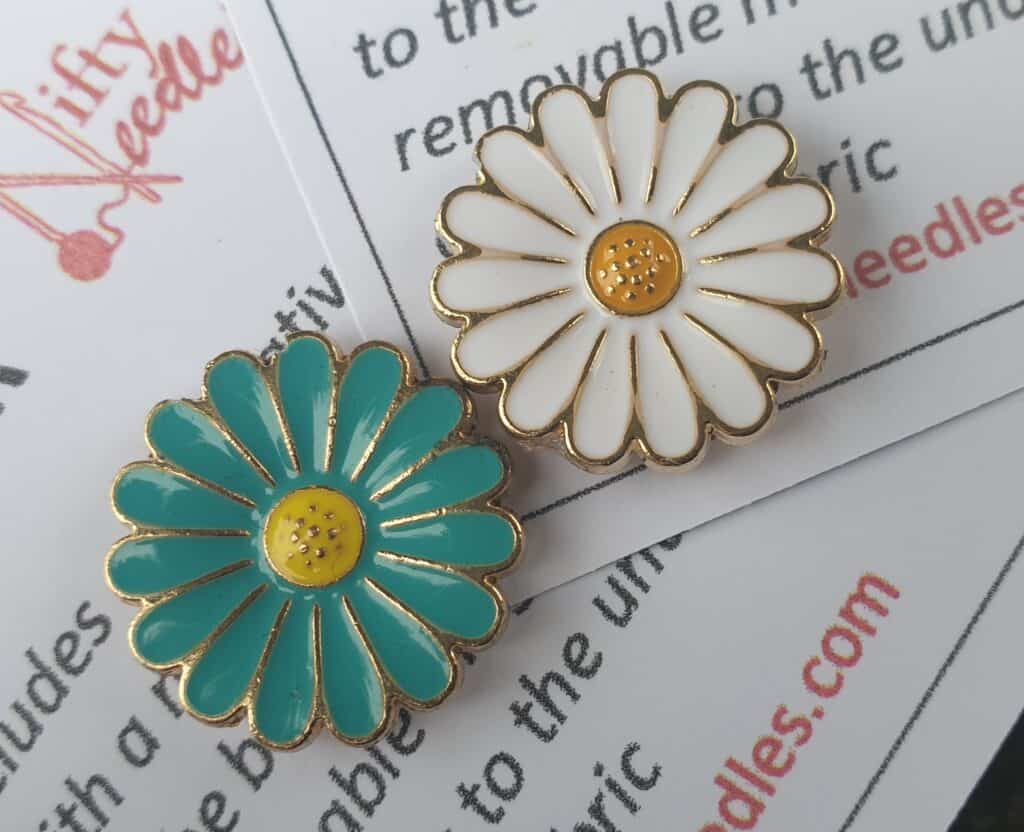
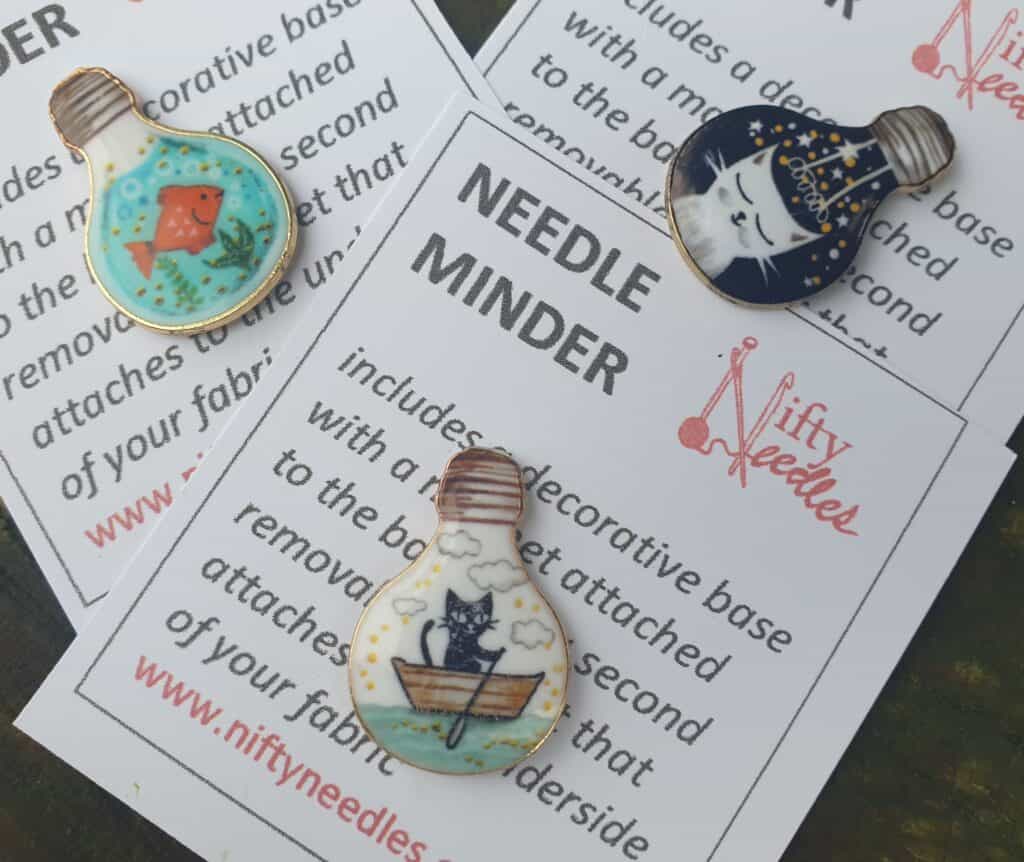
Needle minders can make a great gift because of the almost endless possibilities of designs. There is nothing nicer than having a cute and pretty notion that you can use while you are stitching. I currently have a small range of unique needle minders, but rest assured, I will be constantly expanding on the different designs. You can never have enough needle minders….
I love using small scissors when doing needlework. Lovely small scissors with an extra sharp and small blade. The small ones that are so easy to lose down the back of the sofa, right into the innards of the sofa. I have to confess that the other week I did my deep clean of the sofa where I sit and to my horrid, I found about 4 pairs of lost scissors, some I didn’t even realise I had misplaced! I try so hard to be good and keep them safe on my worktable beside the sofa, but … it is so much easier to just place them on the sofa seat beside me….
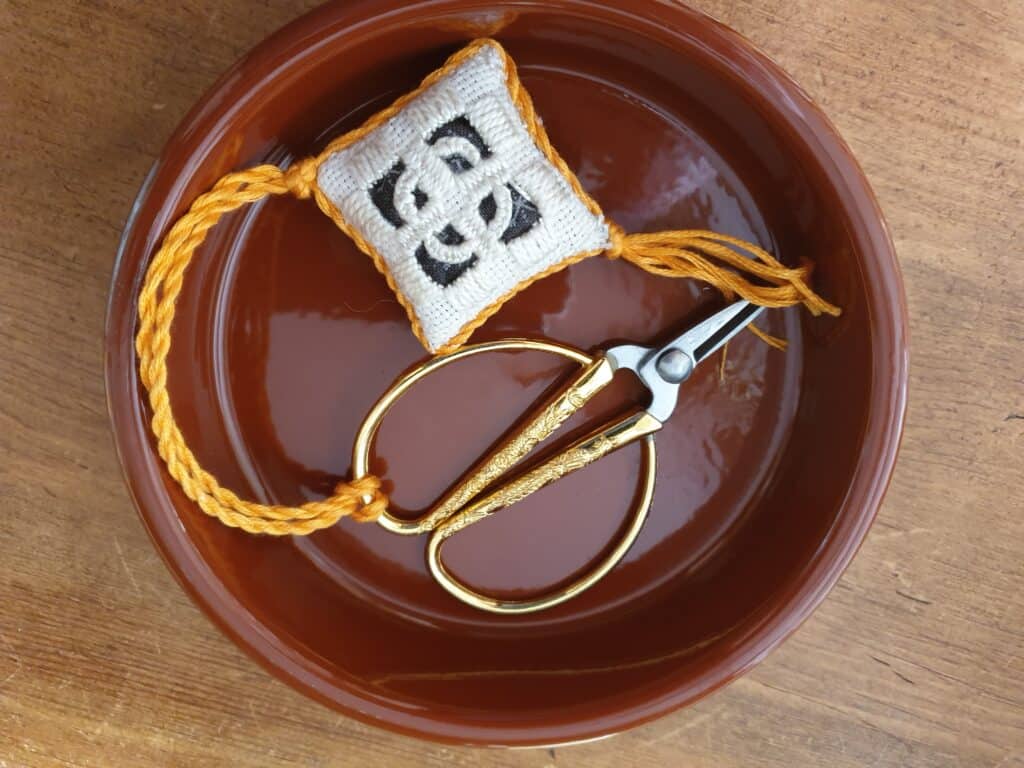
Our needlework ancestors had a lovely accessory to their scissors – scissor fobs. I had seen them years ago and wondered on how they would be useful …. However, a few years back I made one for a needlework course I was teaching. I have to say that once I had the fob on my scissors, I loved it and I rarely misplaced my scissors! – until the fob was taken off for some reason …. And then I misplaced the fob!
Another reason to have a scissor fob is so our scissors are easy to recognise. This is so true when we attend classes or retreats. I have lost count on the times I have ‘misplaced’ scissors at a class or gathering with other crafters …. It is second nature to borrow someone’s scissors as they are ‘on hand’ and it is just as easy to not pass them back straight afterwards. With a handmade fob attached to your scissors, they are now unique and not just your standard ‘blend into the crowd’ scissors. It is also a great way for family members to recognise that the scissors are for needlework and NOT to be used on paper!
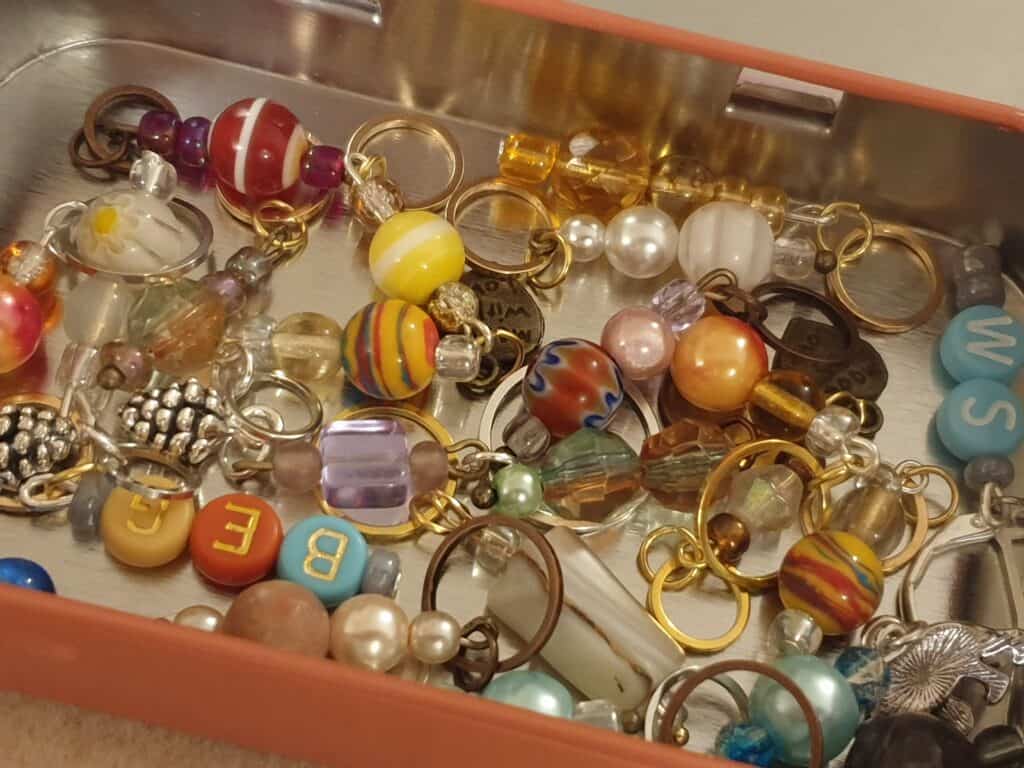
With Alyssa coming home from tech those few months ago, asking about jewellery making and if I had done it before, it has revived a love for jewellery making without actually making jewellery.
I started into the progress and stitch markers and rediscovered my love of unique beads and charms and the satisfaction of creating unique lovely, yet practical items that can be used in crafting.
From those markers and counting chains I started to think on how the handmade jewellery items could be transported into my other craft loves …. Quilting and needlework …. I was searching for items that would make brilliant and unique gifts for the crafter and even for ourselves. There are times when we ALL need to treat ourselves to something pretty that doesn’t cost a fortune….
So the thread conditioner started …. And then the needle minders and creating a range of cute and different needle minders …. And now … the scissor fobs ….
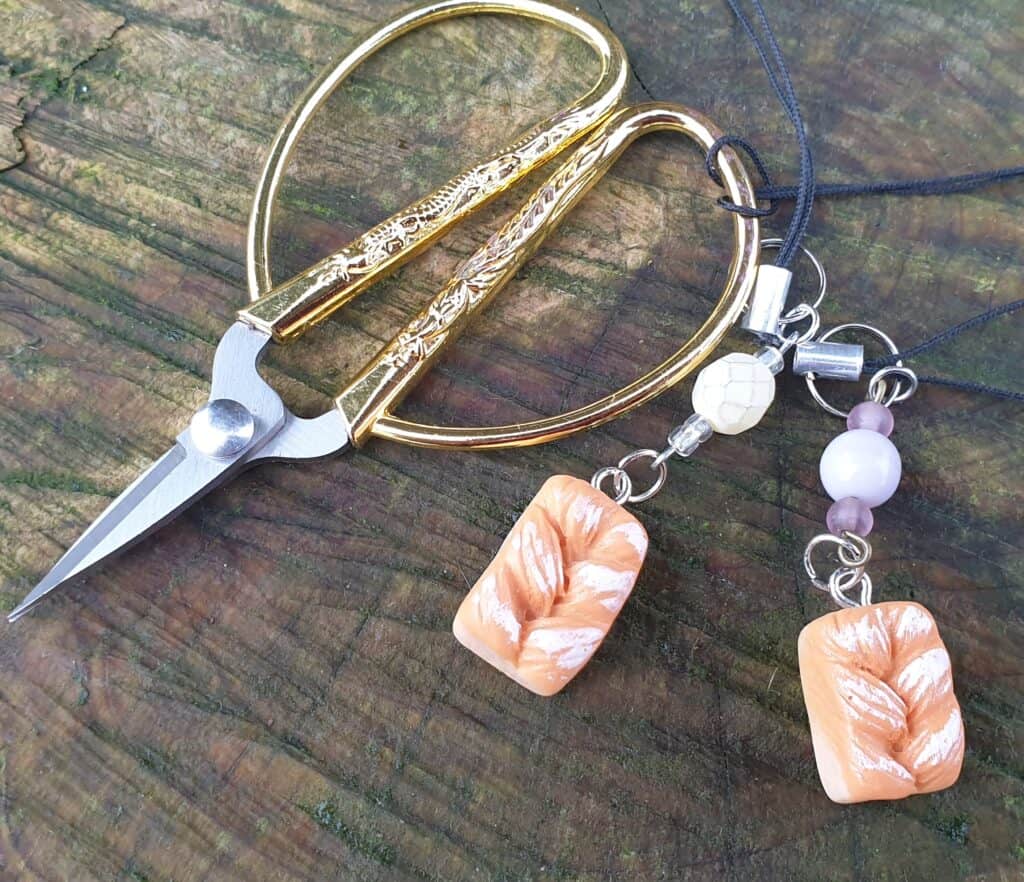
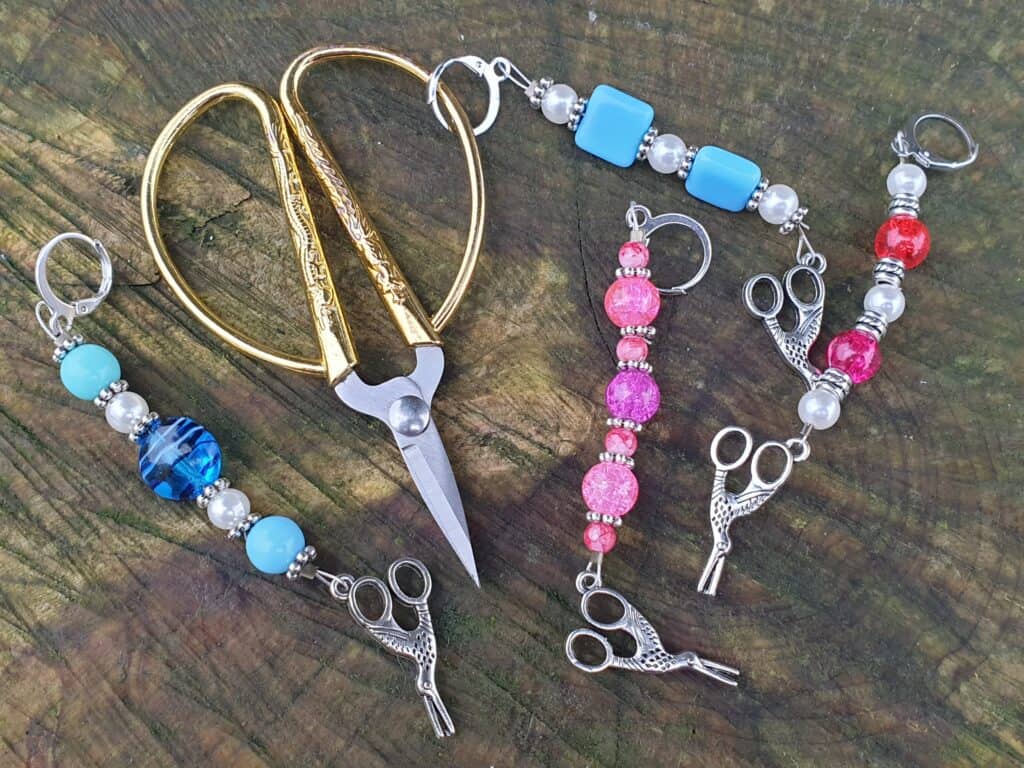
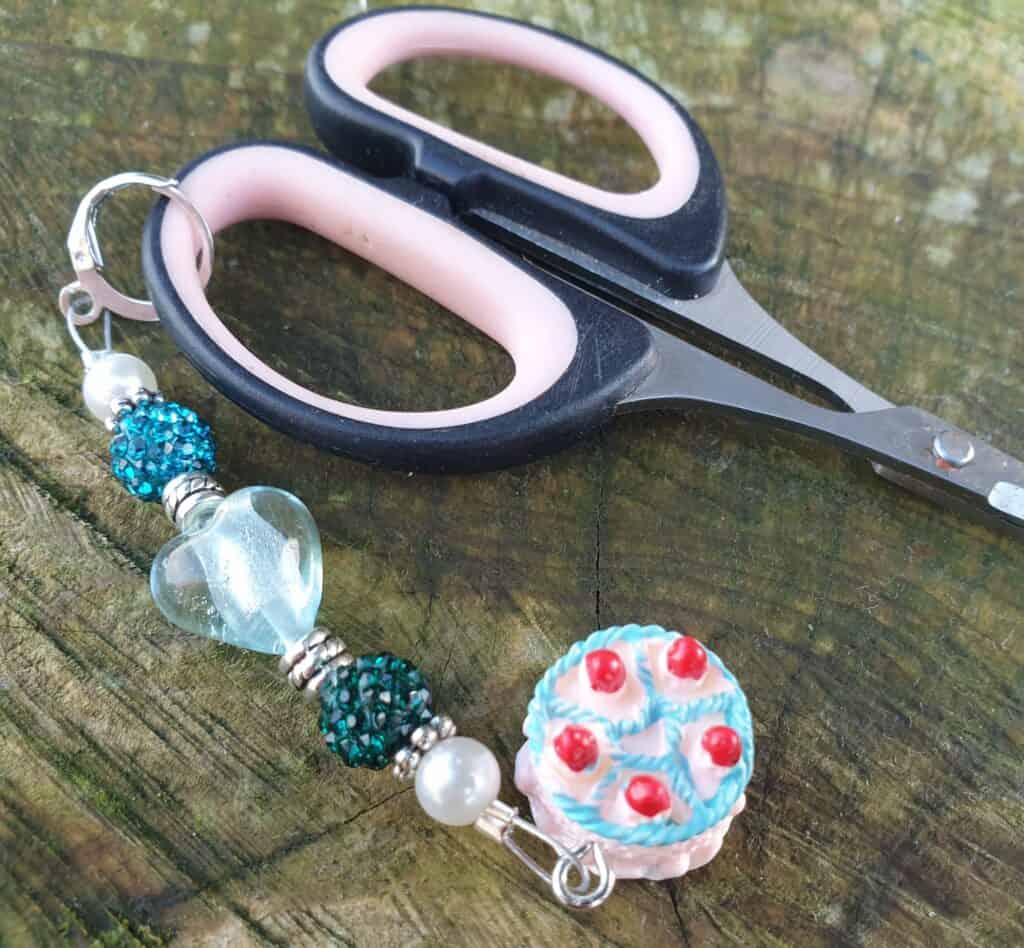
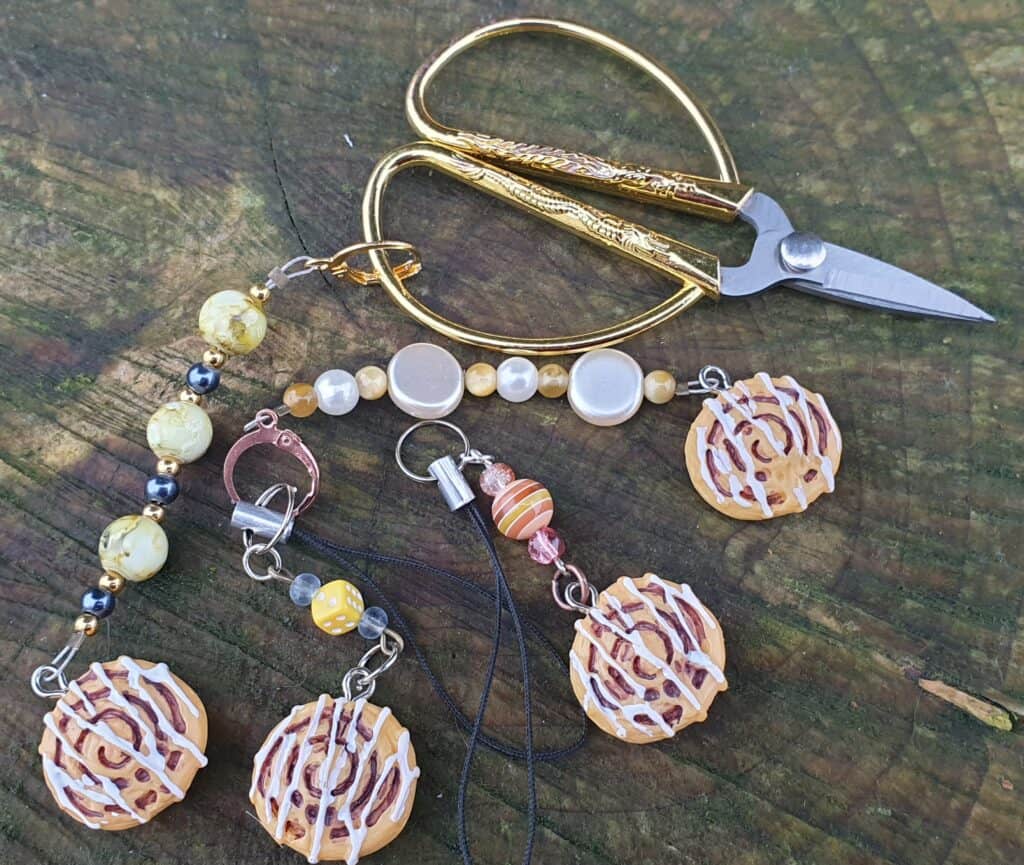
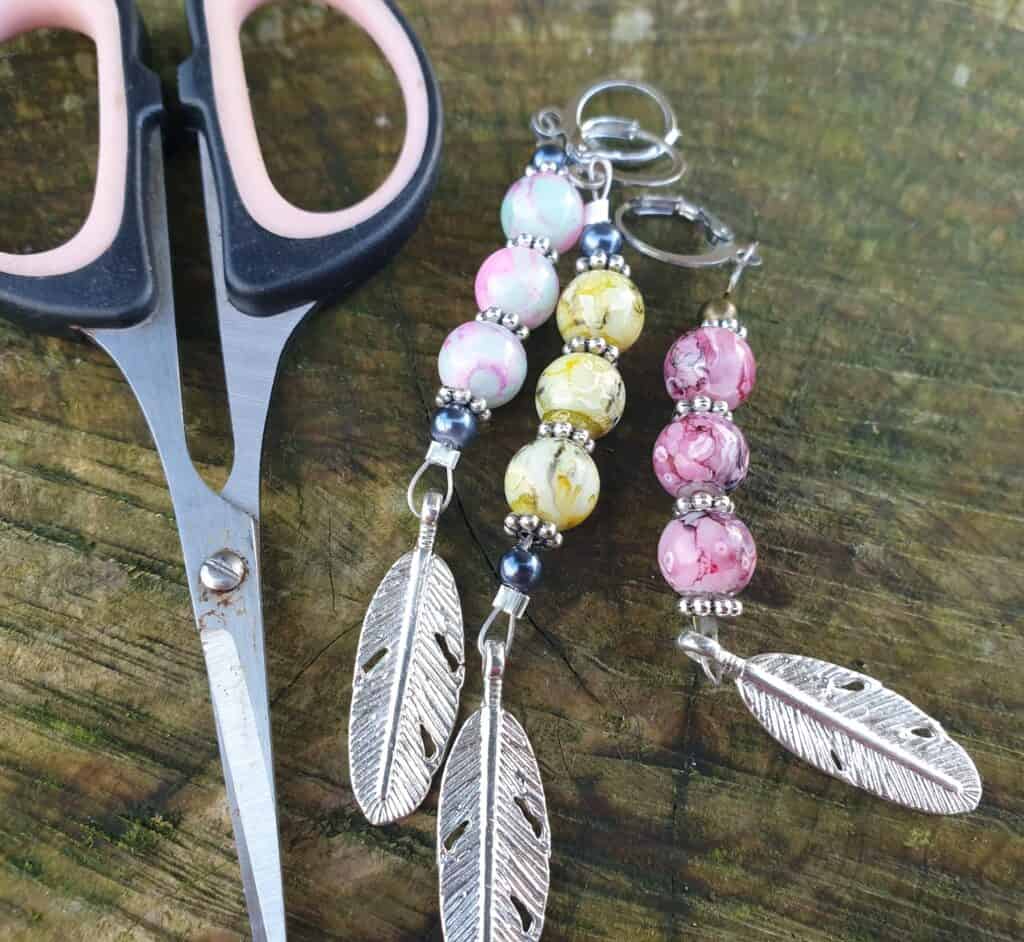
I have created a variety of different styles of scissor fobs from the simple charm fobs to the more decorative beaded fobs and even ones that can have your initial added into the fob….
As with all of my handmade crafting notions, each one is unique and handmade with care using quality materials. Many of the items are limited edition and cannot be repeated, which I feel makes them even more special.
So why not have a look through and let me know what you think of the new range of accessories for Nifty Needles….
Many years ago, a design concept formed in my head, one that I couldn’t let go, but was not sure of how to bring into realisation. Actually, I have to admit … that first seed was planted over two years ago.
Cross Stitch wallhanging
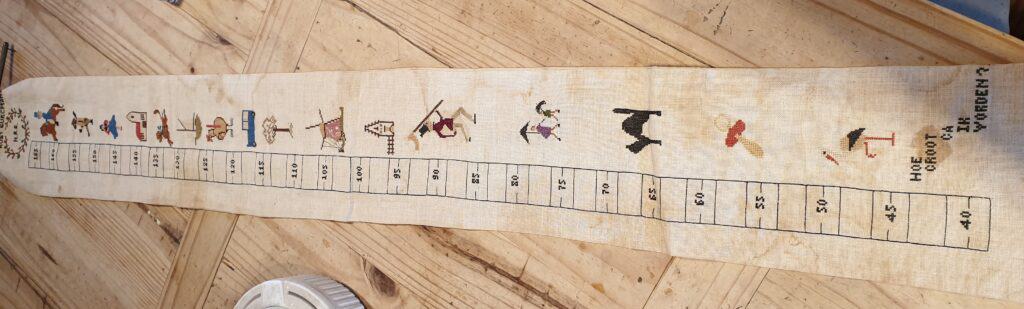
I remember in my childhood, my Oma (grandmother in Dutch) stitched a wonderful keepsake to celebrate the birth of my older sister and myself. Items that were made with her own hands and treasured. She stitched a growth height chart hanging for me, which always hung on my bedroom wall. I treasured it and was always intrigued how the writing on the chart was in Dutch – I couldn’t speak or read Dutch – but I learnt those words with pride – ‘Hoe groot ca ik vorden’ (How big can I get? I still have the chart, wrapped up and kept safe, as a reminder of my Oma who died over 30 years ago.
My older sister, received a stitched fabric book of nursery rhymes in Dutch. I am 5 years younger than her and I remember being little and wishing the book was mine as it was magical and could be touched and used, whereas my chart hung on the wall to look at, not to interact with. It is strange how we think when we are very young.
So, you are probably asking at this point, as to what these stitched keepsakes have in common with the embroidery sampler book? Well, even though I no longer want my sister’s fabric book, the concept of a fabric book stayed with me all these years. I always wanted to create a similar book (not necessarily in nursery rhymes) but a fabric book that would become a treasured piece of craft.
So moving many years forward, to about 3 years ago, the concept came to me again when I started to design embroidery designs and realising that it would be amazing to create a sampler book full of embroidery stitches. My head filled with ideas and issues of exactly how to put it into patterns so others could follow the tutorials and create their own embroidery sampler book.
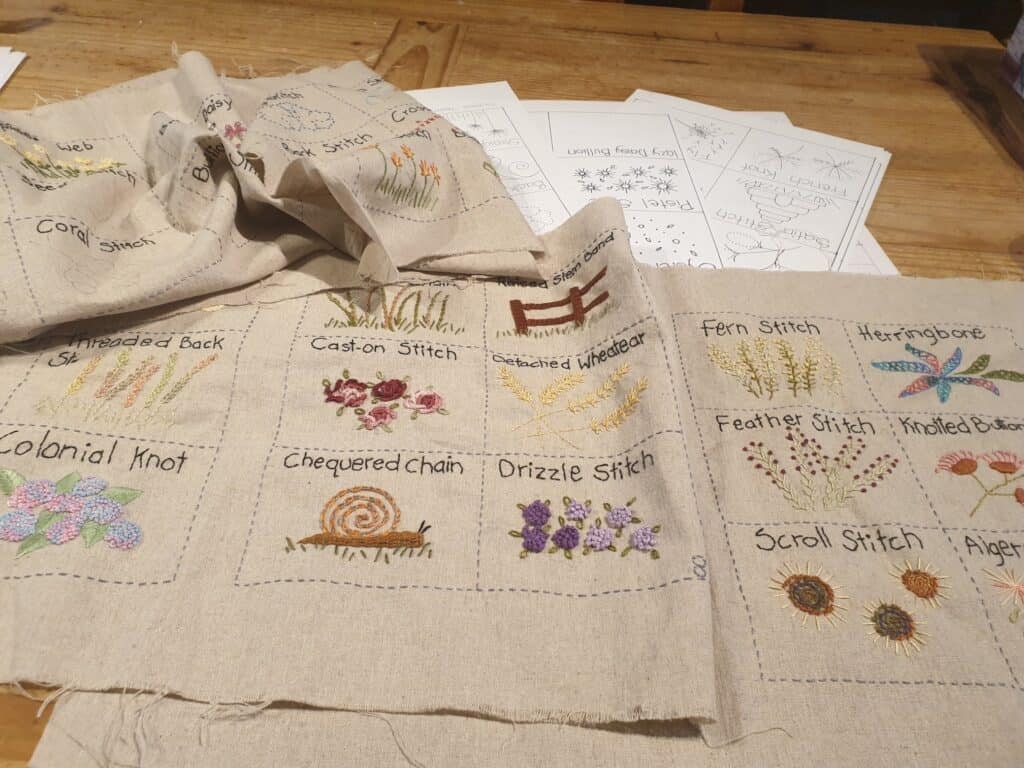
Just over two years ago, I started to put the ideas down on paper and start thinking on embroidery stitches to go into the book. That was the hardest decision, there are literally hundreds of different embroidery stitches! So hard in fact, that I decided to create two different books – a short one with 36 sts and a longer one with the same 36sts and 24 more stitches. I can never do simple!! The next choice was even harder! I didn’t just want any embroidery sampler design where you stitch a line of that particular stitch. To me, it didn’t really give me any insight in the stitch. Yes, it showed you how to work that stitch, but you were then left with the issue – just what do you use this stich for? What can be created with this stitch?
Draft Notes
And so, the next issue came about. I had the list of the stitches I wanted to use in my two books. BUT, what and how do I design something simple with the particular stitch? My vision for the book was to have a theme. I then thought of what most embroidery designs feature ….. gardens. The stitches really did work well in creating floral designs. The birth of my embroidery sampler book concept came about. The books would focus on a garden theme and the stitches used would form some sort of garden/nature theme. It was challenging at times, to work the particular stitch into a design, but a lot of fun as well. With the theme decided upon, the next issue arose – what design would I use with each stitch? I am old school when it comes to coming up with designs – I prefer paper and pencil. I had already accumulated a good size paper trail with all my notes and design ideas. I had to have some way of keeping everything structured so I wouldn’t get too overwhelmed. At this stage, I was only concerned with what design each embroidery stitch would have. My notes got well used, and there was a lot of crossing out and redevising along the way. Once I was happy with the order of the stitches and the design sketches, though these got changed along the way, I created two paper books with the outline of the stitches and pages, just so I could see what the finished book would look like. I am a visual person and sometimes I need to have something physical in front of me.
Book Mock up
With the design notes and plans, I could now set about coming up with final design sketches and drawing these up into the final templates for each page. At this point, I still had not actually thought of how this would all go into a pattern, how do I write out the instructions for the book or the actual embroidery stitches? Those important factors, didn’t come into the equation at this time – I was focused on actually creating the book itself.
It is a difficult task when you set about writing and creating written pattern/instructions so someone can come along and follow the instructions to create their own sampler book from the written pattern. I really hadn’t thought that through. I started off with stitching the book, telling myself that the pattern content will come along. My initial thought was to create step by step photos of each stitch and that is how I started.
Two years ago, Alyssa and I went on holiday to Wales and I took my pages with me to work on during down time. It started off really great, but over time it has harder to remember to take step by step photos and ensure they were clear. I was still having issues with how the pattern should be written so it was not too lengthy but still clear enough for anyone to follow.
I came back from holiday, and continued to work on the pages. But it stopped shortly after as I really wasn’t happy with how it was progressing, I had a mental block on how to take the patterns forward. I put the pages in a tin and set them aside, with the intention, I would get back to it when I had a clear mind. Fast forward a year or so – I had pulled the pages out to show people every so often over the year and discuss what my ultimate goal was – and then promptly placed them back saying I will get back to them. I was still struggling with the pattern writing.
It even got to the point where I had ‘misplaced’ the fabric pages. They were not where I thought I had kept them safe. I tried not to panic over it, and soon ‘forgot’ about them.
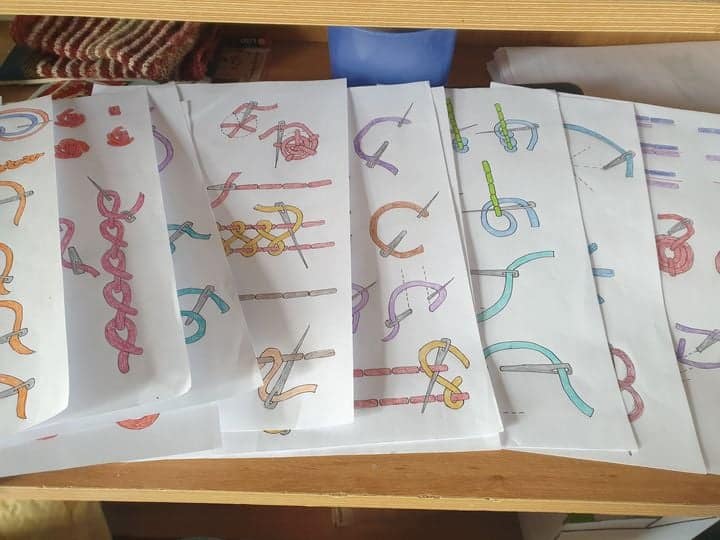
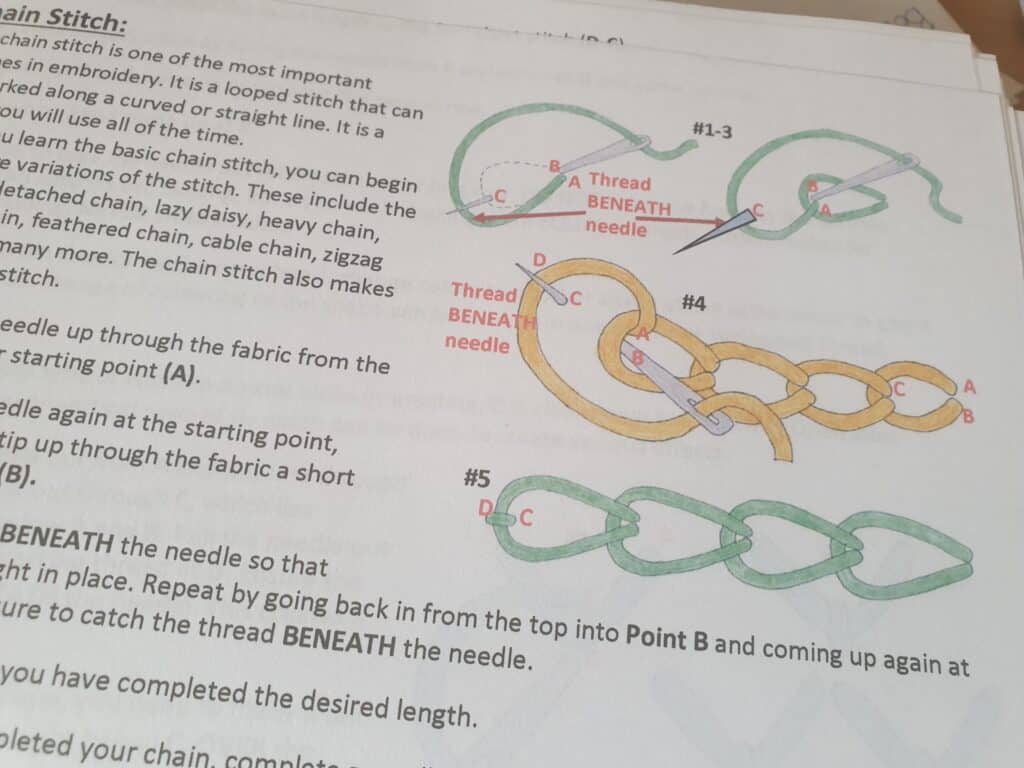
At the beginning of the journey, I had sent the first pattern to my testers who were wanting to do the project with me. They had their pages all prepared and ready to start stitching. I felt really bad, as I had put it all aside due to the mental blocks I was having with the patterns. Fast forward to the first lockdown – I devised a learn to crochet tutorial and I drew the diagrams and coloured them in. These instructions had great feedback and many found these diagrams easier to follow than photos. This got me thinking back to the embroidery sampler patterns and how it may be better to have coloured diagrams instead of photos which may or may not be in focus or the right lighting. With doing the crochet tutorial, I was able to move away from my mental block on the embroidery stitches.
Stitch diagrams
However, I still had the issue of locating my pages …. It didn’t help either when my testers asked if/when I was going to finish the sampler book….. so, with a confession and a promise to my testers …. And a frantic search around the house (several days in fact) looking to where my ‘safe’ spot was, I came up with nothing! Bring in Latisha, who offered to find them for me – and within 15 mins she had found them in the box of felt pieces! Heaven knows how or why they were in the bottom of that box! But, I was not going to get into solving that particular mystery, I was just so thankful that they had been found and I didn’t have to start making new pages …..
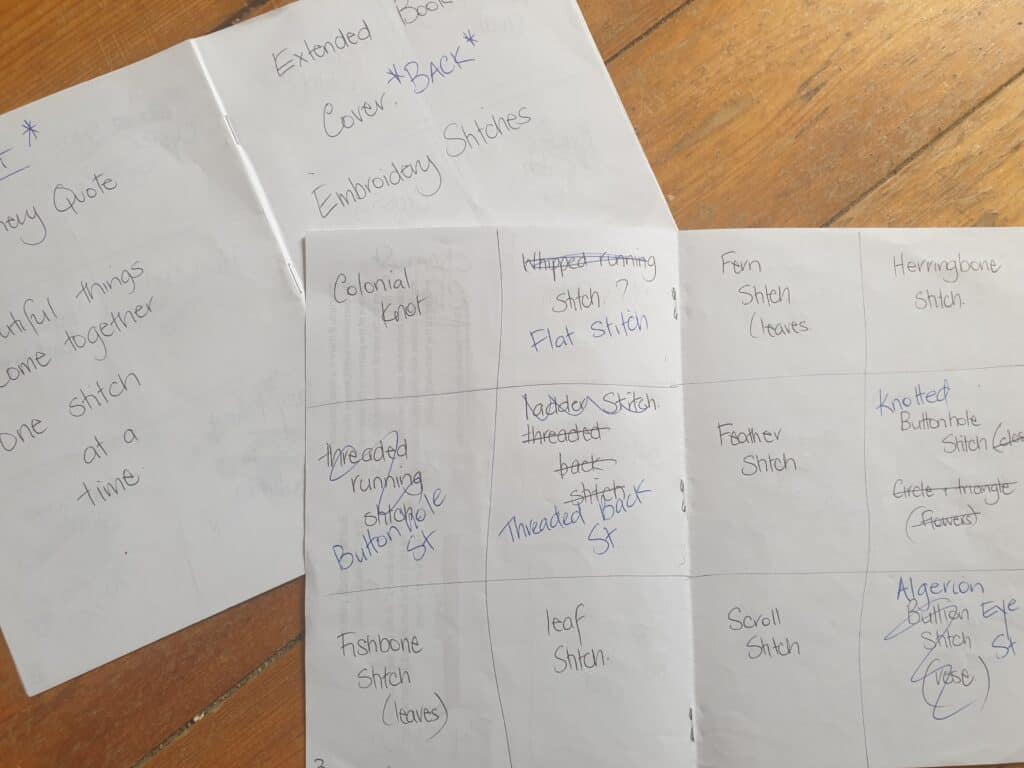
After not looking at the design notes and stitched pages for 2 years, it took a while for it to all come back …. I had noted on the paper books that the outside covers would have a saying on one side and name/year on the other. All of my notes on stitch designs, were all there and I had even written down all the stitch instructions, which I was so thankful for. I knew there was a reason why I put everything down on paper and keep it safe in a folder. Once I had gone over everything, I was able to look at the project with a fresh mind and the pattern instruction concept seemed to just flow and come together.
getting familiar with the notes and stitched pages
Maybe, I needed that time away to get it all right. I know that I felt better within myself this time round and the format of the pattern and instructions just seemed to come together. I even enjoyed drawing up the steps for the stitches and it seemed that with these diagrams, I was even able to rewrite the instructions so they followed the diagrams.
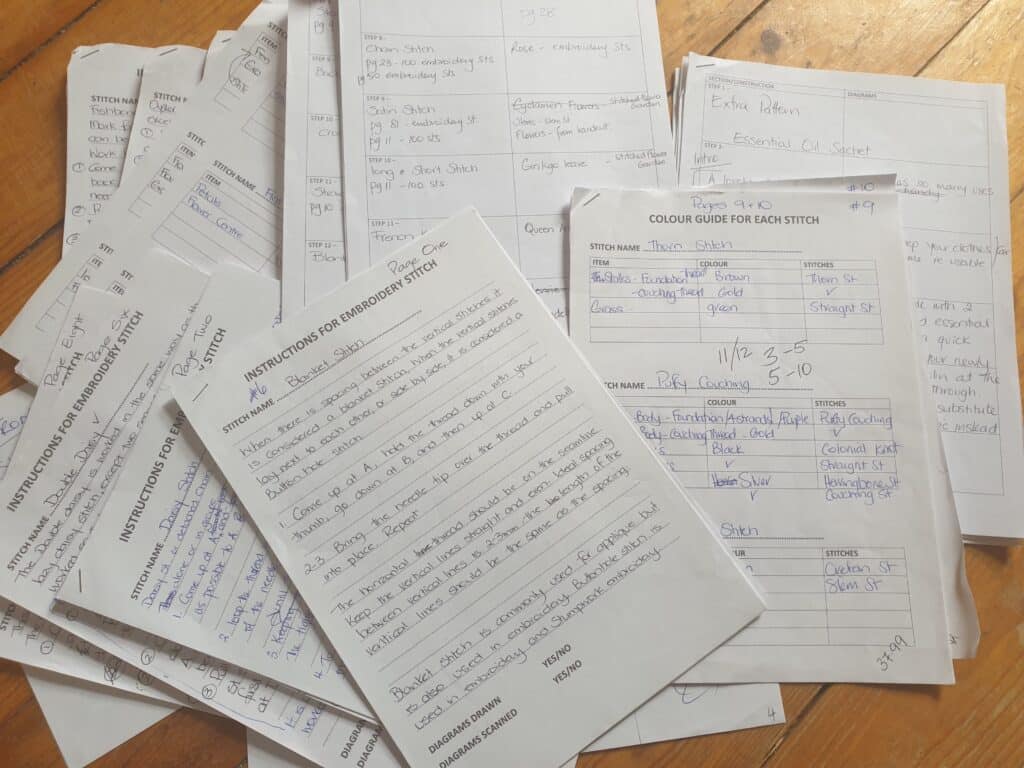
Stitch instructions and diagrams
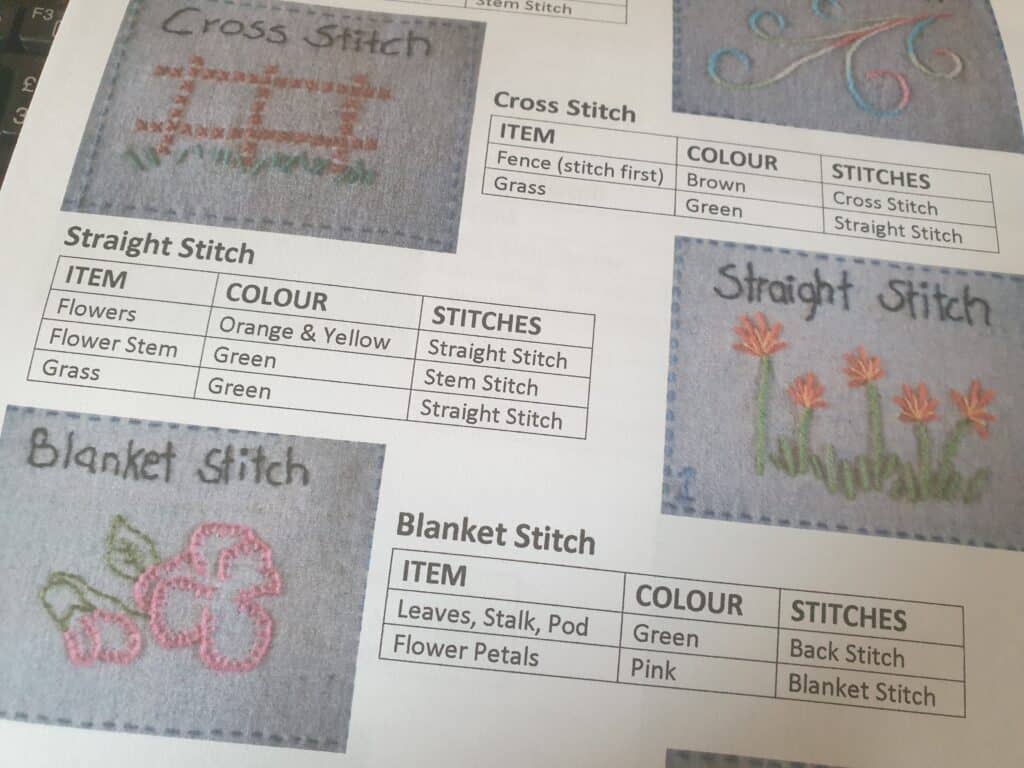
It was still a lot of work – finishing the stitches in both books and writing up each part of the stitch design, the colour I used and the stitch that was used. It was a section of the pattern that evolved as I went along, trying to find a simple and visual way to lay out how each embroidery stitch design was created. Hopefully, with the structure I have devised in the monthly patterns, it has made it that bit easier to follow.
Stitch design instructions
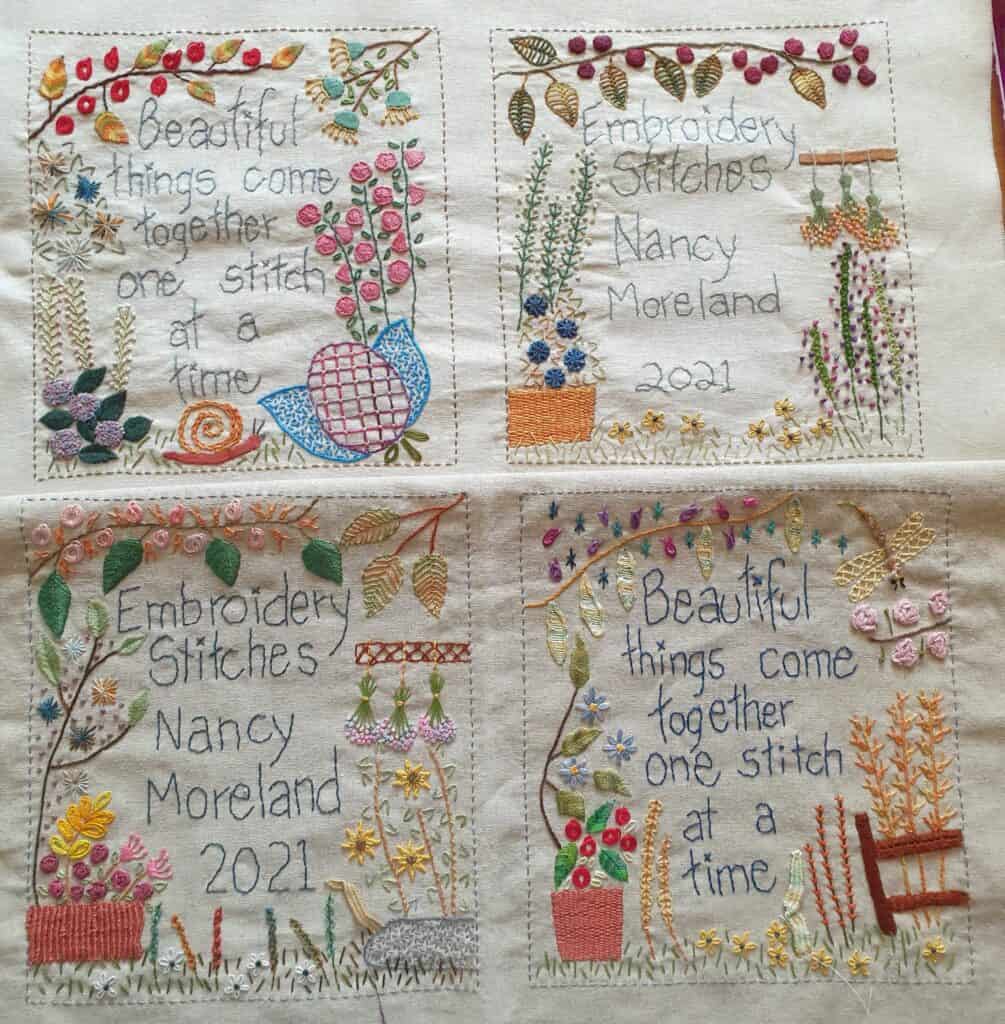
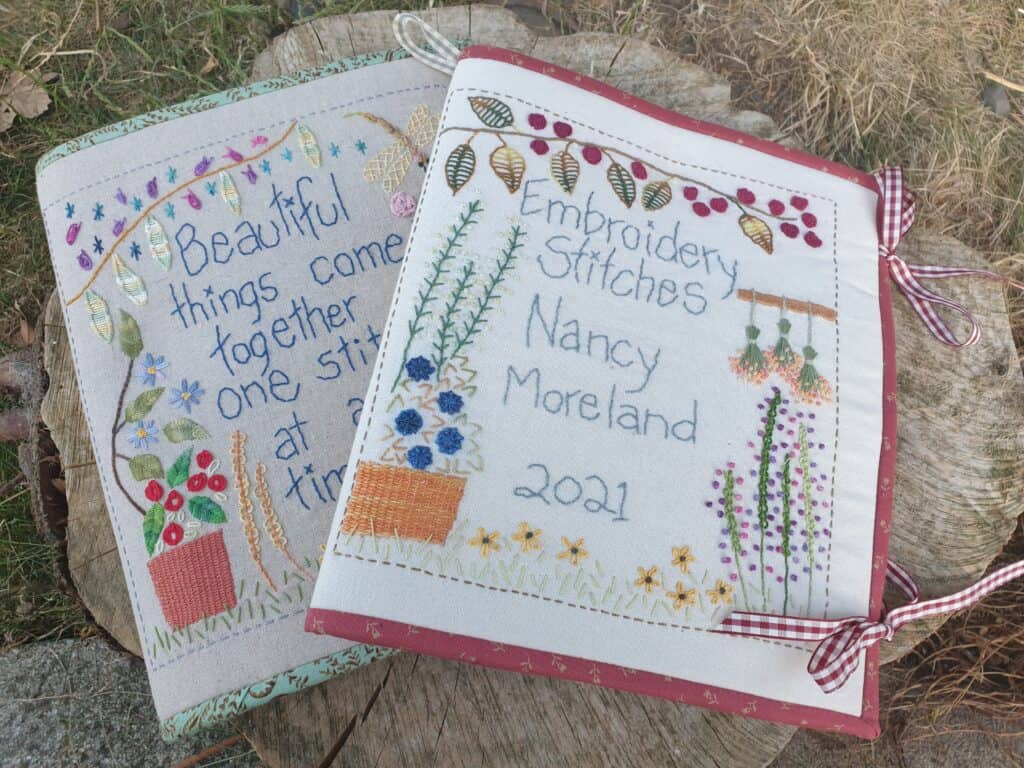
I still had to design the outer covers for both books and each one had to be different as both books used stitches that are learnt in that particular book. They were fun to come up with and the hardest decision was about which design should be on the front, and which on the back. That issue was never decided on, my testers all had different choices – so it was decided that the decision of what you would put on the front cover – The saying design or the title design – would be left up to you to decide! If everything in this sampler book was laid in stone for you to follow and create an exact replica of my book, there would be no fun or individuality on this embroidery journey.
outer cover designs
I have found that this embroidery sampler book journey has definitely evolved over the years. At the beginning, I have to admit I was really unsure on how to bring this project to fruition and make it perfect from the launch. Looking back, I am convinced that it needed that break in between …. I needed to grow as well. Sometimes we can have a seed of creation, but just don’t know how to execute it so it is exactly right. I needed the time to ponder over the pattern instructions so they were just right. The break also allowed for the concept to expand, at the start, I was just focusing on releasing the patterns … and had no thought or desire to have fabric kits, etc. So, the break allowed this to evolve and I was able to work on having kits available to purchase to support the sampler book. It has also allowed me to be able to offer the pattern for both left handers and right handers. I am so thankful for this, and fully believe that things happen for a reason and the two-year break was needed so I could bring this embroidery journey to fruition in the best possible way.
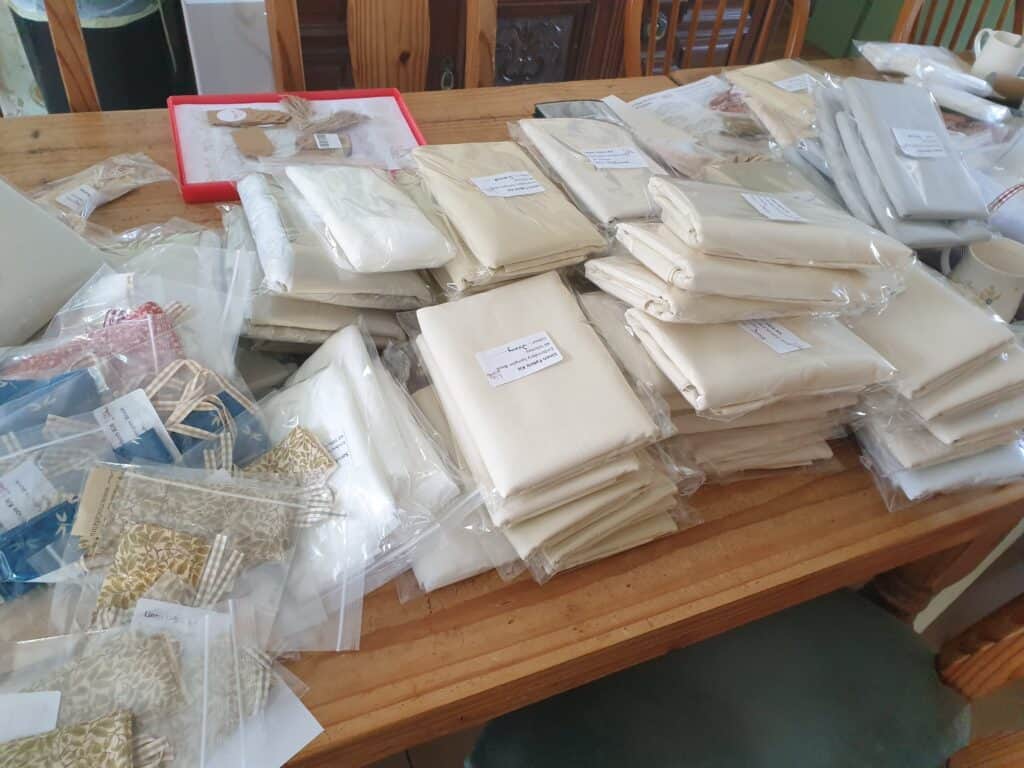
kit packing
So, how does this Embroidery Sampler Book monthly subscription work?
Each month a pattern will be released which will give you clear and simple instructions on how to create your chosen book. These can be saved in a folder for future reference. The first month will include cutting instructions for your ‘pages’ and how to ‘rule up’ each individual page to get the pages ready to start stitching the embroidery stitches in the following months.
Over the following months, you will receive 12 embroidery stitches to stitch into your book.
In the final month, you will receive the pattern, templates and instructions for the cover (front & back) of your book. These designs will incorporate all/most of the stitches you have stitches over the previous months. You will also receive detailed instructions on how to put your book together. The 36st sampler book is over 5 months and the 60st sampler book is over 7 months. There is NO pressure to complete each monthly pattern before the next pattern is released. This is your journey and you work along at your own pace. Alongside the patterns, I have started a Facebook group that is solely for the embroidery sampler book and it is a place where we can share our progress photos, ask for support and I can give extra advice for each monthly pattern and videos (if needed) on the embroidery stitch. https://www.facebook.com/groups/1981259928809348
This book will become a treasured heirloom, something to treasure for years to come. You will also learn some new and interesting embroidery stitches that you can incorporate in future projects.
So, are you wanting to join the embroidery journey? The first monthly pattern is available on our website, along with any kits that you may need/want to help with your journey in creating your very own Embroidery Sampler Book. I look forward to being part of your journey in learning new (& old) embroidery stitches
To provide the best experiences, we use technologies like cookies to store and/or access device information. Consenting to these technologies will allow us to process data such as browsing behaviour or unique IDs on this site. Not consenting or withdrawing consent, may adversely affect certain features and functions.
Functional
Always active
The technical storage or access is strictly necessary for the legitimate purpose of enabling the use of a specific service explicitly requested by the subscriber or user, or for the sole purpose of carrying out the transmission of a communication over an electronic communications network.
Preferences
The technical storage or access is necessary for the legitimate purpose of storing preferences that are not requested by the subscriber or user.
Statistics
The technical storage or access that is used exclusively for statistical purposes.The technical storage or access that is used exclusively for anonymous statistical purposes. Without a subpoena, voluntary compliance on the part of your Internet Service Provider, or additional records from a third party, information stored or retrieved for this purpose alone cannot usually be used to identify you.
Marketing
The technical storage or access is required to create user profiles to send advertising, or to track the user on a website or across several websites for similar marketing purposes.