The ‘Cursed’ Quilt

Featured

Years ago …. Well before COVID … that dreaded word … how the world has changed since then …. Isn’t it funny how we seem to relate to incidents or happenings to … BEFORE COVID …. Well …. In this incident, it was prior to Covid and the dreaded LOCKDOWN in early 2020.

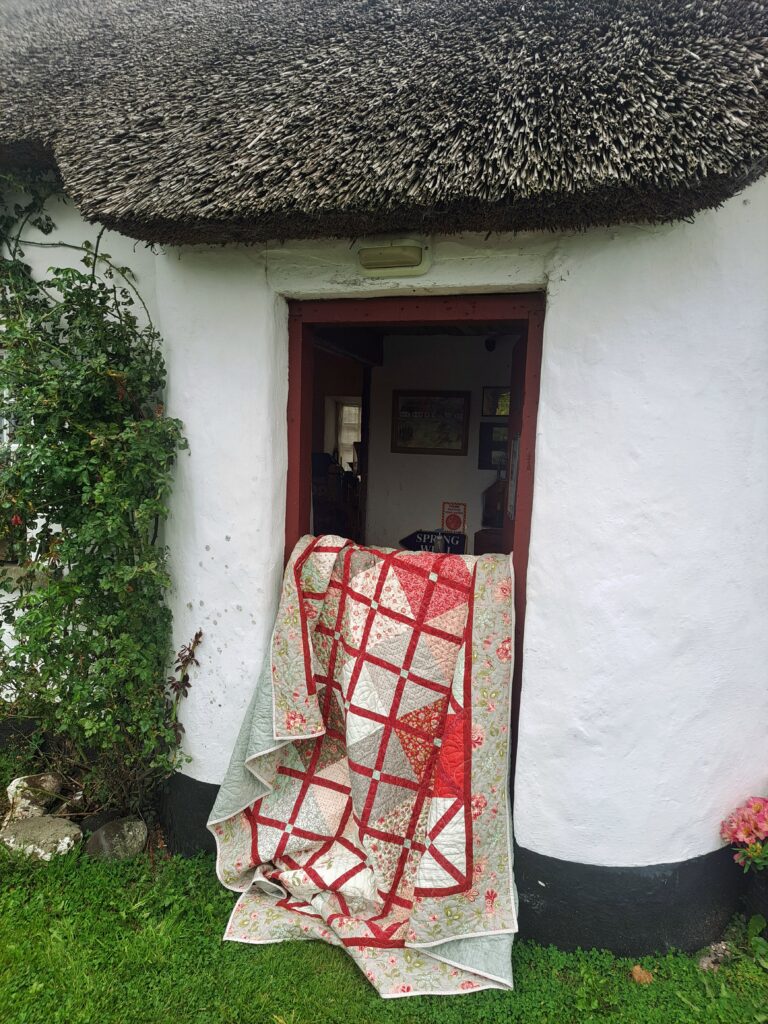
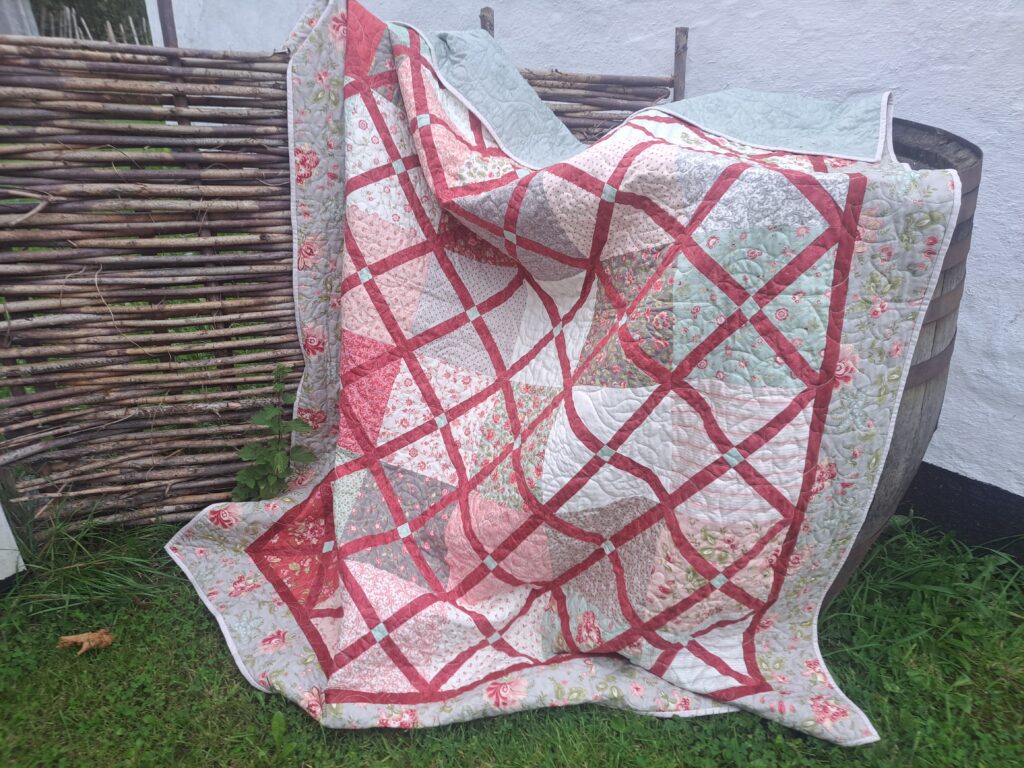
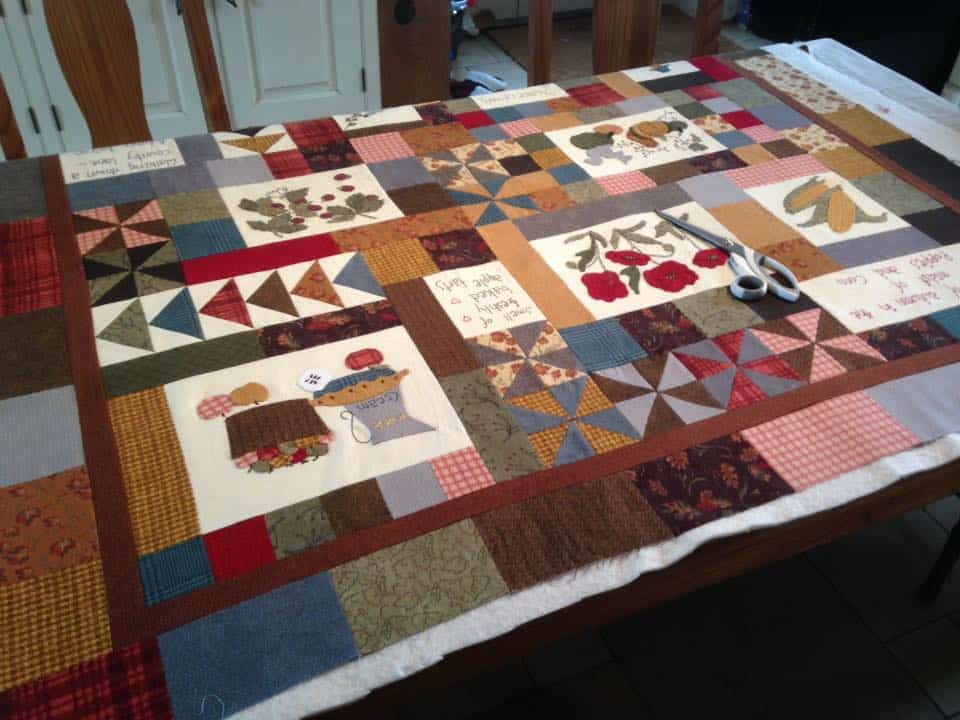
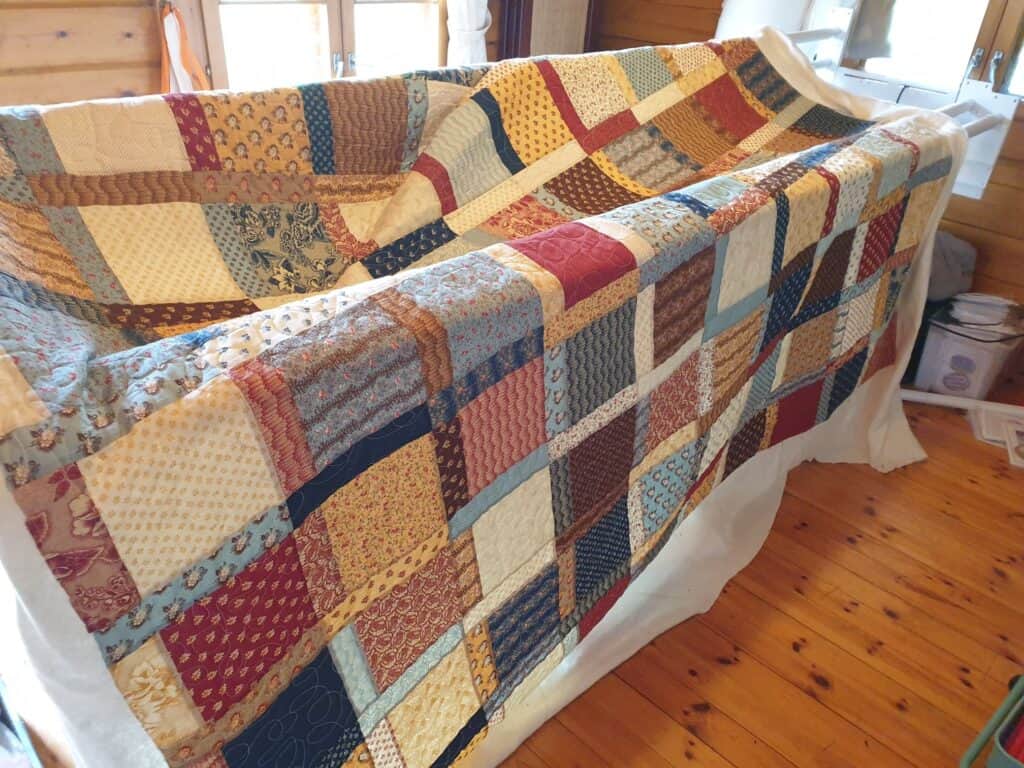
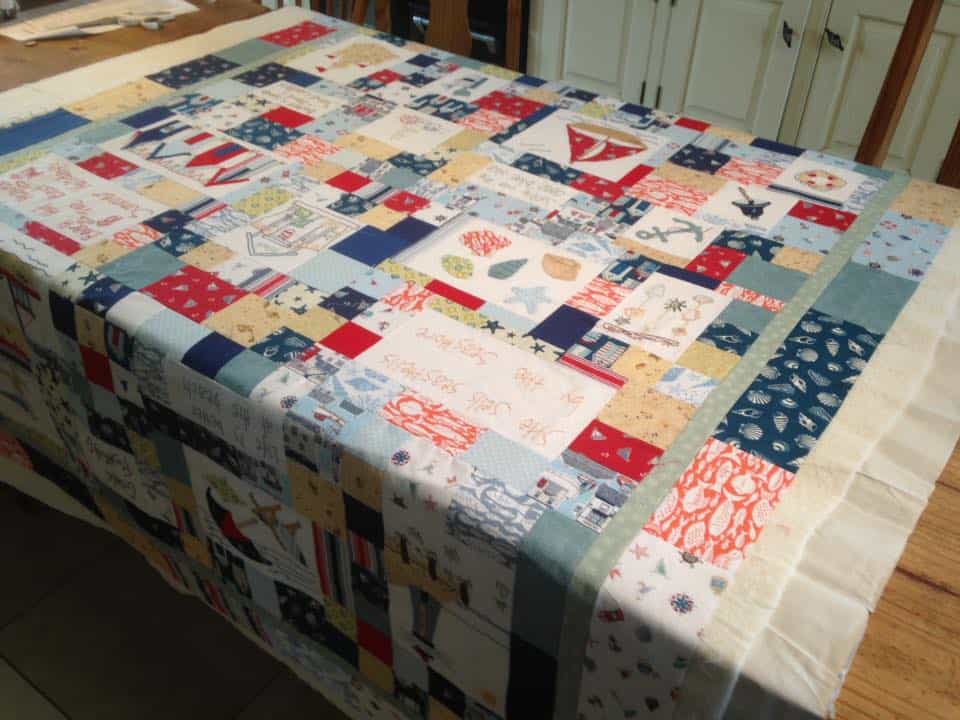
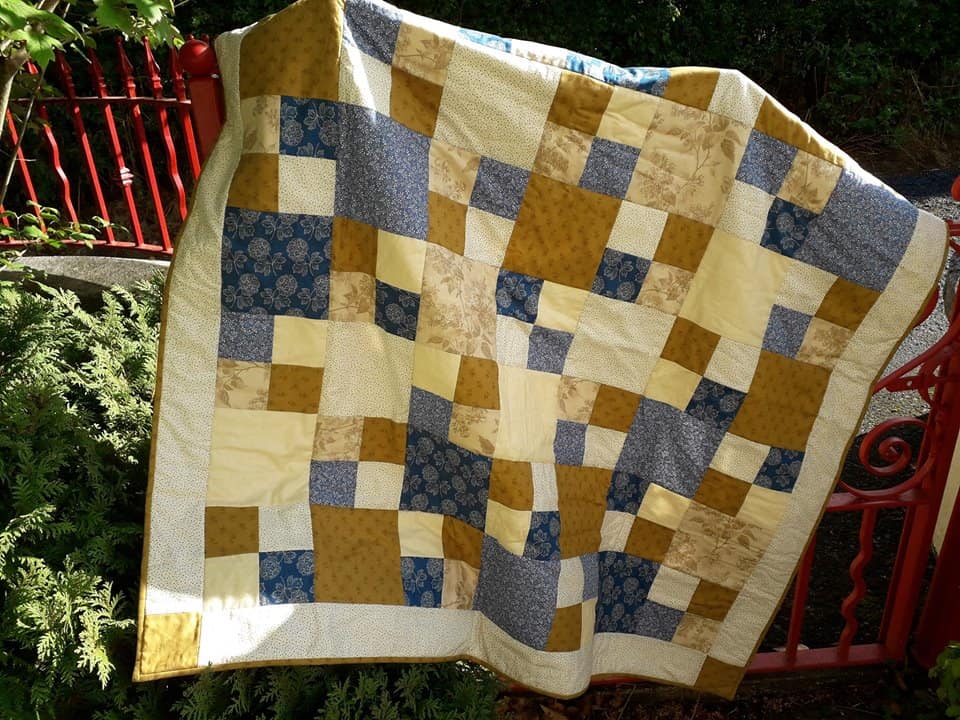
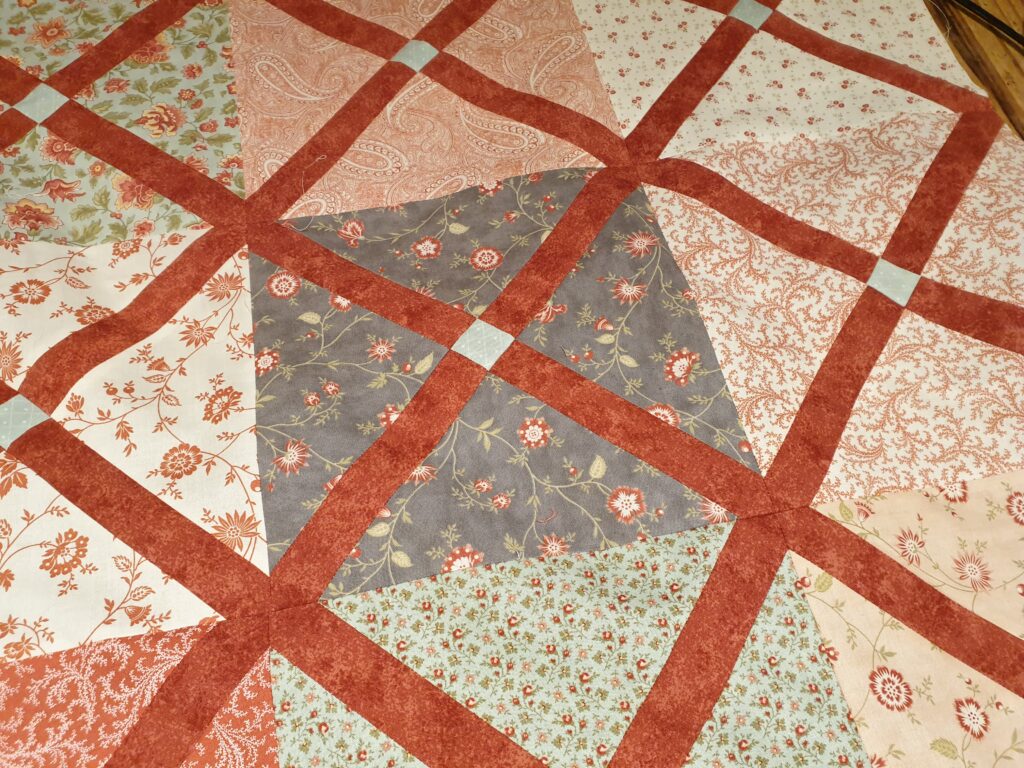
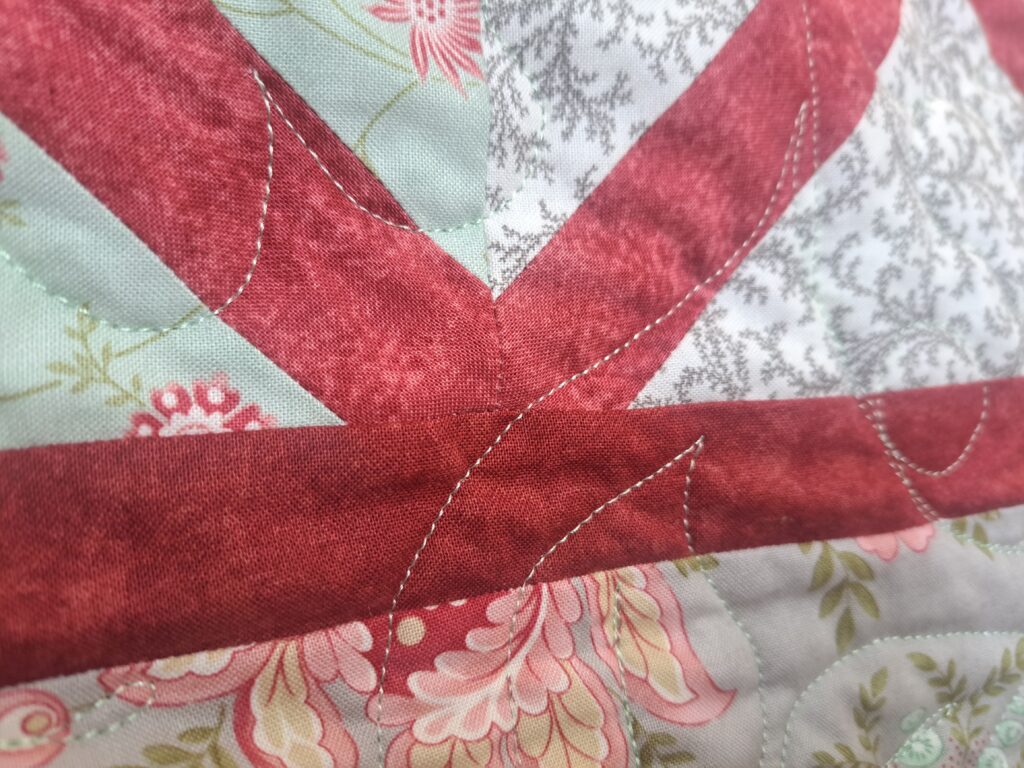
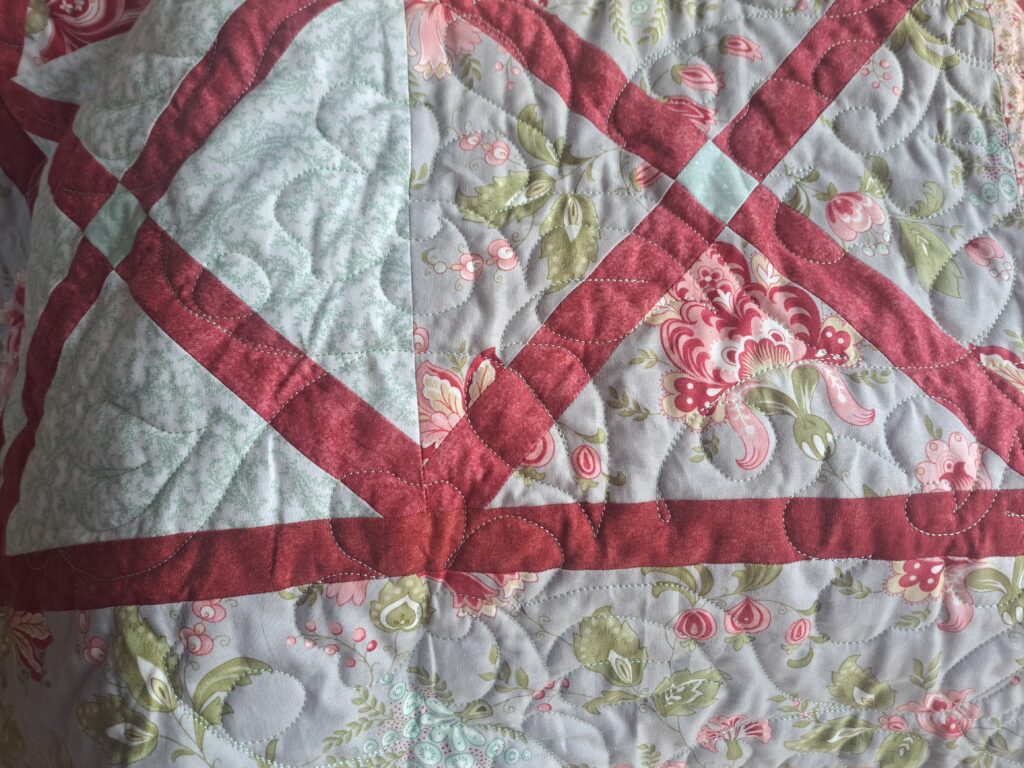
However, this quilt design started prior to then. In fact it was late 2019. I had a design for a quilt in my head and I started to work on it. I had the rough sketches and notes for the quilt using a Layer Cake and some fabric lengths. It was an easy quilt to put together. I had done up the notes for creating the blocks and sashing strips – all constructed using a simple construction technique. I had put the notes into a folder and set about making up my quilt sample. The quilt blocks came together well, and I was thrilled with the overall effect once the blocks were sewn together and created like a ‘trellis’ effect with the sashing strips meeting in the corners of each block.

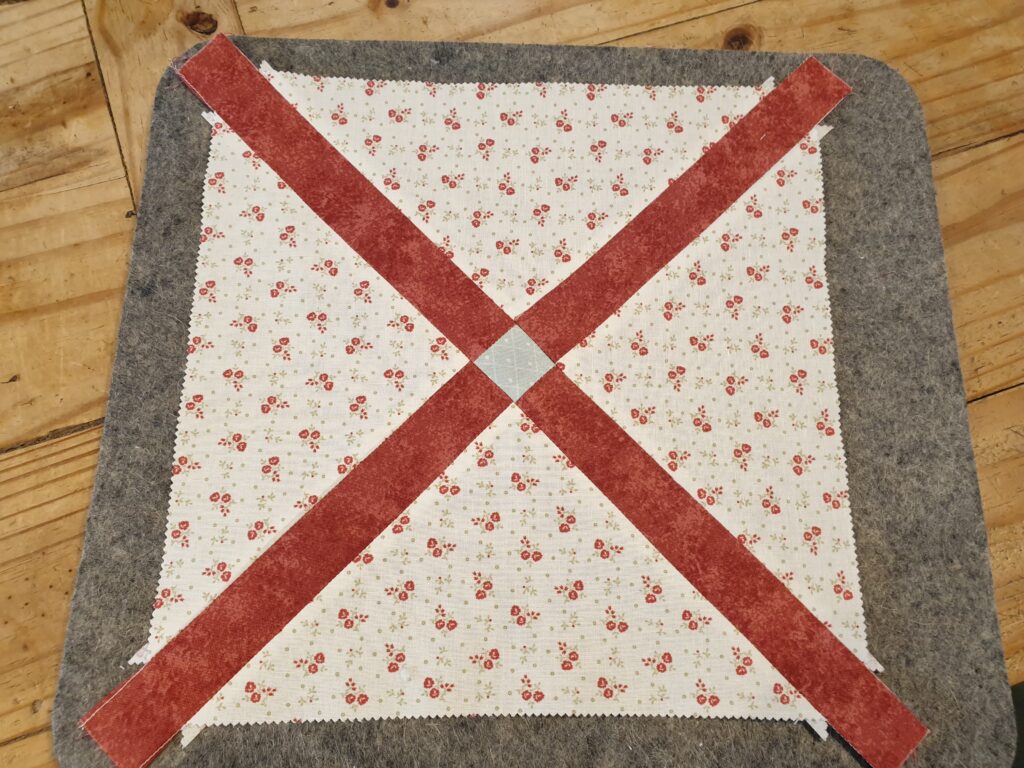
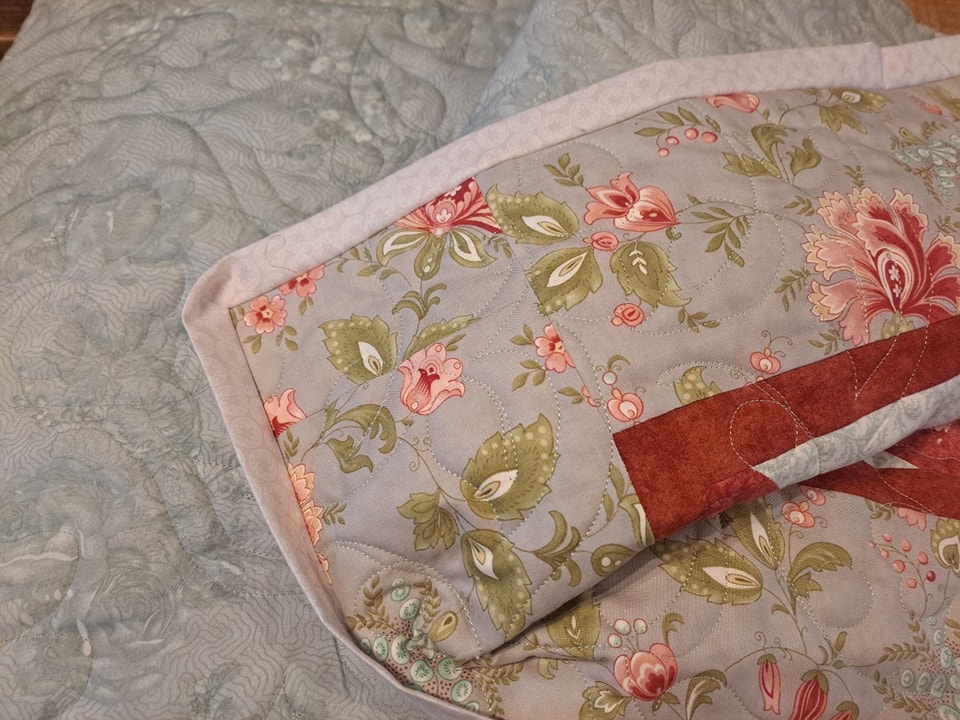
Then came to cutting and attaching the inner border…. That was when the FIRST MISHAP happened! I didn’t have enough of the red fabric to do the inner border. Remember, I was using my stash fabric …. But I didn’t worry too much as I knew it was a fabric line that was continuous due to it being a great staple in blender fabrics. I searched online for the fabric line and the needed colour – Red. Shouldn’t be too hard – Red is RED – right??? Actually … it’s not that simple. I should have known that not every Red is the same. I found 3 reds in the fabric range, I ordered them, and they arrived …. Only to find that …. NOT ONE of the reds were remotely the RED I needed. So I phoned up the fabric store and discussed my problem. I was told that it probably a RED that the fabric company had discontinued. Their suggestion was to post them over a snippet of the Red fabric, and they would try to match it up as best as they could…. And then LOCKDOWN happened, and I never heard back from them about a suitable Red fabric replacement! To add to it all, there were no other shops – everyone was in lockdown!

So my search for Red fabric was on hold. I put the quilt top away in a box. I still kept an eye out for any suitable red fabric and even rethought my quilt design. Fast forward many, many months (after purchasing any suitable red fabric that I saw online) and I came across someone on a Facebook De-stash group that was selling some red fabric. I purchased it and it arrived. Low and behold, the red fabric was NOT a direct match to the red fabric already in the quilt … BUT it was SO close that it was hard to tell there was a difference. I was now able to finish the quilt top by adding on the inner and outer borders.

Once the quilt top was complete, I thought that I should now start on finished typing up the final draft. Usually I do this BEFORE I sew up my design samples. So, since I couldn’t find a paper copy of the draft pattern, I knew it would be on the computer. To my dismay, there was NO draft pattern on the computer!! Who knew what had happened! I couldn’t even find any of my hand written notes. I guess after a few years of trying to find suitable fabric and a couple of lockdowns, I had forgotten the ‘safe’ place I had put it! (we ALL have that safe place …. right????)

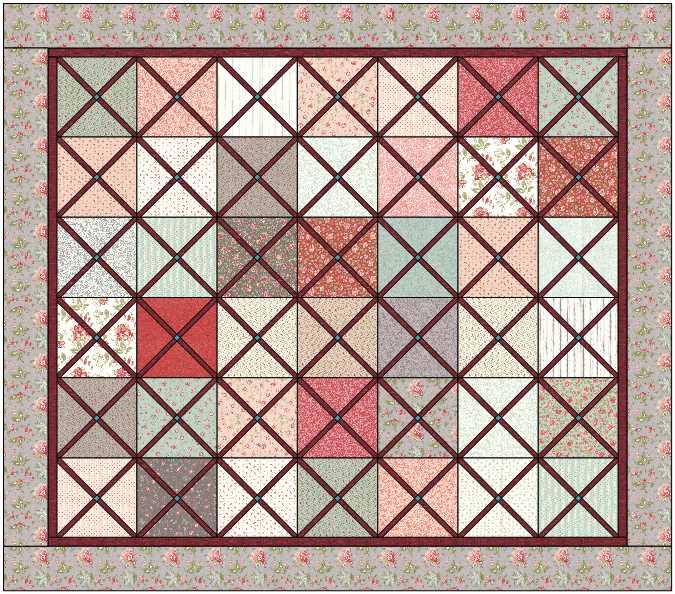
So, this was now the SECOND mishap for this quilt! Are you starting to see a pattern arising here? I got back onto the computer and started to type up another first draft of the quilt, complete with NEW diagrams and instructions. I guess the positive outcome of this is that I now had better skills in doing up diagrams for the pattern instructions. Far more clearer than my first pattern. There is always a reason as to why things happen…. This second pattern version was far better than the first one. I was even able to do a mock layout on EQ software to see how the quilt would look once it was complete and to use the diagrams that I had created in EQ, in the pattern.

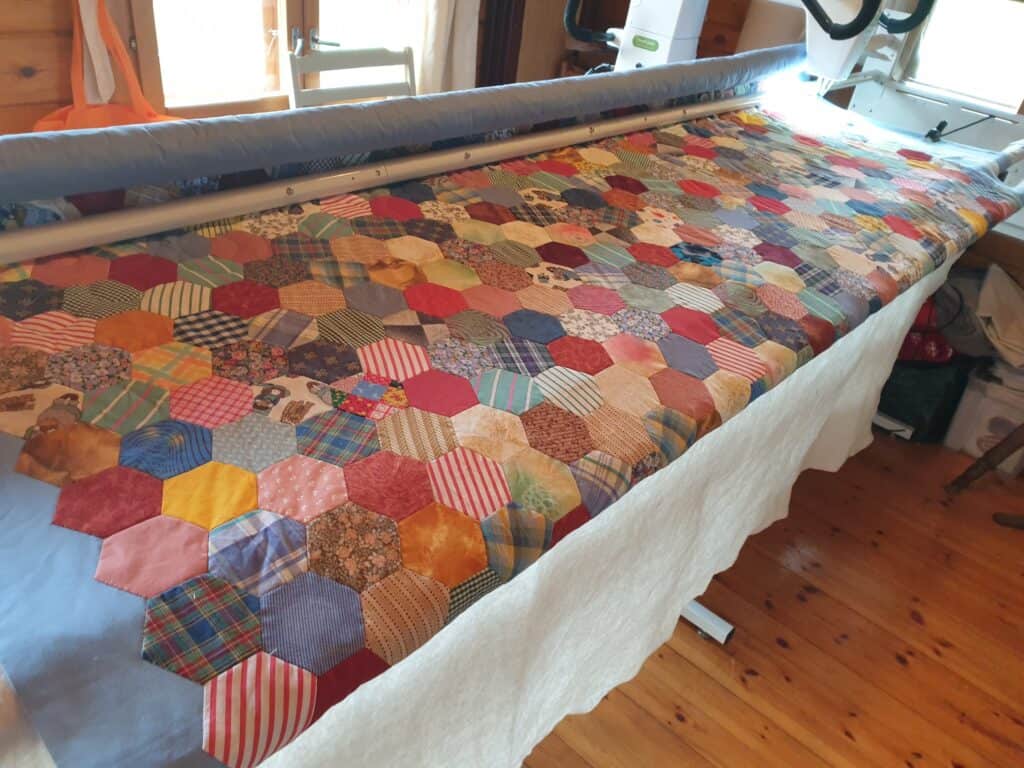
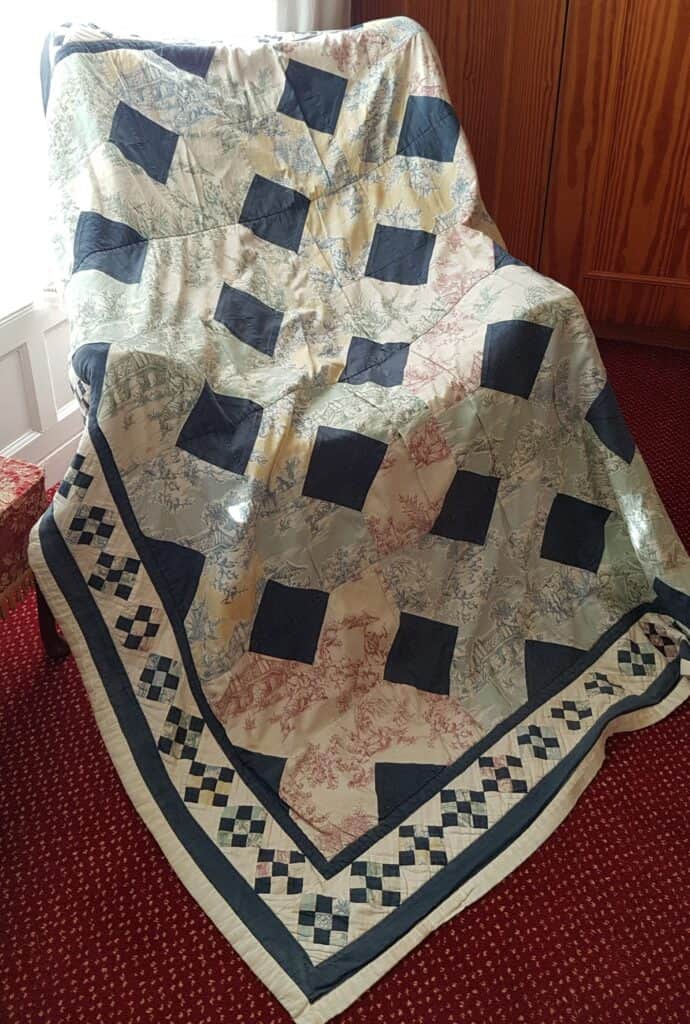
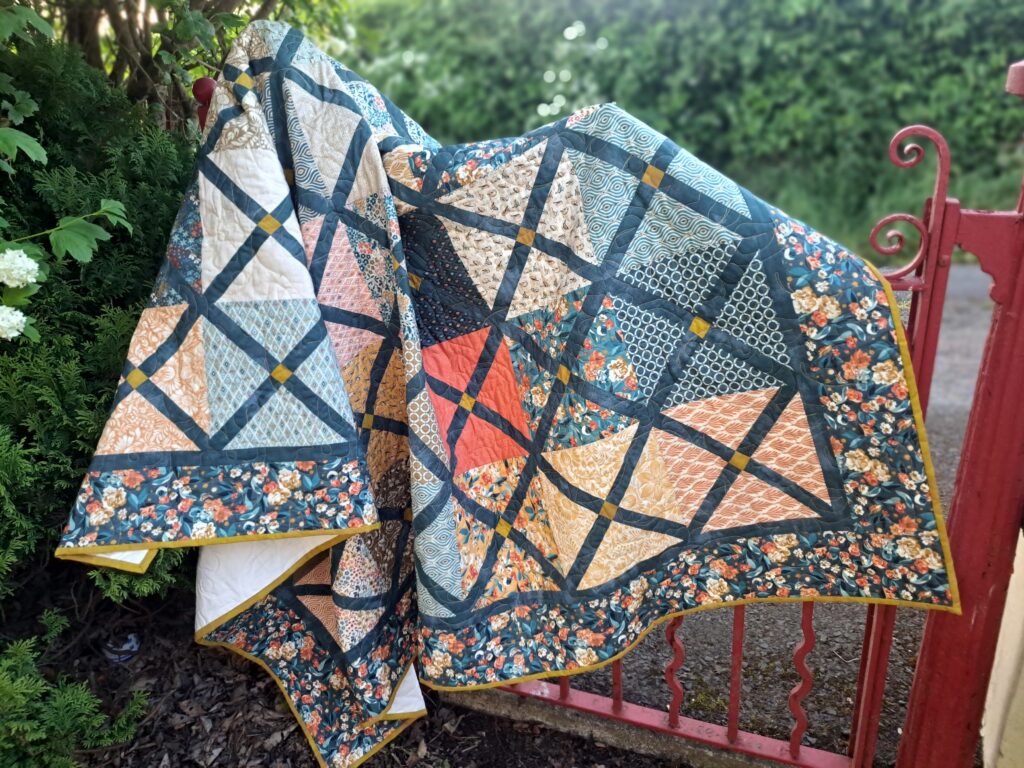
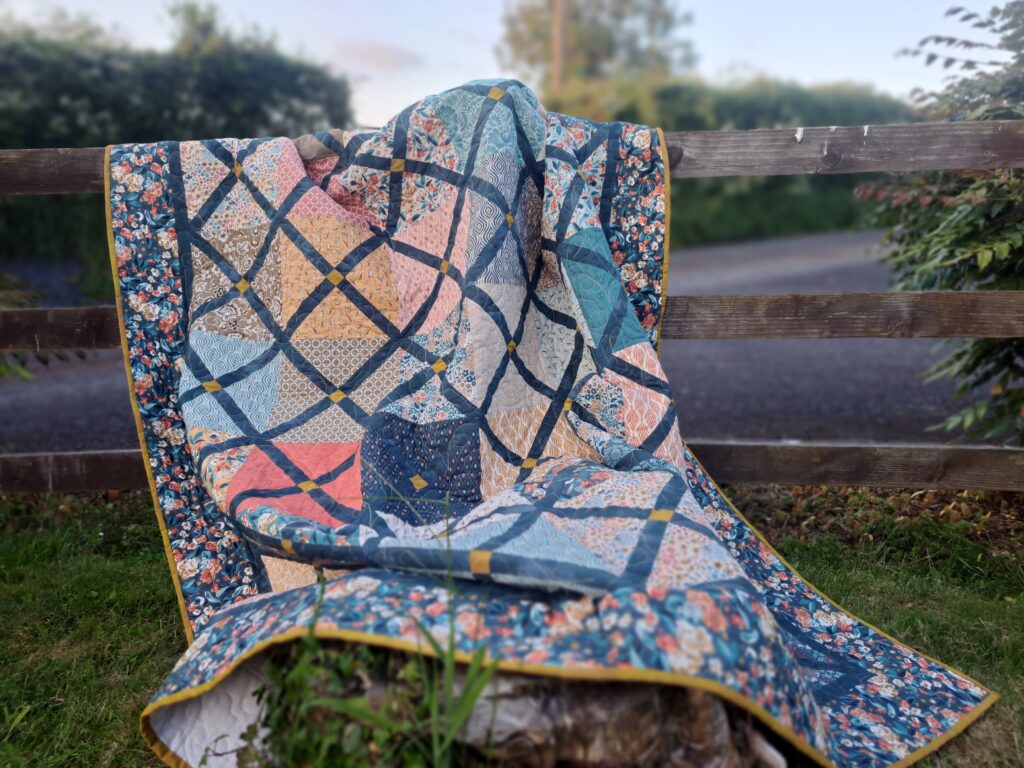
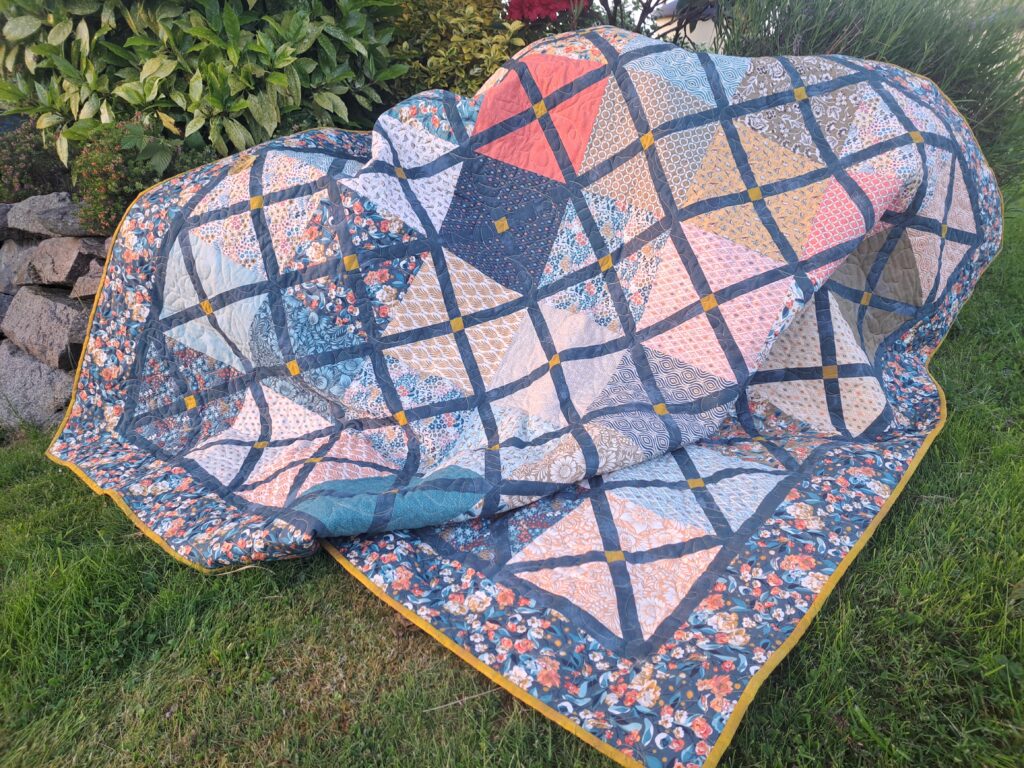
So, now that the second version of the pattern was in its final draft, I was able to send it off to the testers to test out the pattern. You have to agree that the quilt from one of the testers was simply stunning. Since she was local, we were able to load it onto the longarm as quilt it and I was fortunate enough to be able to take some lovely photos which really showcased it.

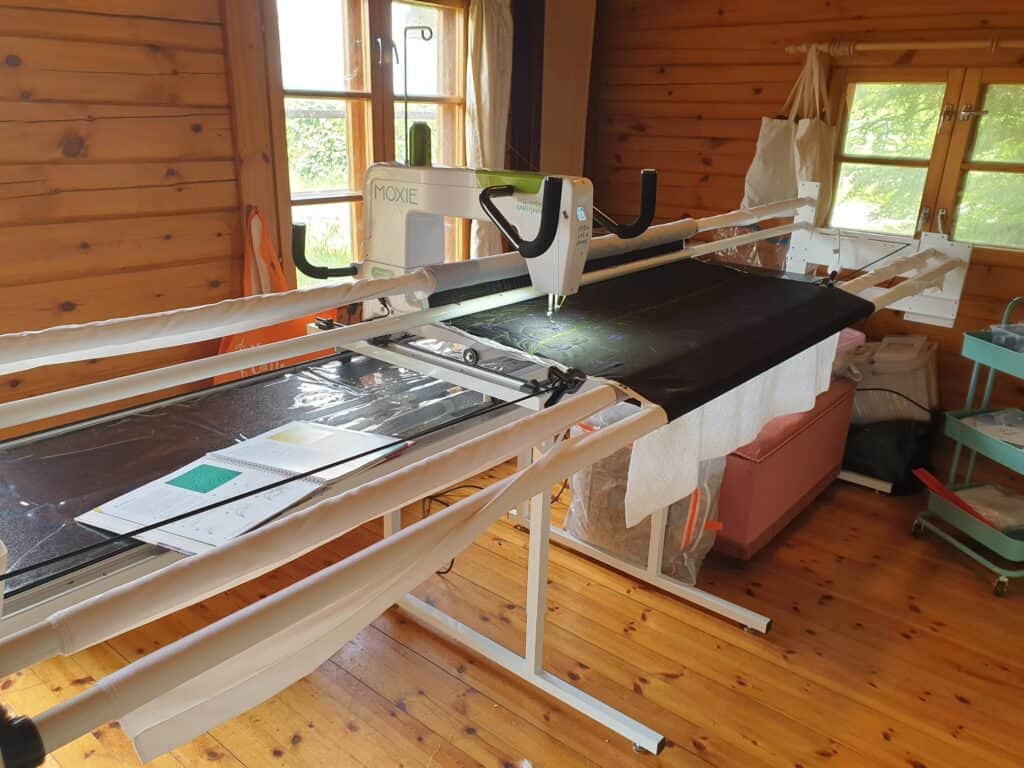
At this stage, my actual quilt sample was still lying in a box waiting on being quilted. But I was never able to get to that stage as my longarm was always busy with other quilts and it seemed to get pushed back all the time. I promised that I would finally get to it this summer (2023). It shouldn’t surprise me that it took over 3 years to get it to this stage … but it was great when it finally made it onto the longarm.

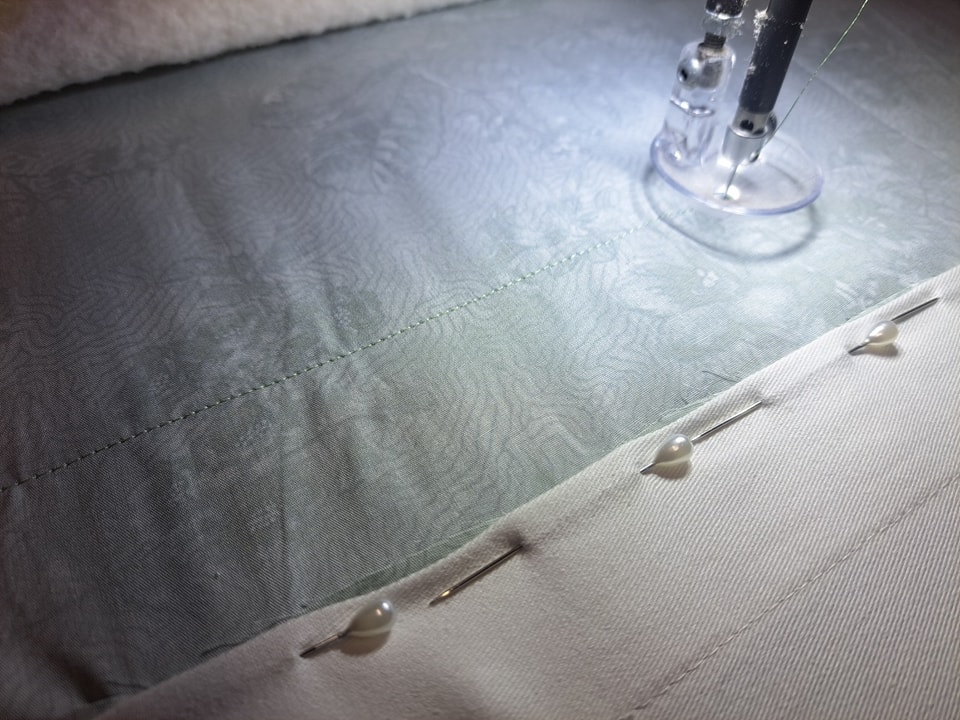
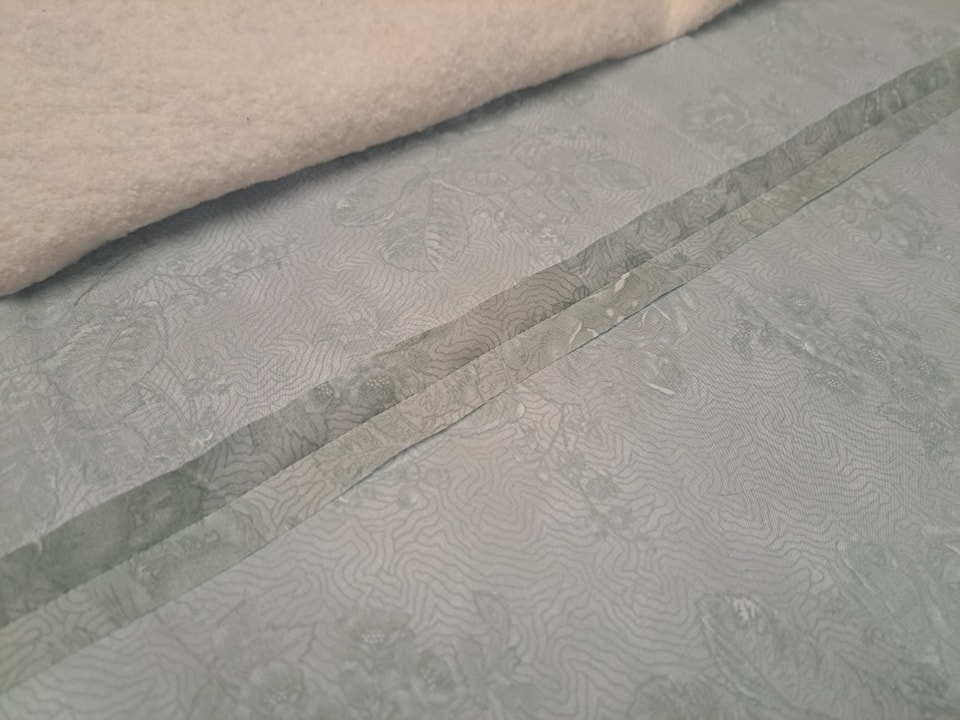
I guess you all know the saga of that incident – the THIRD mishap!! Even before it made it on the longarm, I mucked up the extra wide backing fabric!!! I don’t think there is many that have a seam in their extra wide backing fabric …. I meant the reason you purchase extra wide backing fabric … is so you don’t need to have seams! Well, trust me … this quilt decided that it needed to have a seam running in the middle of the quilt back! Not a disaster but hey … defeated purchasing extra wide fabric. So now that, THAT problem was solved, it was all about loading it onto the longarm frame.

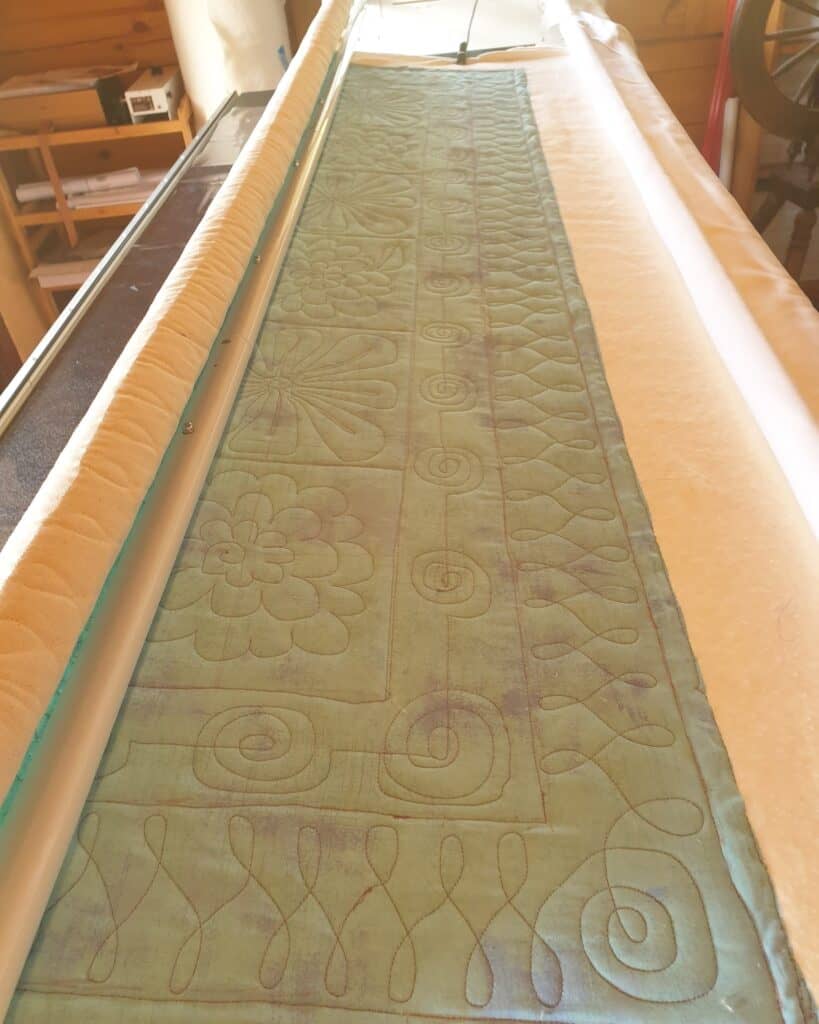
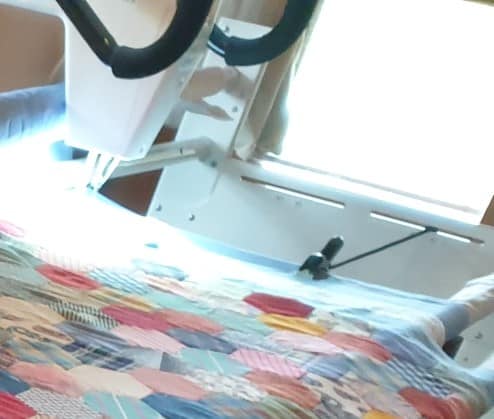
Once on the frame, the quilting design and stitching went great. NO problems at all!! Until it was near the end of the quilt – I only had two more quilting passes to go and the quilt was all finished!! You guessed it – FOURTH mishap!! The backing fabric was far too short for the quilt top!! I think this was about when I had my meltdown!!! It certainly had turned into the CURSED quilt!

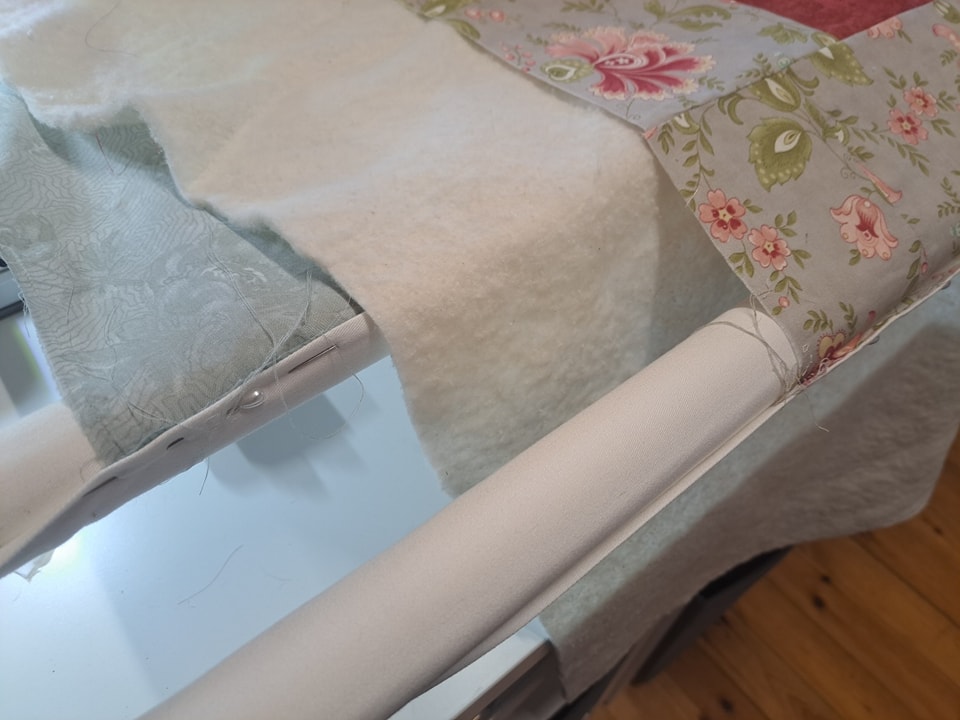
I can honestly say … a few ‘choice’ words were said … a few tears were shared …. And then I remembered, that once, when I first got the longarm, I had watched as many HandiQuilter videos as possible, and I vaguely remembered about one which explained and SHOWED how to attach EXTRA backing fabric WITHOUT removing the quilt from the frame!!!

I suddenly realised that it was not the end of the world and there is ALWAYS a reason (& lesson to be learnt) for mishaps. I searched the video and watched it, several times over. Turned up the music, took a few deep breathes and taught myself … HOW to attach extra backing onto the longarm frame! I can NOW quite proudly say that I tackled something that seemed impossible at the start …. Mastered it … and can NOW do it again … IF EVER this happens again. Let’s hope it doesn’t (or at least for a very long time) but it is always good to know that all things can be fixed (within reason). Nothing is truly LOST!!

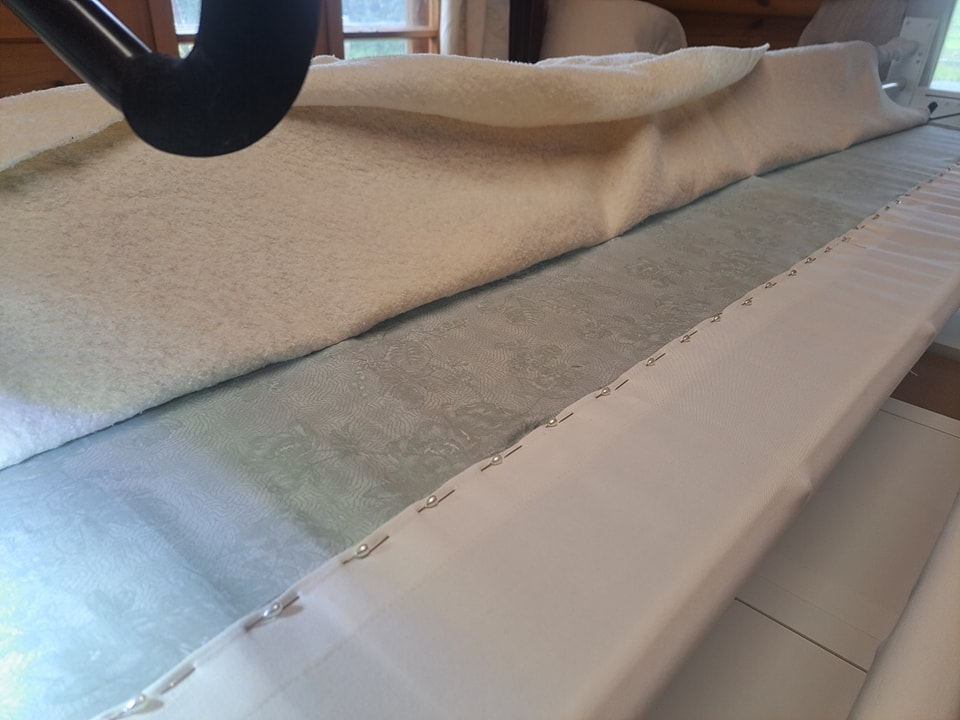
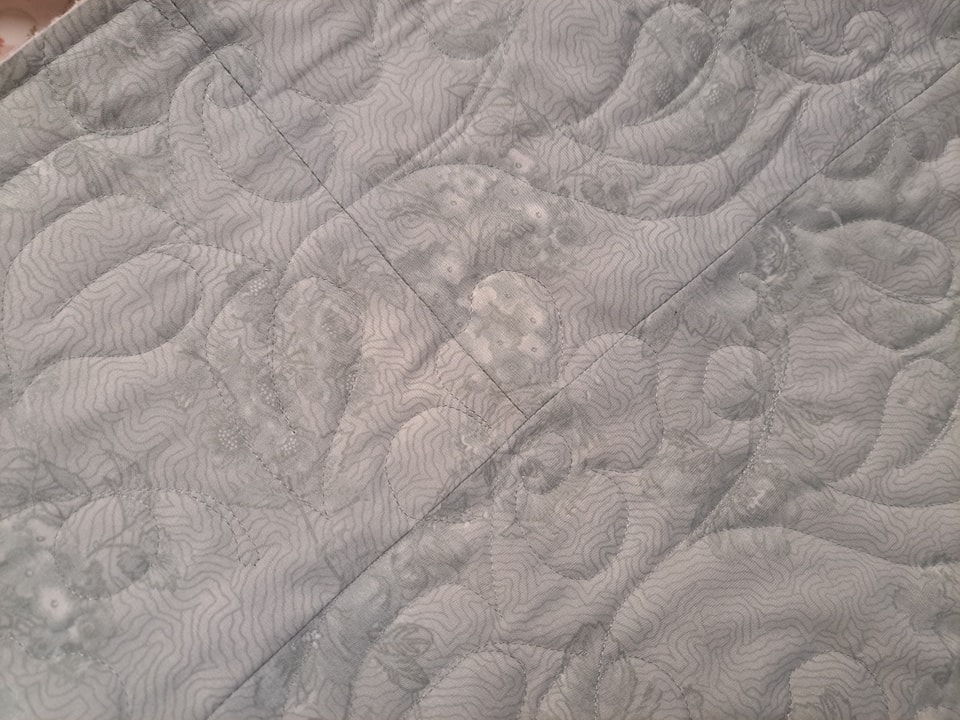
So with the backing fabric fixed (OK, instead of one seam, there is now THREE seams) … I was able to complete the quilting of the quilt and take it off the longarm. I could then attach the binding and hand stitch it. Finally, my quilt could be finished … even if was started 4 years ago!! But hey, the FIFTH mishap was about to happen …. The binding fabric that I had put away safe was NOT where it should have been! I searched my room for over an hour … I found LOTS of fabric I had forgotten about … But NOT the binding fabric.

I can tell you, that at this stage I was beyond caring …. I needed the quilt finished …. So I grabbed some suitable fabric that blended in and did a binding and got it handstitched.

The saga of the CURSED quilt! So, is the pattern in any way CURSED ??? DEFINITELY NOT!!!

The actual quilt design, may look complicated…. BUT it is actually a simple design. It is just the journey I had in getting the quilt finished. I really enjoyed constructing the blocks and by following the simple instructions and techniques I have included in the pattern; you will also find that it is a relatively simple quilt design.

Though one word of advice – ENSURE that your Layer Cake fabrics are EXACTLY 10” square to begin with. If they aren’t, then you will struggle to get the essential finished block construction. You may think that ALL Layer Cakes are 10” square …. I mean that is what a Layer Cake is …. 10” fabric squares. This is what one of my testers found out. And in doing so, we all learnt that NOT everything is what it says it should be on the box! Measure beforehand. What is the saying – Measure twice, Cut once!!

This was such a learning curve, that I had to include this in the pattern.

So please, do not be put off by my cursed story of the quilt. I truly loved making the quilt and found it such a relatively easy make (& quick) especially if you follow through step by step in the cutting and preparation of the blocks. I am keen to make this quilt again …. And see if I can cancel out all the ‘cursed’ incidents.

The pattern is now available on my website …

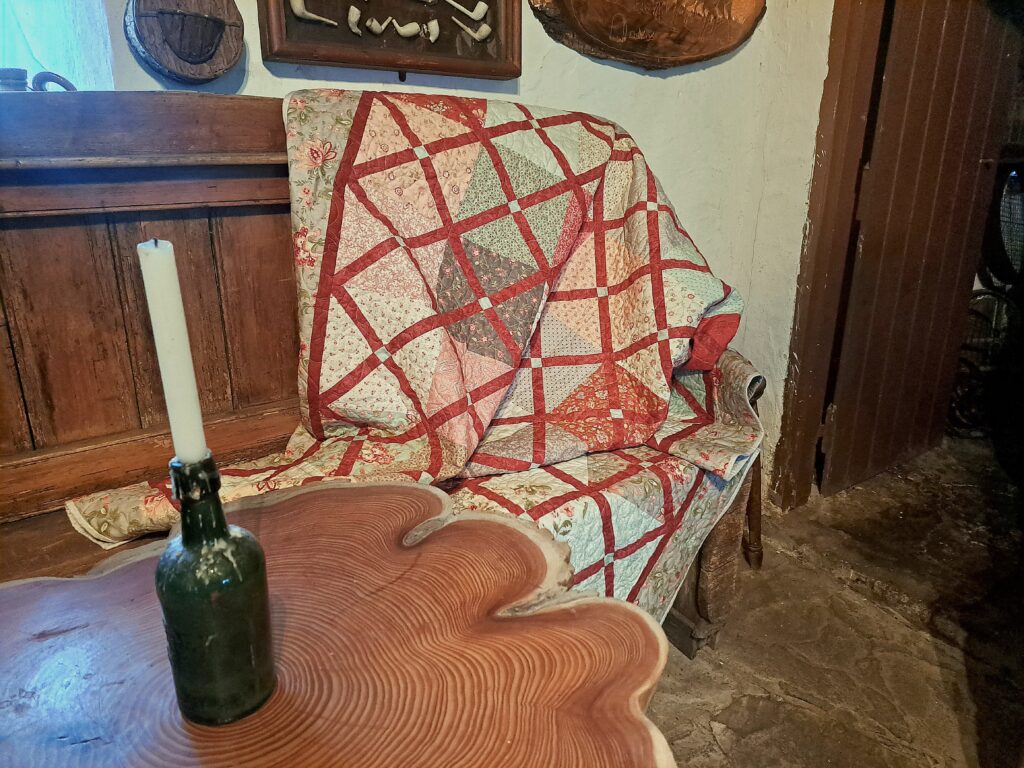
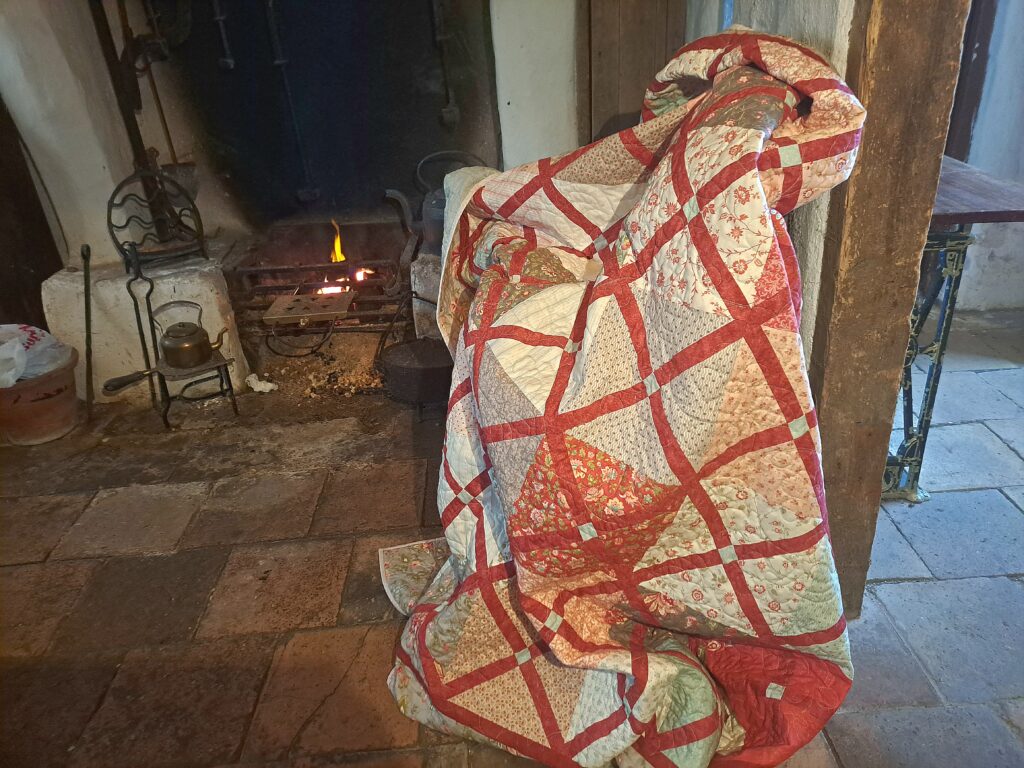
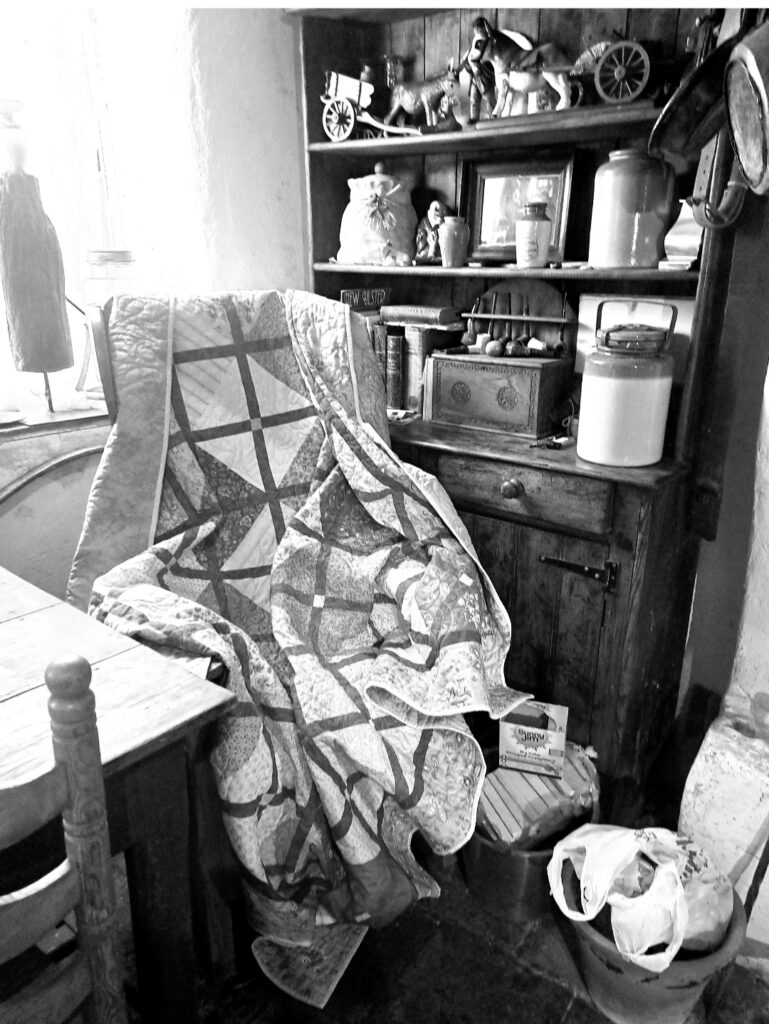
p.s. I couldnt resist taking the opportunity and doing a photo shoot of my quilt at the charming historic 300+ yr old Dan Winter’s cottage just outside Portadown, Northern Ireland…..

Size of Backing Fabrics/wadding for the longarm

Featured

Are you ready for post one of our Quilting Finishing Techniques for both the longarm and domestic machine finishing?

Our first post is about the size of backing fabric and wadding that is needed if you are getting your quilt finished on a longarm.

Over the years, I have always quilted my quilts either by machine or by hand (when I had the time, which is usually never).

I seriously dread the layering of the three fabrics to create the ‘quilt sandwich’. I have to admit that larger quilt tops could hibernate in the ‘to be quilted’ box for a number of months …. or years! Not sure why, but I think it is more the dreaded thought that I could end up being short of either the wadding or backing fabric. I can honestly say that I ‘always’ ensure that my wadding and backing fabric is roughly 2-3” larger than the quilt top, around ALL 4 sides. However, I have had, on at least one occasion where I have miscalculated and have run short of either the wadding or the backing fabric and had to re-do the layering process. Tough lesson to have when it is a huge quilt.

Layering quilt on the table with only about a inch or so extra of the wadding and backing fabric – tight squeeze, but ok for quilting on domestic sewing machine

So, what if the quilt is being sent to be long armed quilted? Is the rule of 2-3” larger than the quilt top? I never thought it would be different and was surprised that it wasn’t the same. I am guessing that I wouldn’t be the only one who thought it would be the same principle if you were quilting it on your own machine. Reading that both the backing fabric and the wadding needed to be at least 8” larger than the quilt top (at least 4” larger on ALL four sides) really surprised me.

It got me doing some research to find out why. Strangely enough, I like to know the reasoning behind rules and techniques and why it is so. In finding the answers I thought it would be a great opportunity to explain the ‘why’ in a blog post so you can understand the reasoning why so much extra is needed on the long arm frame.

So, the 8” isn’t to allow for the longarm quilter to compensate for any layering errors she may have. The three layers are loaded onto the frame separately to ensure that each layer is wrinkle free and taut on the frame. The backing fabric and top have the centre top marked so that the centre point on both fabrics can be matched to the centre point on the take up rollers on the frame. This helps to ensure that the quilt top is placed centrally on the frame. The wadding is laid between the two with the wadding and backing fabric side edges matching. The quilt top lies on these two with 4-6” clearance all the way round.

clearance of wadding and backing fabric on a longarm frame ready for quilting

So why is size important?

The quilt back is loaded onto the quilting frame and two rollers – one at the top and the other at the bottom. This gives a flat surface, free of wrinkles with a tension that enables you to quilt.

quilt on the longarm frame

However, to be able to quilt well, you need good tension on both sides, not just at the top and bottom. The side tension is achieved with the side clamps that are attached to the frame. This now gives a 4-way tension on the quilt which prevents any puckers or tucks. This still doesn’t really explain why the extra fabric is needed on the backing fabric and wadding.

side clamp to ensure correct side tension

Well, if the quilt top was the same size as the wadding and backing fabric or if not much clearance has been allowed, then the clamp would be too close to the quilt top. This causes a big issue when the quilt is being quilted and the need to quilt (or baste) up to the side edges of the quilt top. The machine needs clearance to ensure the needle can go over the quilt edge. If the clamps are too close to the edge of the quilt top, the machine will bump against the clamp, causing the quilting stitches to be off.

side clearance of wadding and backing fabric – only about 1″ of wadding and 2″ for backing fabric. It meant that extra care needed to be taken to ensure the wadding and backing fabric cleared the top quilt and quilting had to be worked around the side clamp to prevent being knocked.

If rulers are being used for quilting, then it really is essential to have clearance as the ruler base extends on each side of the machine. If that base hits the side clamps, then it could mess up the ruler work.

Another important reason for having that extra clearance is that the tension needs to be checked with each new quilt loaded to ensure that both the top and bobbin thread are stitching correctly. This also needs to be done after each bobbin change. The tension test needs to be done using the backing fabric and wadding with a small piece of extra fabric (usually the backing fabric) as this is what is being quilted so will give the actual quilt stitching. If there is no extra allowance, then there is no room to test the tension.

suitable clearance from the quilt top to provide room for being able to do a tension test before commencing to quilt and enough clearance so the side clamps would not get in the way when quilting.

This would also apply if you were stitching free motion on your quilt with your domestic sewing machine.

So with explaining about the size of the backing fabric, it now leads into the question of – ‘what can I use for my backing fabric?’

Come back next week to find out about –

Backing fabric options – Extra wide fabric; Sheeting; Pieced backs

And the following posts –

  • “Squaring” off backing fabric and quilt tops
  • Binding          – How much binding; How to prepare binding; Attaching binding to quilt front; Finishing the binding
  • Quilt Labels – Why quilt labels?; What to put on a label; How to create a label; How to attach a label

Start of the Longarm Journey

Featured

With introducing Longarm Quilting Services to Nifty Needles, I thought it was a great opportunity to write a blog post on what is involved in getting your quilt quilted on the longarm.

I am so excited to be finally offering this service. For many (many) years it has been my dream to own a longarm quilting machine. It was something I thought I could only dream about. However, thanks to COVID, I needed to rethink Nifty Needles and the longarm was one of the long term goals (wishes) I set down for Nifty Needles and I can now proudly announce that this goal has been achieved!

the Moxie

I am loving being able to get creative with the machine and testing my creative skills. I can truthfully say that it no longer scares me senseless as it did when it first arrived or even when I thought of getting one. I still have lots to experiment with as there are some features on the machine that I haven’t tried out yet.

I purchased the Moxie Handi Quilter which is able to stitch pantographs, groovy boards and ruler work in addition to the hand guided free motion quilting. The Moxi sits on a 10foot frame which means that it can quilt up to a width of 105” with ease and any length.

When the machine arrived on a pallet with so many different boxes, it was mind blowing. Realisation sunk in about WHAT I had actually purchased! The mere thought that it was now up to us (Latisha and myself) to actually unpack the boxes and build the frame up from the ground, so to speak, was so scary! I think at one stage; I was secretly panicking that it may not fit into the log cabin. We did actually build the frame, the wrong way round and only for the fact that the cabin had a 10ft pitched roof, were we able to turn it round by standing it on its end in the middle. It definitely was not able to turn round!! If it wasn’t for the high peak, the frame would have had to be taken apart …. I definitely did not want to even think about that option. With the help of some little helpers we got the Moxi set up.

Building the frame with help

After I got the machine set up, I needed to write down all the information and services for the website which was more involved than I thought possible. I sourced some excellent reference books on longarm quilting machines, spent some lengthy evenings doing some ‘bedtime’ reading just to get myself familiar with the longarm, designs and what it is actually capable of. Reading and researching is a great help when trying to get used to a new piece of machinery. But, honestly, nothing beats diving right in and doing the practical stuff.

With the research and reading I also found that there was so much more to the longarm. I also have to confess that I have never had a quilt finished on a longarm. The few I had seen that had been quilted on a longarm were so densely quilted that they were stiff. To me, a quilt should be cosy and soft, not stiff. Since getting the longarm I have discovered that quilts are quilted in the way you prefer – gently quilted to retain the cosiness with an all-over simple design or custom quilted for a more unique quilt.

allover free motion quilting

I also found it was interesting to find out and understand what is exactly required when getting a quilt quilted on the longarm. When I am told that things need to be done a certain way, I like to understand why it is needed or done in that particular way. So with this in mind, it got me thinking that it would be a great opportunity to do a series of blog posts with supporting PDF tutorials to explain about preparing a quilt for a longarm or even when we are quilting and finishing it ourselves on our domestic machines at home.

So over the next month or so I will post supporting blog posts with the techniques and ‘whys’. The subjects will be as follows –

  1. Size of backing fabrics/waddings
  2. Backing fabric options – Extra wide fabric / Sheeting / Pieced backs
  3. “Squaring” off backing fabric and quilt tops
  4. Binding  – How much binding / How to prepare binding / Attaching binding to quilt front / Finishing the binding
  5. Quilt Labels – Why quilt labels? / What to put on a label / How to create a label / How to attach a label

To support the blogs, I will create a PDF of the technique so you can download the information for your own reference.

I know that when I was at the start of my quilting journey I truly wish I had such information to help me progress. My journey was marked with trial and error. But I have learnt by my mistakes. In fact, we all need to make mistakes. It is how we learn and develop our skills. But there are times when you wish that you had that extra bit of advice so you don’t feel as though you are foundering around.

I hope you will find the blog posts and PDF tutorials of some interest and support on your quilting journey. If there are any other techniques relating to quilting, let me know and I can look at doing up more tutorials relating to the technique.

But, tutorials aside, this blog started with the long arm and what role it will be doing within Nifty Needles. Have a read of the website pages on our longarm services. But more importantly, click on our Introductory offer voucher to download your voucher which will give you a discounted offer on our edge to edge quilting service for your first two quilts. You could save up from £30 to £70 depending on the size of your quilt. To prevail of the discount, you DO need to bring in the voucher, so click on the link to download and print off your voucher. We will also be permanently offering a customer loyalty scheme where you can get 15% discount on every 5th quilt you bring to be quilted. Your first two discounted quilts go towards the loyalty scheme as well.

If you would like more information or to book an initial consultation appointment for one of our longarm services, please contact us either by phone (078 6018 6261) or email (nancy@niftyneedles.com). Nifty Needles is NOT a shop and is open ONLY by appointment, so please do not just arrive on the off chance.

When you come for your pre-booked initial consultation, please bring your quilt top with you and we can have a cuppa while we discuss your requirements such as wadding, backing, quilting services, design options and thread colour choice. These will all be written down in detail on your order form.

We look forward to working with you in quilting or finishing your treasured quilts.

Don’t forget to come back next week when we start our series of Quilting Techniques. The first one being, all about the size of backing fabrics and waddings.

Happy quilting

Beginning Your Quilting Journey

Featured

I have spent a few days working on a beginners’ quilt pattern. This pattern is a quilting beginner’s workshop in a written pattern. Creating this has taken me quite a few days as I had to rewrite the pattern I used in the Introduction to Quilts Workshop. This is a workshop I have held in recent years.

With this pattern I wanted to include all the tips and techniques I would teach and show in a workshop. It proved to take far longer than I thought! Basically, what should have been a simple and straightforward task turned into a mammoth piece of work taking about three days.

While writing out the hints and techniques to help you create your first quilt, I thought back to when I created my first quilt, over 25 years ago! Well, actually, I probably started my first quilt long before that (I am showing my age now).

When I left school at 16 years, I went to work for a Fabric shop in New Zealand. It was a terrible place to work, the owner was awful, working conditions were just as bad and the pay even worse However, due to my sewing experience in dress making, it was a dream job. I was surrounded by all of this fabric. One of our jobs was to cut off the label printed on the fabric, at the start of the role. It was about a ten-inch strip across the width of the fabric and this rejected fabric was placed under the counter. The fabric was all cotton; There was no such thing as quilting fabric or Quilting Shops back then. Those cut off strips piled up, and one of the perks was that we could take them home. I think the owner let us do it as he thought the ink would not come off. But I soon found out that the ink disappeared once it had been through a wash in the machine. So, why am I telling this story? Well, these piles of fabric started my adventure into quilting.

I had an old American quilting magazine at home and I admired all the handmade quilts in it. So being creative and young I decided that it would be a really good idea to create a handmade quilt for my Glory Box (or Bottom drawer) so I would have something for my marriage bed. Let me assure you, I had no plans for getting married nor anyone in mind, but I guess a young girl always had her dreams.

So at the tender age of 16 years, I decided to hand sew the quilt made from hexagons. I had to prepare and cut out the paper hexagons, cut out the fabric hexagons, tack the fabric to the paper hexagons and then hand sew them all together. I had plans for a double bed quilt, where it would hang down to the floor. I had never quilted before, knew nothing about how to go about it and there was no such things as quilting classes or shops but, I had the desire to make a quilt, something that would be treasured.

Well, I can assure you, it never graced a double bed. In fact, it lay half completed in a box for many, many years. That box of tacked hexagons, half completed quilt top accompanied me for many, many years, through various house moves. Even, after I got married, the quilt was still unfinished.

Fast forward about twelve to fifteen years or so and I discovered my boxed-up hexagon quilt still unfinished in a box. I decided that it was well past time for the quilt to be finished instead of lying in a box for another twelve years. It didn’t become a double bed size quilt, more like a lap size. But it was finished. I think back now with sorrow, thinking I no longer have that quilt, it was tattered and never made it with me on my journey here to Northern Ireland. I wish I had treasured it more. But I still carry those memories with me.

It did inspire me to sew more quilts, but on the machine, not by hand sewing! I was into cross stitching and I had this book of mouse designs that I was wanting to stitch for Latisha. This was when she was a toddler, but I didn’t want to frame them. That began my first venture into quilts. I made simple blocks, then pieced them together and made it into a quilt. I was self-taught and quilt making was totally new for me. I didn’t have the tools needed, or the techniques and I didn’t even know what tools I needed. I began my quilting journey on my own, learning, using books borrowed from the library. There was no internet, google or YouTube back then. It was still the Dark ages.

I learnt by my mistakes and went by my gut feeling. Latisha still has that quilt after 15+ years. It is a bit faded and worn but still very much a treasured item. It now graces the wall of Lucas’s bedroom.

From that very first quilt, I wanted to make more. There was still no quilt classes or quilting fabric shops. I think the nearest one to me was a seven-hour drive away. There was no online shopping either. So, all I had was the one fabric shop, you know the one that I worked in after I left school, and their selection was more for dressmaking rather than quilting fabric. So my only option was searching local Charity Shops and finding clothes that had very little seams and was 100% cotton. It is amazing what treasures you can find in those Charity Shops. These were also the places that I found old wool blankets (the type that we used to have on our beds, before duvets). They were usually cream and 100% wool. They made a brilliant option for the wadding, as there was nowhere to buy wadding. The upside was that the woollen blankets made the quilts warm in the winter (there was no such thing as central heating, I am really showing my age now).


I remember finding a stash of lovely Japanese patterned cotton fabric in a charity shop. From this stash I made a large double bed size quilt for Latisha to take to university. It had a large woollen blanket for the wadding and kept her warm for many years at her various accommodations. She even brought the quilt over here when she moved over from New Zealand. That quilt bears many battle scars, but it is still doing its job.

While looking into quilting and the history of it, I found that during the pioneer days, quilts were made from old clothes and old blankets. I was just reliving those traditions without knowing it, making quilts from old clothes and blankets to give them new life. I have made quilts from curtain fabric, chintz and whatever I could find. I was self-taught and created quilts with what I had on hand. My skills would not have been the best and I made many mistakes. I read book after book to improve my skills. I didn’t know about ¼” foot, applique, machine piecing and other tips to improve my quilt making.

Going forward a few years and I am now in my mid to late thirty’s and I discovered that there was a quilting guild in the area. It was in a historic House and gardens in the village I grew up in and I had spent many years exploring the grounds. At one time I even joined their painting group when I was a teenager. Wanting to learn more about quilting, I nervously went to one of their meetings, eager to learn new skills from them. It would be easy, after all quilters and crafters are all friendly helpful people that would welcome me gladly. I still remember, very vividly, stepping into that room of strangers Twenty years ago. I very nervously asked if it was possible to join as I was interested in quilt making. I was confronted with questions. What is your experience? Have you done quilting before? I answered that I had been sewing since I was 9 years old, did dress making and recently started to make a few quilts.

“Oh, what do you use to make your quilts?” I told them about my finds at Charity shops and how I made my quilts.

“Heavens!! That is not quilting! Quilts are only made with the proper Quilting materials!”

There was no warm welcome, no instant friendships. Basically, I had broken all of the Quilt Police Rules! I left and vowed never to put myself in that position again, deflated because I chose to do quilting my own way. It was the start of the journey into learning how to do quilts MY way, teach myself and reach my goal of showing others how to sew and quilt.

I have learnt so much along the way of my journey and I can honestly say I am still learning. Quilting techniques and tools are constantly improving and I have found, that what I knew and did ten to twenty years ago is NOT what I do now. I look back at my first quilts, I have a slight shudder to myself when I look at my mistakes and lack of techniques. But this is all part of the process and I am proud of what I have achieved and how far I have come. I have learnt the tricks and techniques, but I will never say that I need to stop learning. Learning is always an ongoing process. I will always treasure those first quilts, the ones where I didn’t use a rotary cutter, mat and ruler – they just weren’t round back then, but I would never think of NOT using them now. Why go backwards in the journey of making quilts? They make it easier to get accurate cutting, so anything that makes it easier is the best.

So, after that journey back in time, I now come to the purpose of what I started in the beginning of this post. The rewriting of a pattern for your very first quilt creation, to begin your journey in quilt creating.

When I teach workshops, I like to share the tips and cheats that I have learnt to creating a quilt easier. The tips on how to correctly press your seams and why, how to pin and the importance of pinning so that you can ensure all seams and points meet up as they are meant to.

I learn things from experience, for instance, my first experiences in layering quilts and having disasters due to the three layers not working together, ending up with huge wrinkles when I do the quilting to hold the layers together. Not using the right tools or materials did not help either, so I have shared how I have overcome the issues, so you can enjoy the process of layering and quilting.

Basically, this tutorial pattern is like having me looking over your shoulder guiding you through making your first quilt. I usually get that from my students “I wish I could have you at home looking over my shoulder, telling me what to do.” So, if you have always wanted to make a quilt but have been putting it off due to not knowing how to go about it, having no classes to attend and just need the hints and tips to improve your quilting experience, then this tutorial pattern is a great place to start.