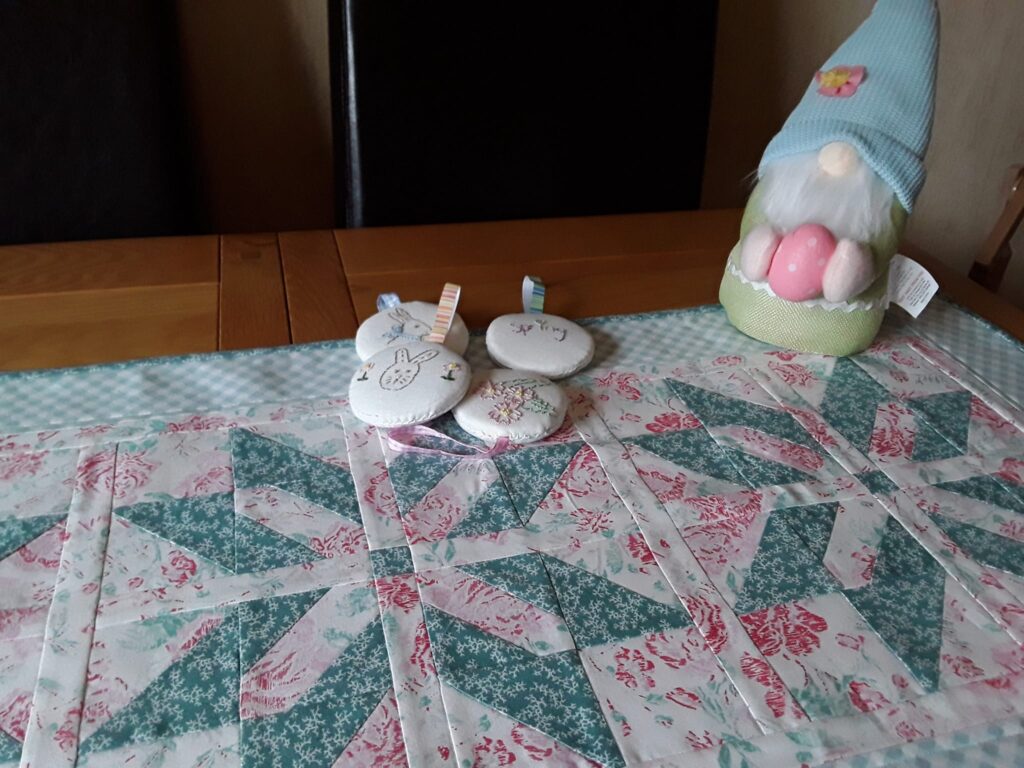
The ‘Cursed’ Quilt

Featured

Years ago …. Well before COVID … that dreaded word … how the world has changed since then …. Isn’t it funny how we seem to relate to incidents or happenings to … BEFORE COVID …. Well …. In this incident, it was prior to Covid and the dreaded LOCKDOWN in early 2020.

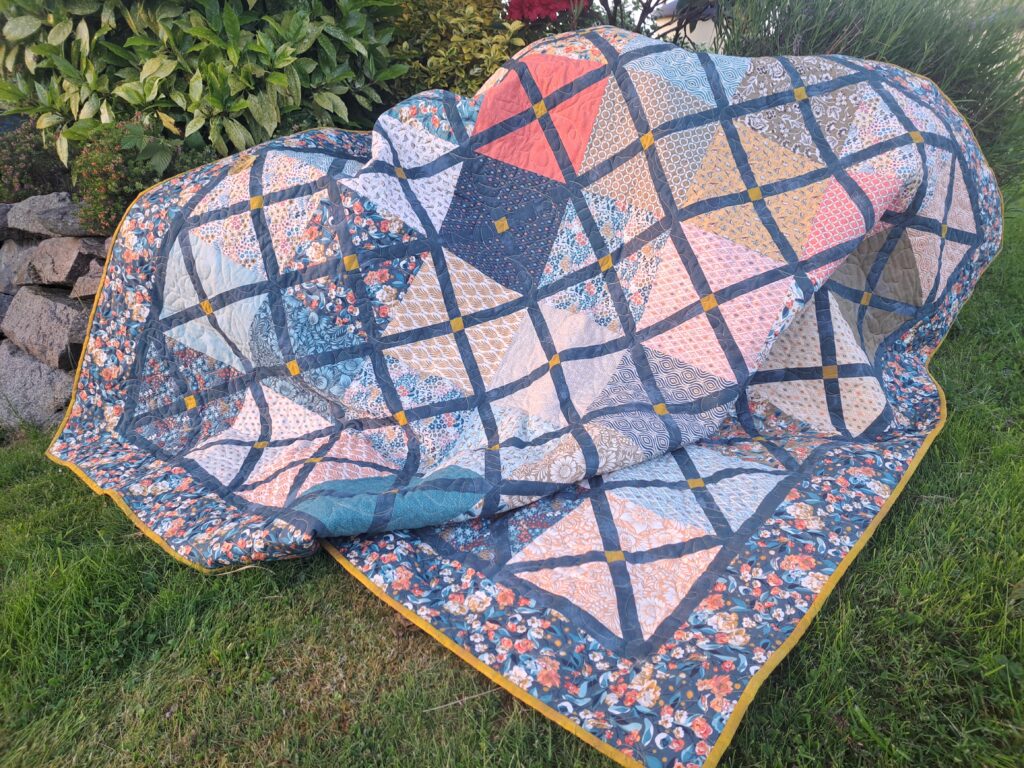
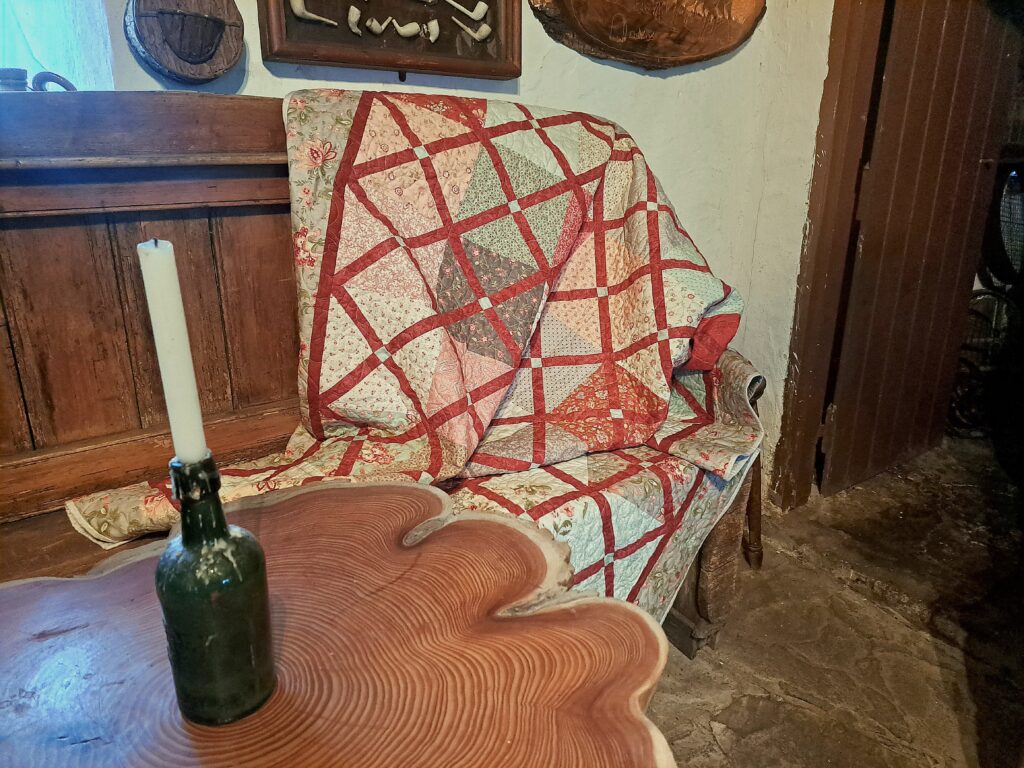
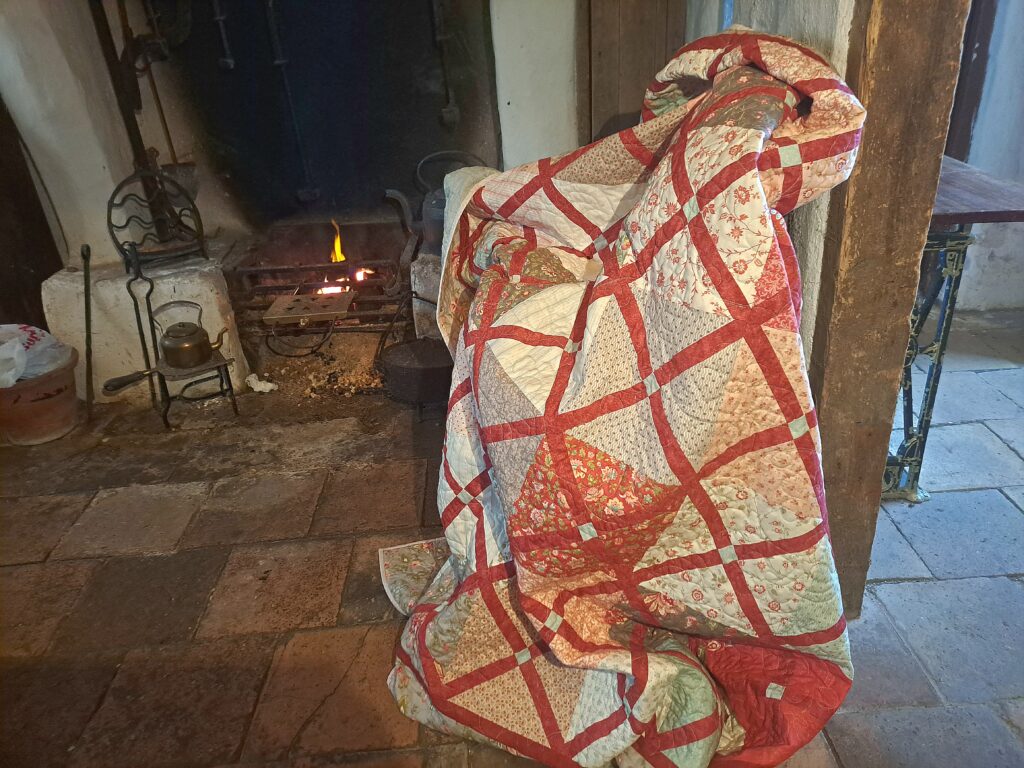
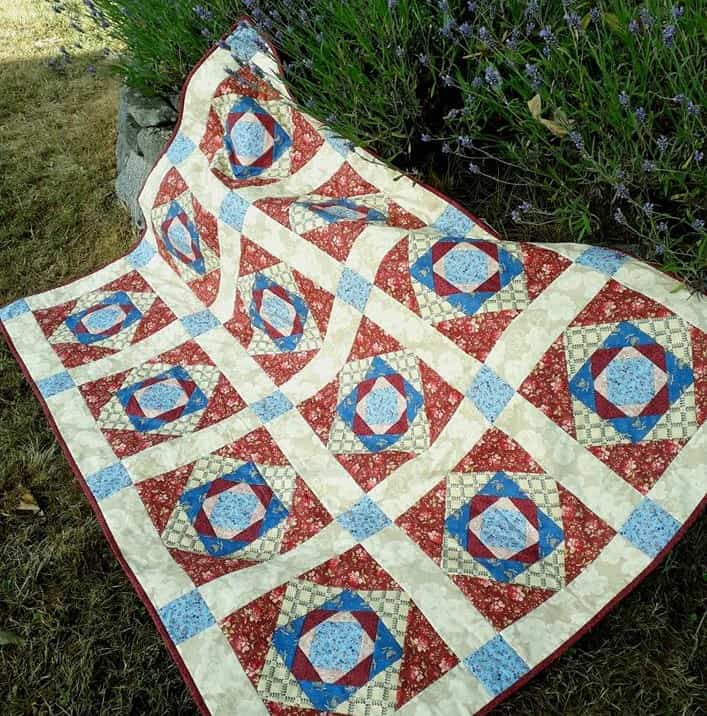
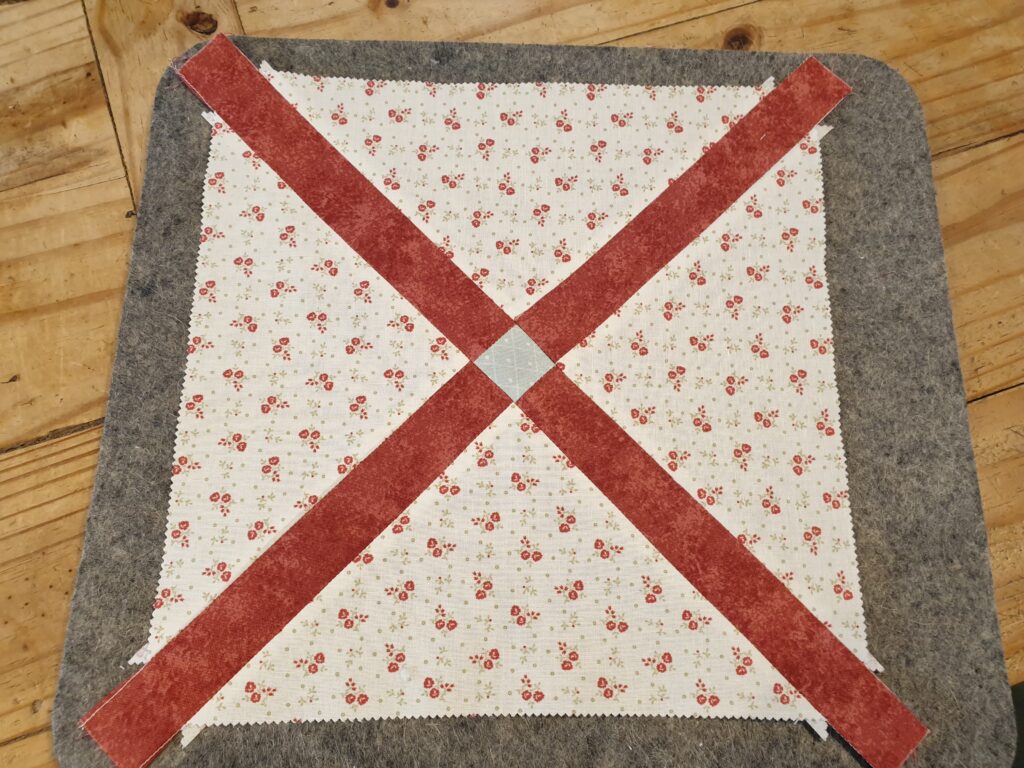
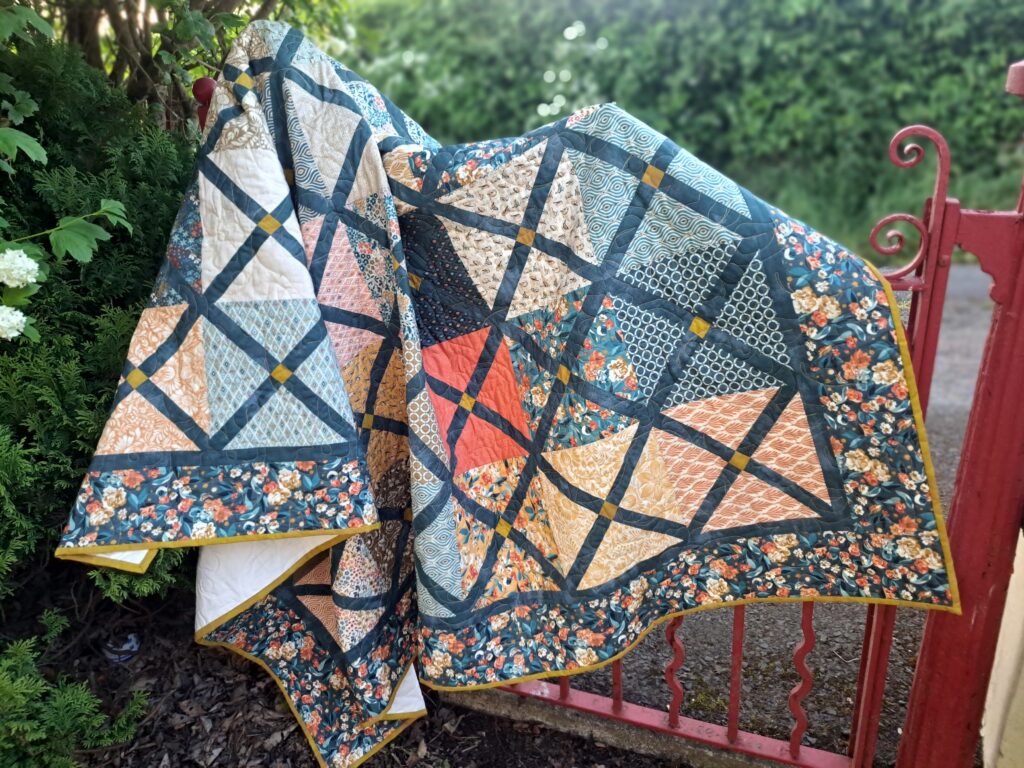
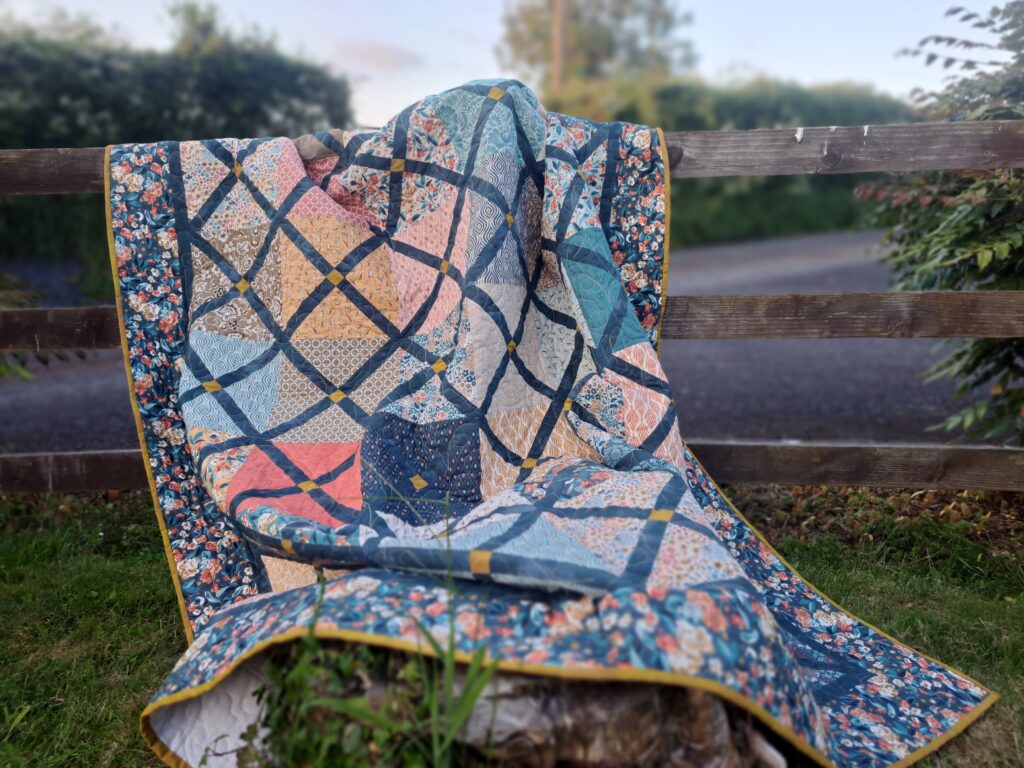
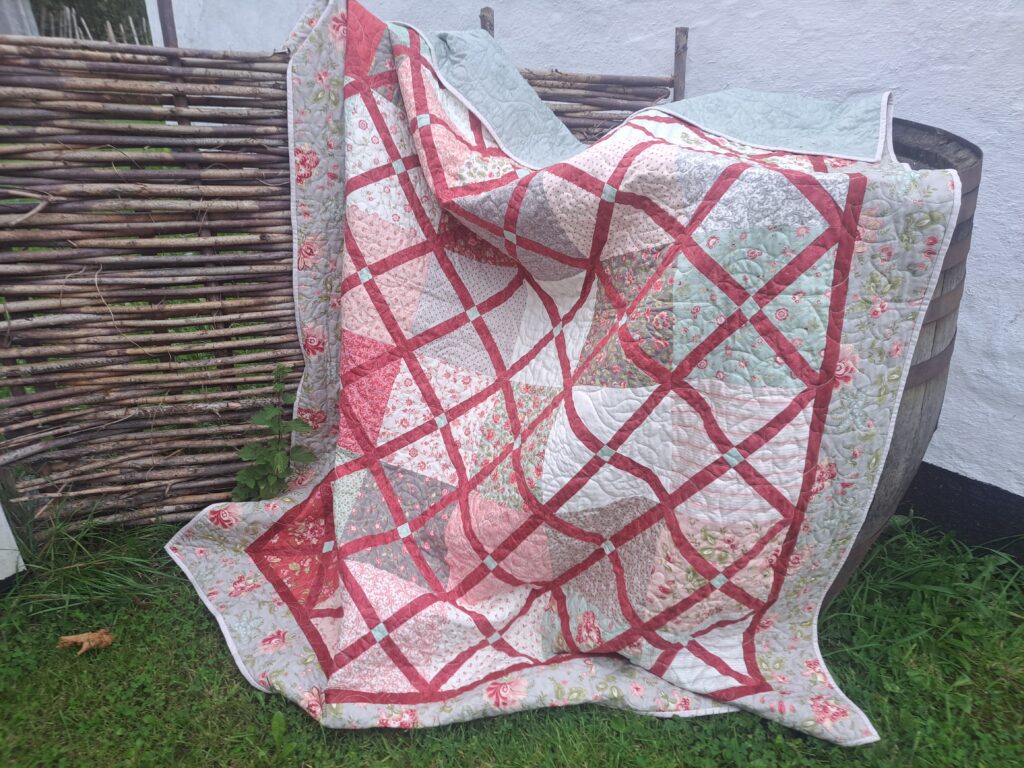
However, this quilt design started prior to then. In fact it was late 2019. I had a design for a quilt in my head and I started to work on it. I had the rough sketches and notes for the quilt using a Layer Cake and some fabric lengths. It was an easy quilt to put together. I had done up the notes for creating the blocks and sashing strips – all constructed using a simple construction technique. I had put the notes into a folder and set about making up my quilt sample. The quilt blocks came together well, and I was thrilled with the overall effect once the blocks were sewn together and created like a ‘trellis’ effect with the sashing strips meeting in the corners of each block.
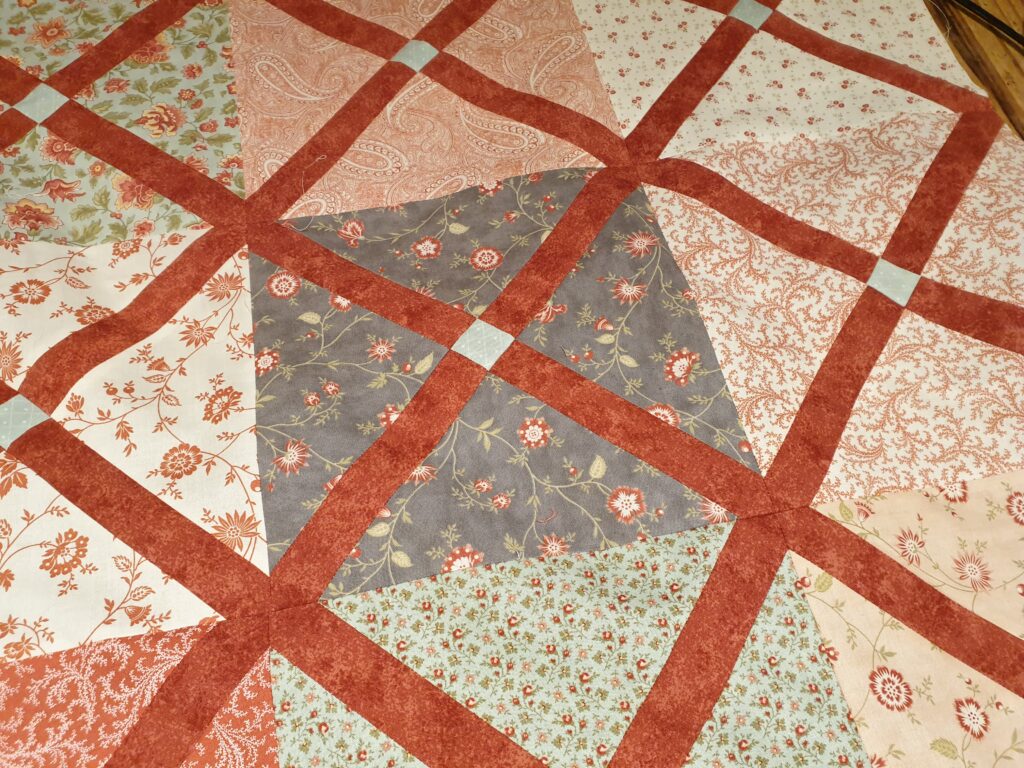
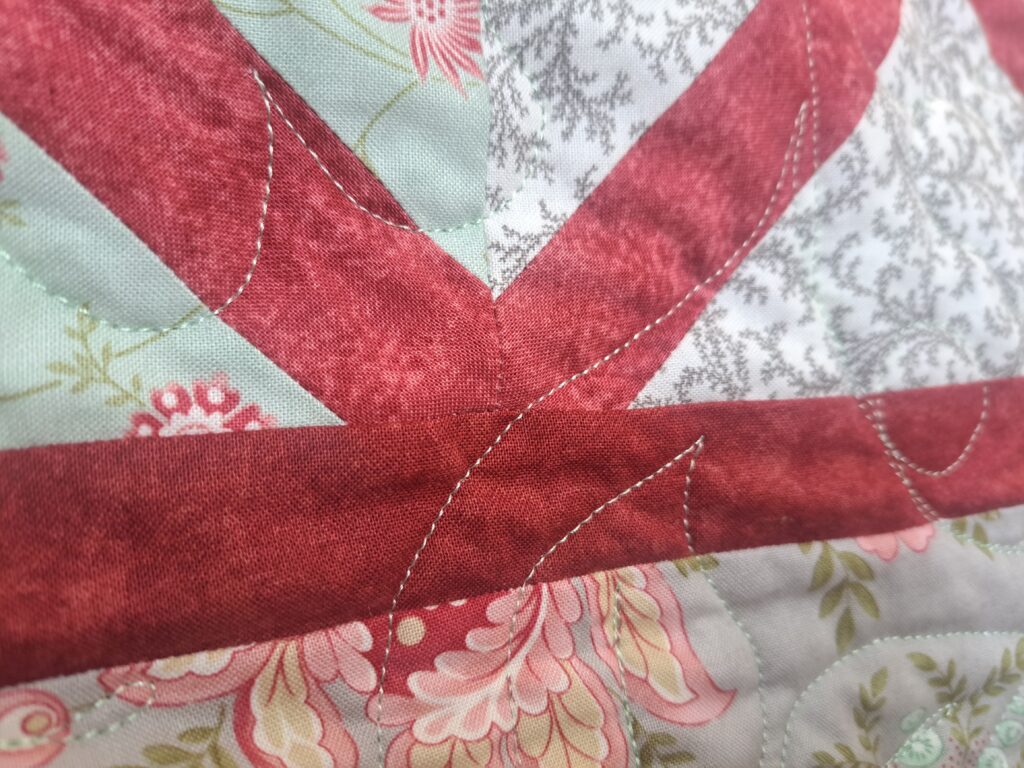
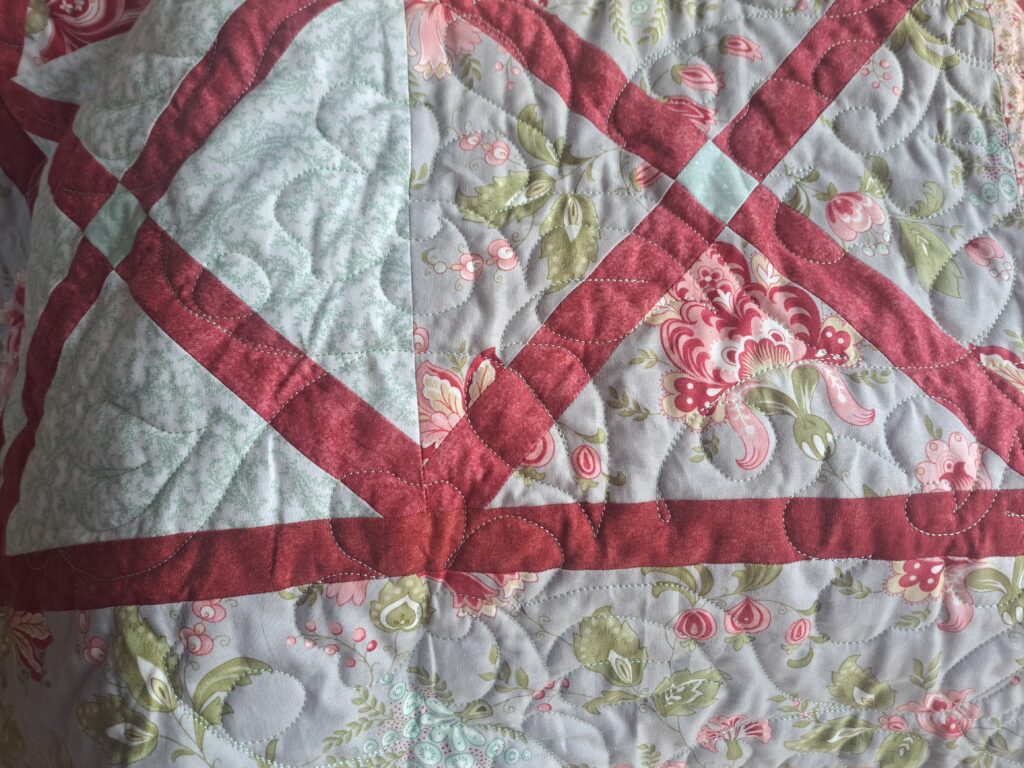
Then came to cutting and attaching the inner border…. That was when the FIRST MISHAP happened! I didn’t have enough of the red fabric to do the inner border. Remember, I was using my stash fabric …. But I didn’t worry too much as I knew it was a fabric line that was continuous due to it being a great staple in blender fabrics. I searched online for the fabric line and the needed colour – Red. Shouldn’t be too hard – Red is RED – right??? Actually … it’s not that simple. I should have known that not every Red is the same. I found 3 reds in the fabric range, I ordered them, and they arrived …. Only to find that …. NOT ONE of the reds were remotely the RED I needed. So I phoned up the fabric store and discussed my problem. I was told that it probably a RED that the fabric company had discontinued. Their suggestion was to post them over a snippet of the Red fabric, and they would try to match it up as best as they could…. And then LOCKDOWN happened, and I never heard back from them about a suitable Red fabric replacement! To add to it all, there were no other shops – everyone was in lockdown!

So my search for Red fabric was on hold. I put the quilt top away in a box. I still kept an eye out for any suitable red fabric and even rethought my quilt design. Fast forward many, many months (after purchasing any suitable red fabric that I saw online) and I came across someone on a Facebook De-stash group that was selling some red fabric. I purchased it and it arrived. Low and behold, the red fabric was NOT a direct match to the red fabric already in the quilt … BUT it was SO close that it was hard to tell there was a difference. I was now able to finish the quilt top by adding on the inner and outer borders.
Once the quilt top was complete, I thought that I should now start on finished typing up the final draft. Usually I do this BEFORE I sew up my design samples. So, since I couldn’t find a paper copy of the draft pattern, I knew it would be on the computer. To my dismay, there was NO draft pattern on the computer!! Who knew what had happened! I couldn’t even find any of my hand written notes. I guess after a few years of trying to find suitable fabric and a couple of lockdowns, I had forgotten the ‘safe’ place I had put it! (we ALL have that safe place …. right????)

So, this was now the SECOND mishap for this quilt! Are you starting to see a pattern arising here? I got back onto the computer and started to type up another first draft of the quilt, complete with NEW diagrams and instructions. I guess the positive outcome of this is that I now had better skills in doing up diagrams for the pattern instructions. Far more clearer than my first pattern. There is always a reason as to why things happen…. This second pattern version was far better than the first one. I was even able to do a mock layout on EQ software to see how the quilt would look once it was complete and to use the diagrams that I had created in EQ, in the pattern.

So, now that the second version of the pattern was in its final draft, I was able to send it off to the testers to test out the pattern. You have to agree that the quilt from one of the testers was simply stunning. Since she was local, we were able to load it onto the longarm as quilt it and I was fortunate enough to be able to take some lovely photos which really showcased it.
At this stage, my actual quilt sample was still lying in a box waiting on being quilted. But I was never able to get to that stage as my longarm was always busy with other quilts and it seemed to get pushed back all the time. I promised that I would finally get to it this summer (2023). It shouldn’t surprise me that it took over 3 years to get it to this stage … but it was great when it finally made it onto the longarm.

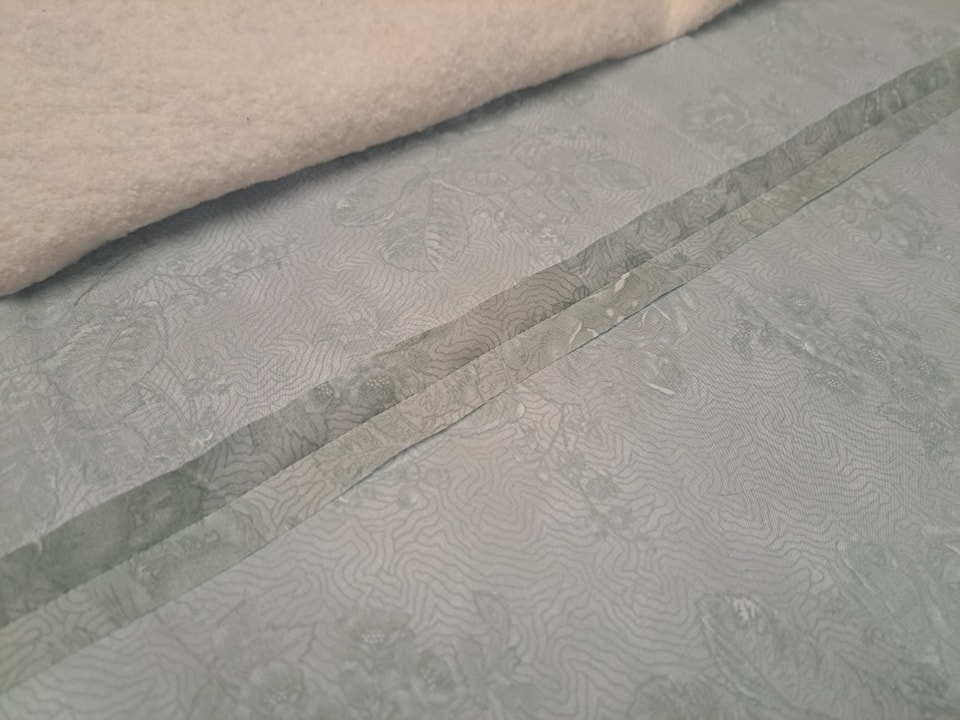
I guess you all know the saga of that incident – the THIRD mishap!! Even before it made it on the longarm, I mucked up the extra wide backing fabric!!! I don’t think there is many that have a seam in their extra wide backing fabric …. I meant the reason you purchase extra wide backing fabric … is so you don’t need to have seams! Well, trust me … this quilt decided that it needed to have a seam running in the middle of the quilt back! Not a disaster but hey … defeated purchasing extra wide fabric. So now that, THAT problem was solved, it was all about loading it onto the longarm frame.
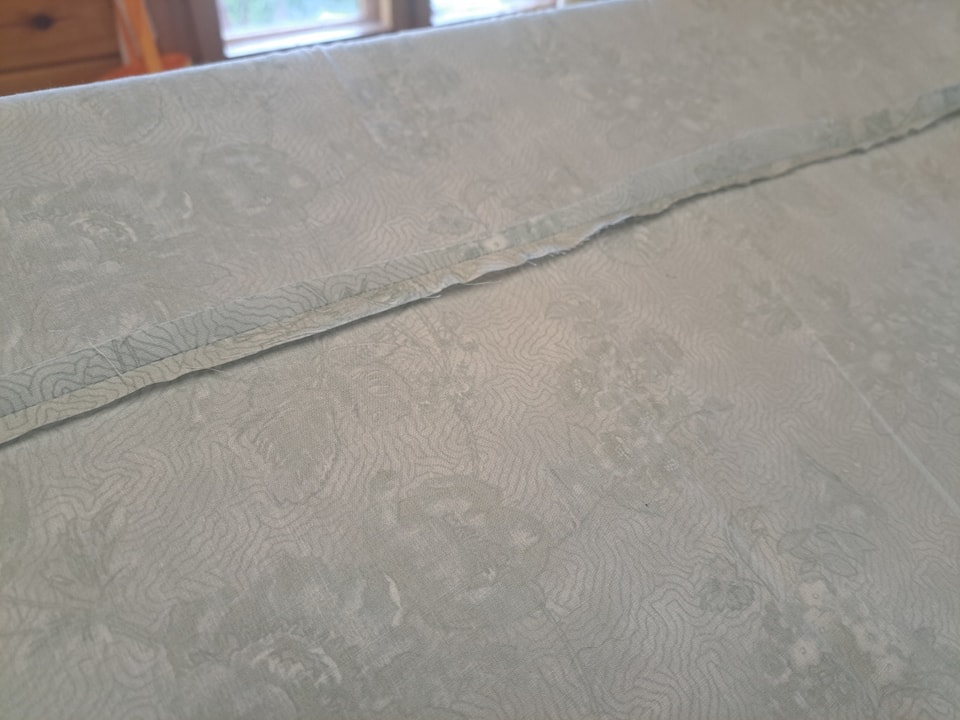
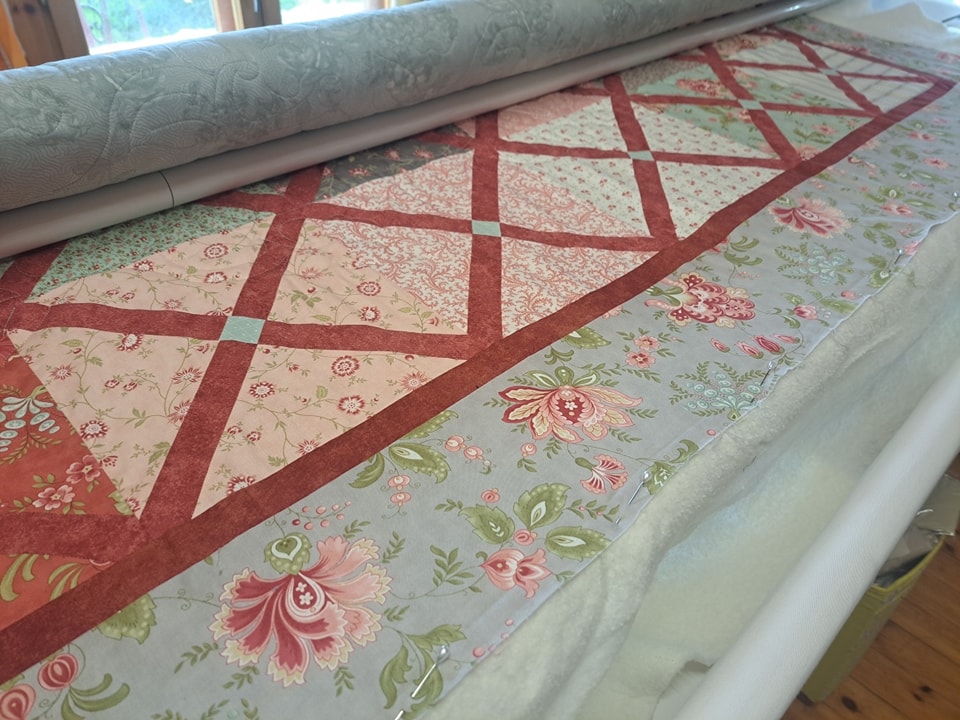
Once on the frame, the quilting design and stitching went great. NO problems at all!! Until it was near the end of the quilt – I only had two more quilting passes to go and the quilt was all finished!! You guessed it – FOURTH mishap!! The backing fabric was far too short for the quilt top!! I think this was about when I had my meltdown!!! It certainly had turned into the CURSED quilt!
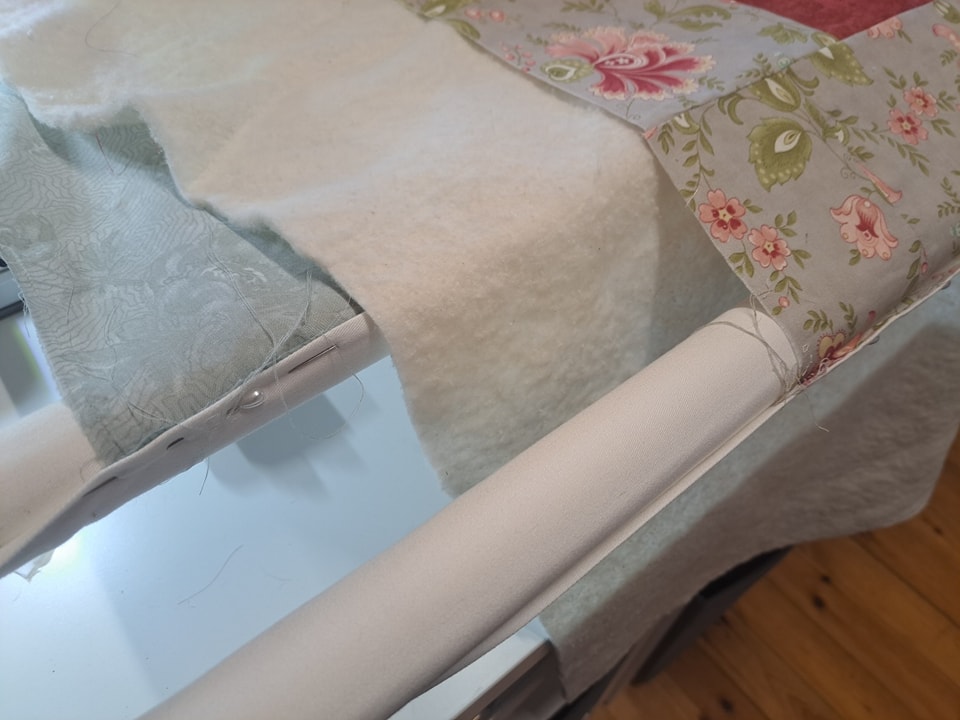
I can honestly say … a few ‘choice’ words were said … a few tears were shared …. And then I remembered, that once, when I first got the longarm, I had watched as many HandiQuilter videos as possible, and I vaguely remembered about one which explained and SHOWED how to attach EXTRA backing fabric WITHOUT removing the quilt from the frame!!!

I suddenly realised that it was not the end of the world and there is ALWAYS a reason (& lesson to be learnt) for mishaps. I searched the video and watched it, several times over. Turned up the music, took a few deep breathes and taught myself … HOW to attach extra backing onto the longarm frame! I can NOW quite proudly say that I tackled something that seemed impossible at the start …. Mastered it … and can NOW do it again … IF EVER this happens again. Let’s hope it doesn’t (or at least for a very long time) but it is always good to know that all things can be fixed (within reason). Nothing is truly LOST!!
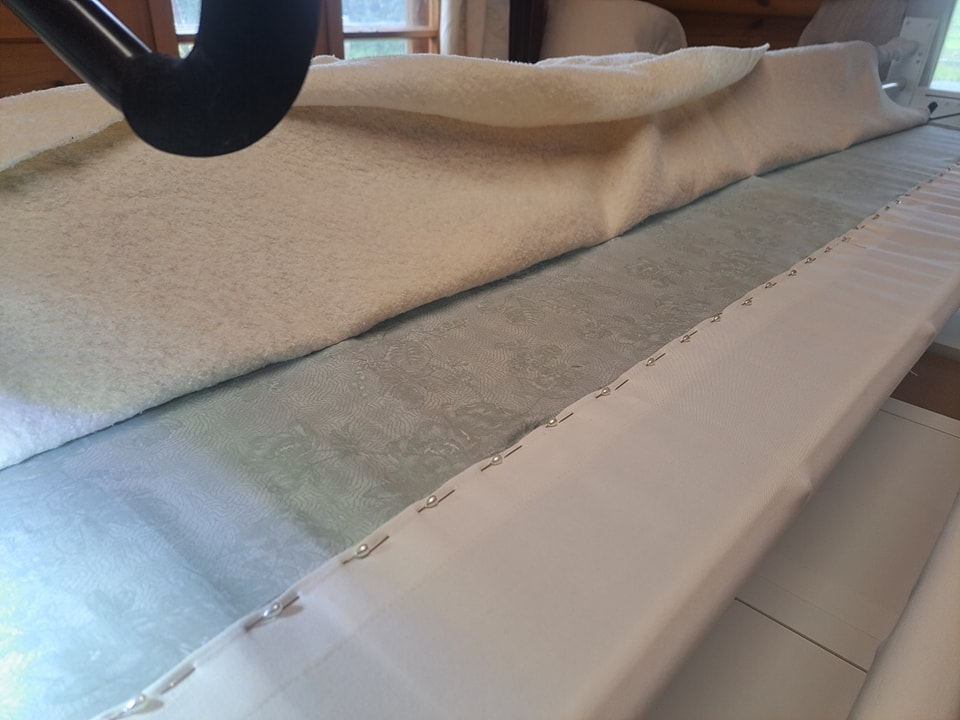
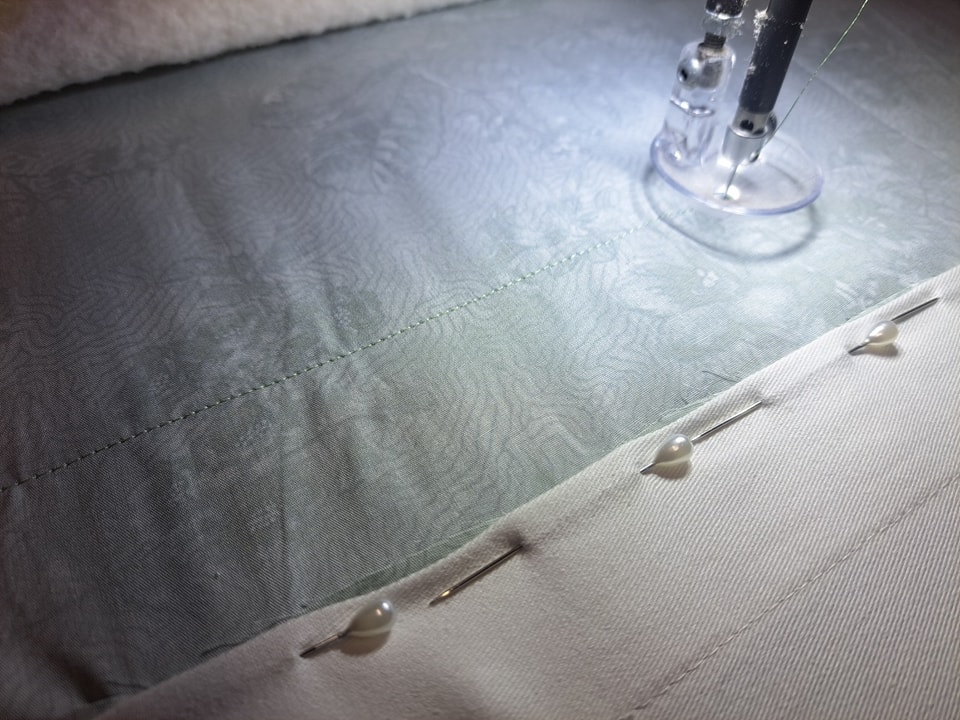
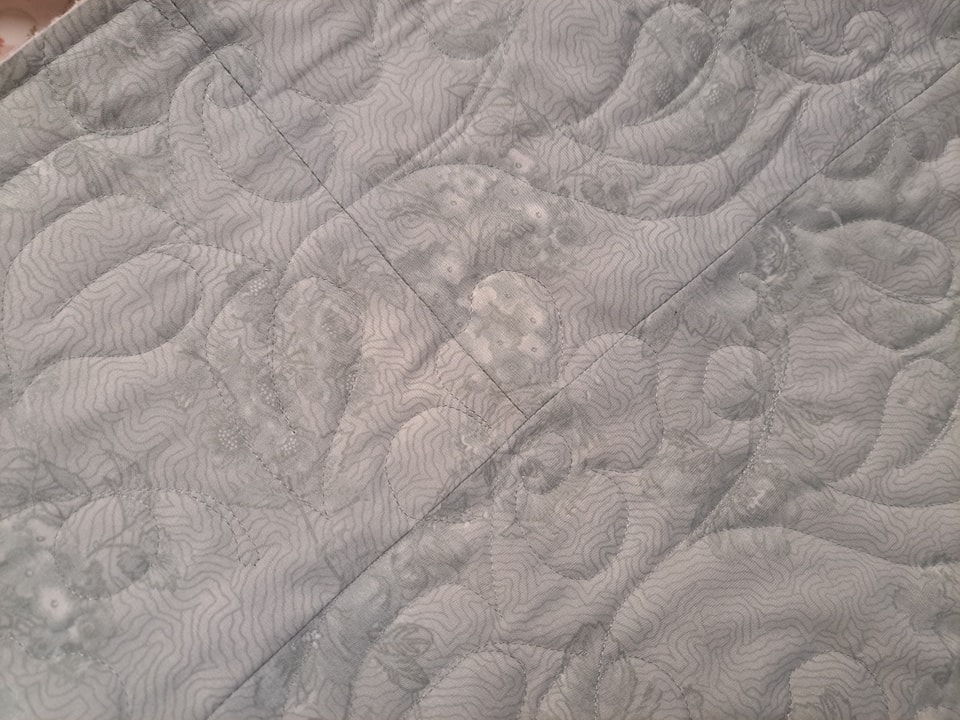
So with the backing fabric fixed (OK, instead of one seam, there is now THREE seams) … I was able to complete the quilting of the quilt and take it off the longarm. I could then attach the binding and hand stitch it. Finally, my quilt could be finished … even if was started 4 years ago!! But hey, the FIFTH mishap was about to happen …. The binding fabric that I had put away safe was NOT where it should have been! I searched my room for over an hour … I found LOTS of fabric I had forgotten about … But NOT the binding fabric.

I can tell you, that at this stage I was beyond caring …. I needed the quilt finished …. So I grabbed some suitable fabric that blended in and did a binding and got it handstitched.
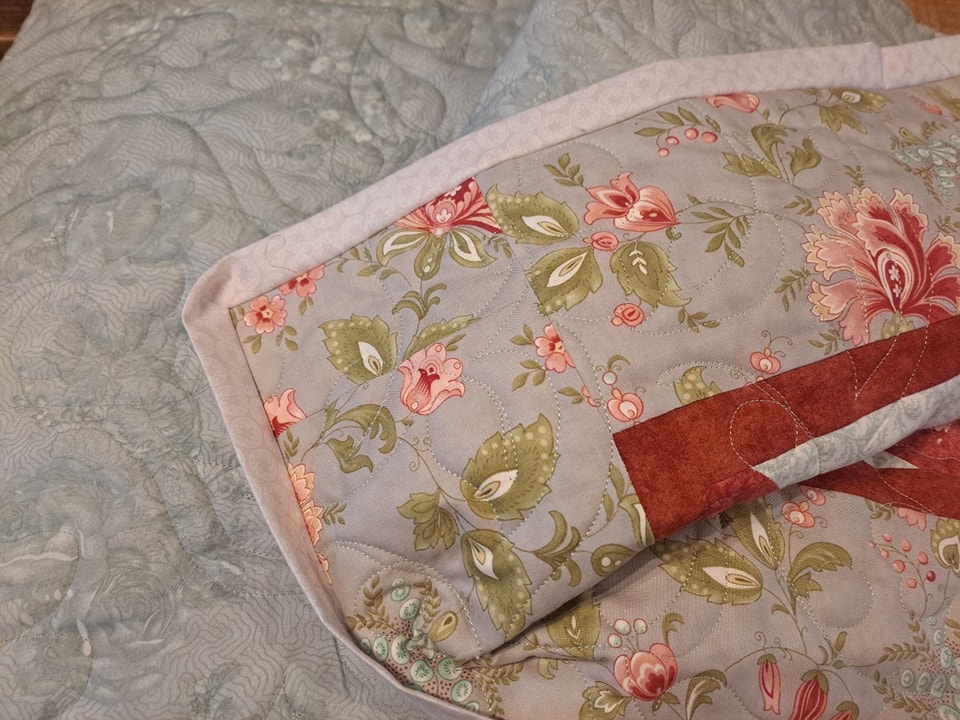
The saga of the CURSED quilt! So, is the pattern in any way CURSED ??? DEFINITELY NOT!!!

The actual quilt design, may look complicated…. BUT it is actually a simple design. It is just the journey I had in getting the quilt finished. I really enjoyed constructing the blocks and by following the simple instructions and techniques I have included in the pattern; you will also find that it is a relatively simple quilt design.

Though one word of advice – ENSURE that your Layer Cake fabrics are EXACTLY 10” square to begin with. If they aren’t, then you will struggle to get the essential finished block construction. You may think that ALL Layer Cakes are 10” square …. I mean that is what a Layer Cake is …. 10” fabric squares. This is what one of my testers found out. And in doing so, we all learnt that NOT everything is what it says it should be on the box! Measure beforehand. What is the saying – Measure twice, Cut once!!

This was such a learning curve, that I had to include this in the pattern.

So please, do not be put off by my cursed story of the quilt. I truly loved making the quilt and found it such a relatively easy make (& quick) especially if you follow through step by step in the cutting and preparation of the blocks. I am keen to make this quilt again …. And see if I can cancel out all the ‘cursed’ incidents.

The pattern is now available on my website …

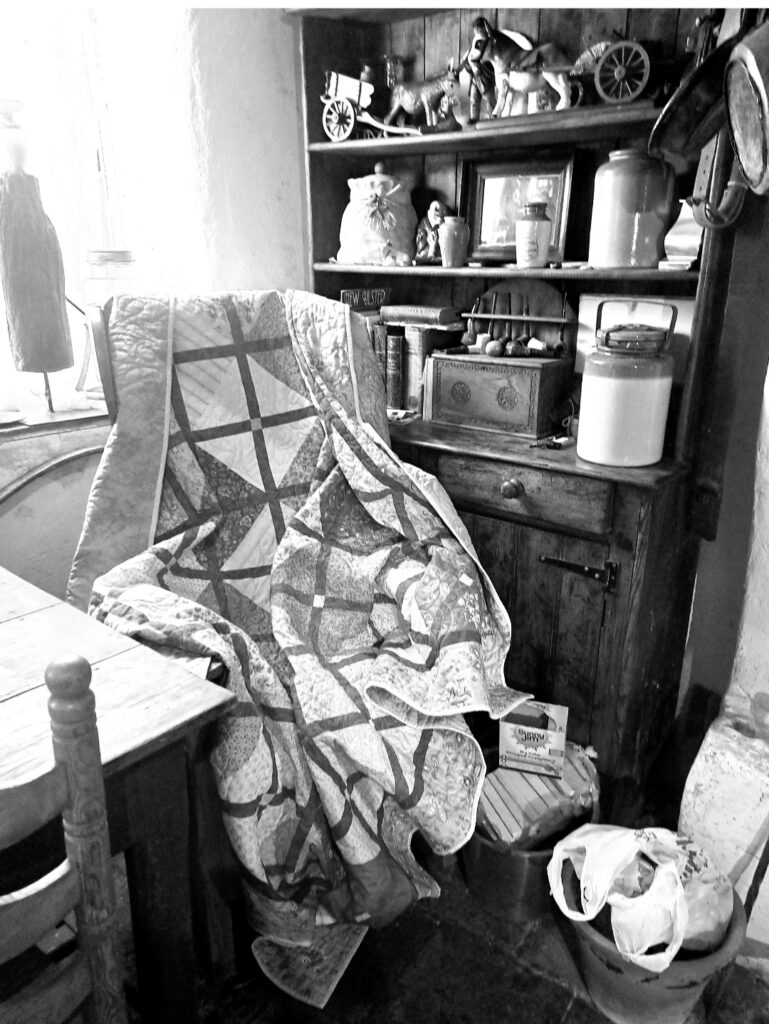
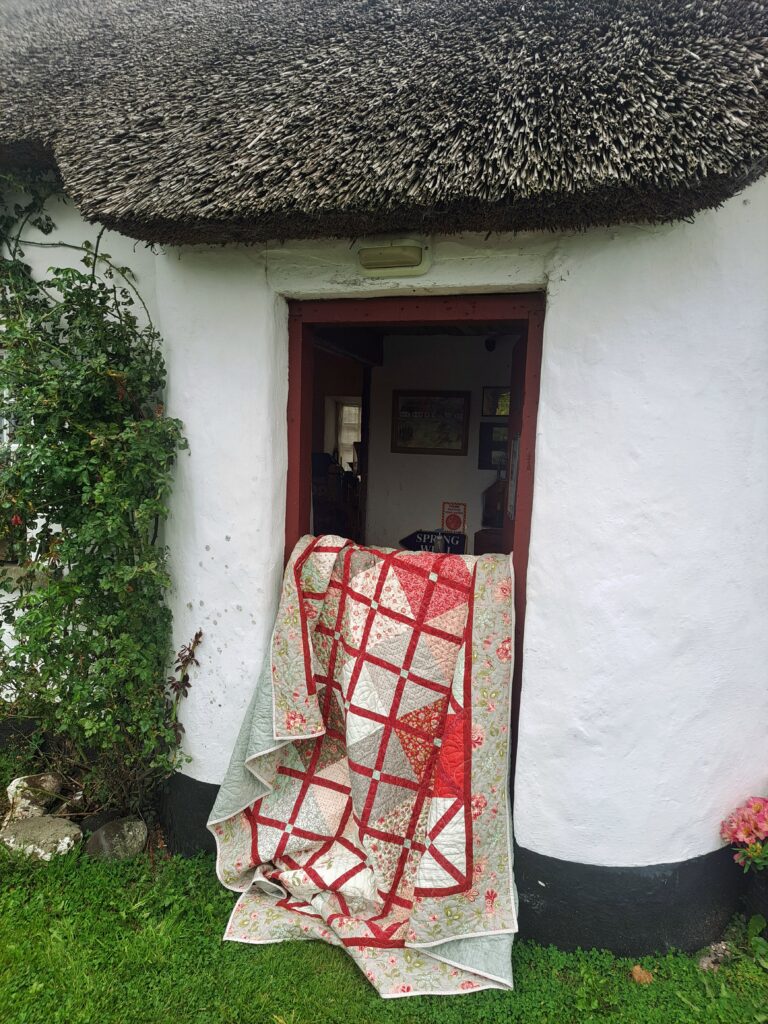
p.s. I couldnt resist taking the opportunity and doing a photo shoot of my quilt at the charming historic 300+ yr old Dan Winter’s cottage just outside Portadown, Northern Ireland…..
New Designs – Star Flower Collection

Featured

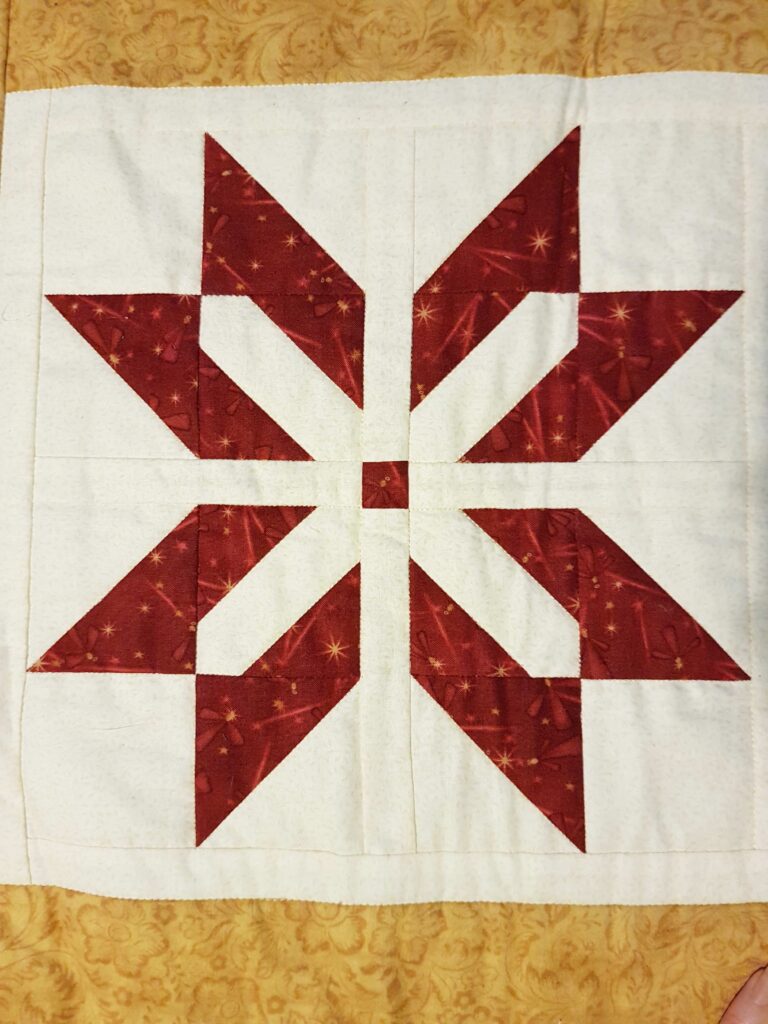
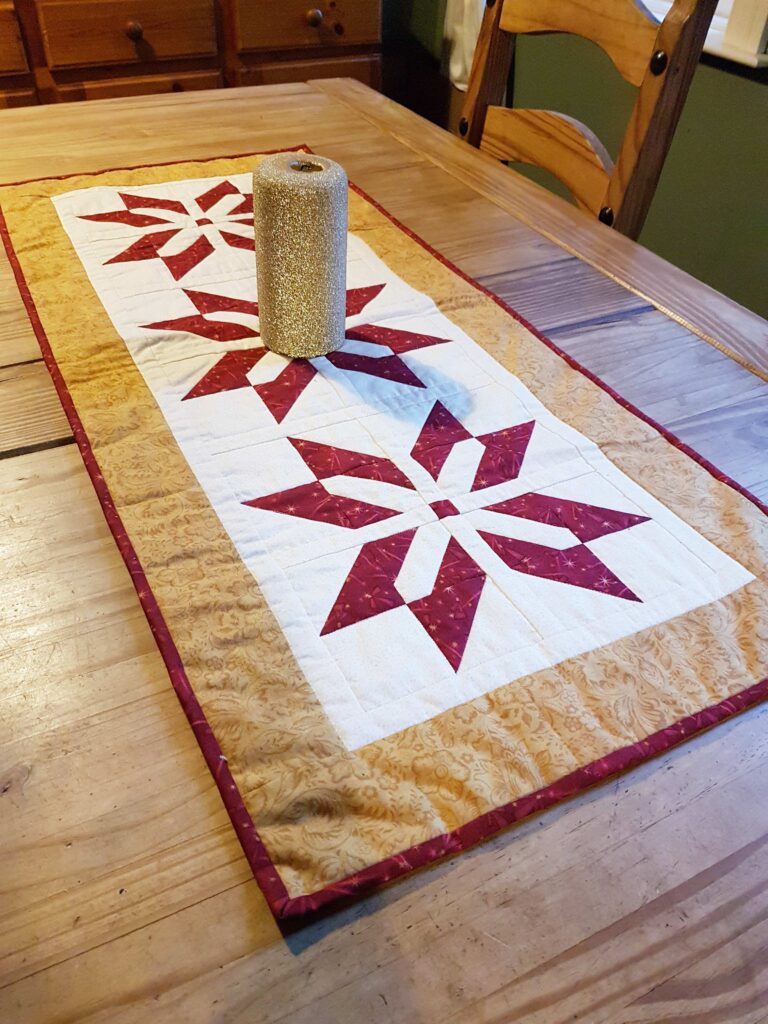
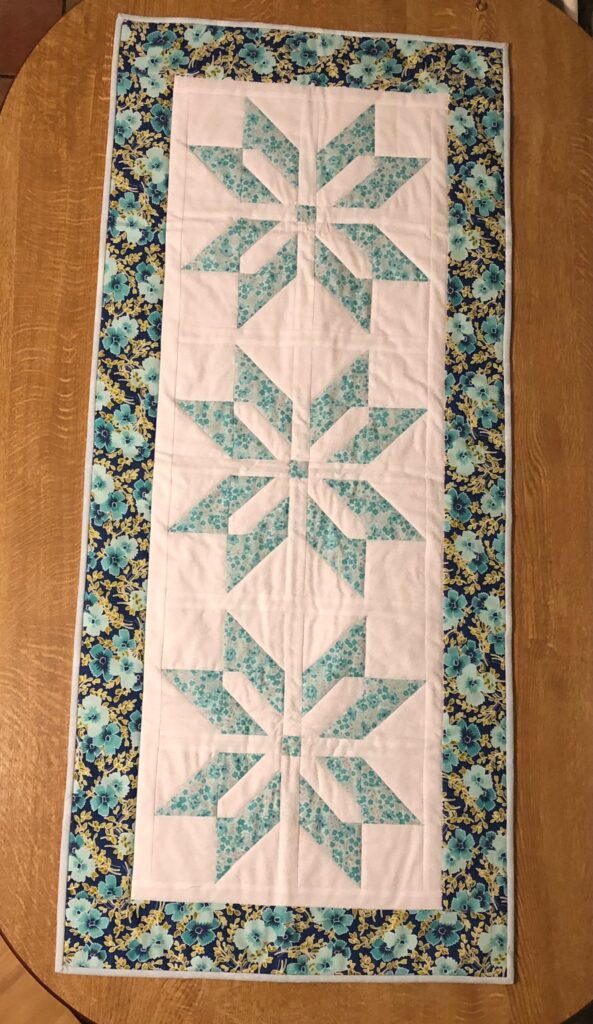
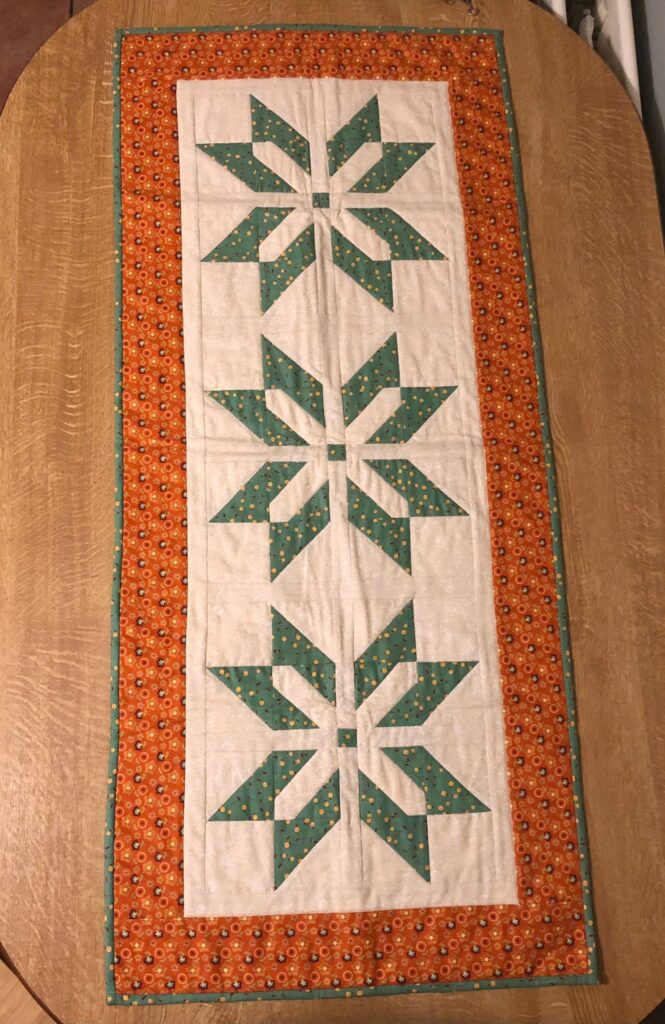
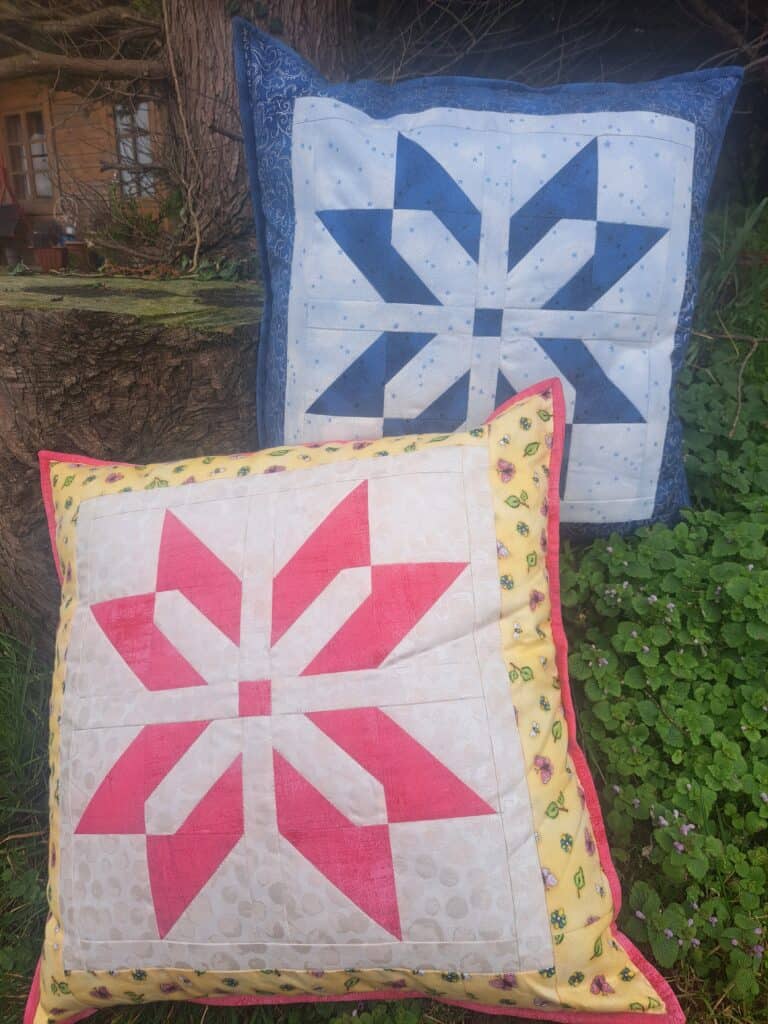
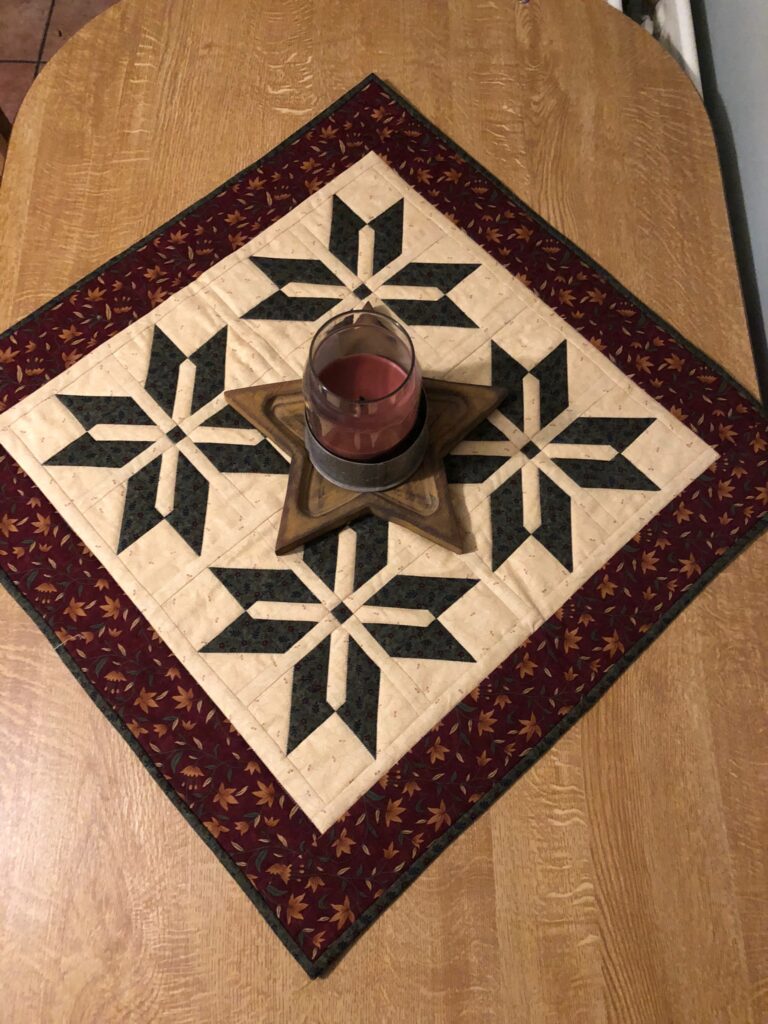
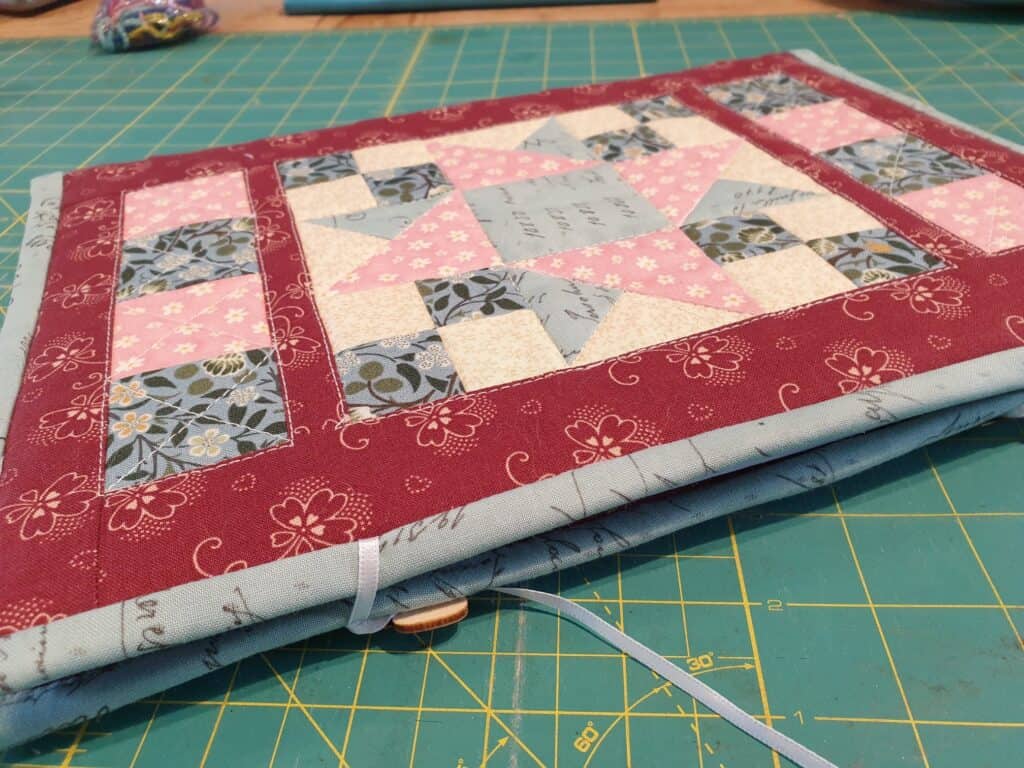
Going back several years, a table runner was designed, pattern written up for a workshop on furthering your sewing techniques…. A table runner that featured several small blocks …. Blocks that were named …. Half square triangles …. Hatchet blocks …. And put together to form a lovely eight pointed star….

Star Flower Block

It was a lovely block and made an even prettier table runner when several blocks were joined together.

Fast forward to a few months before Christmas 2022 …. And one of the ladies at our weekly sewing class mentioned the table runner that she had made at the workshop all those years ago…. How it was one of her favourite table runner patterns to do … and how much she had learnt from that workshop and the new techniques learnt. It was her ‘Go to’ table runner to make when she wanted to make a present for someone.

I had actually forgotten about the table runner … and had to be reminded of it …. Once I saw the pattern, I realised that it was still lying in the depths of my computer hard drive …. I had never actually gotten round to publishing the pattern!

I decided to print out the pattern and update it, so it was more in keeping with my current pattern formats. That was a task in itself …. It is amazing how much one’s pattern writing have come since it then! At another weekly sewing class, another student mentioned how the design was lovely but was definitely advanced for her skills! I challenged her and said that I would give her the pattern once I had updated it and she could sew it up …. (actually meant that she could test it for me) … Well, she accepted the challenge and found the instructions easy to follow and the cutting instructions/diagrams made it so less daunting! In fact she loved the design/table runner so much, she made two of them for Christmas presents! Think it is safe to say that the pattern was rewritten clearly and with simple to follow instructions.

The table runner pattern is available in both PDF and printed format.

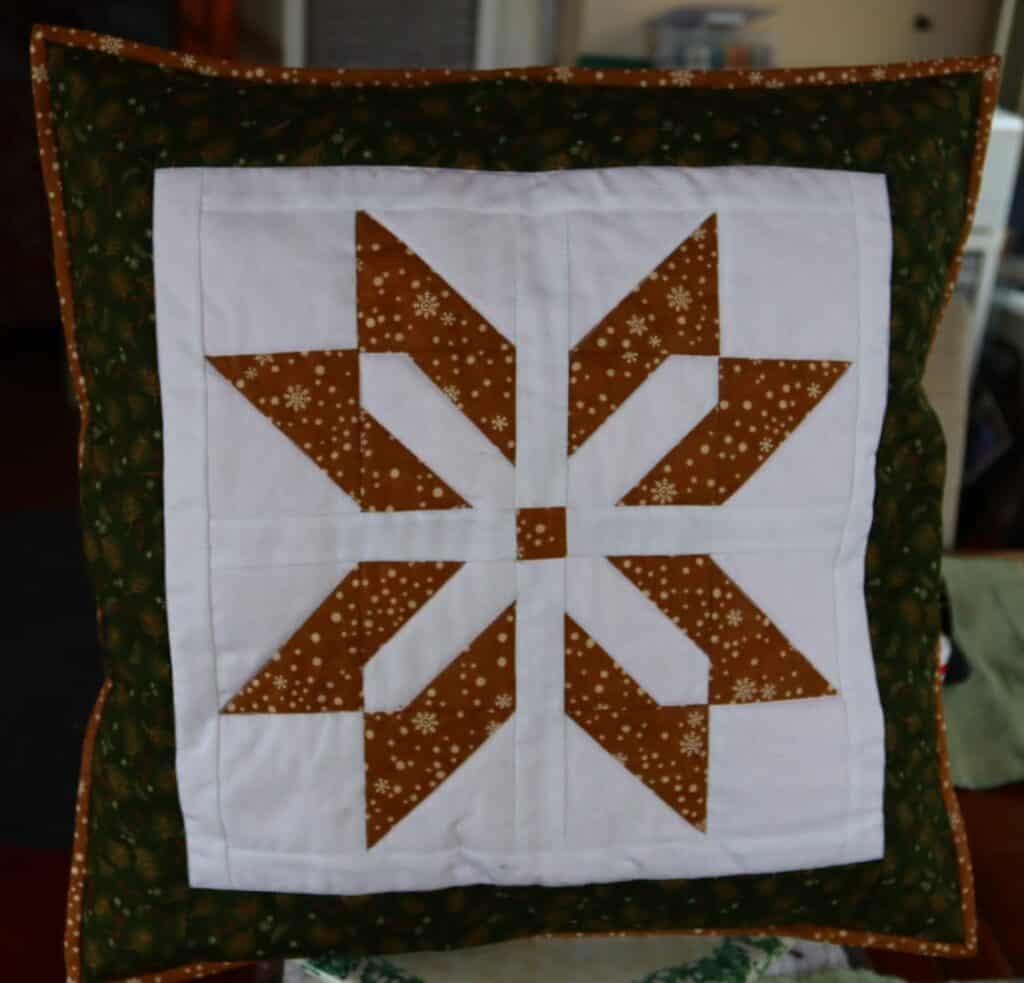
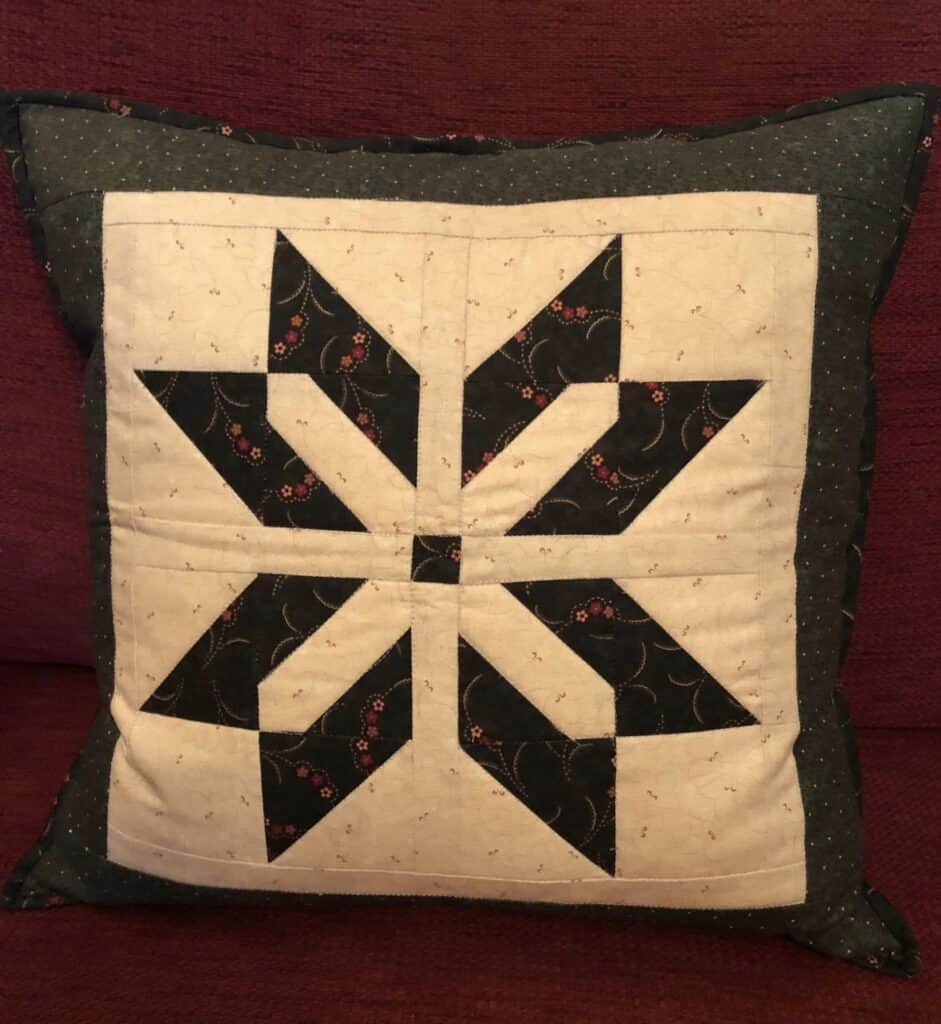
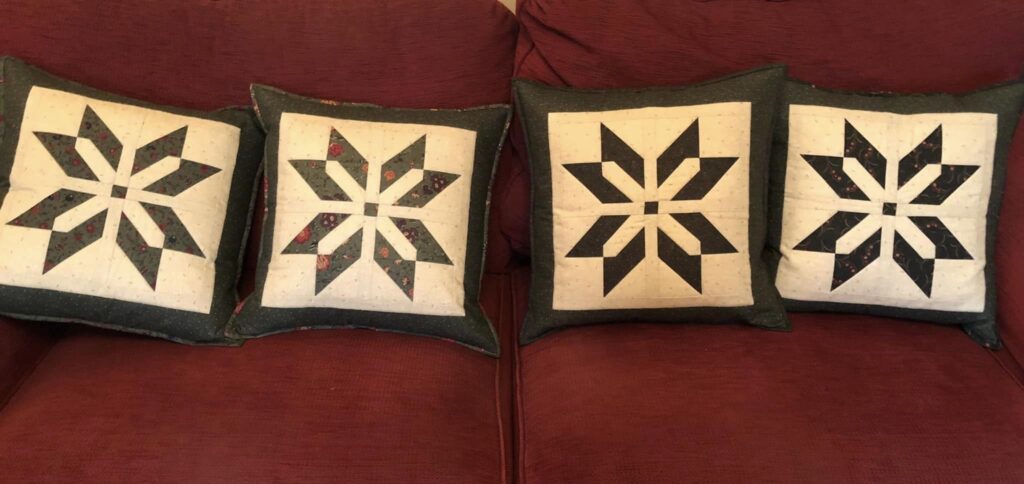
So after completing the two table runners, my ‘tester’ came back to say how much she thoroughly enjoyed the design, and it would be lovely as a square table topper (would suit her Mother’s round dining table) …. ‘it would also make lovely cushion covers’ …. Oh and wouldn’t the block make a gorgeous quilt?!

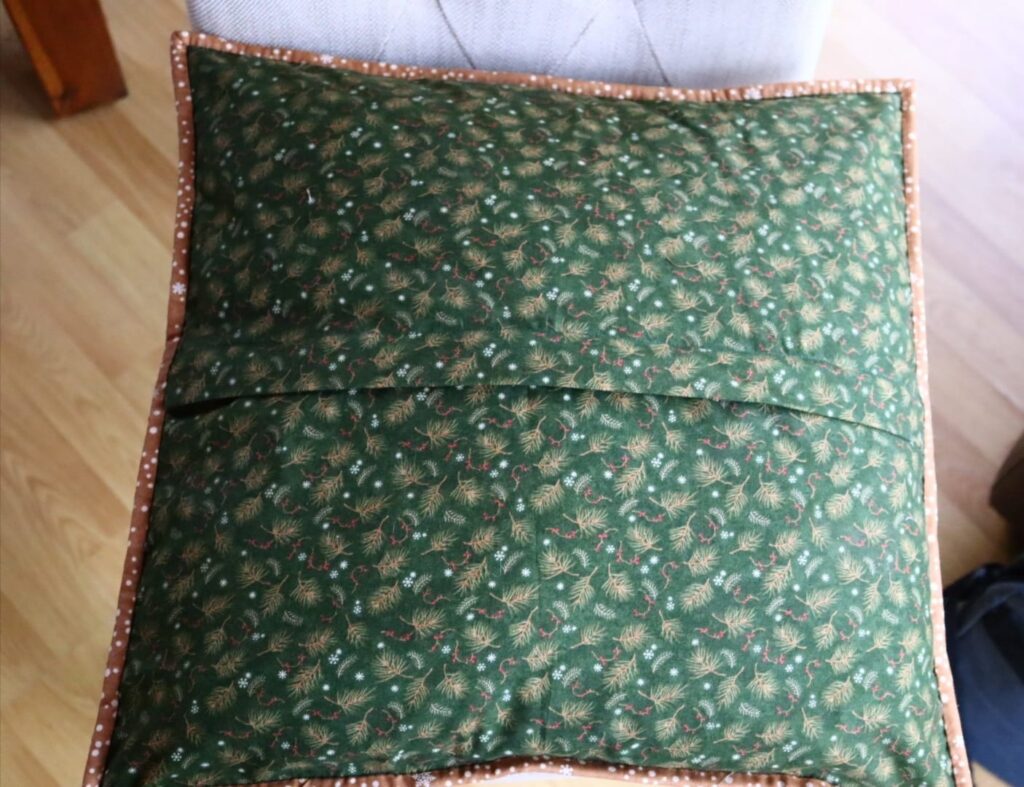
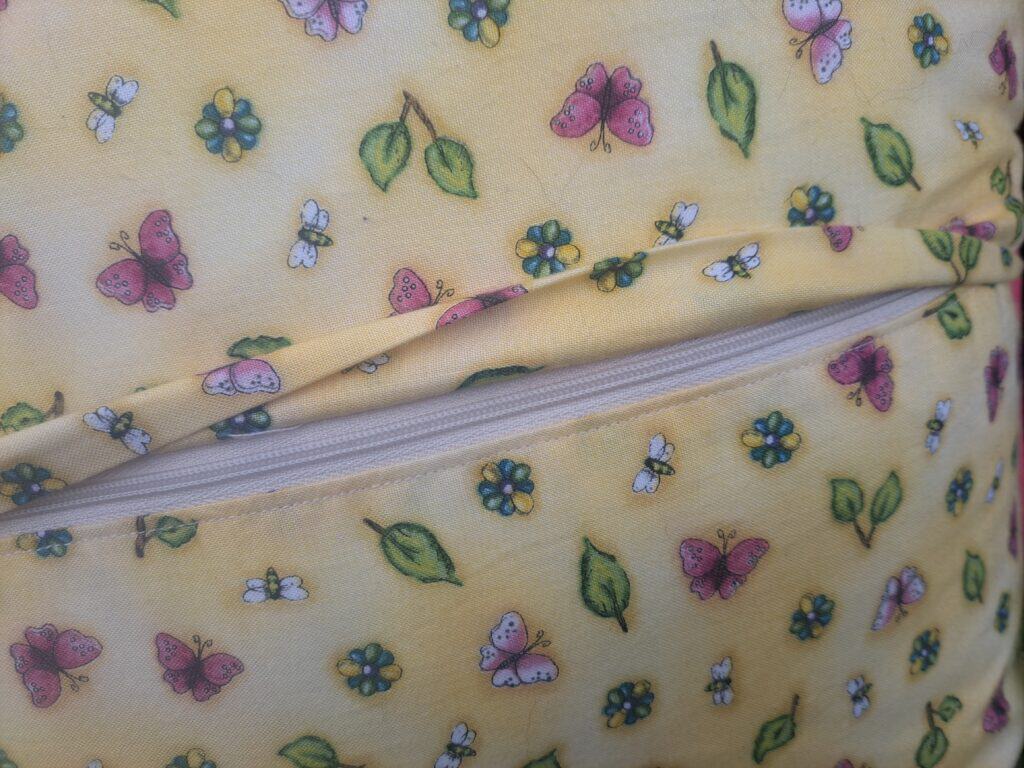
I guess it is safe to say that a challenge was made to me, and I couldn’t refuse! …. I wrote up a pattern for a cushion cover. However, I didn’t want to finish this cushion cover with my usual button closure on the back. I wanted to have a zip in it!  But not a zip placed in the seam … also wanted binded edges …. So … if the zip was not to go into the seam … and with binding around the cushion …. The zip would need to be placed in the back of the cushion cover. I didn’t want the zip to be seen …. I really do dislike a zip showing on a cushion cover. So …. The idea of having a flap covering the zip was born … a zip discreetly hidden under a flap of fabric on the cushion back.

The Cushion cover pattern is available in both PDF and printed format.

The best thing about putting zips in … and NOT using pins …. Is to use washable basting tape! This really is a game changer! No more scary ‘putting in zips!’ trauma!

Even my testers were like ‘NO, I cant put a zip in!’, ‘My zips never turn out right’!! Well, the feedback from the ladies was brilliant. I think it is safe to say that sewing in zips is so easy! Especially when you use the basting tape. If you have never used basting tape before to sew in your zips …. OR … if you have never sewn in a zip because it is too scary … then do not be afraid … to do be put off with this pattern …. The instructions and diagrams, guide you through step by step in sewing in the perfect discreetly hidden zip into the back of a cushion cover!

Zip Flap closure

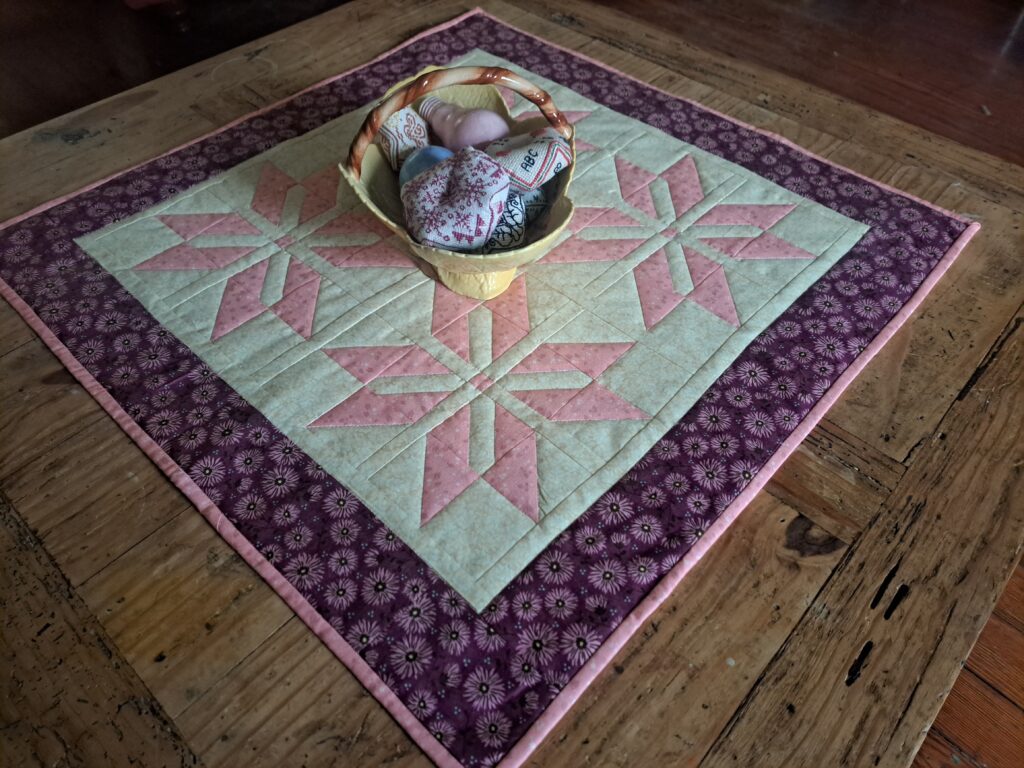
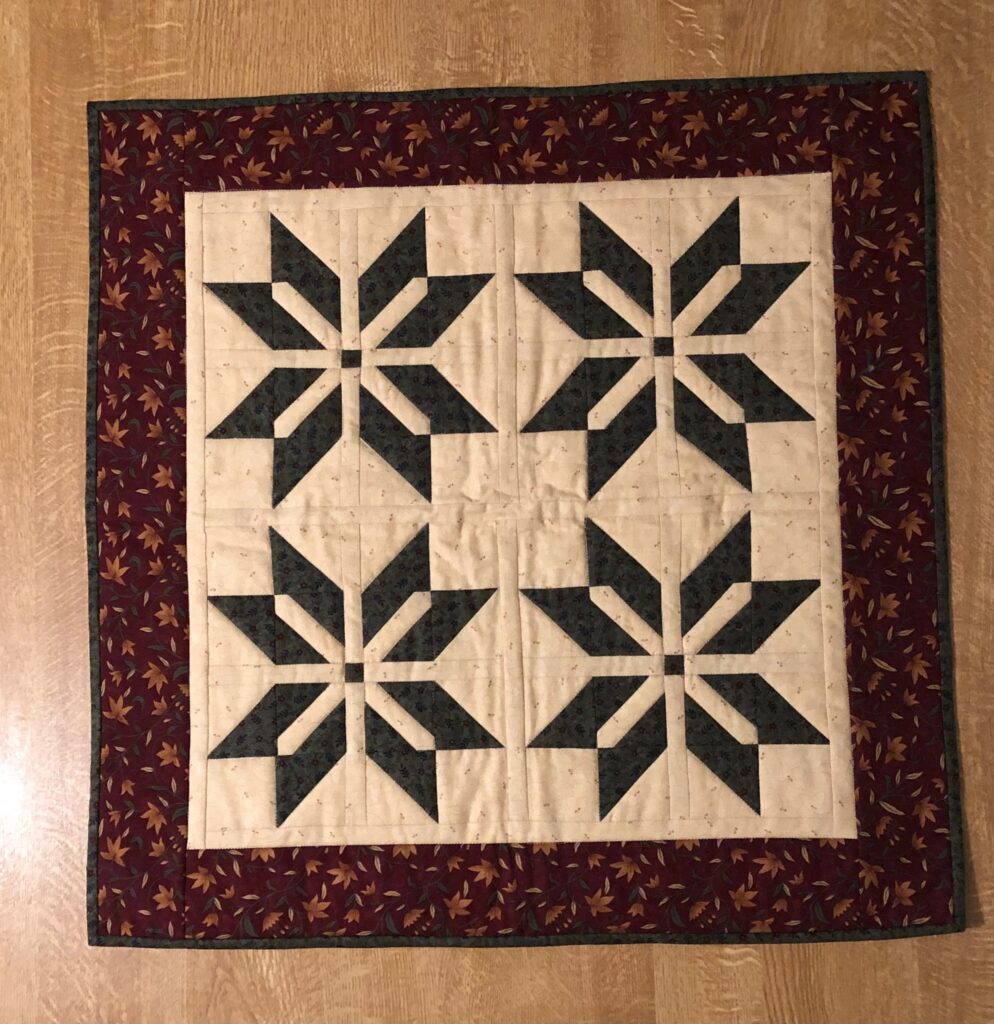
The next challenge was the table topper for mother’s dining table … This design was a bit more complex. I could have just used four blocks from the cushion cover and have a square table topper. But the blocks from the cushion cover and the table runner were quite large. If I used that sized block, it would have made my table topper come out quite large. I wanted it to be a reasonable size – around 22-24” square. So I had to go back and work on my figures and have a play with sizing and measurements – this is where maths comes in handy – not my most favourite/easiest subject at school. The blocks needed to be smaller, the hatchet block needed to have a smaller section of fabric showing in the centre. It was all trial and error and making up a few hatchets until I came up with just the right distance in the block.

The table topper pattern is available in both PDF and printed format.

Then Christmas comes along and other work commitments that needed priority over the design samples. I had them sewn … just had to hand sew all the bindings. So, I quietly worked away on the hand stitching when I had a spare moment. I rewrote the pattern drafts, got them proof read and finalised on the computer.

I did had to take photos of the finished items for the pattern covers and website. It really is quite hard to get the time for a photo shoot and just the right weather to take some outdoor photos. But in the end I managed to get all that sorted.

So since Christmas I have been finalising the patterns on the computer and I am happy to say that these patterns are now ready for the website.

The block really is quite stunning and is far easier than it looks. It would not be a beginner’s patchwork pattern but great if you are wanting to further your techniques. The pattern instructions and diagrams are clear and easy to follow.

These designs would look great for Christmas or anytime of the year. Just change your fabric choices. All three designs have been made in a variety of fabrics to really show off just how versatile this block is. I think the hardest part of making this pattern is deciding if you want to make it up with Christmas fabric, in autumn tones or spring colours ….. So why not make up several of each and then you can enjoy the designs all year round!
Quilter’s Handbook – Basic Reference Section

Featured

I have written a couple of blog posts about getting my craft snug (and stash/materials) organised in the lead up to my latest release – The Quilter’s Handbook. I have gone over the first two sections in the handbook – Inventory Section and Planner/Journal Section. I hope you found those posts to be interesting and helped to encourage you to get more organised with your quilting area. If you didn’t get a chance to read them, please do.

Have you ever had a tension issue while sewing and completely forgot just how to fix the problem? Or maybe you have been stumped on how to cut the correct measurement of fabric pieces needed? You may feel completely confused when confronted with the names of fabric pre-cuts or quilting terminology or even wondered on just how big to make the quilt which is to go onto a particular sized bed, etc.

Well, the next section in the Quilter’s Handbook deals on just those issues. I have complied the most common issues that we all experience at some stage. Now you just need to refer to your handbook for quick reference, instead of having to try and find the answer online and never knowing exactly where to look. Why waste time searching while you could be spending that time quilting?

Basic Reference Section

So, just what is in this section?

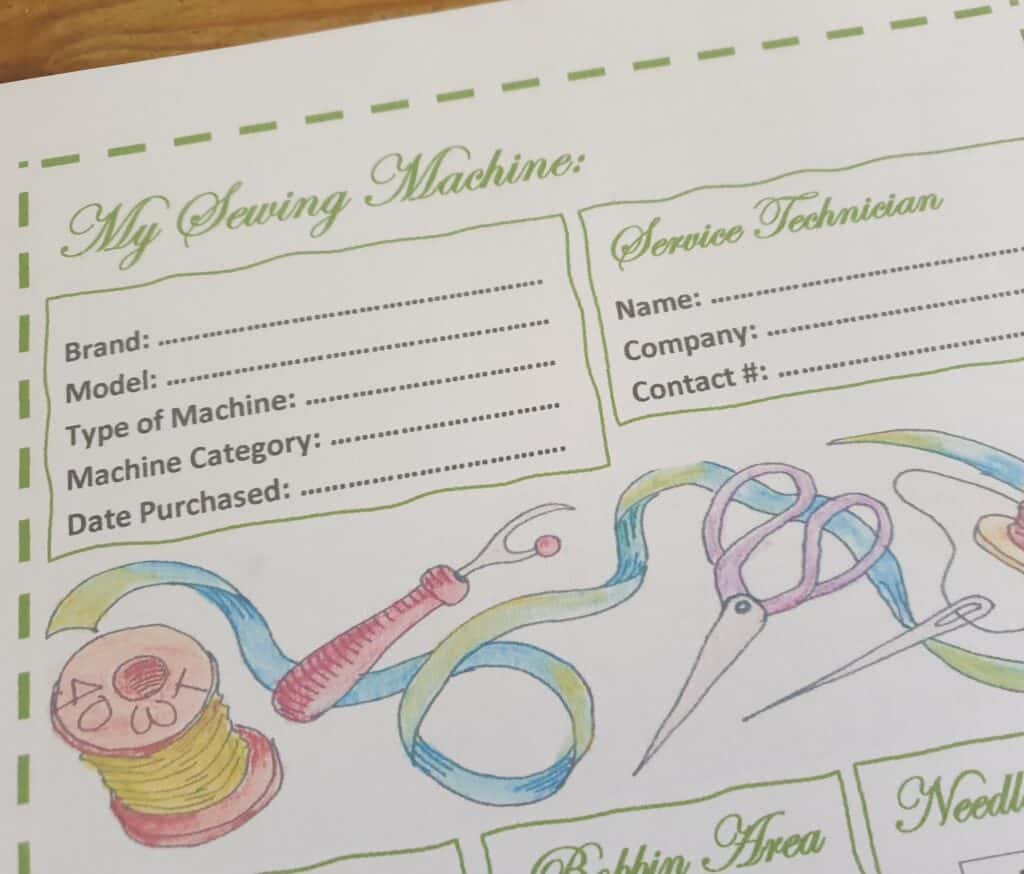
I have designed a template that is all about our sewing machine. It has space to fill in all the details of our sewing machine – Brand, model, and the category group of the machine if applicable, along with any extra feet/tools you may have brought for your machine. I have found this handy as I have quite a selection of extra specialised feet for my machine. My machine is also quite a specialised machine, and it is in a certain category which is important for when I am wanting to order extra bobbins or feet for my machine. Without knowing this category, I could purchase the wrong foot/bobbins for my machine. I can assure you I have done exactly that in the past! With these details recorded in my handbook, I can now quickly double check what category I need to search for when purchasing extra parts for my machine. Not all machines will have this, but it is always handy to have that recorded somewhere that it is quick to double check.

I have included a section where you can write in all the extra tools and feet that you have purchased for your machine. I found this quite useful when I went through my pile of feet that came with the machine and that I have purchased along the way. I was now able to identify and write down what the feet where for. My next step is to sew a handy zipped bag to house the feet separately, along with any instructions sheets that came with them, so I can keep them safe and know exactly what they are used for. This is especially true for the feet that I wouldn’t use as often but still need to use on specialised sewing projects. I am still working on the perfect bag to keep them all where I can also label each compartment with the name of the foot!

There is space to record the contact details for the service technician that you may use for servicing/repairing your machine. You no longer need to search frantically for the contact number that you wrote down on a scrap piece of paper or wonder where you placed their business card …..
I have drawn up sections where you can write down the dates of when your machine was serviced, as well as the date when the bobbin area was last cleaned, and the needle changed.

If you hold more than one sewing machine, it is handy to have one for each of your machines. I have done one up for my Pfaff sewing machine but also plan on doing one up for my longarm machine so I can keep a record of all the extra tools and feet that I have purchased for the machine. It just helps for when I may want to purchase anything in the future and I know straight away what I have for the machines, instead of having to go and search through my box of tools or feet for the machines.

My Sewing Machine

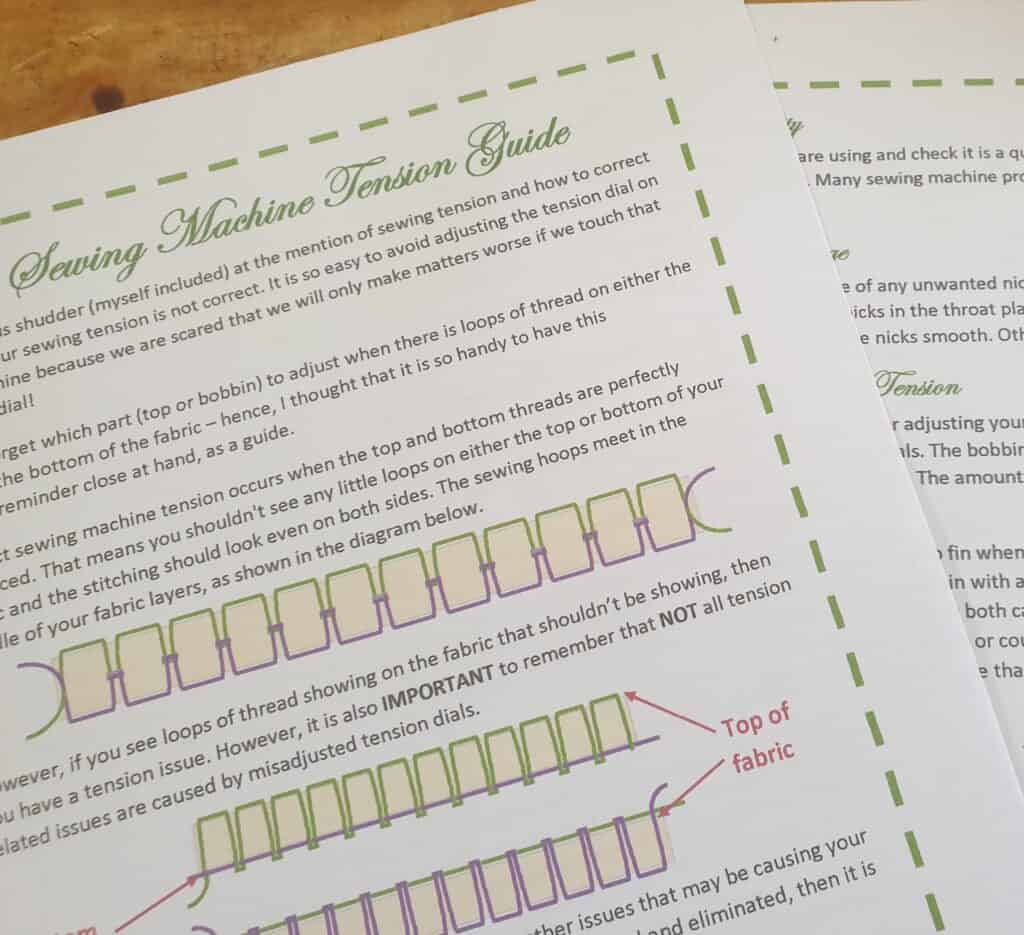
How many of us shudder at the mere thought of having tension issues while we are sewing? We can be sewing quite happily only to discover that our sewing is not right, we either have loops on the top or bottom of our fabric and the stitching is not balanced. One pull of one of the threads and the whole stitching comes undone!

I know I really do run scared if the machine has any tension issues and I dread having to touch my tension dial! I seem to inwardly hope that I never have to fix any major tension issues. However, having issues with our stitching where the loops do not meet in the middle of the fabric layers does not instantly mean that we should fiddle with our dials! Before we go anywhere near our tension dials, there is so much more that we should check. The dials are what we check last, after we have go through and checked everything else!

This handy reference goes through what to check when our machine is giving us tension problems and once, we have eliminated all of those other possible issues, we can then start to adjust our tension dials.

However, I have always found it hard to know which way to move the dial – is it up or down the number range depending on if our tension is tight or loose? I also tend to forget how to work out from the way the thread shows on the fabric as to whether the tension is too loose or too tight. I need to have something visible in front of me to remind me.

I really do dread tension issues, and my longarm machine is very sensitive to having the correct tension to ensure that the stitching is perfect with no loops on the bottom or the top of the quilt. The stitching loops need to meet in the middle! I knew that I would have to overcome my fear of tackling and correcting tension and I had gotten to be quite good with ensuring the correct bobbin tension. The slightest things would throw it off, even were the tension would be off if the bobbin was not wound on with the correct tension of the thread going through the tension discs.

It seemed that my longarm decided that I needed to face my fears and conquer the fear of tension. Last August I was quilting a wholecloth quilt which required a lot of stitching as the design was the stitching! I was working to a deadline, and would you believe that my quilting had serious loops underneath! Half a day’s quilting took me over a day to unpick! I really needed to conquer and overcome my fear and be able to tackle and solve tension issues. I went through all the steps prior to attacking the tension dials. I kept on saying out loud ‘Loosey lefty / tighty righty’ – it certainly imbedded into my brain, and I learnt which way to tighten or loosen the tension dials. I must say that those couple of days of pure hell – stitching, unpicking, not so nice words, and going through all the tension steps – really helped me to overcome my fear of tension issues. I can not say that I will not shake with fear the next time I have a major tension issue, but I know that I can always refer back to my tension guide, take a deep breathe, grab Jack, and know that I can overcome my tension issues.

Sewing Machine Tension

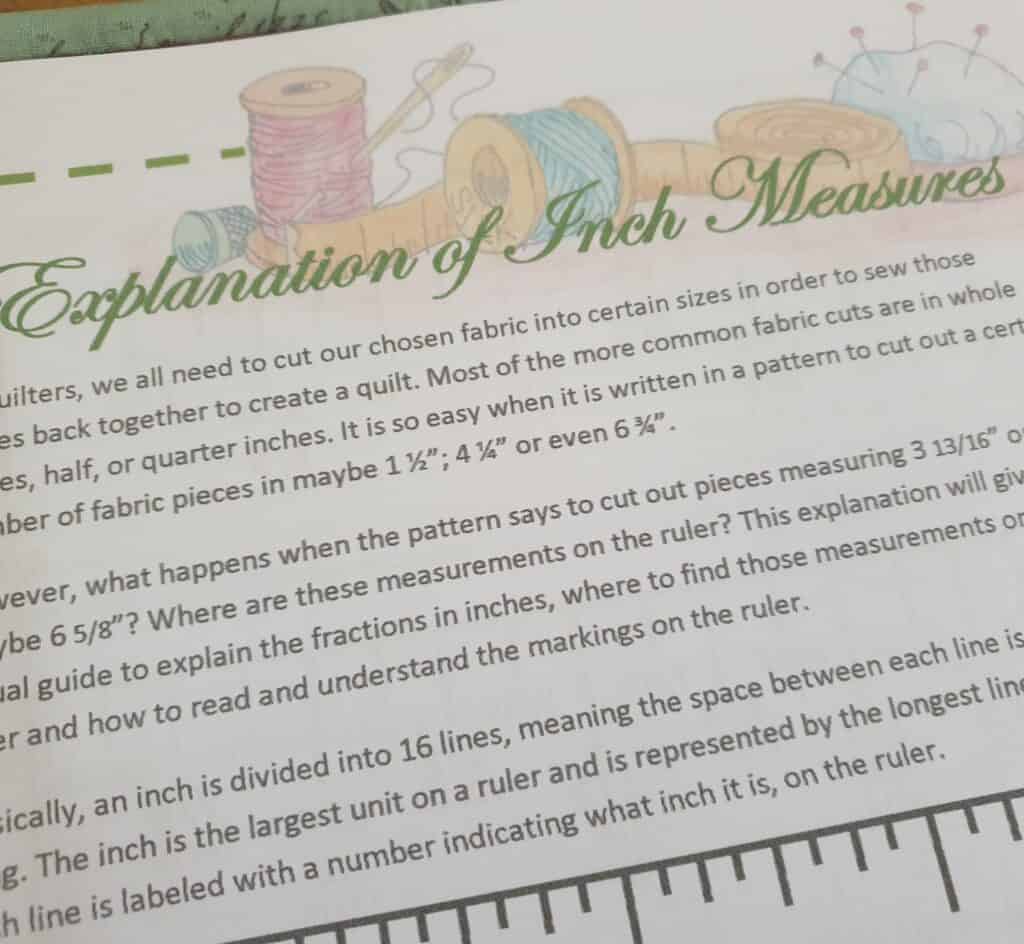
When I am teaching workshops, I have often been met with bewildered looks at times when the pattern calls for cutting fabrics which may not be of the more common inch fraction measurements. We will all be familiar with the ¼”, ½” and ¾” measurements and able to find those with ease on the ruler. But there are times when the pattern calls for the less common fraction measurements – the ones that talk about eights or sixteenths. Where do we find those on the rulers?

This guide gives a visual guide to explain the fractions in inches and where to find those measurements on the ruler. More confusingly, those fractions may have several ways to write them. So this guide explains how to read and understand all those lines on the ruler between each inch.

Explanation of Inch Measures

Why is it that our quilting patterns all work in inches for cutting our fabric and yet the material lists are usually in metres and the fabric shops sell the fabric by the metre? I haven’t worked out the reason yet, and I don’t think I ever will.

Coming from New Zealand where everything is in metric – kilometres, kilos, centimetres, metres, etc it was quite alien to come to the UK and instead of driving in kilometres, I was doing it in miles! Yet I brought my meat/vegetables by the kilo or grams and the fabric was by the metre or half a metre.

It then got stranger when I starting to cut my fabric for making a quilt, my rulers were in inches and the cutting instructions talked about inches or parts of an inch! The seams were ¼”. It really was a mixed up world! Then there were times when we downloaded a pattern from the states and the material list was all in yards! Just how did a yard compare to a metre? I know that there is 100cm in a metre, but just how many inches are in a yard?

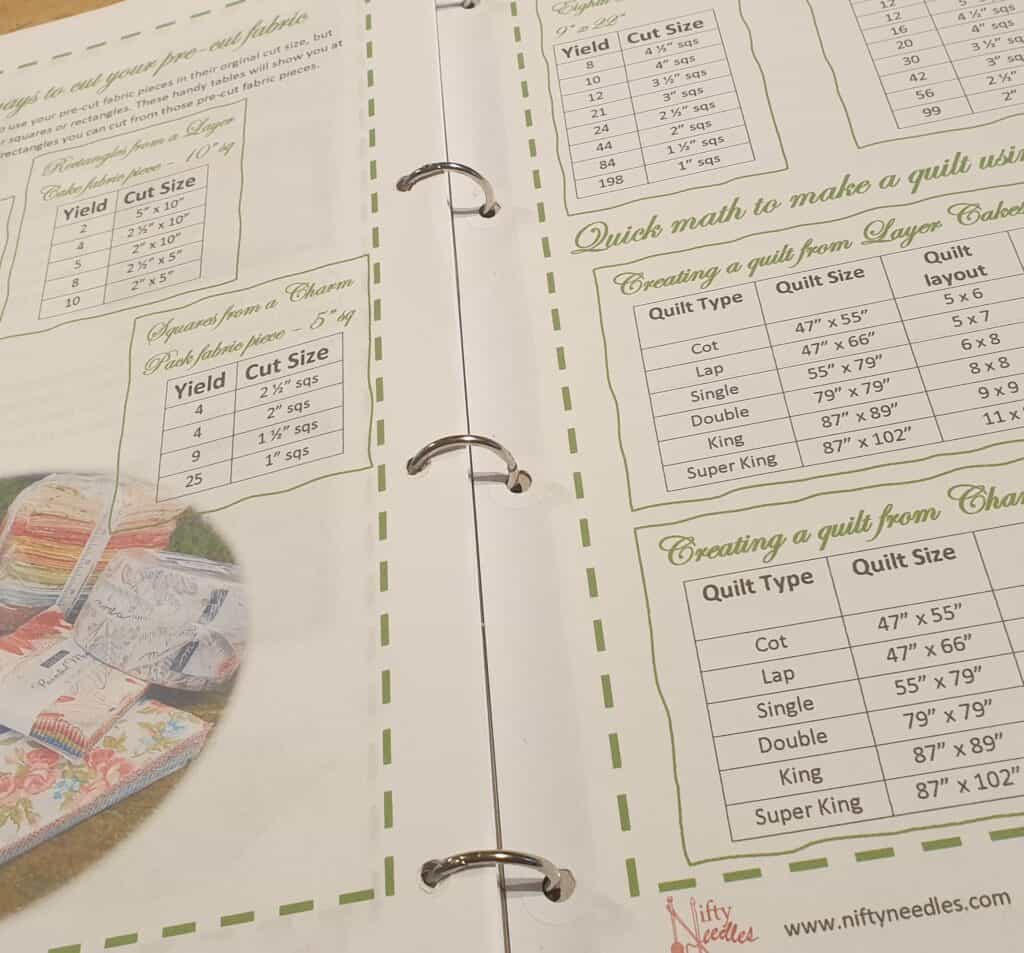
I have drawn up a couple of visual charts, so it is easy to see at a glance on converting yards to metres and inches to centimetres. Now you don’t have to go and google to find out.

In this reference, I have also included the approximate sizes of UK beds to help give you an idea on what size to make that quilt. It is easy to find quilt sizes online for the American beds, but they are different from the UK. Even New Zealand has different bed sizes from the UK, and I found it strange to learn that the UK does not have a Queen, but rather King or Super King!  

This table makes it easy to give you an approximate guideline on what size to make the quilt if it is to fit a certain bed size.

Conversion charts

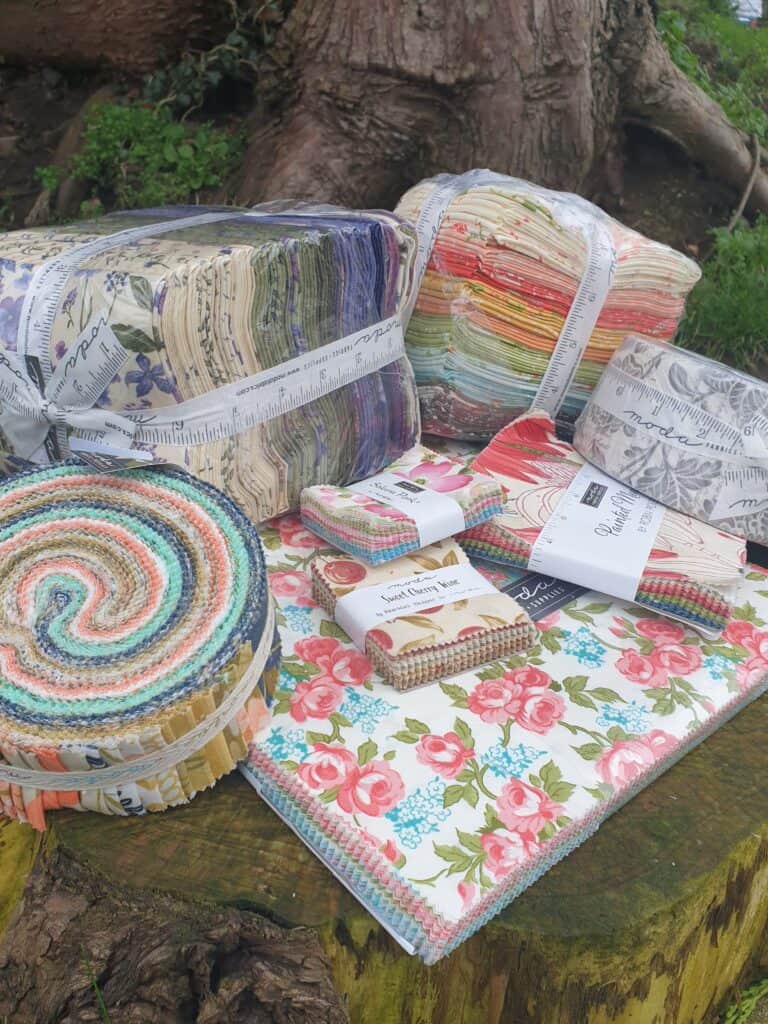
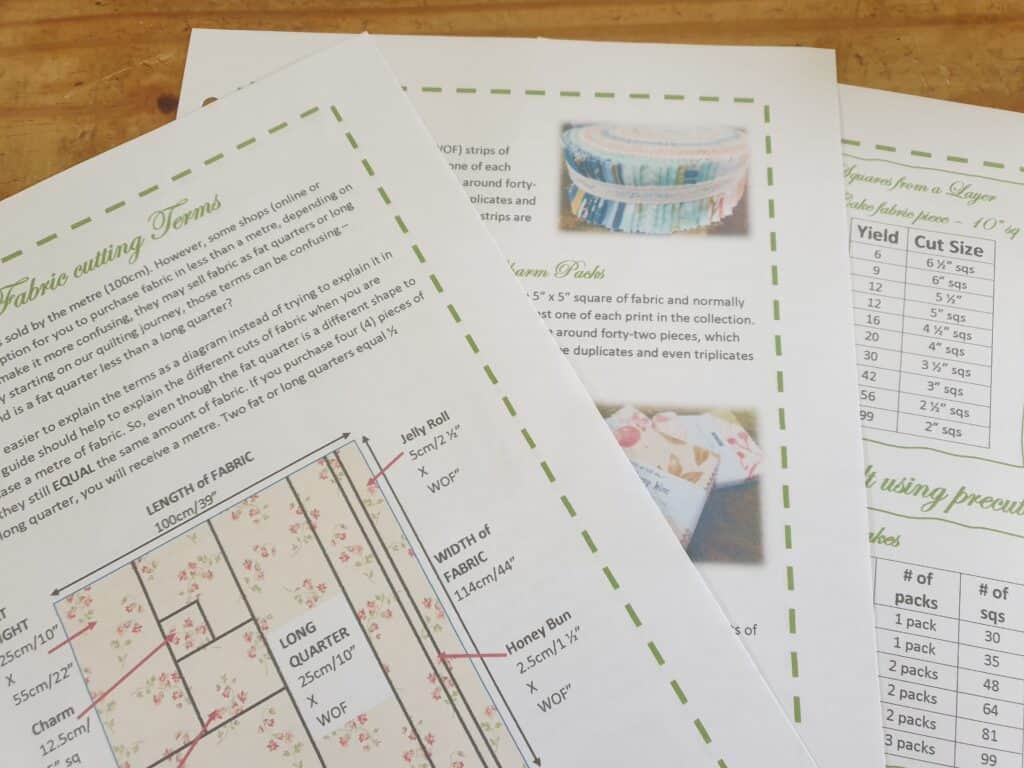
When it comes to purchasing fabric for a certain project, it can also be daunting. You can go into a shop and purchase a metre or part of a metre of fabric, but what if you need to get a Fat quarter, or maybe a long quarter? Even worse, you may need to purchase a Layer cake, Honey bun or a jelly roll …. You would be forgiven if you suddenly thought that fabric purchasing just turned into some kind of cake eating spree. If you are new to quilting, all these lovely or weird sounding fabric terms can be daunting! Is a Fat quarter the same as a long quarter? Just what does it all mean?

I have drawn up a visual guide showing and explaining what the different fabric cutting terms mean and just how much fabric is involved in each cut. I have also written a guide to all the pre-cuts along with photos for each type. I knew that my personal collection of pre-cuts would come in handy – a photo shoot for the handbook. I am sure they enjoyed being taken out of the boxes that they had been thrown into and having the opportunity to see some daylight for photos. The most attention and handling they have received for quite a while I can assure you.

Pre cut fabric photo shoot

So with having some pre-cut fabrics like a layer cake or charm pack, you may want to create different cuts from the 10” or 5” fabric squares. I have compiled charts so you can see at a quick glance just how many 4”, 2” or how size squares you can get from the different precuts. Maybe you just what to know how many charm packs it takes to make a quilt? These handy charts will give you all the help you need by working the math’s out for you.

Guide to precuts

What if you are just at the start of your quilting or sewing journey. Do you find that there is quite a few strange terms and words that are used? It really does seems as though quilters have this secret language that needs to be used.

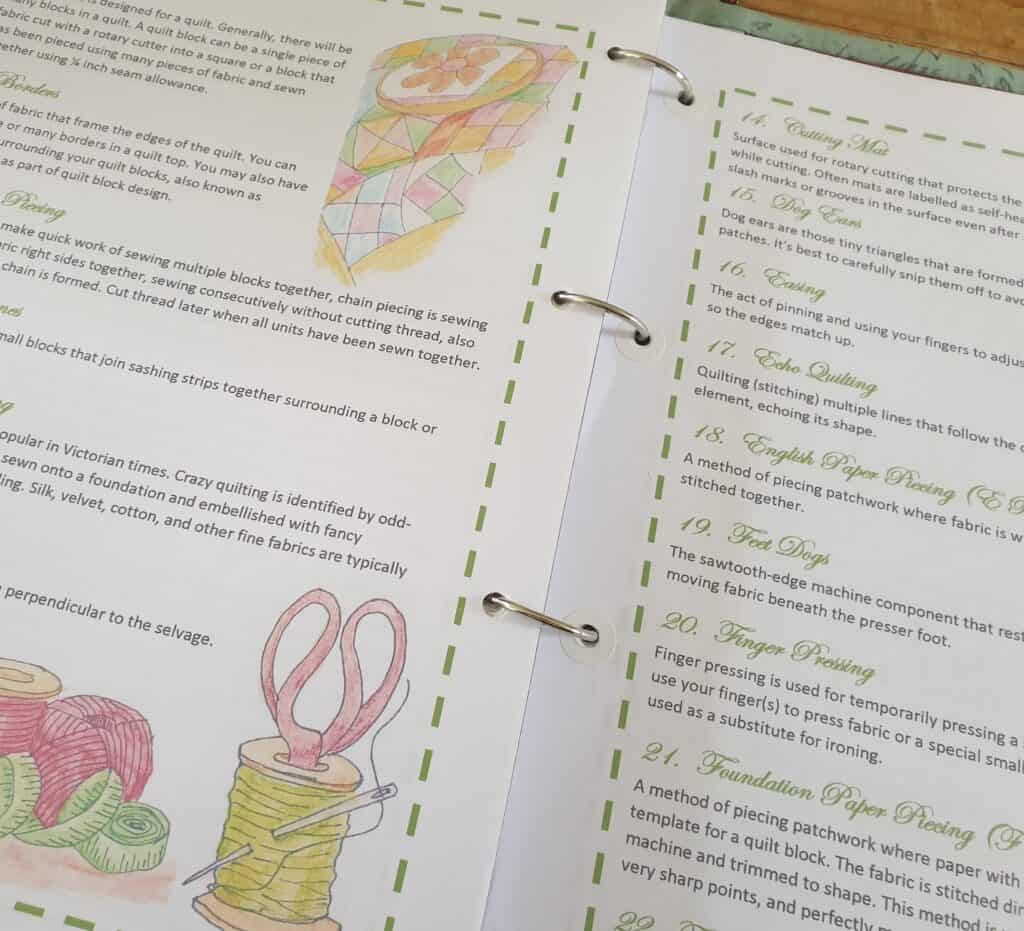
So to help de-code those strange sounding terms, I have compiled a list explaining the meanings for the more commonly used terms to help you break down that language and just be able to get down to the more important part – sewing and quilting.

Common quilting terms

What I like most with the Handbook is that you only need to purchase the parts that you would find useful, which is so much better than purchasing a prebound one where you have to have parts that you would never use.

For example, you may know what all the terms are and don’t need to have this reference, so there is no need to include it in your handbook. Maybe you are not interested in inch measurements or machine tension.

Basically you can pick and choose what you need in your basic reference section and make your own personalised handbook.

Handbook

Come back next time when I will discuss and look at the final section – Cheat Sheets Section. The section that gives you step by step instructions on how to make the more popular and commonly used units in quilting, along with a maths cutting chart so you can quickly refer to so you know what size fabric to cut for the finished sized unit that you are wanting …..

Organising your Sewing Space / Introduction …

Featured

As a crafter of many different craft interests, it can be so hard to know where and how to keep yourself organised (and tidy). If you are lucky enough to have a designated craft room (no matter what size) it is brilliant to be able to have/store everything in the room, go in there to create and when you are finished, just close the door behind you. However, not all of us are lucky enough to have that separate space to store, organise or just to shut ourselves way to be able to sew or craft.

I have always been interested in crafts; in fact it was a way of life when I was growing up. My mother was a sewer who helped to supplement the family income by doing dressmaking for people. I often remember ladies coming to the house for fittings and so forth to have that outfit sewn up. Even back then (50 odd years ago) she didn’t have a designated sewing room. Thinking back now I have no idea where she stored all her sewing/crafting notions and equipment. With a young child’s eye, they always seemed to magically appear when she needed them and magically disappear when they were no longer needed! She sewed from the kitchen table, did the fittings there as well (when my father was not at home) and would draft out the paper pattern for the outfit from a magazine on the floor of the sitting room under the watchful eye of my sister and I (both very young) but even at that young age, we learnt by watching and taking everything in.

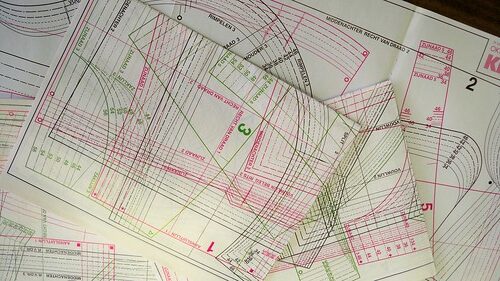
It was just the routine of our family and from a very young age, we learnt the skills of understanding the strange language of the lines (with different colours and patterns) that represented the different outfits in the magazine. Those magazines were sent out a couple of times a year to New Zealand by her mother in Holland and over the years they grew into quite a large pile, and they were used by several generations of sewers. She never threw any of the magazines out and you knew at some stage the outfits would eventually come back into fashion. The magazines were in Dutch, so we could never understand the written instructions on how to make up those wonderful outfits that were photographed in the magazines. However, we were taught how to locate the lines that were for the particular outfit, locate them on the pattern sheets, use the roll of newsprint and the tracing wheel to draft out our very own patterns.

Pattern Drafting sheets

My sisters and I learnt to sew by watching and participation. I was sewing outfits for myself when I was 7/9 years, and those early years gave me a firm foundation into dressmaking. It wasn’t just sewing that my mother gave us a lasting love for. She was also kept herself busy with several other crafts – knitting, crocheting, painting, cross stitch, needlework and spinning. Her passions in those crafts were passed down to myself, and my sisters.

So, how does this relate to craft organisation? Well … my mother never had the luxury of a designated sewing room. She did her sewing on the kitchen table and her other crafts were done in the evening. Looking backon how long I have been sewing and crafting for, I can also honestly say that I never had a designated craft room to store all my crafty notions and materials. Moving from childhood into young adult and then into my own home, I still did not have a designated craft area where I could store everything.

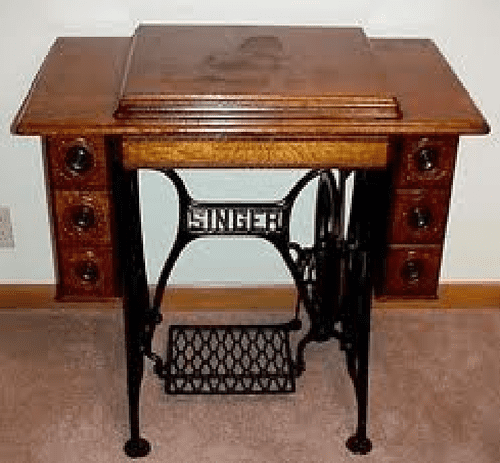
It is hard to think of just where did I store everything. My Dad acquired an old Singer sewing machine treadle table (minus the machine) when I was a teenager. He restored it for me, and it was my own small, designated sewing area. I could keep my machine on the table and sew there. There was space inside (where the machine once was stored) where I could keep all of my dressmaking patterns and the drawers were just perfect for keeping my scissors, pins, and other essential notions in. Maybe I just didn’t have as much as I thought I did. When I was sewing all my own outfits (as well as my girls) I would generally go out and buy the fabric needed, there was no fabric stash. Could I also be right in thinking that maybe now, we are needing so much more in the way of ‘essential’ equipment?

Singer sewing machine table

I kept my other craft materials in cupboards around the house and when I wanted to work on them, I would carry them together and take them where I wanted to work. It was generally in the lounge or the kitchen table. The latter was a bit more of a nuisance as I would have to tidy everything away at every mealtime due to the table being needed.

I remember one house I lived in, I was overjoyed to find there was a space in the laundry (Utility) room with a wooden bench by the window with some shelving on each side. I finally had my own sewing room. However, it was not ideal, the utility room was out through the back door and was basically a concrete floor outbuilding which I had to share with the freezer, washing machine and dryer. There was barely any room in which to work in. I definitely could not lay anything on the floor, it was uneven as well. There was no room to have an iron or to cut everything out. The bench was narrow and not that long, so just large enough for the sewing machine to sit. It was nice when the weather was dry and warm, but during the winter, it was cold and dismal. I think I generally ended up taking my machine and sewing on the kitchen table. The shelves were great to store my odd bits of fabric onto. I was just starting to get into patchwork at this stage and was slowly buying pieces of cotton fabric. There was also a disused toilet and shower room off this area, so it had become a place where I could store my surplus craft materials in boxes, along with fleeces I had acquired for spinning. I guess we make do at the time with what we have. But we all need to have it organised.

Once I moved into the rabbit hole of quilting, my essential notions and tools seemed to explode at an alarming rate. At the start (over 20 years ago) it seemed that only essential tools needed were the cutting mat, ruler, and cutter. Now there is so much more on offer and all claiming to make our quilting so much easier. I am not disputing that, as I have acquired so many tools that I just wouldn’t be without as they have made quilting/sewing so much easier and enjoyable. But when you invest in these needed tools, you really need to keep them safe and more importantly, know where they are so you can grab them when you need them.

We all need to have that one area, that we can go to and know that we can find exactly what we need, where it is kept and more importantly …. To know exactly what we have. Have you ever purchased a tool and then realised that you have exactly the same at home, but had forgotten about it, or maybe mislaid it due to not being organised?

I know I am guilty of that over the years. If you don’t have a designated craft/sewing room, it can be hard to know where everything is kept. Thankfully, I can now say, after 50 years of sewing, I now have my very own designated sewing/craft snug! However, like many crafters I am a messy crafter, and it can be so difficult to keep my craft snug tidy and organised, especially after a day of sewing and pulling things out when I have needed them. I am good at getting out what I need, but just not that great at putting it back after I have finished with it!

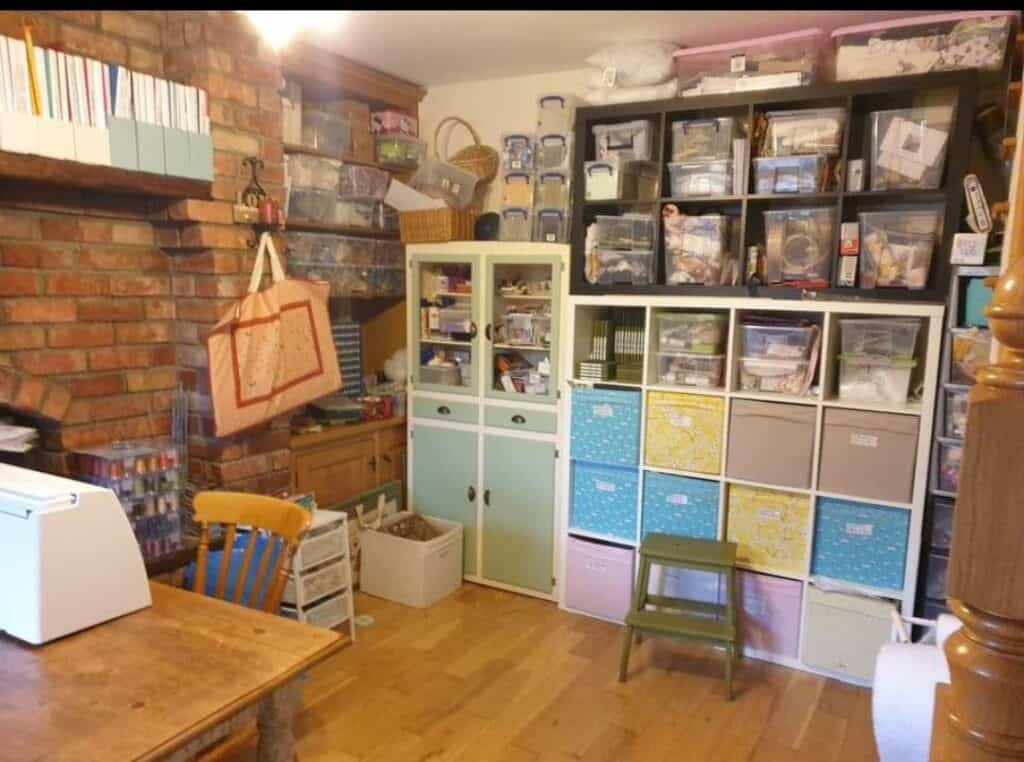
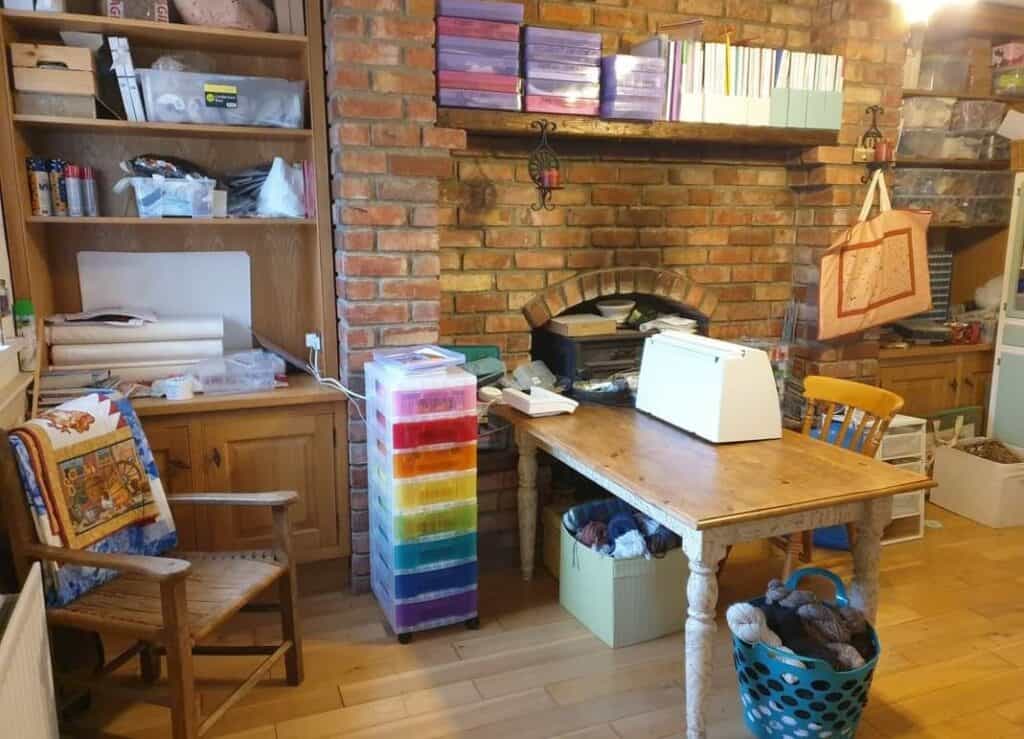
Once tidy craft snug

I love my craft snug and after a few trials and errors I am making it into what I need and require in a sewing area. I have my table in the middle, so I am not facing a wall. The window is far too high to have my machine there and there is a radiator directly under the window. It is not an ideal room as there really isn’t any wall space available, it is basically an open area off the kitchen and next to the stairs. So it is making the best of what I have to work with and using it to its best ability. The Ikea storage shelves are brilliant, and I have found the fabric bins and plastic tubs really make for great storage containers. There is built in shelves and cupboards which are still a work in progress. I have purchased several types of plastic drawers which are put to great use – for storing all my spinning tools and blending fibres as well as the different types of needlework thread.

I have found that I am ‘a list’ person. I like to work to lists. It gives me something tangible to work from and to look at when I need to refocus myself and know exactly what I have. I like order, I just find it hard to maintain that order all the time. I tend to be a messy sewer …. I will leave that there ….

I also found that my craft snug can tend to become a dumping ground. When in a rush, things get dumped in there with the intention of ‘sorting that out later on’ and it just never does. I am also a crafter that needs to have several projects on the go at the same time. To the point where I have numerous (too many to count) Unfinished Projects. There are times when I tend to forget about them and stumble across them many years later. It shouldn’t be like this, but it is. My creative mind seems to jump about from one idea to another, especially when it comes to coming up with new designs.

During the first COVID lockdown I used the time to think over my craft projects and different crafts. I was in desperate need to know exactly what projects I had, be it partially finished or yet to be started. What tools and equipment I had and just exactly where it was all stored? To find a suitable method in which to store my fabric. The list was endless.

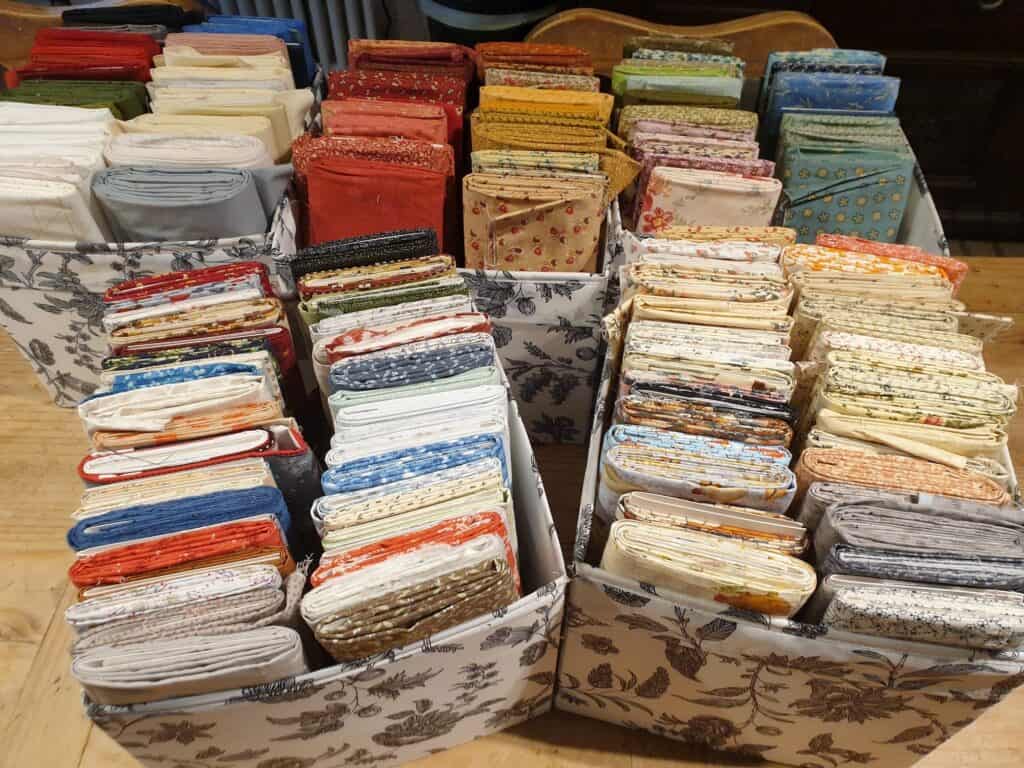
Fabric storage

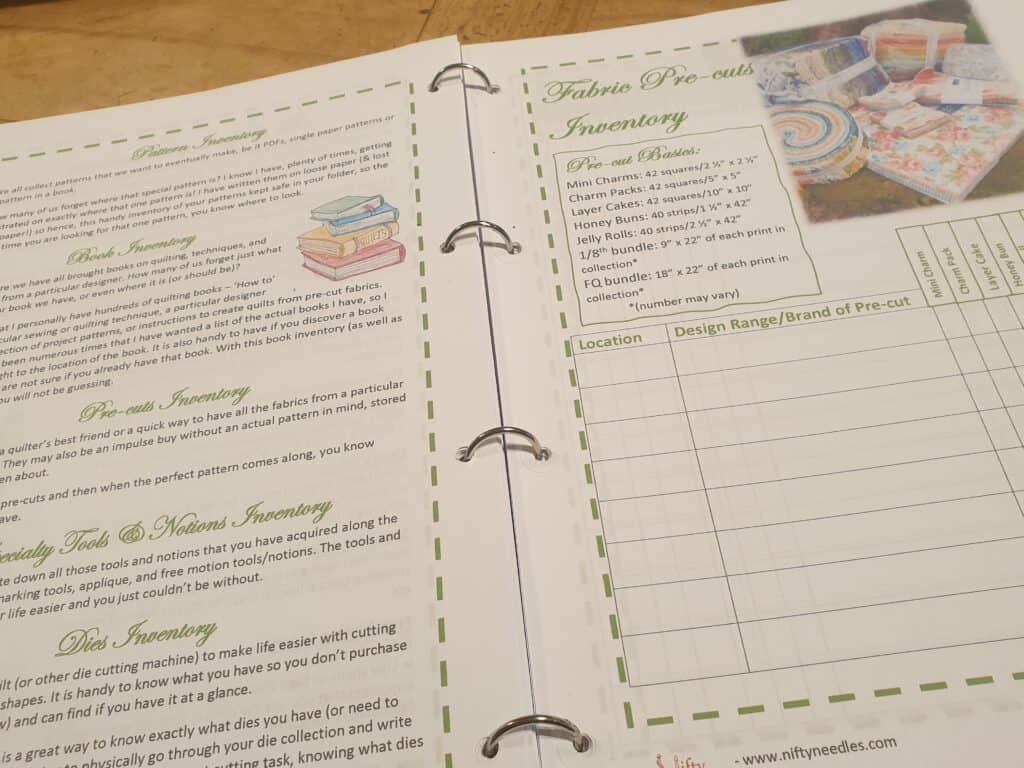
I know I could just tidy and organise my sewing snug again, but how long would it stay in that state, and it still didn’t solve the need to know what equipment I actually had. I had purchased an Accuquilt machine several years ago and had been slowly adding to my collection of dies. When I found a good sale for them online, I struggled to know what I already had without having to go through them all and write them down. This was the first step in starting to organise my tools. I had complied an Inventory for my Accuquilt dies. I found this so handy, and it was brilliant to be able to transfer that inventory idea to the other expensive equipment I had acquired over the years – books, patterns, free motion rulers, quilting rulers and other handy specialised notions.

Inventory pages

There is such an achievement when you have gone through all your notions, tools, patterns, etc sorted them and compiled an inventory of them all. It gives you a sense of being in control and knowing exactly what you have. It is even better if you know exactly where that particular notion is kept. I decided that this was the year that I would truly get myself organised.

So with inventories all completed, it got me thinking of the projects started but never finished and even the ones planned but never started. In sorting through my craft snug, I pulled out containers of long forgotten fabric bundles, obviously placed together for a particular project but having no idea which one due to no pattern or note placed in the container. This is when I decided to expand on my inventories. I discovered several containers of pre-cut fabric bundles – jelly rolls, charm packs, layer cakes …. I had no idea of just exactly what I had and NEEDED to know so I could use them!

Pre-cut fabrics

I wanted to create some organisation with my sewing so I would not get overwhelmed with what I had to get done or even to forget about the special quilt I wanted to make but never got round to. I started thinking on the project folders/books that many quilters spoke about. The concept interested me, but I never found exactly what I wanted or needed in such a book. I like to work from lists. I am terrible for roughly scribbling lists/notes on scraps of paper and then losing them as I had nowhere to keep them safe. I guess I searched and thought about the concept for quite a number of years, but never did anything about it. I just couldn’t find one that fitted all my needs. I wanted something that I could add to if I ran out of space – so a book wouldn’t work as it would not allow me to add to the pages when I ran out. It would also have pages that I wouldn’t use so it would be a waste of a book. I didn’t want to print off templates and put them into a folder – it just wouldn’t be special enough. I thought of placing the paper sheets into plastic pockets – but that wasn’t suitable – as it meant that each time, I wanted to write something down, I would have to take the paper out of the plastic pocket. I really needed to put my thinking cap on.

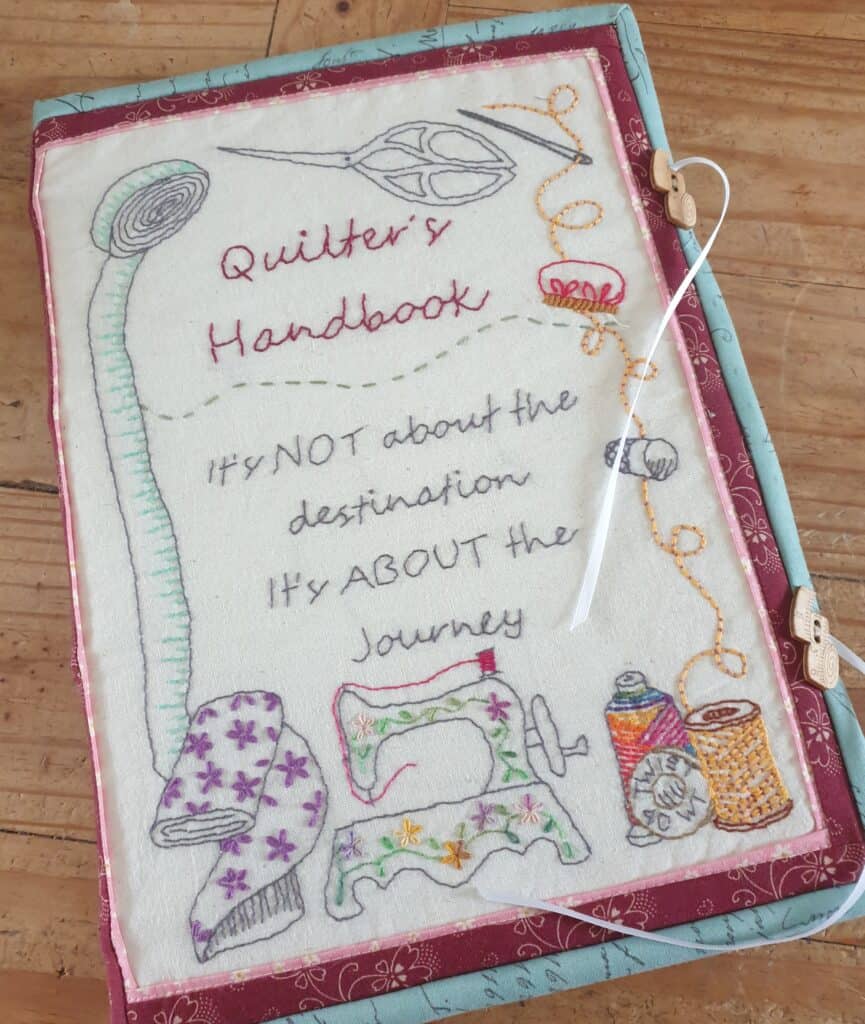
So, the Quilter’s Handbook was conceived…. I started to put down ideas of what I wanted in my book to keep me on track…. Somewhere I could write down all the projects I wanted to start, those I needed to finish, as well as the projects I was currently on where I could add in notes for any adjustments. Somewhere that the notes would be safe, and I could refer back to them if I ever needed to make that particular project again. It also gave me a record of what I had made, something to go back over in years to come. I also needed a place where I could keep a record of all the patterns, books, tools, and notions that I have and where they are kept. The handbook was designed so that you could decide just what pages/sections you needed for your own use, so there was no wasted or unnecessary pages.

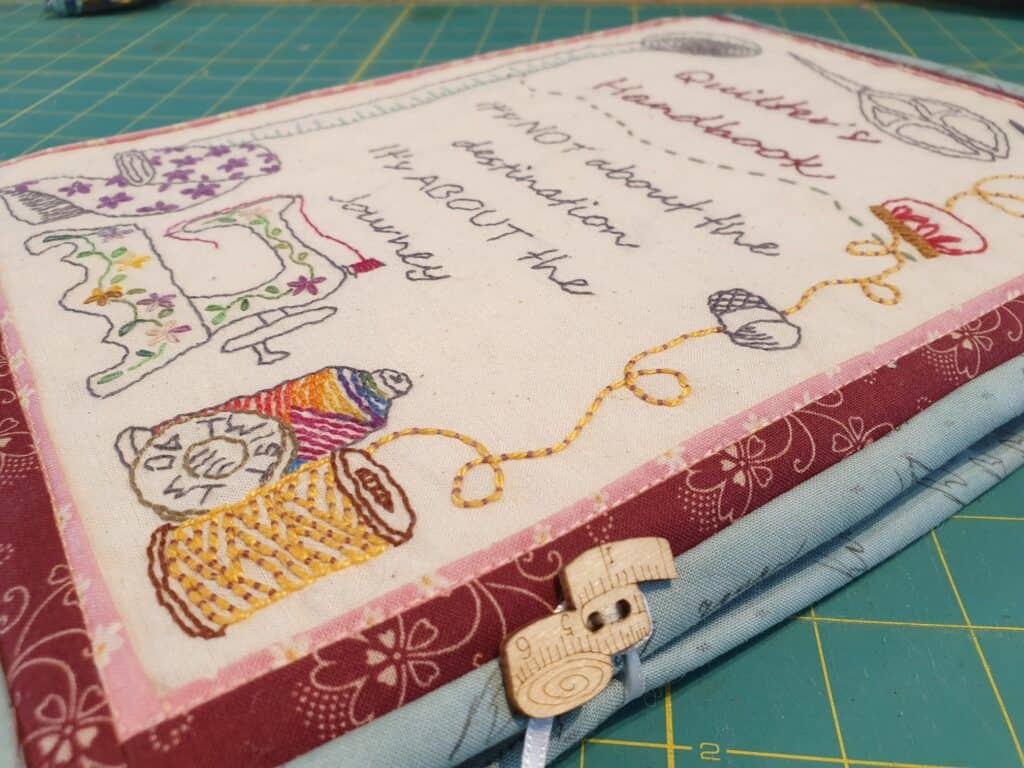
Front cover of the Quilter’s Handbook

I had so much fun deciding on what to put into this folder. I am excited about sharing it with you over the next few weeks. It is the result of many months of research, ideas, trials, and errors in putting together the perfect quilters handbook to help keep you organised and on track. I also felt it was important to add in a section of the basics when it comes to quilting and using your machine. How often have we had tension issues and just not quite sure on how to adjust the tension dial or even to check through all the tension issues before touching that dial? What about how to accurately cut fabric when we are directed in the pattern to cut fabric with a 16th fraction? Maybe all the quilting terms are confusing? What about the common sizes of UK beds if we want to make a quilt for a particular sized bed? I have complied all that to go into this Handbook. Now you just need to grab the handbook and look it up instead of spending hours searching online for answers. There is so much more to this book….

Back cover of the Quilter’s Handbook

Over the next few weeks, I will do blog posts on helping you to organise your sewing area. We will discuss storing your tools, notions and fabrics and using the inventory sheets and making them work for you. We will also look further into the Quilters Handbook and how to make the most of it.

I hope you will enjoy accompanying on this journey while, together, we will organise our designated sewing space…… and move this area ….

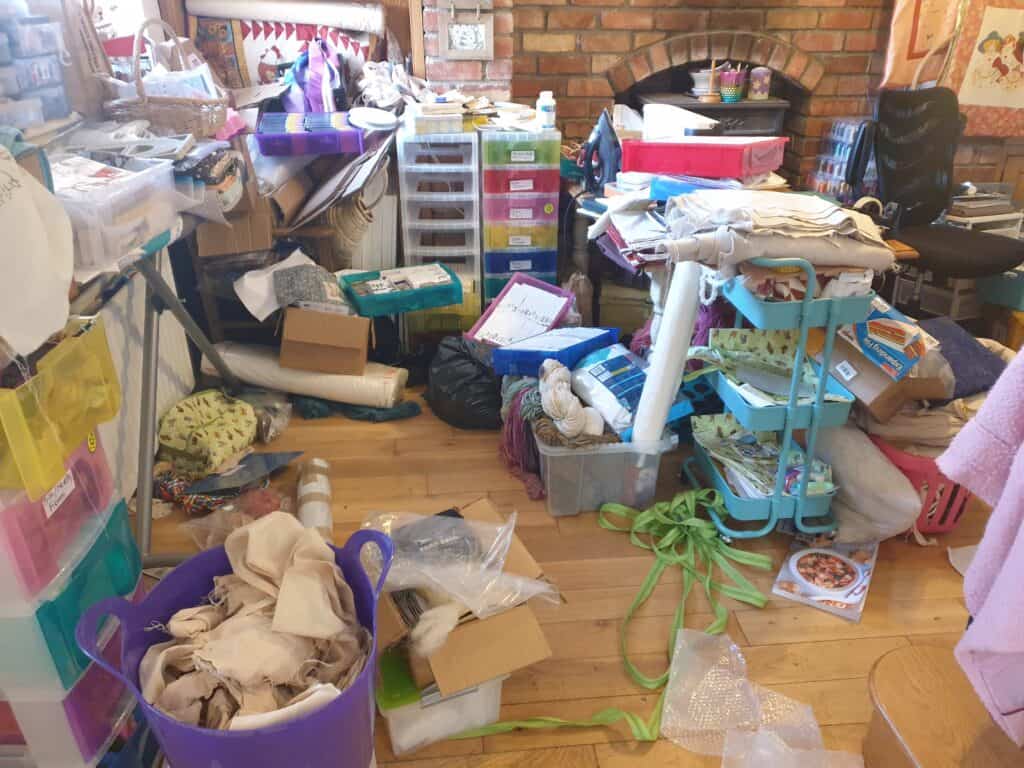
One very messy craft snug in desparate need of organising and sorting

Into an improved, tidy and VERY organised sewing space ….

Stitch and Progress Markers – the reason why I have been neglecting Facebook …..

Featured

Alyssa was talking to me a few weeks back on how her tutor at tech had suggested to her about making jewellery. She asked if I had done it before and so forth…. I was abit taken back as I had never known her to be interested in jewellery …. I had to remind myself that she is nearly 19 years old, and her choices/interests are changing. I also remembered that she was probably too young to remember that I had gone through a stage of making jewellery and still had so much beading supplies! So, we spent an enjoyable couple of hours hunting out the jewellery boxes and going through them and seeing what I had. It was like finding a treasure box! There were so many lovely wee finds and jewellery that had been finished or part finished….

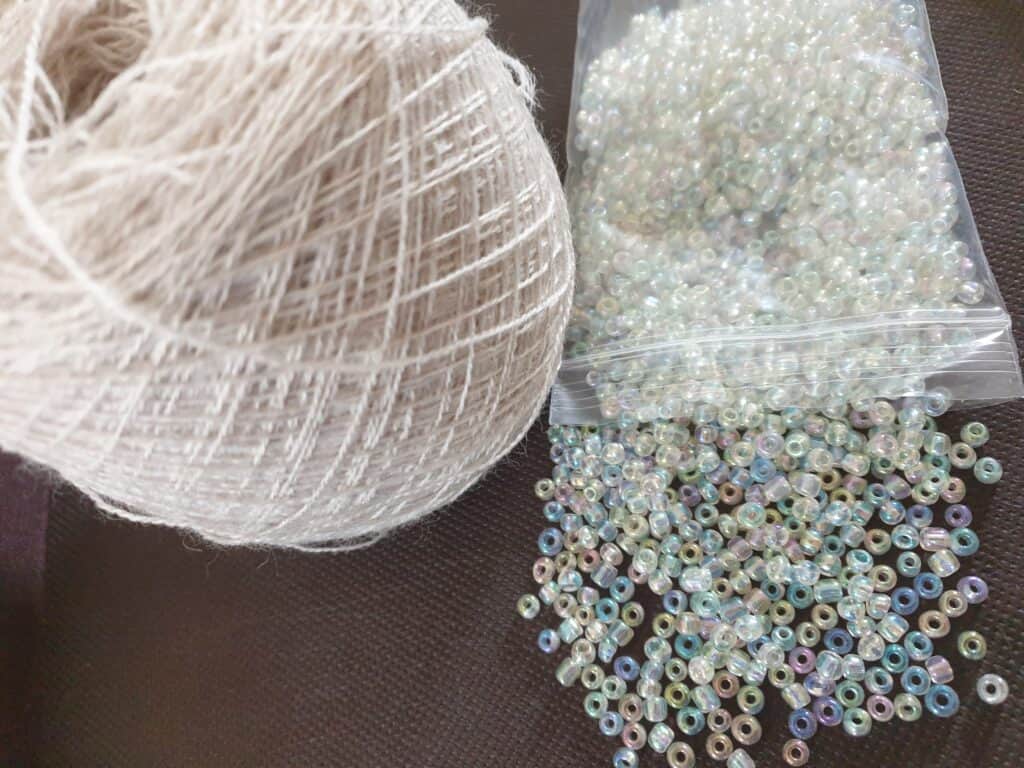
Alyssa claimed quite a few lovely pieces from old antique jewellery that I had found in charity shops and was able to make them up into earrings for herself. There were bags of seed beads that I used regularly in lace shawls that I had made up over the years – and the most recent shawl …. Latisha’s wedding shawl…

It also got me thinking on, just how much I enjoyed making jewellery and doing the beading as well as thinking (with some sadness) that I just do not have the time to do the craft now … Alyssa is all inspired to start on making fashion jewellery …. And is now showing the tutors and fellow students in her class on how to make up earrings and bracelets to sell at their upcoming craft morning at the tech as part of her course.

So, you are probably wondering (at this point) exactly what this all has to do with stitch and progress markers ….

Well … I use stitch markers all the time with my knitting. They are essential when knitting Top Down garments and even more so when you are knitting a complex lace shawl pattern where you need to keep an eye on the pattern repeats/sections. I also used special hook markers for crochet, or to remind me what the start of a row was when knitting socks ….

I use my faithful KnitPro markers that come in two sizes – extra small and extra-large – as well as two colours – pink and blue. Quite boring really and restrictive when the pattern advises you to use numerous colours (& you only have the two colours) to help you to remember what each section in the knitting is for …. I also NEVER seem to have enough of the right size. This was especially true when I was knitting the wedding shawl and needed to add in more markers on every NEW pattern repeat. I think I had 50 odd markers on my needle towards the end. I can assure you that I DID NOT have anywhere near 50 markers to put on my needle! So this was where I was so glad that Alyssa had gone through that stage (Just like every other child to the point that they were impossible to buy at one point) of the bungie band thingies that was a global craze so many years ago!! For the life of me … I CANNOT remember the proper name! Those horrid, brightly coloured, EXTREMELY tiny rubber bands that were made into bracelets, charms, key rings, and numerous other items. The bands that were so easily lost and found all over the house or down a small person’s/pet’s throat! The ones that now lie abandoned and they can not be given away! Alyssa’s vast collection lay abandoned in a drawer for quite a while …. Until I discovered an alternative use for them.

They make brilliant alternative stitch markers! They are made from rubber, so can stretch and are an endless, smooth circle. They fit snuggly between stitches on your needles and can be easily moved from needle to needle. They also come in a vast selection of colours. The only downfall … they have the tendency to flick across the room if you are not careful, while you are trying to transfer the bungie band from needle to needle! But never fear …. There is always plenty more of those wee bands ….

Now, I do love using unique and lovely tools with my crafting … but somehow think that those wee rubber bands DO NOT classify as unique and lovely craft tools. They are certainly unique ….

I recall that many years ago I had acquired some hand crafted stitch markers …. Ever so pretty …. But not very practical. Two had been made with a split ring for the ring that goes onto the needle. Not great, as the split on the ring kept snagging onto the yarn, which isn’t the best when you are using delicate (& expensive) yarn. So those were put to the back of my knitting notions container. The other two were made with a beading wire which created a smooth loop to go over the needles … perfect …. As there was NO split to snag the yarn. However, the loop area was able to move … in other words, as the beads could move up (&down) the wire, the loop became smaller, which made it harder to be able to slide your needle in to transfer it to the other needle. So, guess what happened to those markers.

As time moved on, I still went back to those stitch markers (when I ran out of the plastic plain stitch marker rings) to see if they had improved with lack of use. Sadly, NO.

So, that brings us back to disused jewellery box….

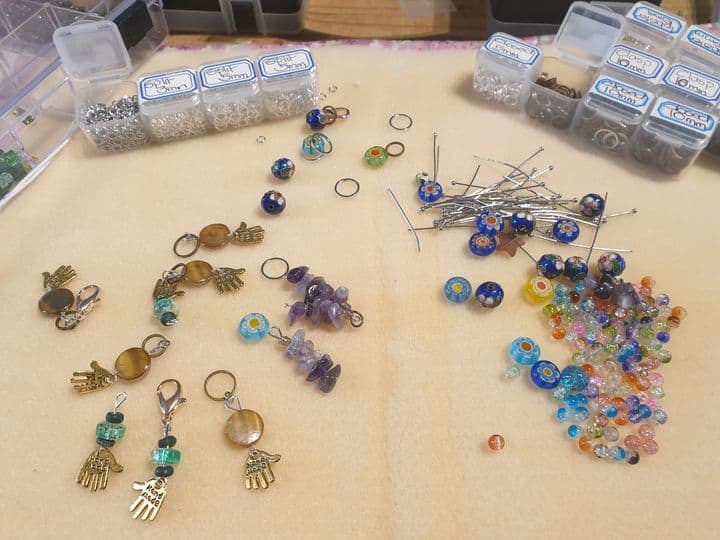
There was so many lovely beads and charms lying in wee containers, all begging to be made up into wonderfully unique and lovely stitch markers. But definitely with NO splits in the needle ring and no moving loops! So, I did some research (on faithful Google) and several hours (ahem, maybe longer) I had discovered some wonderful things in the world of stitch markers! There are also markers called progress markers, using opening clasps that are used for crochet as well as knitting. There are markers used with a specific purpose – to keep track of the beginning of the round if knitting/crocheting in the round, the right side and wrong side of your project, along with so much more. Stitch markers have entered the world of creativeness! I also found some other wonderful tools used for counting and so forth. My creative juices over flowed ….

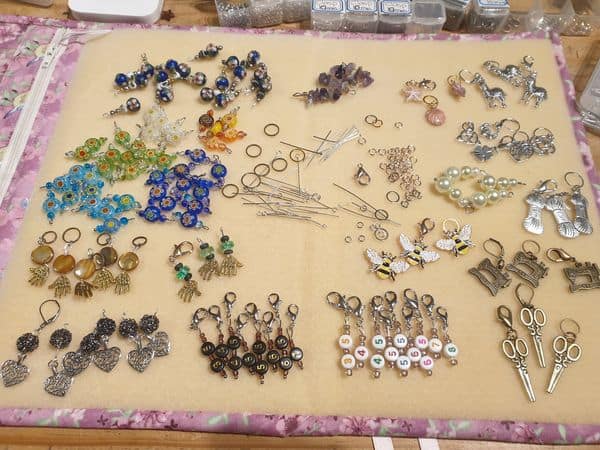
I placed some orders for the tool items I would need …. As well as some other loveliness that just kept jumping into my basket along the way. Alyssa was also getting into the spirit (and obsession) of this jewellery making lark. The purchases started arriving in the post and the pile kept growing …. Alyssa was itching (along with myself) to dive right in and start creating. However, there were more important tasks (workwise) to be done and more importantly, the items needed to be sorted, labelled and put into containers so it made it easier to know what was what and where it was. It is about the crafters obsession for being organised in a very messy crafty way. So, the two of us spent a few hours (which quickly turned into a day) sorting through everything and putting into assigned containers and labelling for easier reference. A long but necessary task and OH, so satisfying at the end.

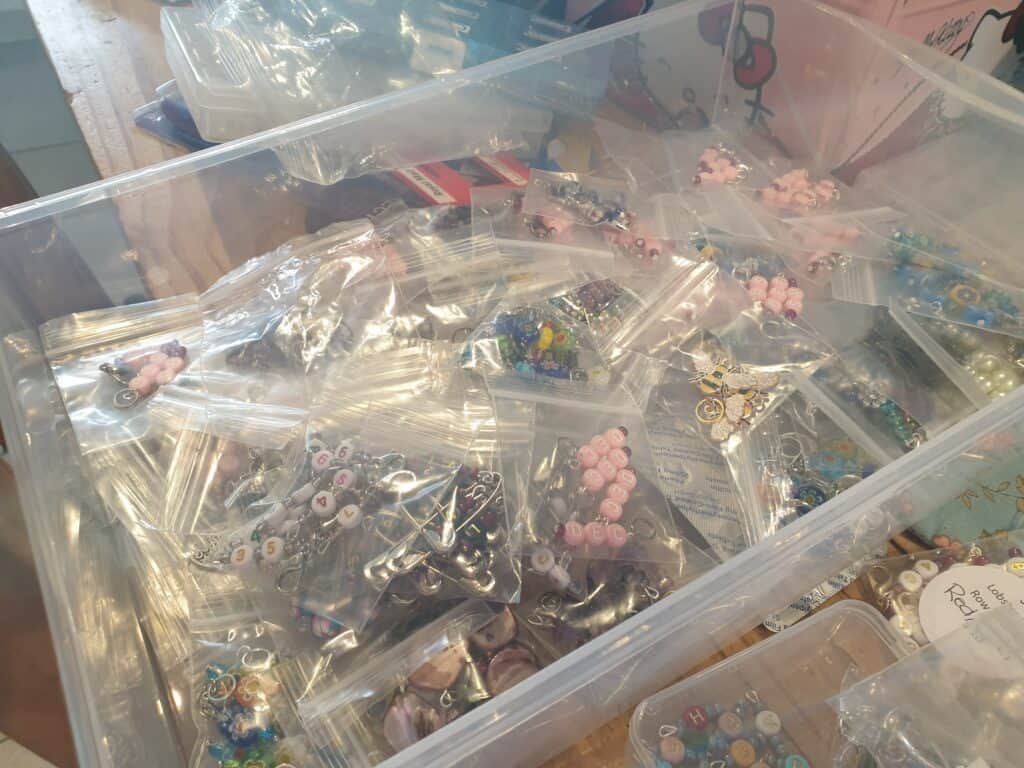
Then, came the time to actually start creating the markers up. A few turned into a small pile which grew into a HUGE pile. And would you believe, I am still wanting to make more (& use them). Who says markers need to be boring?

I got to thinking that maybe not everyone would know quite how to use the markers to their best protential …. or maybe not know exactly what is available ….. So, of course me being me …. I thought that it maybe it would be best to actually do up blogs on the different markers and what they are used for. Over the next few weeks, I will release a blog on the different sort of markers and how they are (can be) used. I knew of stitch markers to use for knitting the top down technique and in shawl knitting, but there is so much more ways to use these wonderful wee tools. I am actually shocked that I had not heard of them and now wonder how I did without them over the years.

I also discovered some other wee items/tools that I will be making and adding to the Nifty Needles products. I am all about useful tools that we just can’t do without but are also pretty in appearance.

The stitch/progress markers will be released shortly, just in time for Christmas as these would make amazing gifts for any crafter. I didn’t quite think everything through …. All I focused on was making up a selection and forgot about the time it takes in photographing them, writing up descriptions etc, and then uploading everything to the website …. So I think I need to step back …. Slow down and realise that things just take time ….. BUT, it is hard when your mind overflows with creative juices and you just want to do it all NOW …..

So do come back and find out about all the uses of decorative markers ….. I am sure you will be convinced that these are the perfect wee tools that you just cant do without ….

The next post will all be about the stitch and progress markers for both Knitting and crochet

Squaring up your Quilt top and Backing fabric

Featured

Are you ready for post two of our Quilting Finishing Techniques for both the longarm and domestic machine finishing?

So with the backing fabric the correct size and the quilt top finished, there is still abit more preparation needed before the quilt can be taken to be quilted on the longarm.

It is important to check if both the backing fabric and quilt top are ‘squared’ off (especially the TOP & BOTTOM EDGES), as it is necessary for the longarm quilting process. If the quilt is being quilted on the longarm, it is the top and bottom edges which will be attached to the rollers on the frame and need to be straight and parallel with each other. If these two ends are not straight, then the backing fabric will NOT lie flat and square on the frame.

Quilting does not correct issues if the backing and quilt top are NOT square. If the quilt is not square, has fullness through the centre, or has wavy borders you may end up with pleats quilted in to try and flatten your work. Both top and backing should be carefully pressed. If you can’t press it flat, the quilter can’t quilt it flat without a lot of extra work and maybe putting in some tucks or pleats.

So, with knowing why how backing fabric and quilt tops need to be square, the next question that comes up is, … How do I square up my backing fabric?

I can remember from my dressmaking days, my mother (who was a professional dressmaker) taught me that if you required a straight cut to your fabric, the best way was to snip a little pass the selvedge, and rip the fabric, all the way across to the other side. This ensured that you had ‘cut’ your fabric along the straight of the grain. This method can work most of the time. However, what happens if the grain is slightly off which can happen if the fabric has been sitting folded on a bolt for a while and the grain gets slightly distorted. It can take quite a bit of pulling the fabric piece at some weird and wonderful angles to encourage the fabric grain to come back in a straight line. Usually this method does bring back the correct lay of the fabric grain. So, if you want to use this method to square off your fabric, ENSURE the grain is straight by lining up your selvedges and check that the ‘ripped’ edges lay straight.

I have used another method for many years to find the straight grain of my quilting fabrics and even use this method to get my fabric to lie flat when I store the fabric on boards. I will go into this in more depth when doing my blog series on organisation.

So, to square the fabric you first need to press the fabric to get out any creases or tucks. If it is a long length of fabric (more than 2 metres) I usually skip this first step and do it after the next step which is where I bring the two selvedges together of the fabric length so I am technically folding the fabric in half lengthways. However, I am NOT going by the cut edges of the fabric length and using them as a guide. I ignore those edges and focus on bringing the two selvedges together with my fingers as though it is hanging from a clothesline. 

With looking at the fold line that is hanging down, I check to see how it is hanging. Is it wavy, gathered or curving? If it is, use your fingers to slightly adjust the selvedge edges to the left or right until the bottom edge fold hangs straight and flat. You do NOT want to see any puckers.

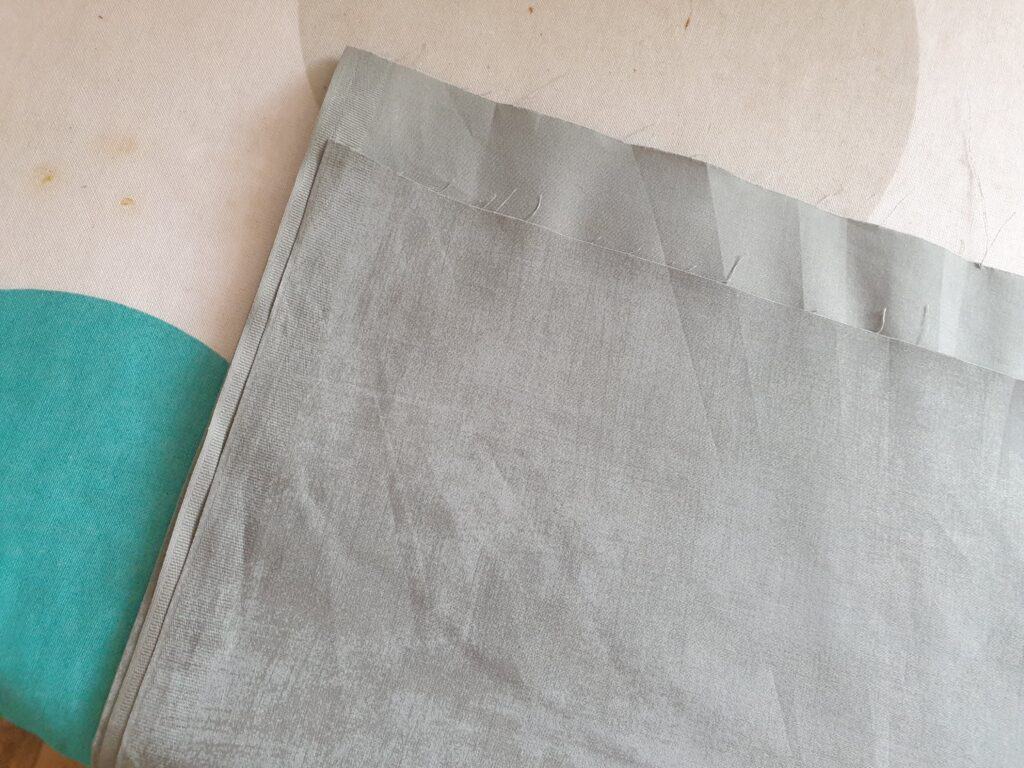
Once I have the fold line nicely matching the selvedges and the fabric fold is lying flat, I then give the length a good press. Once it is pressed and the fold line is lying smooth and flat, I then lay the fabric length on my cutting mat so I can straighten up the cut edges of the fabric. Carefully smooth the fabric, keeping the fold line flat and bump free. At this stage the fabric (folded in half) will still be too big to be cut on the cutting board.

So, you now need to bring the folded edge to the selvedge edge and you have created four layers of fabric. The fabric length is folded into quarters. Check that the fold line and the selvedge edge is still pucker free and lying flat as well as the middle section of the fabric length is smooth. Check the second fold of the fabric to make sure that all 4 layers are in the fold and that there are no hidden wrinkles or lumps.

The four folds should now mean that your fabric length can be cut comfortably within the cutting mat guidelines. If you are working with extra wide fabric, it is the same principle, but you will need to keep folding the fabric until it is small enough to fit comfortable on your cutting mat. Just be sure that you smooth out any wrinkles and the fold line is lying straight.

Carefully line up the folded edge of the fabric length with a horizontal inch line on your cutting mat, ensuring that the selvedges edge is still on your cutting mat and NOT extending pass the mat onto your table.

Smooth fold and selvedges

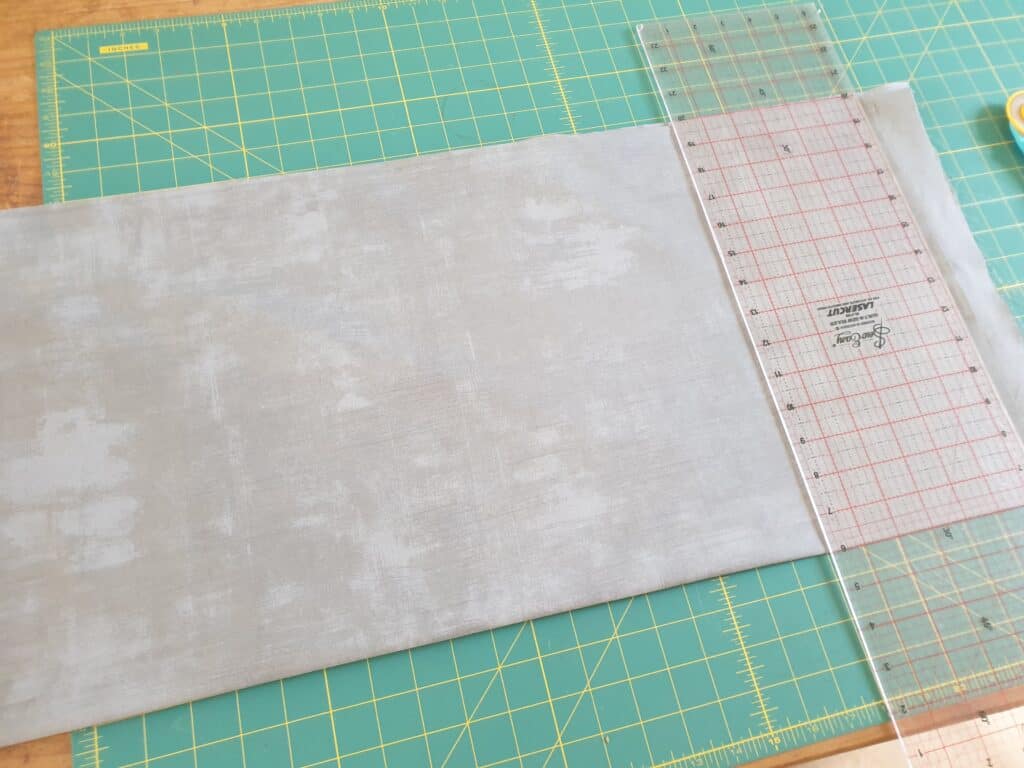
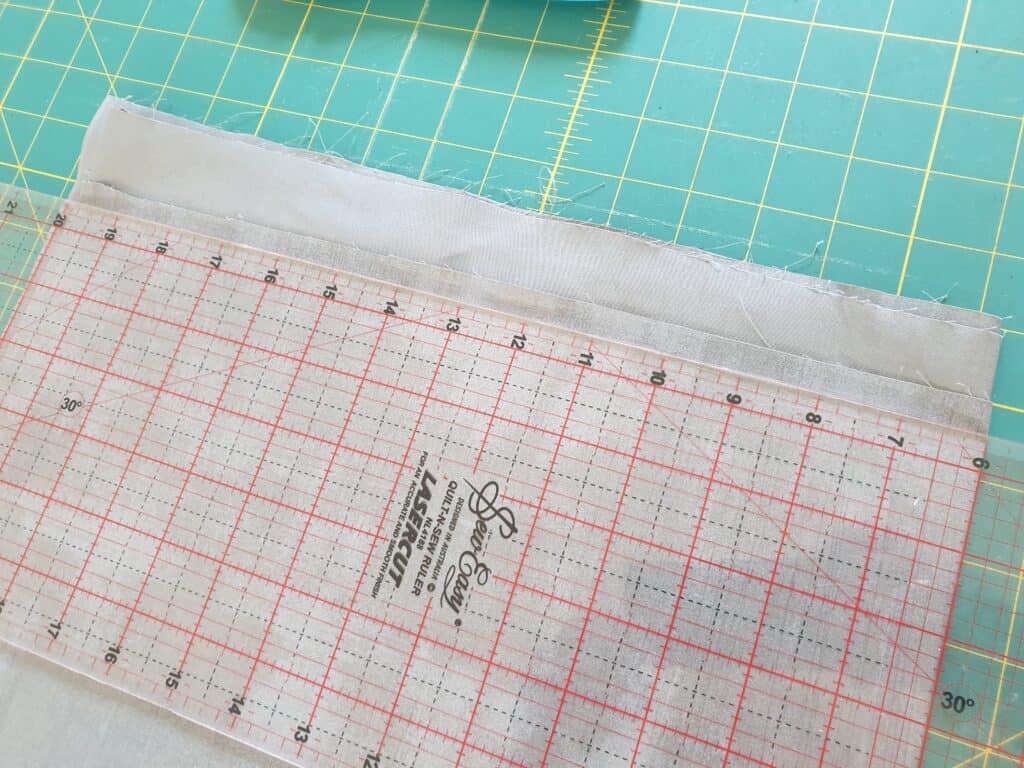
Place the ruler near the edge of fabric that is to be straightened, with the body of the ruler placed on the actual fabric. Ensure the ruler extends past the fabric width by a couple of inches at each edge. Line up the ruler by matching the lines on the cutting mat with your ruler to ensure you are cutting a straight line.

Using a rotary cutter, glide along the ruler, applying enough pressure to cut through all layers of the fabric. Make sure you have placed your hand correctly on the ruler to apply enough pressure to prevent the ruler from slipping as you cut.

To ‘square’ the other edge of the fabric length, you turn the fabric along and repeat the steps.

You now should have a perfectly ‘squared’ backing fabric that is ready to be loaded onto the long arm.

So how do we ensure our quilt top is squared and ready to be quilted?

It is not just the backing fabric that needs to be square. The quilt top also needs to lie flat and square to ensure it goes onto the quilting frame correctly and not cause issues with quilting lines.

Sometimes a border that is not cut or sewn on correctly can cause Wavy Border Syndrome (W.B.S). Proper preparation and techniques can prevent WBS.

There are several types of borders. The quilt may have a pieced border that is designed to be pieced, as with our quilt – Exploding Squares. The pieced border makes it easy to ensure the borders are lying flat due to the pieces being pre-cut to exact measurements and there are ‘guideline’ marks along the quilt edge where each section connects. Basically, all that is needed is to pin where each matching seam is to meet as shown in the photo. If everything is cut and sewn together correctly, then there should not be any need to square off your quilt.

Exploding Squares
Exploding Squares quilt

Other quilts may just have a ‘plain’ border as with our Bookcase Quilt Tutorial, 12 Days of Christmas Quilt, The Hen Party Quilt and 4-Patch Quilt – where the borders are from ONE fabric and may be in one section or have a seam to create the exact length needed to fit along the edge of the quilt.

Borders should (where possible) be cut parallel to the selvedge of the fabric as this has less stretch to the fabric and lessens the chances of the border being over stretched while sewing and causes it to pucker, or under stretched which will cause the border to be wavy. Both of these issues will cause the quilt/border to NOT lie flat.

It would be ideal to be able to cut the border in one piece, so it is the EXACT length needed to be sewn to the quilt edge, but sometimes this is not possible. If you need to have seams in the border length, ensure that the overall length of the border piece is the same measurement as the quilt edge it is being attached to. It is recommended to pin each end of the border piece to the ends of the quilt top that you are sewing. I also attach several pins along the side – ideally in the middle and a couple in each half section, this helps to ‘ease’ in your border piece to ensure it lies flat.

Another type of border is where you have pieced borders, using left over fabrics from the quilt centre design. The pieces can be all different lengths (but the same border width) to create a ‘scrappy’ border as in our BOM quilts – Autumn Beckons and Down by the Seaside quilts. These borders have several seams in the border to achieve the exact length of the required border and attached to the quilt edge. With having the quilt loaded onto the long arm frame and stretched, it can cause the border seams to come unstitched. A way to lessen this possibility, is to stitch the border seams with a smaller stitch length (I usually use a 2mm length) and to also ‘stay stitch’ the edge of the quilt top.

It is also important to have BOTH opposite border sections the same length. All four border pieces are prepared and sewn in the same manner. If you have prepared and attached your border sections correctly, then it is pretty much certain that your quilt top is square.

Checking how square your quilt top is the same method as for squaring your quilt back. Bring together BOTH side edges of the quilt top, ensuring the fold line of the quilt top lies flat and pucker free. If needed, you can then cut the top/bottom edges to ensure they are straight and square. The method is then repeated by bringing the top and bottom edges together to check on the side edges.

If you wish to keep a copy of this technique for future reference, you can download the PDF – How to square off your Backing fabric/Quilt top – here.

So with explaining How to ‘square’ off our backing fabric and quilt top, it now leads into the question of – ‘What fabric can be used to back a quilt?’

Come back next week to find out about –

Backing fabric options – Extra wide fabric / Sheeting / Pieced backs

And the following posts –

  • Binding          – How much binding / How to prepare binding / Attaching binding to quilt front / Finishing the binding
  • Quilt Labels – Why quilt labels? / What to put on a label / How to create a label / How to attach a label